 Overslaan naar inhoud

Luchtbubbels in inspuitgevormde onderdelen zijn niet één defect met één oplossing. Ze kunnen opgesloten lucht nabij een weld-lijn zijn, vocht dat gas wordt, gedegradeerd resin, slechte ontluchting1, of een interne vacuümholte2 veroorzaakt door krimp. Als je elke bubbel behandelt door simpelweg druk te verhogen, kan je één symptoom verbergen en drie nieuwe creëren.
Dit handboek geeft je een fabrieksstijl diagnosepad voor spuitgieten bubbels. Het doel is eerst het bubbeltype te identificeren, en dan materiaaldrogen, machineinstellingen, gate-locatie, vormventilatie, of onderdeelontwerp in de juiste volgorde aan te passen. Dat bespaart testtijd en houdt de spuitgietvorm van te vroeg de schuld krijgen.
- Identificeer bubbeltype voordat druk wordt veranderd.
- Vochtigheid, ingesloten lucht, en holtes vereisen verschillende fixes.
- Ventilatie en gate-locatie zijn vaak beslissend voor succes.
- Droogrecords zijn belangrijker dan operatorgeheugen.
- Ontwerpveranderingen zijn beter dan heroïsche procesoptimalisatie.
Wat veroorzaakt luchtbubbels in spuitgietonderdelen?
Luchtbubbels worden veroorzaakt door ingesloten gas, materiaalvochtigheid, melt degradatie, slechte packing, of geometrie die gasuitgang blokkeert. De eerste taak is te beslissen of de bubbel nabij de oppervlakte zit, binnen een dikke wand, aan het einde van de flow, rond een rib, of nabij de gate.
Een ware luchtinsluiting3 verschijnt meestal waar twee melt fronts samenkomen of waar het laatste gebied van de cavity vult. Het plastic sluit het gas af voordat de vent het kan vrijlaten. Je kan een bubbel, brandmerk, short shot, of glanzend zwak punt zien. Als de defectlocatie elke cyclus de flow path volgt, vermoed luchtbeweging en venting voordat de resin wordt beschuldigd.
Een vacuümholte gedraagt zich anders. Deze vormt zich vaak in een dikke pen, ribbasis of zware wand waar de buitenkant eerst bevriest en het midden blijft krimpen. Het oppervlak kan acceptabel lijken, maar doorsnijden van het onderdeel onthult een holle ruimte. In onze ervaring komen vacuümholtes vaak voor wanneer kopers dikke wanden voor sterkte aanvragen en zich dan afvragen waarom het onderdeel interne belletjes heeft.
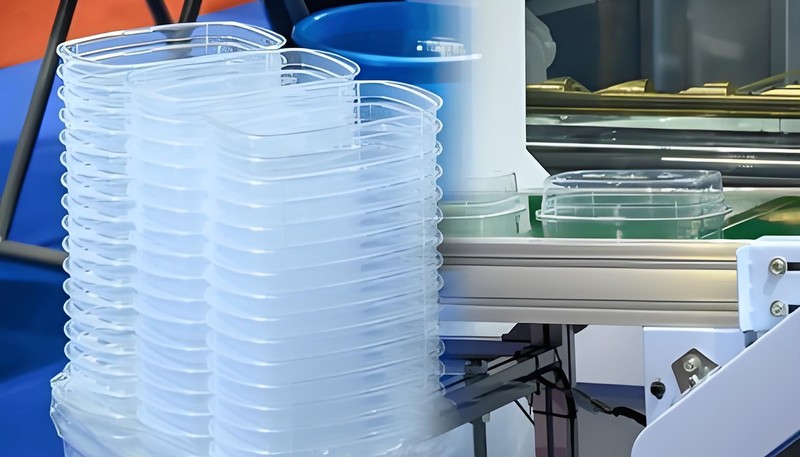
In onze fabriek in Shanghai heeft ZetarMold 47 spuitgietmachines van 90T tot 1850T en ervaring met meer dan 400 kunststofmaterialen. Dat bereik is belangrijk omdat belletjes in een klein ABS-deksel, een grote PP-behuizing en een met glasgevuld nylon behuizing verschillende hoofdoorzaken kunnen hebben, zelfs wanneer het defect er hetzelfde uitziet.
"De locatie van de bel is de snelste aanwijzing voor de hoofdoorzaak."Echt
Een bubbel aan het einde van de vulling wijst naar opgesloten lucht of slechte ventilatie, terwijl een bubbel binnen een dikke sectie wijst naar krimp, pakken, of koelingonbalans.
"Alle bubbels kunnen worden opgelost door injectiedruk te verhogen."Vals
Hogere druk kan helpen bij sommige opvulholtes, maar het kan uitstulpingen, spanning, brandvlekken, schuifverhitting en overvulling verergeren als de hoofdoorzaak vocht of ingesloten lucht is.
Hoe herken je opgesloten lucht van vocht of vacuümholtes?
Ingesloten lucht is locatie-stabiel, vochtigheid is vaak willekeurig, en vacuüm holtes zijn meestal verborgen binnen dikke geometrie. Gebruik locatie, timing, cut inspectie, droogrecords, en procesrespons om ze te separeren.
Begin met een eenvoudige snijtest. Snijd het onderdeel door het defect en inspecteer de wand. Als de holle ruimte centraal in een dik gebied zit, behandel het eerst als krimp of opvulling. Als de bel naar het oppervlak opent of zich nabij het einde van de vulling bevindt, inspecteer dan ontluchtingen, laslijnen en stromingsaarzeling. Als het defect verandert na correct drogen, was vocht waarschijnlijk deel van het probleem.
Een drooglog is geen papierwerkdecoratie. Hygroscopische materialen zoals nylon, PC, ABS, PBT en TPU kunnen tijdens vormgeving stoom afgeven wanneer de vochtigheid te hoog is. Niet-hygroscopische materialen kunnen nog oppervlaktewater bevatten als ze koud opgeslagen zijn of aan vochtige lucht worden blootgesteld. We adviseren droogtemperatuur, droogtijd, dauwpunt, hopperblootstellingstijd en resinbatch te registreren voor elke bubbelonderzoek.
Negeer geen geur of verkleuring. Als het materiaal een verbrande geur heeft, geel wordt of zwarte stipjes vertoont, kan de bubbel voortkomen uit degradatie in plaats van normale lucht. Overmatige cilindertemperatuur, lange verblijftijd, hoge schroefsnelheid, doodlopende zones in de cilinder, of besmet regranulaat kunnen allemaal gas genereren voordat het plastic de holte bereikt.
| Symptom | Waarschijnlijke oorzaak | Eerst check |
|---|---|---|
| Bubbel aan einde van vulling | Air trap | Ontluchtingsdiepte en stroompad |
| Willekeurige sproetmarkeringen | Vocht of vluchtige stoffen | Drooglog en resinopslag |
| Interne holle kern | Vacuümholte | Wanddikte en packing |
| Verbrande bubbel | Gas compressie | Ventilatie en inspuitsnelheid |
Na de eerste classificatie, houd een sample board. Plaats één onderdeel van elke trial setting op het board en schrijf de resin lot, droogrecord, melt temperatuur, injectie snelheid profiel, holding druk, en cavity nummer naast het. Die simpele habit voorkomt dat het team door geheugen discussieert. Het laat ook zien of een fix repeatable is of of één lucky shot wordt verward voor een stabiel proces in normale productie vandaag weer. Houd foto's, cut samples, en settings samen voor later vergelijking tijdens team review veilig.
Hoe moeten procesinstellingen worden aangepast om bubbels te verwijderen?
Procesinstellingen moeten alleen worden aangepast nadat het drogen van het materiaal en het type defect zijn bevestigd. Voor ingesloten lucht: verminder overmatige injectiesnelheid aan het einde van het vullen of gebruik gefaseerde injectie. Voor vacuümholtes: verbeter de pakdruk, houdtijd, poortvriescontrole en koelbalans.
De veilige volgorde is eerst drogen, dan snelheidsprofiel, dan pakken en vasthouden, dan smelttemperatuur, dan matrijstemperatuur. Alle vijf tegelijk veranderen leidt tot een mooi ogend proefrapport en een nutteloze oorzaakregistratie. Houd één referentie-instelling aan, pas één variabele aan en markeer monsters met het exacte schotnummer.
Injectiesnelheid verdient speciale aandacht. Snel vullen kan helpen om vroegtijdig bevriezen te voorkomen, maar het comprimeert ook ingesloten lucht harder. Als de lucht niet kan ontsnappen, kan het resultaat een brandmerk, bubbel of kort schot zijn. Een tweefasenprofiel werkt vaak beter: sneller door het gemakkelijke stroomgebied, dan langzamer nabij het laatste vulgebied zodat het ontluchten tijd heeft om te werken.
Pakinstellingen helpen wanneer het defect een vacuümholte is. Verhoog de houddruk voorzichtig, verleng de houdtijd tot de poort bevriest en bevestig de stabiliteit van de cushion. Als de poort te vroeg bevriest, heeft extra houdtijd geen effect. Koppel de correctie aan productietijd spuitgieten, omdat langere koeling en houdtijd zowel de kosten als de output kunnen veranderen.
"Een gefaseerd inspuitsnelheidsprofiel kan luchtinsluitingen aan het einde van de vulling verminderen."Echt
Het vertragen van het smeltfront nabij het laatste vulgebied kan gascompressie verminderen en geeft het ontluchten meer tijd om verplaatste lucht vrij te laten.
"Meer houdtijd verwijdert altijd interne holtes."Vals
Houdtijd werkt alleen zolang de poort open is. Als de poort al bevroren is, kan de druk het krimpende materiaal binnenin het onderdeel niet bereiken.
Onderdeelgewicht is hier een nuttig processignaal. Als een hogere houddruk het onderdeelgewicht verhoogt en de luchtbel vermindert, was het pakken waarschijnlijk te zwak. Als het onderdeelgewicht stopt met stijgen maar de holte blijft, is de poort mogelijk al bevroren of is de dikke sectie te geïsoleerd van de poort. Dat onderscheid is belangrijk omdat het ene geval een instelprobleem is en het andere mogelijk poort- of ontwerpwijzigingen vereist. Bewaar de monsters en onderdeelgewichten samen, zodat de volgende ploeg dezelfde conclusie kan herhalen zonder later te hoeven gokken.
Wanneer heeft de vorm ventilatie of gate-veranderingen nodig?
Matrijsontluchting is nodig wanneer de bubbel zich op dezelfde locatie herhaalt na drogen en procesafstelling. Een stabiele locatie betekent stabiel stromingsgedrag. Als dezelfde hoek, ribeinde, pen of laslijn elke keer faalt, vertelt de matrijs je waar de lucht vastzit.
Ontluchting moet worden geplaatst op het werkelijke laatste-vulgebied, niet alleen waar de ontwerper tijdens de gereedschapsbouw heeft geraden. Stromingssimulatie helpt, maar kortschotonderzoeken zijn vaak praktischer op de werkvloer. Vul het onderdeel op 80%, 90% en 95%, en kijk dan waar het smeltfront stopt en waar lucht geen ontsnappingsroute heeft.
De locatie van de poort is ook belangrijk. Een poort die de stroom rond een hoge rib of in een blinde zak duwt, kan lucht vasthouden, zelfs als de ontluchtdiepte correct is. Het verplaatsen van de poort, het toevoegen van een overlooptab, het aanpassen van de verdelerbalans of het verbeteren van de scheidingslijnontluchting kan betrouwbaarder zijn dan proberen gas door een afgesloten sectie te forceren. Voor kopers is dit waarom een vroege DFM-beoordeling een late gereedschapsreparatie verslaat.
Als je leveranciers vergelijkt voor een cosmetisch of luchtdicht project, vraag dan hoe zij luchtbellen diagnosticeren voordat je het gereedschap toewijst. Een goede sourcing guide moet controleren of de leverancier ontluchting, drogen en pakken kan uitleggen in plaats van te beloven dat elk defect later gemakkelijk op te lossen is.
Hoe kan ontwerp van onderdelen bubbels voorkomen voor de tooling?
Bubbelveilig ontwerp van onderdelen gaat vooral over uniforme wanden, open stroombanen en geometrie die lucht laat ontsnappen. Vermijd dikke secties, blinde zakken, slechte ribovergangen en lange stroombanen die gas vasthouden. Een ontwerp dat er sterk uitziet in CAD kan moeilijk zijn om te vullen en te ontluchten in staal.
Begin met wanddikte. Dikke bussen en ribben veroorzaken krimppunten, terwijl plotselinge wandovergangen stromingsaarzeling veroorzaken. Gebruik kernuitsparingen, ribben, steunen en geleidelijke overgangen in plaats van massieve blokken. Als een dik gebied onvermijdelijk is, plaats de poort zo dat pakdruk het kan bereiken voordat de poort bevriest en beoordeel de verwachte schimmelkrimp vroeg.
Tapsheid en textuur kunnen ook de bubbeldiagnose beïnvloeden. Een ruwe textuur kan kleine oppervlaktegasmerken verbergen, maar het lost ingesloten lucht niet op. Diepe ribben kunnen extra ontluchting of ontluchting in het uitstootgebied nodig hebben. Dunne wandgedeelten hebben mogelijk hogere snelheid nodig, maar hogere snelheid kan gas harder comprimeren als het ontluchtingspad zwak is.
De beste beoordelingsvraag is simpel: waar gaat de lucht heen? Als niemand dat kan beantwoorden voordat het staal wordt gesneden, verwacht dan vertragingen bij de proef. Markeer laatste-vulzones, laslijnen, dikke secties en cosmetische oppervlakken op de DFM-beoordeling. Die ene tekening voorkomt vaak dagen van gissen bij de machine.

Wat is de snelste troubleshooting workflow voor bubbels?
De snelste probleemoplossingsworkflow voor bubbels wordt bepaald door de functie, beperkingen en afwegingen die in deze sectie worden uitgelegd. De snelste probleemoplossingsworkflow is: classificeer de bubbel, verifieer het drogen, voer een kortschotonderzoek uit, pas één procesvariabele aan, en pas daarna de matrijs aan. Deze volgorde beschermt je tegen het najagen van de verkeerde oorzaak en houdt het onderzoek nuttig voor toekomstige productie.
Gebruik deze volgorde: inspecteer de locatie, snijd het onderdeel, bevestig het hars en het drogen, controleer de ontluchtreinheid, voer korte schoten uit, stel de injectiesnelheid af, verifieer het pakken, en beslis dan of het gereedschap ontluchtings- of poortwijzigingen nodig heeft. Als het product al in massaproductie is, houd dan een defectenkaart bij per holtenummer zodat je kunt zien of het probleem holtespecifiek of systeembrede is.
ZetarMold heeft meer dan 20 jaar ervaring met vormen en gereedschappen, dus ons team behandelt luchtbellen als een systeemprobleem, niet als een enkele knop op de machine. Stuur de harskwaliteit, onderdeeltekening, wanddikte, foto's van de luchtbellen en het huidige procesblad op als je een praktische DFM- en procesbeoordeling wilt voor de volgende proef.
Veelgestelde vragen
Wat is de meest voorkomende oorzaak van luchtbellen in spuitgietonderdelen?
De meest voorkomende oorzaak hangt af van waar de bel verschijnt, maar ingesloten lucht en vocht zijn de eerste twee controles. Als het defect zich bevindt aan het einde van de vulling of bij een laslijn, inspecteer dan de ontluchting en het stromingspad. Als het defect willekeurig optreedt met zilveren strepen of spatten, controleer dan het drogen en de opslag van het hars. Als de bel zich in een dikke wand bevindt, behandel deze dan als een vacuümholte veroorzaakt door krimp of zwakke pakking. Locatie, herhaalbaarheid en snij-inspectie moeten de eerste correctie sturen.
Kan slecht drogen bubbels veroorzaken in plastic spuitgietonderdelen?
Ja, slecht drogen kan luchtbellen, sproeivlekken, zilverstrepen en zwakke oppervlakken veroorzaken, vooral bij hygroscopische materialen zoals nylon, PC, ABS, PBT en TPU. Vocht wordt stoom wanneer de hars smelttemperatuur bereikt. Dat gas strekt zich dan uit door de stroombaan of verzamelt zich nabij het oppervlak. Controleer altijd droogtemperatuur, droogtijd, dauwpunt en trechterblootstelling voordat je de matrijs wijzigt. Als drogen het defect oplost, pas dan geen staal aan. Bewaar drooggegevens bij het productierecord voor traceerbaarheid.
Hoe lossen vormventielen luchtbellen op?
Moldventielen verhelpen luchtbellen door verplaatste lucht een gecontroleerd ontsnappingspad te geven voordat het smeltmateriaal de holte afdicht. Ventielen worden meestal geplaatst bij scheidingslijnen, laatste-vulzones, uitwerpergebieden, inzetstukken of overloopuitsteeksels. De ventieldiepte moet gas vrijlaten zonder flitsvorming toe te staan. Als het ventiel vuil is, te ondiep of op de verkeerde locatie, blijft de luchtinsluiting bestaan zelfs wanneer de injectiedruk wordt verhoogd. Ventielonderhoud moet deel uitmaken van regelmatige gereedschapsverzorging, vooral ook na lange productieruns.
Waarom krijgen dikke plastic delen interne holtes?
Dikke plastic onderdelen krijgen interne holtes omdat het buitenoppervlak eerst bevriest terwijl het midden blijft krimpen tijdens het afkoelen. Als de persdruk niet meer gesmolten materiaal in het krimpende gebied kan voeden, trekt het midden weg en vormt een holle ruimte. Dit is niet altijd een echte luchtbel. Betere wandontwerpen, grotere of beter geplaatste poorten, langere houddruk en verbeterde koelbalans zijn gebruikelijke oplossingen. Het openzagen van het onderdeel is vaak eerst nodig om het werkelijke defecttype duidelijk te bevestigen.
Moet ik de injectiedruk verhogen om luchtbellen te verwijderen?
Verhoog de injectie druk alleen nadat je het bubbeltype weet. Hogere druk kan helpen bij een packing void als de gate nog open is, maar het zal natte resin niet drogen of een missing vent path creëren. Te veel druk kan flash, stress, overpacking en moeilijke ejectie veroorzaken. Een gecontroleerde trial moet druk samen met holding time, gate freeze en part weight data aanpassen. Gebruik druk nooit als de eerste blinde fix, omdat het tijdens trials snel het evidence kan verbergen.
Wanneer moet het spuitgietmatrijs worden aangepast voor luchtbellen?
Pas de matrijs aan wanneer bubbels zich op dezelfde locatie herhalen na drogen, ontluchtreiniging en redelijke procesaanpassingen. Een vaste defectlocatie betekent meestal dat de luchtweg, poortlocatie, wanddikte of ontluchtingspositie verkeerd is. Voordat staal wordt gesneden: voer korte schoten uit, markeer laatste-vulgebieden en bevestig het defect per holtenummer. Gereedschapsmodificatie moet gebaseerd zijn op bewijs, niet op frustratie. De goedkoopste staalwijziging is degene die wordt ondersteund door gegevens en eerst wordt geverifieerd op proefmonsters voordat deze later wordt goedgekeurd.
-
ontluchting: Ontluchting is een matrijsontwerpmethode die verplaatste lucht en vluchtige stoffen laat ontsnappen uit de holte tijdens het vullen. ↩
-
vacuümholte: Een vacuümholte is een interne holle ruimte veroorzaakt door ongelijke krimp of onvoldoende pakken nadat het oppervlak is bevroren. ↩
-
luchtinsluiting: Een luchtinsluiting is een ingesloten gasbel die niet uit de matrijsholte kan ontsnappen voordat de gesmolten kunststof deze afsluit. ↩


