 Saltar para o conteúdo

- A simulação prevê como a frente de fusão irá interagir com o inserto, mostrando os diferenciais de pressão que causam deslocamento e identificando as posições das linhas de solda antes do molde ser construído. Corrigir a localização do gate ou a posição do inserto no software custa uma fração do que custaria modificar um molde acabado.
- Mechanical retention from knurls, grooves, and undercuts dominates the bond strength; adhesive contribution is secondary.
- Brass is the most common insert material because it machines easily, resists corrosion, and handles thread-forming loads.
- Insert shift, sink marks, and poor bonding are the top three defects—each preventable through gate placement, wall thickness, and surface preparation.
- This process beats ultrasonic welding and press-fitting when you need high torque resistance and hermetic sealing in one cycle.
What Is Metal Insert Injection Molding?
A moldação por injeção com inserção metálica é definida pela função, restrições e compromissos explicados nesta secção. Se estiver a comparar fornecedores ou a planear aquisições, o nosso guia de seleção de fornecedores de moldação por injeção abrange a preparação de RFQ, qualificação e verificações de risco comercial.
dispara um segundo material plástico sobre um primeiro substrato plástico. A moldagem por inserção envolve especificamente a colocação de um componente pré-fabricado — quase sempre de metal, por vezes cerâmico ou outra peça pré-moldada — na cavidade antes de o ciclo começar. O inserto metálico é normalmente carregado manualmente, por um braço robótico ou através de um alimentador vibratório automático em forma de taça. moldagem por injeção é um processo de fabrico que coloca um componente metálico pré-formado na cavidade do molde antes de injetar plástico fundido à sua volta. O resultado é um conjunto único e permanentemente ligado, que combina a condutividade, a resistência das roscas e a rigidez do metal com a liberdade de design e o baixo peso do plástico.
The distinction from sobremoldagem1 é importante. A sobremoldagem dispara um segundo material plástico sobre um primeiro substrato plástico. moldagem por inserção2 envolve especificamente a colocação de um componente pré-fabricado — quase sempre metálico, às vezes cerâmico ou outra peça pré-moldada — na cavidade antes de o ciclo começar. A inserção metálica é tipicamente carregada manualmente, por um braço robótico ou através de um alimentador vibratório automatizado. Uma vez a inserção corretamente posicionada, o molde fecha e o plástico fundido flui à sua volta, fixando o componente metálico na geometria final da peça. Este processo de uma única etapa elimina passos de montagem secundários, como prensagem, soldadura por ultrassons ou colagem, o que reduz custos e risco de falha.

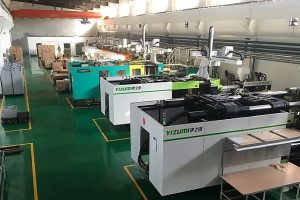
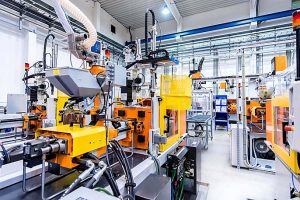
Na nossa fábrica de Xangai, operamos 47 máquinas de moldagem por injeção, desde 90T até 1850T, o que nos dá a flexibilidade para lidar com trabalhos de moldagem por inserção desde inserções eletrónicas delicadas M1.0 até buchas pesadas para automóveis.
“Insert-molded threads can withstand 5–10× more assembly cycles than self-tapping screws in plastic bosses.”Verdadeiro
Self-tapping screws cut threads into plastic during each insertion, progressively degrading the boss material. Insert-molded brass threads distribute load across full metal thread engagement, maintaining clamping force across hundreds of assembly cycles without strip-out.
“Insert molding cycle times are always much longer than standard injection molding cycles.”Falso
With automated insert loading, the added time is often only 3–5 seconds per cycle. The injection, packing, and cooling phases are nearly identical to standard molding. On high-volume automotive connector jobs, cycle times of 18–22 seconds including insert placement are achievable.
How Does the Metal Insert Molding Process Work?
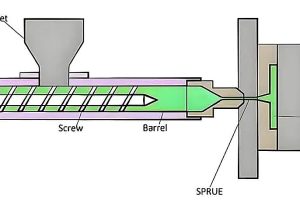
O processo de moldagem por injeção3 for insert molding follows the same fundamental cycle as standard molding, but with a critical pre-step: loading the metal component into the cavity. Here is the complete sequence, broken down step by step.
Step 1: Insert Preparation
Before any plastic flows, the metal inserts must be clean, dry, and free of machining oils or surface contaminants. Many shops run inserts through an ultrasonic cleaning bath or a solvent dip followed by hot-air drying. Contaminants on the insert surface act as release agents, destroying the mechanical bond between metal and plastic.
Some applications call for preheating the inserts to 80–120 °C. Preheating reduces the temperature differential between the molten plastic and the cold metal, which minimizes residual stress at the interface and prevents premature freeze-off that would otherwise create a weak bond line. Preheating is especially important with high-shrink materials like nylon and polypropylene.
Step 2: Insert Placement
The mold opens, and the insert is placed into its designated location in the cavity side of the mold. For low-volume production, operators load inserts by hand using tweezers or vacuum wands. For high-volume runs, robotic arms or automated feed systems (vibratory bowl feeders, escapement mechanisms) place inserts with positional accuracy of ±0.05 mm or better.
O conceção do molde deve incluir características de retenção positivas — pinos com mola, bolsos magnéticos ou assentos cónicos — que mantêm a inserção na posição durante o fecho do molde e a injeção. Sem retenção, o fluxo de material fundido de alta pressão (tipicamente 50–150 MPa) empurrará a inserção para fora de posição, resultando em peças rejeitadas.
Step 3: Mold Closing, Injection, and Packing
Once the insert is seated, the mold closes and the injection unit fills the cavity with molten plastic at temperatures ranging from 200 °C (for polypropylene) to 380 °C (for PEEK). The melt flows around the insert, conforming to every surface feature. Packing pressure holds the plastic against the cavity and insert surfaces as the material cools and shrinks.
Packing pressure and time are more critical in insert molding than in standard molding. The plastic must remain under pressure long enough to compensate for volumetric shrinkage around the insert. Insufficient packing causes sink marks on the outer surface opposite the insert and voids at the metal-plastic interface.
Step 4: Cooling and Ejection
Cooling accounts for 60–70% of the total cycle time. The mold’s cooling channels must extract heat from both the plastic and the metal insert, which acts as a thermal mass. In some designs, the insert’s thermal conductivity works in your favor—brass inserts, for example, help cool the surrounding plastic faster.
After cooling, the mold opens and the finished part is ejected. Ejector pins must be positioned to avoid contact with the insert itself, which could damage surface features or push the insert partially out. For delicate parts, air-blow ejection or robotic extraction is preferred.
Which Materials Work Best for Metal Insert Molding?
Material selection in insert molding involves two independent decisions: the metal insert material and the plastic substrate. The interface between them—the bond line—depends on the interaction of both.
Metal Insert Materials
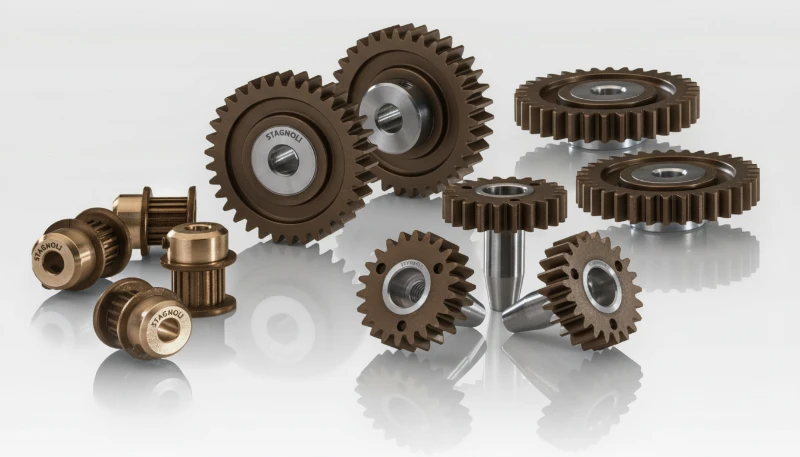
Brass (C36000 or C37700) dominates insert molding for one reason: it is the best all-around compromise. It machines easily into complex knurled and threaded shapes, resists corrosion without plating, conducts heat well (which helps during molding), and costs significantly less than stainless steel. For threaded inserts, brass handles repeated assembly torque without galling or thread deformation.
Stainless steel inserts (303, 304, or 316 grades) appear in medical devices, food-contact applications, and corrosive environments where brass would fail. The trade-off is higher material cost, harder machining (which increases insert price by 2–3×), and lower thermal conductivity, which extends cooling time.
Aluminum inserts work when weight reduction is critical, such as in aerospace or portable electronics. Aluminum’s high thermal conductivity accelerates cooling, but its lower hardness limits thread durability under repeated assembly. Copper inserts serve in electrical applications where maximum conductivity is required—bus bars, grounding terminals, and high-current connectors.
Plastic Substrate Selection
The plastic must be chosen for both the application requirements and its compatibility with the insert molding process. High-shrink-rate materials like polypropylene (PP) and nylon (PA6, PA66) create strong compressive grip on inserts as they cool—but they also generate higher residual stress at the interface. If the wall section around the insert is too thin, this stress can cause cracking.
Engineering thermoplastics like polycarbonate (PC), PBT, and PPS are popular insert molding substrates because they offer lower shrinkage (0.4–0.7% vs. 1.5–2.5% for PP), better dimensional stability, and higher operating temperatures. PEEK is used in aerospace and medical applications where the finished part must survive autoclave sterilization or continuous temperatures above 250 °C.
Glass-filled grades (PA66-GF30, PBT-GF30) are common in structural applications because the glass fiber reduces shrinkage and increases stiffness around the insert. However, glass-filled materials are more abrasive to the mold and may require hardened steel cavities.
Interface Bond Mechanism
The bond between metal and plastic in insert molding is almost entirely mechanical. Unlike overmolding, where chemical compatibility between two plastics can create a molecular bond, metal and thermoplastic do not form covalent bonds. The retention comes from three sources: shrink-fit compression from plastic cooling, mechanical interlocking with surface features (knurls, grooves, undercuts), and friction from the normal force exerted by the compressed plastic.
“Mold flow simulation before cutting steel can prevent 90% of insert-shift and weld-line problems.”Verdadeiro
Simulation predicts how the melt front will interact with the insert, showing pressure differentials that cause shift and identifying weld line positions before the mold is built. Correcting gate location or insert position in software costs a fraction of modifying a finished mold.
“Adhesive bonding between metal and plastic provides the primary retention force in insert molding.”Falso
The bond in insert molding is overwhelmingly mechanical. Shrink-fit compression, knurl interlock, and groove engagement account for 95%+ of retention. Adhesive bonding contributes negligibly because thermoplastic melts do not form covalent bonds with metal surfaces.
| Material | Custo | Thread Life | Resistência à corrosão | Condutividade térmica |
|---|---|---|---|---|
| Brass (C36000) | Baixa | Excelente | Bom | High (120 W/m·K) |
| Stainless Steel (303/304) | Médio-Alto | Bom | Excelente | Low (16 W/m·K) |
| Aluminum (6061) | Médio | Justo | Justo | Very High (167 W/m·K) |
| Copper (C11000) | Médio | Justo | Justo | Highest (390 W/m·K) |
| Steel (1018) | Baixa | Bom | Poor (needs plating) | Medium (50 W/m·K) |
What Are the Critical Mold Design Considerations?
As considerações críticas de design do molde são as principais categorias ou opções explicadas nesta secção. O design do molde para moldagem por inserção exige mais atenção do que um molde padrão, porque não está apenas a gerir o fluxo de plástico, mas também o posicionamento preciso de um componente metálico rígido dentro de um ambiente de alta pressão e alta temperatura.
Insert Positioning and Retention
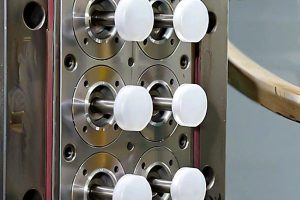
The cavity must include features that locate the insert with repeatability better than ±0.05 mm. Common approaches include tapered seats (which self-center the insert), spring-loaded retaining pins (which grip the insert and release during ejection), and magnetic pockets (for ferromagnetic inserts). The choice depends on insert geometry, production volume, and whether loading is manual or automated.
For multi-cavity molds, each cavity must have identical insert retention features. Even small differences in insert seating depth between cavities create inconsistent bond strength and part dimensions. Mold maintenance schedules should include regular measurement of insert seat dimensions.
Gate Placement and Melt Flow
Gate location determines how the melt front approaches and flows around the insert. The gate should direct flow so that the melt wraps symmetrically around the insert, filling both sides at approximately the same rate. Asymmetric filling creates unbalanced pressure on the insert, causing it to shift during injection.
Avoid placing the gate directly opposite the insert. The high-velocity melt jet hitting the insert surface can cause two problems: it can push the insert out of position, and it can create a flow line or weld line on the far side where the split melt stream reunites. A tangential or edge gate that directs flow along one side of the insert is usually more reliable.
Cooling Channel Layout
The metal insert acts as a heat sink during cooling, which can be either helpful or problematic depending on the design. Brass inserts cool the surrounding plastic quickly, but they also create uneven cooling if the cooling channels are not balanced around the insert. Uneven cooling causes warpage and differential shrinkage.
Vent Placement
Trapped air around insert features (knurls, undercuts) creates burn marks and weak bond lines. Vents must be ground at the parting line and near any dead-end flow paths created by the insert geometry. Vent depth should be 0.01–0.02 mm—deep enough to let air escape, shallow enough to prevent flash.
What Design Guidelines Ensure Reliable Insert-Molded Parts?
Good insert-molded parts start at the DFM stage. The following guidelines come from production experience across thousands of insert-molded part designs.
Wall Thickness Around Inserts
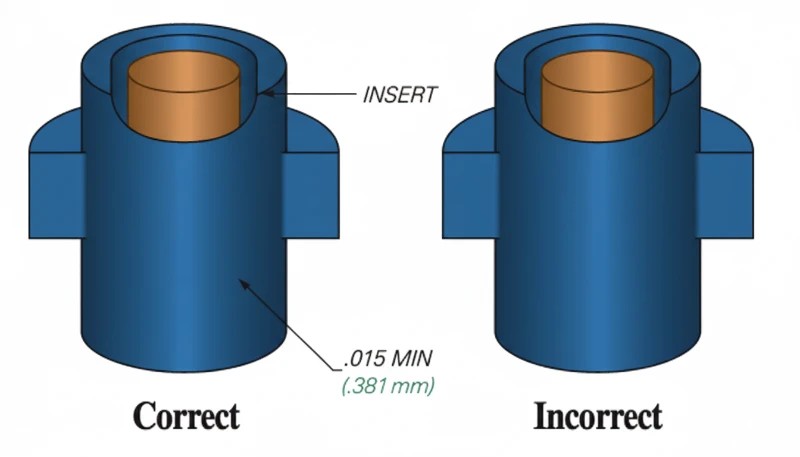
Maintain a minimum wall thickness of 1.5× the insert diameter between the insert outer surface and the part exterior. For a 6 mm diameter insert, that means at least 9 mm of outer diameter on the plastic boss. Going thinner risks sink marks on the outer surface and cracking from shrinkage stress. Going thicker wastes material and extends cooling time.
The wall should be uniform around the insert. Variable wall thickness creates uneven shrinkage, which pulls the insert off-center. If the design requires a non-circular boss shape, use a constant thickness between the insert and the outer wall rather than a constant outer profile.
Insert Shape and Surface Features
Knurling is the most common surface treatment for round inserts. Diamond knurling provides good axial and rotational retention. Straight knurling resists pull-out but not rotation. For maximum retention in both directions, use a combination of diamond knurling and one or more circumferential grooves.
Undercuts on the insert (such as a T-head or flanged profile) provide the strongest retention because the plastic physically cannot pull past the undercut without failing. However, undercuts complicate both insert manufacturing and mold ejection—use them only when the application demands maximum pull-out strength.
Anti-Rotation and Anti-Pullout Design
For threaded inserts, anti-rotation is critical. The insert must not spin inside the plastic when a screw is driven or removed. Two design strategies work: hexagonal or square insert bodies that key into the plastic, and knurled surfaces that create mechanical interlock. Combining both is the most reliable approach for high-torque applications.
Anti-pullout design focuses on maximizing the shear area at the insert-plastic interface. Longer engagement length, wider grooves, and larger diameter flanges all increase pull-out force. A typical well-designed M3 brass insert in PA66-GF30 should achieve 500–800 N of pull-out force and 0.5–1.0 N·m of torque resistance.
Tolerance Stack-Up
Insert molding introduces an additional tolerance variable: the insert’s position relative to the mold cavity. The final positional accuracy of the insert in the finished part depends on the mold seat tolerance, the insert manufacturing tolerance, and the plastic shrinkage. Budget ±0.1–0.2 mm for insert positional accuracy in a well-designed, well-maintained mold.
What Are the Most Common Defects and How Do You Prevent Them?
Os defeitos mais comuns e como os prevenir são as principais categorias ou opções explicadas nesta secção. A moldação com inserção introduz defeitos que a moldação por injeção padrão nunca apresenta. Aqui estão os quatro problemas mais frequentes e as suas causas raiz.
Insert Shift (Displacement)
Insert shift occurs when the melt flow pushes the metal component out of its intended position. The result is an off-center insert, uneven wall thickness, and potentially exposed metal on one side. Root causes include asymmetric gate placement, excessive injection speed, insufficient insert retention in the mold, and unbalanced multi-cavity flow.
Solutions: Use mold flow simulation to verify balanced fill around every insert. Reduce injection speed in the first stage to lower the dynamic pressure on the insert. Improve mold retention features—switch from gravity seats to spring-loaded pins or tapered interference fits. In multi-cavity tools, balance the runner system so all cavities fill at the same rate.
Sink Marks and Voids
Sink marks appear on the part surface opposite a thick insert because the large thermal mass cools slowly, and the plastic shrinks away from the cavity wall. Voids form internally when the outer skin freezes before the core has fully packed out.
Solutions: Increase packing pressure and extend packing time to compensate for volumetric shrinkage around the insert. Preheat inserts to reduce the temperature gradient. Maintain minimum wall thickness of 1.5× insert diameter. Consider using a foaming agent (microcellular molding) for very thick boss sections.
Poor Bond Strength
Mecânica (na placa)
Solutions: Implement a cleaning protocol (ultrasonic bath or solvent wash) for all incoming inserts. Increase melt temperature by 10–20 °C to improve flow into surface features. Extend packing time. If using regrind material, limit the regrind percentage to 15% or less, as degraded material has poor flow characteristics.
Part Warpage and Cracking
Differential shrinkage between the insert area (constrained by metal) and the free-shrinking plastic walls causes warpage. In extreme cases, the residual stress around the insert exceeds the plastic’s tensile strength, causing radial cracks in the boss wall.
Solutions: Use a lower-shrink material or a glass-filled grade. Preheat the insert to reduce the temperature shock. Design the boss with uniform wall thickness and add gusset ribs for structural support. Annealing the finished part at a temperature below the plastic’s heat deflection temperature can relieve residual stress without deforming the part.
How Do You Test and Validate Insert-Molded Assemblies?
Quality validation for insert-molded parts goes beyond standard dimensional inspection. The metal-plastic interface requires dedicated mechanical testing to verify that the bond meets application requirements.
Pull-Out Testing
A universal testing machine grips the plastic part and applies axial force to extract the insert. The test measures peak pull-out force and records the failure mode—whether the plastic fractures, the insert pulls free from the knurl, or the plastic boss ruptures. A well-designed M3 brass insert in glass-filled nylon should consistently achieve 500–800 N pull-out force.
Pull-out testing should be performed on samples from each cavity at the start of production, then periodically during the run. A 10–15% drop in pull-out force from initial samples signals a process drift—typically increasing mold temperature, degrading material, or worn insert seats.
Torque Testing
For threaded inserts, a calibrated torque wrench drives a screw into the insert until either the specified installation torque is reached or the insert spins inside the plastic. The torque-to-failure value defines the maximum safe working torque—typically set at 50–60% of the failure torque for production specifications.
Torque testing catches problems that pull-out testing misses. An insert may have excellent axial retention from deep knurling but poor rotational resistance if the knurl pattern is too fine or the plastic did not fully pack into the grooves.
Cross-Section Analysis
Sectioning an insert-molded part and examining the cut face under magnification reveals the quality of the bond interface. Look for voids between the insert and plastic, incomplete fill of knurl grooves, and sink marks on the outer surface. Cross-section analysis is destructive and typically performed during initial process qualification and after any tool modifications.
Environmental and Life-Cycle Testing
Thermal cycling (typically -40 °C to +85 °C or higher, depending on the application) tests whether differential expansion between metal and plastic causes bond degradation over time. Thermal shock testing with rapid temperature transitions is especially aggressive—it exposes any weak bond line within 50–100 cycles.
Humidity exposure matters for hygroscopic materials like nylon. After 48 hours at 85% RH and 85 °C, nylon absorbs enough moisture to swell 0.5–1.0%, which can reduce the compressive grip on the insert by 15–25%. Always test under realistic end-use conditions.
Where Is Metal Insert Molding Used Across Industries?
Metal insert molding serves any industry that needs strong, reliable metal-to-plastic bonds. The four largest application sectors are automotive, electronics, medical devices, and consumer products.
In automotive, insert-molded threaded inserts appear in interior trim panels, instrument cluster housings, sensor bodies, and under-hood electrical connectors. A single mid-size car contains 50–100 insert-molded threaded bosses. Automotive suppliers specify pull-out and torque values for every insert, and production parts must pass statistical process control sampling to maintain PPAP documentation.
Electronics applications include PCB mounting bosses, RF shield retention posts, battery terminal blocks, and connector housings.
The trend toward miniaturization has driven demand for inserts as small as M1.0, which require precision molds with 0.01 mm tolerance insert seats and specialized loading automation.
Medical device manufacturers use insert molding for instrument handles, surgical tool components, and diagnostic equipment housings. Stainless steel inserts are standard in this sector because they survive autoclave sterilization and meet biocompatibility requirements. ISO 13485 quality systems require full traceability of every insert lot to the finished device.
Consumer products—power tool housings, kitchen appliances, sporting equipment, and toys—use insert molding for threaded assembly points that must survive repeated disassembly and reassembly. The cost premium of a brass insert (typically $0.02–$0.10 each in volume) is trivial compared to the warranty cost of a stripped plastic thread.
Beyond these four sectors, insert molding appears in telecommunications hardware (fiber optic connector ferrules, base station antenna brackets), industrial equipment (valve bodies, actuator housings, sensor mounts), and defense applications where threaded metal-to-plastic joints must withstand shock and vibration loads specified by MIL-STD standards. Emerging EV battery applications use insert-molded stainless steel mounting bosses for structural attachment and electrical grounding.
Engineers evaluating joining methods often compare insert molding against three alternatives. Each has distinct strengths and limitations.
Insert Molding vs. Overmolding
Insert molding encapsulates a rigid, pre-made component (usually metal) in plastic. Overmolding molds a second plastic material over a first plastic substrate, creating a soft-touch grip, a seal, or a multi-color part. Overmolding can create a chemical bond between the two plastics if they are compatible (for example, TPE over PP). Insert molding relies entirely on mechanical retention. Choose insert molding when you need metal properties; choose overmolding when you need multi-material plastic integration.
Outsert molding is the inverse of insert molding—it injects plastic features onto a flat metal substrate rather than placing metal inside plastic. Ultrasonic insertion drives a metal insert into a pre-molded plastic boss using high-frequency vibration as a secondary operation. Both avoid insert molding’s tool complexity but sacrifice bond consistency and strength.
The key trade-off: insert molding produces stronger, more consistent bonds because the plastic packs uniformly around the insert under controlled pressure and temperature. Ultrasonic insertion creates a bond that depends on vibration amplitude, insertion depth, and plastic melt during a brief 0.5–2 second cycle—more variables, more opportunity for inconsistency.
Frequently Asked Questions About Metal Insert Injection Molding
What is the minimum wall thickness around a metal insert in injection molding?
O ponto de partida usual é pelo menos 1,5 vezes o diâmetro da inserção como parede de plástico em torno da inserção metálica, com maior margem para resinas frágeis ou com carga de vidro. A parede também deve permanecer uniforme em torno do boss. Se um lado for fino e o lado oposto for grosso, a contração por arrefecimento torna-se irregular e o risco de fissura aumenta. Para roscas sujeitas a carga, confirme a parede com testes de extração e torque em vez de confiar apenas num valor de manual durante a amostragem. Confirme a escolha com dados de amostragem de produção.
Can you use aluminum inserts instead of brass in insert molding?
Sim, mas o alumínio não é um substituto direto do latão em todas as peças moldadas com inserção. O alumínio reduz o peso e melhora a transferência de calor, mas é mais macio, deforma-se mais facilmente durante o carregamento e geralmente oferece menor durabilidade das roscas. Use-o para caixas leves, dispositivos portáteis ou peças aeroespaciais onde a massa importa. Para montagens repetidas com parafusos, o latão ou o aço inoxidável são geralmente mais seguros, a menos que os testes comprovem que a inserção de alumínio cumpre as especificações de binário e arrancamento sob carga e temperatura reais. Confirme a escolha com dados de amostragem de produção.
How accurate is insert positioning in insert-molded parts?
O posicionamento típico de uma inserção em produção pode manter cerca de mais ou menos 0,05 a 0,10 mm quando o molde tem assentos de inserção positivos, carregamento estável e fecho controlado. É possível obter uma precisão mais apertada, mas depende da tolerância da inserção, da repetibilidade do carregador, da pressão de fusão e do equilíbrio da cavidade. Não avalie a precisão apenas pelo CAD. Valide-a com verificações CMM da primeira peça e repetições das verificações em todas as cavidades, porque um localizador fraco pode criar um desvio que só aparece após o molde aquecer. Confirme a escolha com dados de amostragem de produção.
Does insert molding work with high-temperature plastics like PEEK?
Sim, a moldagem por inserção pode funcionar com plásticos de alta temperatura, como PEEK, PPS, PEI e nylon de alta temperatura, mas a inserção e o design do molde têm de suportar temperaturas de processamento muito mais elevadas. A inserção metálica pode precisar de pré-aquecimento para que o material fundido não solidifique demasiado depressa à volta da caneladura ou ranhura. O fornecedor também necessita de aço para ferramentas, sistema de canais quentes e controlos de secagem adequados para a resina. Para peças críticas, faça um ensaio específico do material antes de comprometer-se com a ferramentação de produção e dimensões finais. Confirme a escolha com dados de amostragem de produção.
What causes insert-molded parts to crack around the boss?
As fissuras em torno do boss geralmente resultam de tensão residual, espessura de parede irregular, cantos vivos perto da inserção ou uma grande diferença de temperatura entre a inserção fria e o plástico fundido quente. Materiais de alta retração agravam o problema porque o plástico tende a contrair enquanto a inserção metálica restringe o movimento. As soluções normais são espessura de parede uniforme, raios generosos, resina com carga de vidro ou de baixa retração, pré-aquecimento da inserção e validação com ciclagem térmica em vez de inspeção apenas à temperatura ambiente antes do envio e aprovação. Confirme a escolha com dados de amostragem de produção.
How many inserts can be molded into a single part?
Uma peça pode conter uma inserção ou várias inserções, mas o limite prático é definido pela precisão do carregamento, tempo de ciclo, acesso à cavidade e risco de colocação incorreta do hardware. O carregamento manual é geralmente melhor para quantidades baixas ou peças simples com uma a três inserções. O carregamento robótico torna-se mais atrativo quando o número de inserções aumenta, a orientação tem de ser repetível ou a fadiga do operador causa erros. Cada inserção adicional deve ter um assento positivo e uma característica clara de poka-yoke no design do molde. Confirme a escolha com dados de amostragem de produção.
Is insert molding suitable for low-volume production?
A moldagem por inserção pode ser adequada para produção de baixo volume quando a peça necessita de resistência fiável, integração selada metal-plástico ou posicionamento repetível que a inserção secundária não consegue fornecer. Pode não ser económica para rebordos roscados simples abaixo de algumas centenas de peças, porque o molde requer assentos de inserção e trabalho extra de amostragem. Para protótipos ou séries de transição, compare três rotas: moldagem por inserção manual, inserção ultrassónica após moldagem e usinagem mais montagem. Escolha com base no risco total, não apenas no custo da ferramentação para o comprador. Confirme a escolha com dados de amostragem de produção.
-
overmolding: Overmolding is a two-shot injection molding process where a second plastic material is molded over a first substrate to create a multi-material or multi-color part. ↩
-
insert molding: Insert molding is a manufacturing process in which a pre-formed component is placed into an injection mold cavity and encapsulated by molten plastic to form a single integrated assembly. ↩
-
injection molding process: The injection molding process is a cyclic manufacturing method in which plastic pellets are melted, injected under pressure into a mold cavity, cooled, and ejected as a solid part. ↩


 EN
EN  ES
ES  FR
FR  DE
DE  PT
PT  AR
AR  RU
RU  JA
JA  KO
KO  IT
IT  NL
NL  TR
TR  PL
PL 