Projektując część łączącą dwa materiały — na przykład metal i tworzywo albo sztywne tworzywo i miękkie TPE — trzeba w końcu wybrać: formowanie z wkładkami1 czy obtrysk2. Obie metody pozwalają utworzyć jeden wielomateriałowy element, ale działają inaczej, mają inne koszty i nadają się do innych zastosowań.
W praktyce wybór niewłaściwego procesu może kosztować tysiące dolarów na poprawki oprzyrządowania, nie wspominając o wielotygodniowych opóźnieniach projektu. Widziałem, jak inżynierowie automatycznie wybierali obtrysk, choć prostszym i tańszym rozwiązaniem byłoby formowanie z wkładką, i odwrotnie. To zamieszanie jest zrozumiałe: oba procesy łączą materiały, eliminują montaż wtórny i pozwalają wytwarzać zintegrowane komponenty. Jednak ich mechanika działania jest całkowicie odmienna.
Ten artykuł przedstawia dokładnie, jak działa każdy proces, gdzie każdy z nich jest najlepszy, oraz jak zdecydować—na podstawie dwóch dekad praktycznego doświadczenia fabrycznego w codziennym stosowaniu obu procesów. Niezależnie od tego, czy potrzebujesz metalowych wkładów z gwintem zamkniętych w plastiku, czy miękkiej powłoki chwytu na twardym rdzeniu, zrozumienie tych dwóch procesów pomoże Ci wybrać właściwą drogę od samego początku.
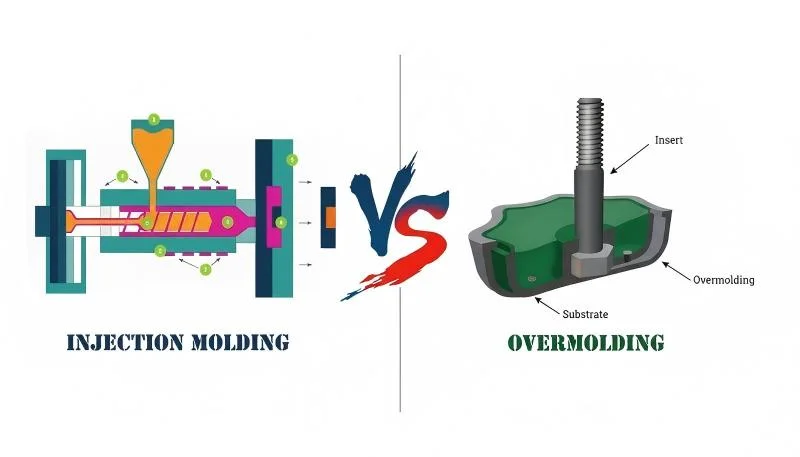
- Formowanie z wkładką umieszcza preformowaną wkładkę (zwykle metalową) w formie, następnie wtryskuje plastik wokół niej w jednym wtrysku.
- Nadlewanie formuje drugi materiał na preformowanym podłożu, wymagając minimum dwóch wtrysków.
- Formowanie z wkładką świetnie się sprawdza w połączeniu metalowych gwintów, kontaktów lub wzmocnień z plastikową obudową.
- Nadlewanie jest standardem dla uchwytów z miękkim gripem, uszczelniaczy i wielokolorowych produktów konsumenckich.
- Koszt narzędzi i czas cyklu różnią się znacznie — zrozum je przed decyzją.
Materiały do Formowania Wtryskowego 5 -
Wlewanie wkładów jest jednostopniowym procesem, który obejmuje preformowany komponent — zwykle metal — w środku płynnego plastiku podczas jednego cyklu wtrysku. Wkład jest ładowany do formy przed każdym wtryskiem, a plastik formuje się wokół, tworząc trwałe połączenie.
Formowanie z wkładkami to jednoetapowy proces formowania wtryskowego, w którym gotowy element — zwykle metalową wkładkę gwintowaną, styk elektryczny lub wzmocnienie — umieszcza się w gnieździe formy przed wtryskiem tworzywa wokół niego. Stopiony polimer opływa wkładkę, zamyka ją w tworzywie i po schłodzeniu tworzy trwałe połączenie. Rezultatem jest jeden zintegrowany element niewymagający dodatkowego montażu. Jeśli porównujesz dostawców lub planujesz zakupy, nasz przewodnik wyboru dostawcy formowania wtryskowego omawia przygotowanie zapytania ofertowego, kwalifikację i kontrolę ryzyka handlowego.
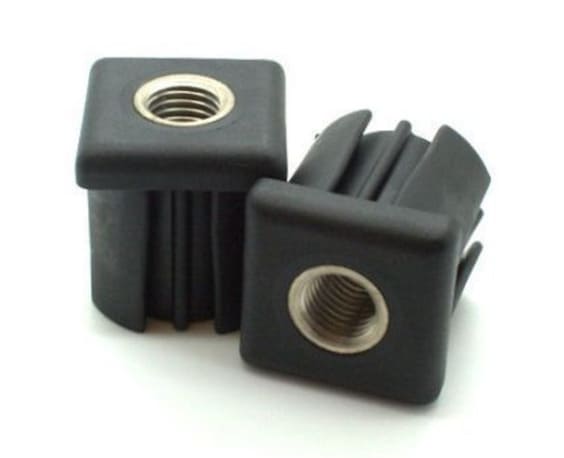
Same wkładki są zwykle wykonane z mosiądzu, stali lub stali nierdzewnej i niemal zawsze mają knurowane, rowkowane lub gwintowane powierzchnie zewnętrzne, aby poprawić mechaniczne połączenie z plastikiem. W produkcji małoseryjnej operatorzy ręcznie ładowają wkładki do formy. Dla produkcji wielkoseryjnej, ramiona robotyczne, podajniki wibracyjne lub systemy pick-and-place automatyzują proces. Większość dedykowanych maszyn do formowania z wkładką używa konfiguracji pionowego zacisku – grawitacja naturalnie utrzymuje wkładkę na pozycji gdy forma otwiera się i zamyka, co znacznie redukuje ryzyko przemieszczenia wkładki podczas manipulacji.
Kluczowe parametry procesu obejmują temperaturę płynięcia, szybkość wtrysku i ciśnienie docisku. Temperatura płynięcia różni się w zależności od materiału — PA66 działa około 280–300 °C, a PBT jest bliższe 240–260 °C. Szybkość wtrysku musi być wystarczająca, aby płynąć wokół wkładu przed zamknięciem wlotu, ale nie tak szybka, aby przemieszczać wkład.
Przygotowanie powierzchni wkładki jest równie ważne. Dobrze zaprojektowany wzór radełkowania, otwory poprzeczne lub rowki spiralne zapewniają mechaniczne zakotwienie. Aby uzyskać maksymalną siłę połączenia, w niektórych zastosowaniach łączy się elementy mechaniczne z podkładami adhezyjnymi.
Czym jest obtrysk i jak przebiega?
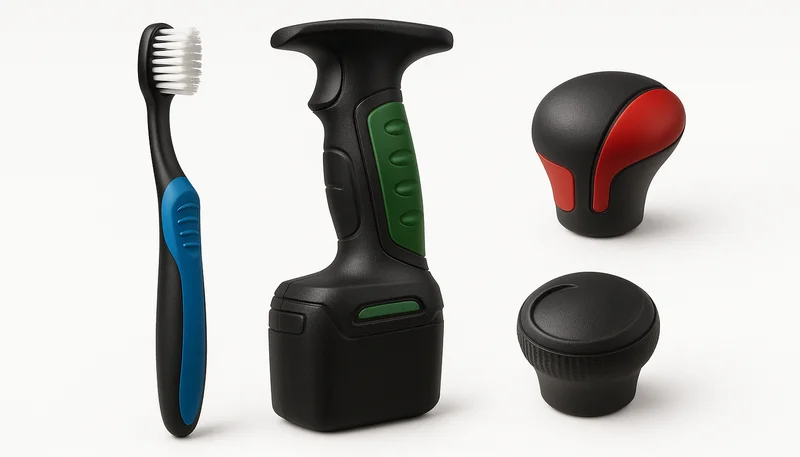
Overmolding jest procesem dwustopniowym, który formuje drugi materiał – zwykle miękką elastomer – na twardym plastikowym substracie. Wynikiem jest jedna część z dwoma różnymi strefami materiałów połączonych razem. Najczęstszym scenariuszem jest twarda plastikowa obudowa z gumową strefą chwytu.
Działają tu dwa odrębne mechanizmy łączenia, a zrozumienie różnicy jest niezbędne dla niezawodnej produkcji. Wiązanie chemiczne powstaje, gdy podłoże i materiał obtrysku mają zgodne struktury cząsteczkowe — materiał obtrysku częściowo topi powierzchnię podłoża i podczas wtrysku scala się z nią na poziomie molekularnym. Jest to najmocniejszy typ połączenia, ale silnie zależy od materiałów: nie wszystkie kombinacje podłoża i obtrysku łączą się chemicznie. Mechaniczne zakotwienie wykorzystuje cechy fizyczne zaprojektowane w podłożu — podcięcia, rowki, szczeliny teowe lub otwory przelotowe — do których wpływa materiał obtrysku i za którymi blokuje się podczas chłodzenia.
W praktyce najlepsze i najbardziej niezawodne części obtryskiwane wykorzystują oba mechanizmy. Mechaniczne elementy kotwiące projektuje się jako zabezpieczenie, a następnie dobiera zgodne materiały, aby podstawową przyczepność zapewniało wiązanie chemiczne. Jeśli wiązanie chemiczne zawiedzie — na przykład wskutek zanieczyszczenia powierzchni lub wahań procesu — elementy mechaniczne utrzymają część w całości.
Obtrysk można wykonywać na jednej maszynie z formą obrotową (tzw. formowanie dwukomponentowe3) albo na dwóch oddzielnych maszynach, między którymi podłoże przenosi się ręcznie lub robotem. Proces dwukomponentowy na maszynie obrotowej jest szybszy, bardziej stabilny i zapewnia lepszą powtarzalność wymiarową, ponieważ podłoże nie opuszcza kontrolowanego środowiska. Formowanie transferowe między dwiema maszynami jest bardziej elastyczne i wymaga tańszego oprzyrządowania, ale wprowadza zmienność manipulacji i koszt pracy. Typowe materiały obtrysku to TPU zapewniający odporność na zużycie i elastyczność, SEBS do miękkich w dotyku produktów konsumenckich oraz TPV do uszczelnień samochodowych pod maską.
Jak różnią się formowanie z wkładką i overmolding?
Wlewanie wkładów i nadlewanie są fundamentalnie różne w liczbie cyklów, złożoności narzędzi i typem połączenia między materiałami. Wlewanie wkładów jest jednostopniowym procesem; nadlewanie wymaga dwóch wtrysków. Tabela poniżej rozbiera różnice w czynnikach najważniejszych w produkcji.
| Kryteria | Formowanie wkładek | Formowanie nakładkowe |
|---|---|---|
| Liczba wtrysków | Jednorazowy wtrysk | Dwa lub więcej wtrysków |
| Typowa wkładka/substrat | Metal (mosiądz, stal, stal nierdzewna) lub preformowany komponent | Wcześniej wtryskowane podłoże z twardego plastiku |
| Materiał nakładany | Termoplastyczna żywica (PA, PBT, PC, etc.) | Miękki TPE, TPU, SEBS lub drugi twardy plastik |
| Główny mechanizm wiązania | Mechaniczne połączenie (rowkowanie, gwinty, podcięcia, shrink-fit) | Wiązanie chemiczne + mechaniczne połączenie |
| Złożoność formy | Jedno gniazdo ze stanowiskiem załadunku wkładek | Dwa gniazda (lub forma obrotowa do wtrysku dwukomponentowego) |
| Typowy czas cyklu | Krótszy (jeden wtrysk + chłodzenie) | Dłuższy (dwa wtryski + przeniesienie + chłodzenie) |
| Koszt oprzyrządowania | Niższy (jedno gniazdo) | Wyższy (dwa gniazda lub forma obrotowa) |
| Typowe zastosowania | Łączniki gwintowane, złącza elektryczne, igły medyczne | Narzędzia z miękkim uchwytem, uszczelnienia, wielokolorowe części konsumpcyjne |
| Dopasowanie do wielkości produkcji | Od niskiego do wysokiego poziomu (ręczne lub zautomatyzowane ładowanie wkładek) | Średnie do wysokiego (preferowana automatyzacja) |
Jednoetapowy charakter formowania z wkładkami z natury skraca cykl — nie ma etapu przenoszenia podłoża, drugiego wtrysku ani dodatkowego chłodzenia. Czas załadunku wkładek może jednak zniwelować tę przewagę, zwłaszcza przy ręcznym załadunku w produkcji małoseryjnej. Doświadczony operator umieszcza wkładki w ciągu 5–10 sekund, natomiast robot skraca ten czas do 1–3 sekund na cykl. Z kolei dwuetapowy proces obtrysku znacząco wydłuża cykl, lecz powstający w nim bezszwowy detal wielomateriałowy często eliminuje późniejsze operacje montażowe — zakładanie uszczelek, klejenie czy montaż zatrzaskowy — których formowanie z wkładkami po prostu nie może zastąpić.
Powszechnym błędnym przekonaniem jest to, że w formowaniu z wkładkami można stosować wyłącznie wkładki metalowe. W rzeczywistości można zatapiać wtryskowo komponenty z tworzyw sztucznych, elementy ceramiczne, zespoły PCB, soczewki szklane, a nawet wkładki z tkaniny lub folii. Kluczowym ograniczeniem jest odporność wkładki na temperaturę i ciśnienie wtrysku materiału obudowującego. Podobnie obtrysk nie ogranicza się do połączeń miękkiego materiału z twardym — można obtrysnąć drugim sztywnym tworzywem w celu wzmocnienia konstrukcji lub uzyskania wielobarwnej estetyki.
Kiedy powinieneś wybrać formowanie z wkładką?
Formowanie z wkładkami jest właściwym wyborem zawsze wtedy, gdy część wymaga zintegrowania wstępnie uformowanego komponentu — zwłaszcza metalowego — bezpośrednio z korpusem z tworzywa sztucznego. Jeśli projektujesz obudowę złącza z gwintowanymi wkładkami mosiężnymi, które muszą wytrzymać wielokrotne cykle montażu i demontażu, formowanie z wkładkami zapewnia większą wytrzymałość i powtarzalność niż jakakolwiek metoda montażu po formowaniu.
Jakie materiały są używane w formowaniu wtryskowym PPS?
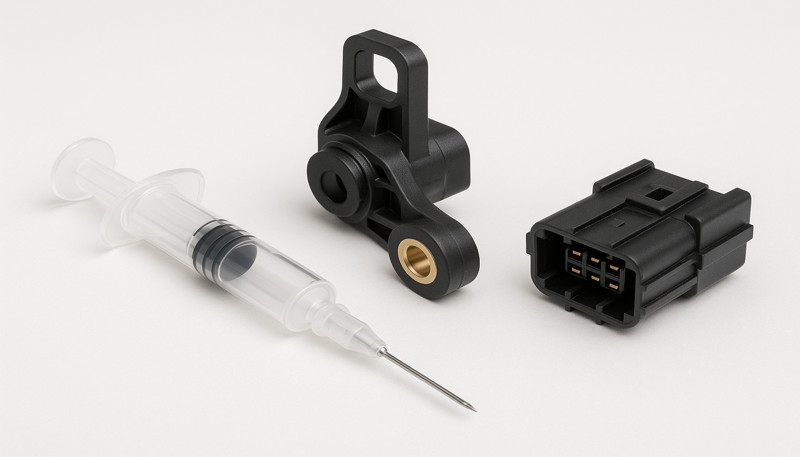
Obudowy złączy, korpusy czujników, obudowy PCB i zespoły antenowe często wykorzystują formowanie z wkładkami do osadzania metalowych pinów, zacisków lub ekranowania EMI bezpośrednio w obudowie z tworzywa. Proces tworzy hermetyczne uszczelnienie wokół każdego styku, kluczowe dla obudów o klasie IP stosowanych na zewnątrz i w przemyśle. Z naszego doświadczenia produkcyjnego wynika, że złącza z wkładkami regularnie przechodzą testy IP67 i IP68, podczas gdy części ze stykami montowanymi później często przeciekają na styku pinu z tworzywem podczas cykli ciśnieniowych.
Urządzenia medyczne
Narzędzia chirurgiczne, urządzenia do podawania leków, złącza cewników i sprzęt diagnostyczny często łączą igły, kanały lub elektrody ze stali nierdzewnej z korpusami z tworzywa sztucznego. Formowanie z insertami zapewnia sterylność, precyzję i zgodność materiałową wymaganą w tych zastosowaniach. Biokompatybilne tworzywa, takie jak PEEK, PC klasy medycznej i PPSU, dobrze łączą się z odpowiednio przygotowanymi powierzchniami metalowymi, a proces jednoetapowy ogranicza ryzyko zanieczyszczenia w porównaniu z montażem wieloetapowym.
Samochodowe elementy złączne i konstrukcyjne
Gwintowane wkładki mosiężne zatopione w plastikowych wspornikach montażowych występują w całych współczesnych pojazdach — od mocowań deski rozdzielczej i spinek tapicerki po uchwyty przewodów pod maską i obudowy czujników. Wkładka zapewnia trwały gwint wytrzymujący setki cykli montażu i demontażu bez zerwania, a konstrukcja formy wtryskowej umożliwia złożone geometrie, które w wykonaniu całkowicie metalowym byłyby zbyt kosztowne. Oszczędność masy dzięki zastąpieniu metalowych wsporników hybrydami tworzywo–metal formowanymi z wkładkami jest ważnym czynnikiem odchudzania pojazdów.
"Obtrysk zwykle wymaga droższej formy niż formowanie z wkładką, ponieważ potrzebuje dwóch gniazd lub formy obrotowej."True
Oprzyrządowanie do obtrysku kosztuje 15 000–40 000+ USD, w porównaniu z 8 000–20 000 USD za oprzyrządowanie do formowania z wkładkami, głównie dlatego, że obtrysk wymaga dwóch oddzielnych gniazd (w przypadku formowania transferowego) albo formy obrotowej z dwoma stanowiskami (w przypadku formowania dwukomponentowego). Wyższy koszt wynika z dodatkowej złożoności precyzyjnego ustawienia dwóch gniazd i obsługi mechanizmu przenoszącego podłoże.
"Formowanie z wkładką wymaga co najmniej dwóch wtrysków do wykonania części."False
Formowanie z wkładką to proces jednoetapowy. Metalową wkładkę umieszcza się w gnieździe formy przed rozpoczęciem pojedynczego cyklu wtrysku. Natomiast obtrysk wymaga dwóch lub większej liczby wtrysków do ukończenia części.
Kiedy powinieneś wybrać overmolding?
Obtrysk jest właściwym wyborem, gdy jedna bezspoinowa część ma łączyć dwa materiały o różnych właściwościach. Miękki materiał na twardym, elastyczny na sztywnym — jeśli liczą się ergonomia, uszczelnienie lub estetyka, obtrysk jest najlepszym rozwiązaniem.
Produkty konsumenckie i ergonomiczne wzornictwo
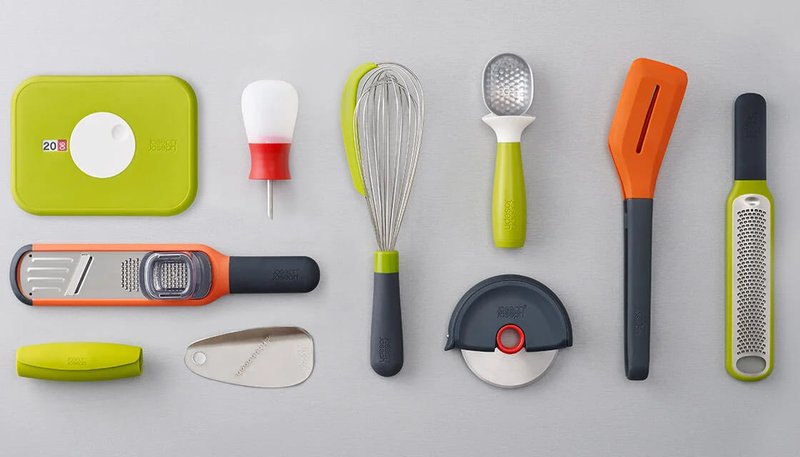
Szczoteczki do zębów, uchwyty elektronarzędzi, przybory kuchenne, kontrolery do gier i urządzenia do higieny osobistej wykorzystują formowanie wielokomponentowe, aby nanieść miękką powierzchnię na sztywny rdzeń konstrukcyjny. Miękka warstwa TPE lub TPU zapewnia wygodny chwyt, tłumienie drgań, pochłanianie uderzeń i wysokiej jakości wrażenia dotykowe, których nie da się uzyskać z jednego sztywnego materiału. Marki konsumenckie zbudowały całą tożsamość produktów na czystej, wielomateriałowej estetyce możliwej dzięki temu procesowi — kontrast między błyszczącym sztywnym tworzywem a matową, miękką powierzchnią jest natychmiast rozpoznawalny.
Uszczelnianie i ochrona przed czynnikami środowiskowymi
Jeżeli detal ma być wodoszczelny lub pyłoszczelny, nadlewanie miękkiego materiału uszczelniającego (np. TPE stanowiącego alternatywę dla silikonu) bezpośrednio na sztywną obudowę tworzy jednolitą uszczelkę — bez oddzielnego pierścienia O-ring do montażu, rowka do obróbki, etapu montażowego ani potencjalnej drogi wycieku. Rozwiązanie to jest standardowo stosowane w elektronice zewnętrznej, wyposażeniu morskim, czujnikach przemysłowych i samochodowych systemach złączy. Trwale połączona uszczelka jest z natury bardziej niezawodna niż wciskany pierścień O-ring, ponieważ nie ma rowka, który mógłby zostać niewłaściwie ustawiony podczas montażu, ani ryzyka pogorszenia szczelności wskutek trwałego odkształcenia po ściskaniu w całym okresie użytkowania wyrobu.
Estetyka wielobarwna i wielomateriałowa
Obtrysk dwukomponentowy umożliwia formowanie tworzyw w różnych kolorach podczas jednego cyklu maszyny, tworząc ostre, czyste granice kolorów bez późniejszego malowania, tampodruku ani etykietowania. Kolor stanowi integralną część wyrobu — nie zarysuje się, nie wyblaknie ani nie złuszczy. Rozwiązanie to jest powszechnie stosowane w logo marek na elektronice użytkowej, panelach przycisków urządzeń AGD oraz oznaczonych kolorystycznie elementach wyrobów medycznych, w których trwałość koloru jest wymogiem regulacyjnym.
"Formowanie wielokomponentowe całkowicie eliminuje potrzebę montażu wtórnego części wykonanych z wielu materiałów."True
Obtryskiwanie pozwala uzyskać gotowy element wielomateriałowy bezpośrednio w procesie formowania. Uszczelnienia, powierzchnie typu soft-grip, uszczelki i elementy wielokolorowe powstają już podczas formowania, dzięki czemu nie są potrzebne osobne operacje montażowe, takie jak zakładanie pierścieni O-ring, klejenie czy malowanie.
"Mosiężne wkładki gwintowane można osadzać w częściach z tworzyw sztucznych wyłącznie metodą ultradźwiękową po formowaniu."False
Wkładki mosiężne można montować kilkoma metodami: przez formowanie z wkładką (umieszczaną przed wtryskiem), osadzanie ultradźwiękowe (wciskanie w uprzednio uformowane otwory za pomocą drgań ultradźwiękowych), osadzanie termiczne (podgrzanie i wciśnięcie) lub montaż samogwintujący. Formowanie z wkładką zapewnia najmocniejsze i najbardziej powtarzalne połączenie, ponieważ tworzywo kurczy się bezpośrednio wokół elementów kotwiących wkładki.
Jak porównać koszty między formowaniem z wkładką i overmolding?
Koszt rozstrzyga decyzję praktyczną. Formowanie z wkładkami zwykle ma znacznie niższy koszt oprzyrządowania, ponieważ wykorzystuje formę jednogniazdową, a mechanizmem załadunku wkładki jest zazwyczaj prosty uchwyt lub ręczne umieszczanie. Formowanie wielokomponentowe wymaga formy dwustanowiskowej z mechanizmem transferowym albo obrotowej formy z dwoma oddzielnymi gniazdami, co może podwoić lub potroić inwestycję początkową.
Ekonomika kosztu jednostkowego jest bardziej złożona. Formowanie z wkładką oznacza niższy koszt materiału (jedna żywica polimerowa i metalowa wkładka) oraz krótszy cykl, lecz koszt wkładek się kumuluje—mosiężne wkładki gwintowane kosztują zwykle $0.02–$0.15 za sztukę, zależnie od rozmiaru i ilości. Formowanie wielokomponentowe zużywa więcej materiału (dwa różne polimery) i wymaga dłuższych cykli, ale może całkowicie wyeliminować późniejszy montaż—uszczelnień, podkładek, klejenia i połączeń zatrzaskowych—który inaczej znacznie zwiększa koszt części.
W przypadku produkcji wielkoseryjnej (50,000+ units) oszczędności robocizny wynikające z formowania wielokomponentowego często równoważą wyższy koszt oprzyrządowania już podczas pierwszej lub drugiej serii produkcyjnej. Przy mniejszych wolumenach lub w zastosowaniach, w których podstawowym wymaganiem jest integracja metalu, formowanie z wkładkami wygrywa pod względem całkowitego kosztu posiadania.
| Składnik kosztu | Formowanie wkładek | Formowanie nakładkowe |
|---|---|---|
| Inwestycja w oprzyrządowanie | $8,000–$20,000 (jedno gniazdo) | $15,000–$40,000+ (forma dwugniazdowa lub obrotowa) |
| Koszt materiału na część | Niższe (jedna żywica + wkładka metalowa) | Wyższy (dwa materiały żywiczne) |
| Typowy czas cyklu | 15–40 sekund na cykl | Łącznie 30–80 sekund (dwa wtryski) |
| Koszt wkładki/komponentu | $0.02–$0.15 na wkładkę | Nie dotyczy (drugi materiał formowany na miejscu) |
| Oszczędności w pracy montażowej | Eliminuje montaż elementów złącznych | Eliminuje etapy uszczelniania/uszczelki/klejenia |
| Wolumen progu rentowności | Ekonomiczne od ~1000 jednostek | Najlepszy zwrot z inwestycji przy 10 000+ jednostkach |
Podsumowując: jeżeli projekt wymaga przede wszystkim osadzenia metalowego elementu w tworzywie, formowanie z zaprasowaniem wkładek jest niemal zawsze bardziej ekonomicznym wyborem niezależnie od wielkości produkcji. Jeżeli potrzebujesz powierzchni typu soft-touch, zintegrowanych uszczelnień lub wielokolorowej estetyki, wyższy koszt oprzyrządowania do formowania obtryskowego zwraca się dzięki wyeliminowaniu operacji wtórnych i zwiększeniu niezawodności wyrobu.
Jakie są najważniejsze kwestie konstrukcyjne dla każdego procesu?
Wytyczne projektowania formowania z wkładkami
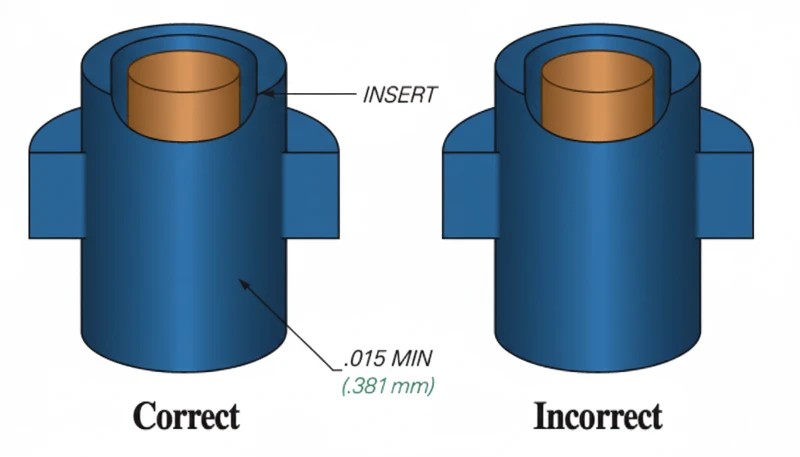
Zagadnienia projektowe są zasadniczo różne między wtryskiem z wstawką a nadlewaniem. Dla wtrysku z wstawką, grubość ścianki wokół wstawki powinna wynosić co najmniej 0,5× średnicy wstawki (a idealnie 1×), aby zapobiec wgnieceniom na przeciwległej powierzchni i zapewnić odpowiedni przepływ materiału dla pełnej enkapsulacji.
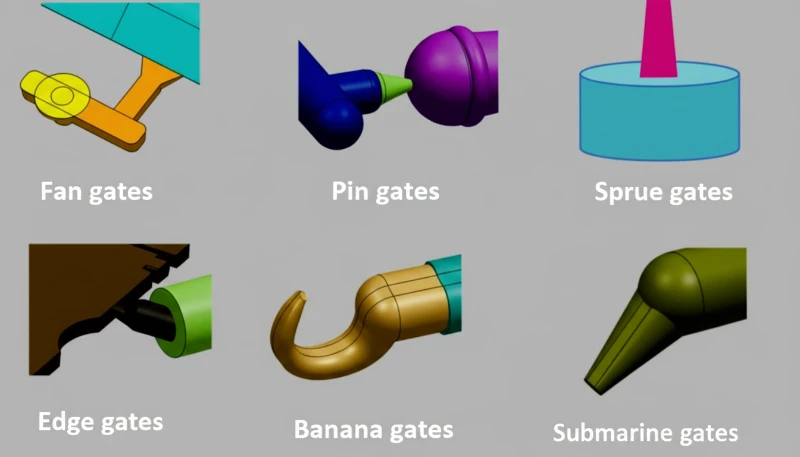
Formę należy zawsze projektować tak, aby wkładka była podparta z co najmniej dwóch stron, co zapobiega jej ugięciu lub obrotowi podczas wtrysku. Położenie wlewu ma kluczowe znaczenie: należy umieścić go tak, aby stopione tworzywo opływało wkładkę w sposób zrównoważony z obu stron, zamiast uderzać w nią czołowo. Niezrównoważony front płynięcia może przesunąć wkładkę o 0,2–0,5 mm, co bywa niedopuszczalne w zastosowaniach o małej tolerancji, takich jak złącza elektryczne.
Wytyczne projektowania nadlewania
Siła wiązania chemicznego zależy całkowicie od zgodności materiałów; przed wyborem zawsze sprawdź tabelę adhezji dostawcy. Sprawdzone pary to ABS + TPE, PP + SEBS oraz PC + TPU. Gdy wiązanie chemiczne jest niemożliwe, trzeba zastosować wyłącznie zakotwienie mechaniczne: podcięcia, rowki T lub otwory przelotowe, za którymi zatrzyma się materiał obtrysku.
Grubość ścianki warstwy nadlewu zwykle wynosi od 1,0 do 3,0 mm. Cieńsze warstwy (poniżej 1,0 mm) mogą nie osiągnąć odpowiedniej wytrzymałości wiązania i mogą być trudne do równomiernego wypełnienia. Grubsze warstwy (powyżej 3,0 mm) znacząco wydłużają czas cyklu ze względu na wymagania chłodzenia i mogą powodować odkształcenia w podłożu. Unikaj ostrych przejść między podłożem a nadlewem — używaj zaokrąglonych krawędzi (minimalny promień 0,5 mm), aby zapobiec koncentracji naprężeń, które mogą prowadzić do rozwarstwienia pod obciążeniem lub podczas cykli termicznych.
Kąty pochylenia w gnieździe do obtrysku muszą uwzględniać elastyczność miękkiego materiału — dla obtrysków z TPE zwykle wystarcza 1–2°, w porównaniu z 0.5–1° często stosowanymi dla sztywnych tworzyw. Podłoże należy od początku projektować z myślą o obtrysku, a nie traktować go jako późniejszego dodatku. Dodawanie cech umożliwiających obtrysk do istniejącego projektu podłoża jest częstą przyczyną problemów z adhezją.
"Grubość ścianki nadlewu poniżej 1,0 mm może obniżyć wytrzymałość połączenia i powodować problemy z wypełnianiem."True
Cienkie warstwy nadlewu (poniżej 1,0 mm) stwarzają dwa problemy: materiał może nie osiągnąć odpowiedniego przepływu, aby wypełnić gniazdo w sposób spójny, a zmniejszona powierzchnia styku ogranicza powierzchnię wiązania chemicznego. Zalecane minimum to 1,0 mm, przy czym zakres 1,5–2,5 mm jest optymalny dla większości nadlewów z TPE i TPU.
"Gładkie wkładki cylindryczne zapewniają wystarczającą siłę osadzenia w większości zastosowań formowania z wkładkami."False
Gładkie wkładki opierają się wyłącznie na skurczu pasowania, który zmienia się w zależności od warunków przetwarzania. Wkładki radełkowane lub rowkowane zapewniają 3–5 razy większą wytrzymałość na wyciąganie, ponieważ tworzywo mechanicznie zazębia się z cechami powierzchni. W przypadku każdej aplikacji nośnej niezbędne jest przygotowanie powierzchni wkładki.
Jakie materiały najlepiej działają dla każdego procesu?
Dobór materiałów ma kluczowe znaczenie w obu procesach, lecz kryteria są zasadniczo różne. W przypadku formowania z wkładkami najważniejsza jest zdolność otaczającego tworzywa do opływania wkładki i mechanicznego zaciskania się na niej podczas chłodzenia i skurczu. Przy obtrysku głównym zagadnieniem jest adhezja — zarówno chemiczna, jak i mechaniczna — między podłożem a materiałem obtrysku.
| Proces | Podłoże/Wstawka | Materiał do formowania | Kluczowa kwestia |
|---|---|---|---|
| Formowanie wkładek | Wstawka gwintowana mosiężna | PA6, PA66, PBT | Wysoka skurczliwość tworzy silne połączenie mechaniczne |
| Formowanie wkładek | Igła ze stali nierdzewnej | PC medyczny, PEEK | Biokompatybilność, tolerancja autoklawowania |
| Formowanie wkładek | Końcówka/kołek miedziany | PBT, PPS, LCP | Izolacja elektryczna, stabilność wymiarowa |
| Formowanie wkładek | Radiator aluminiowy | PBT, PA66 + GF | Zarządzanie termiczne, wzmocnienie strukturalne |
| Formowanie nakładkowe | Podłoże ABS | TPE (twardość Shore’a A 50–80) | Silna wiązanie chemiczne, produkty konsumenckie |
| Formowanie nakładkowe | Podłoże PP | SEBS, TPV | Uszczelki samochodowe, miękkie wykończenie na poliolefinie |
| Formowanie nakładkowe | Podłoże PC | TPU | Odporność na zużycie, możliwa przejrzystość optyczna |
| Formowanie nakładkowe | Podłoże PA66 | TPE-S lub TPE-O | Pod maską samochodu, odporność chemiczna |
| Formowanie nakładkowe | Podłoże POM | TPU lub TPE | Zespoły przekładniowe, niskie tarcie i miękka w dotyku powierzchnia |
W obtrysku wkładek popularne są materiały półkrystaliczne, takie jak PA66 i PBT, ponieważ ich większy skurcz (1.2–2.0%) wytwarza wokół wkładki większą siłę połączenia skurczowego niż w przypadku materiałów amorficznych, takich jak PC (0.5–0.7%). Materiały amorficzne zapewniają jednak lepszą stabilność wymiarową i węższe tolerancje, dlatego wybór zależy od tego, czy w danym zastosowaniu priorytetem jest odporność na wyrwanie, czy dokładność położenia.
Przy obtrysku zawsze potwierdzaj zgodność chemiczną badaniami fizycznymi. Badanie wytrzymałości połączenia obtrysku zgodnie z ASTM D903 jest branżowym standardem ilościowej oceny adhezji między podłożem a warstwami obtrysku. Karty danych dostawców materiałów podają oceny adhezji, lecz rzeczywista wytrzymałość połączenia zależy od konkretnych warunków procesu, w tym temperatury stopu, prędkości wtrysku, stanu powierzchni podłoża i szybkości chłodzenia.
Co nauczyliśmy się z ponad 20 lat doświadczenia w produkcji?
Codzienna realizacja formowania wkładek i obtrysku w naszym zakładzie w Szanghaju na 47 wtryskarkach (90T–1850T, w tym 3 dedykowanych maszynach dwukomponentowych) nauczyła nas kilku rzeczy, których nie opisują podręczniki:
Dokładność położenia wkładki jest najważniejszym czynnikiem jakości. Już przesunięcie wkładki o 0,2 mm może spowodować niezgodność wymiarową złączy elektrycznych o małej tolerancji. W produkcji wielkoseryjnej stosujemy robotyczne ładowanie wkładek z kontrolą wizyjną. W naszych maszynach z pionowym zespołem zamykającym grawitacja pomaga w pozycjonowaniu, lecz nadal używamy czujników w formie, aby potwierdzić położenie przed każdym wtryskiem. System czujników zwrócił się w ciągu trzech miesięcy dzięki wyeliminowaniu braków spowodowanych niewłaściwie umieszczonymi wkładkami.
Badanie przyczepności obtrysku musi rozpocząć się na etapie próbkowania, a nie podczas zwiększania produkcji. W zbyt wielu projektach problemy z wiązaniem wykrywano dopiero podczas PPAP lub kontroli pierwszej sztuki, ponieważ połączenia materiałów nie przetestowano w rzeczywistych warunkach produkcyjnych. Nasza standardowa procedura wymaga danych z badań wytrzymałości połączenia obtrysku na pierwszych próbkach, zanim zadanie przejdzie poza fazę próbkowania. Dysponując 8 starszymi inżynierami (każdy ma ponad 10 lat doświadczenia) i ponad 120 pracownikami produkcji, mamy zasoby, aby wykonać to prawidłowo.
Optymalizacja czasu cyklu jest źródłem rzeczywistej marży. W formowaniu z wkładkami skrócenie czasu ich ładowania dzięki automatyzacji (podajniki wibracyjne, roboty pick-and-place) często daje większą redukcję cyklu niż optymalizacja parametrów wtrysku. W obtrysku największe znaczenie mają skrócenie czasu przenoszenia podłoża między stanowiskami oraz optymalizacja równoczesnego chłodzenia obu materiałów. Nasz zespół inżynieryjny koncentruje optymalizację procesu na tych obszarach, ponieważ zapewniają najwyższy zwrot z inwestycji.
Posiadamy certyfikaty ISO 9001, ISO 13485, ISO 14001 i ISO 45001 oraz stosujemy sześcioetapowy proces kontroli jakości obejmujący kontrolę wejściową, pobieranie próbek w toku produkcji, kontrolę procesu, kontrolę pakowania, kontrolę końcową i kontrolę przed wysyłką. Niezależnie od tego, czy projekt wymaga formowania z wkładkami elementów klasy medycznej, czy obtryskiwania poprawiającego ergonomię produktu konsumenckiego, własna narzędziownia i ponad 100 zestawów form dostarczanych miesięcznie zapewniają nam zdolności produkcyjne i precyzję niezbędne do realizacji zamówienia.
Jakie są najczęściej zadawane pytania dotyczące wlewania wkładów i nadlewania?
Często zadawane pytania
Jaka jest główna różnica między formowaniem z wkładkami a obtryskiem?
Formowanie z zatapianiem wkładek jest procesem jednowtryskowym, w którym wstępnie wykonana wkładka (zwykle metalowa) zostaje umieszczona w gnieździe formy przed wtryśnięciem wokół niej tworzywa, co tworzy trwałe połączenie mechaniczne dzięki pasowaniu skurczowemu i cechom powierzchni. Nadlewanie jest procesem dwuwtryskowym, w którym drugi materiał formuje się na wcześniej uformowanym podłożu z tworzywa, tworząc połączenie zarówno przez adhezję chemiczną, jak i mechaniczne zazębienie. Podstawowe różnice dotyczą liczby wymaganych cykli wtrysku, rodzajów łączonych materiałów i zastosowanych mechanizmów wiązania.
Czy formowanie z wkładkami jest tańsze od obtrysku?
Oprzyrządowanie do formowania z wkładkami jest zazwyczaj tańsze, ponieważ wymaga jedynie formy jednogniazdowej z mechanizmem załadunku wkładki, natomiast obtrysk wymaga dwóch oddzielnych gniazd lub formy obrotowej, co może dwu- lub trzykrotnie zwiększyć nakłady początkowe. Koszty jednostkowe są bardziej złożone: formowanie z wkładkami wiąże się z niższymi kosztami materiału i krótszym czasem cyklu, ale same wkładki metalowe zwiększają koszt każdej sztuki o $0.02–$0.15. Obtrysk kosztuje więcej w przeliczeniu na cykl, lecz może wyeliminować późniejsze operacje montażowe. Przy wolumenie powyżej 10,000 sztuk obtrysk często staje się rozwiązaniem bardziej ekonomicznym pod względem kosztu całkowitego.
Czy można wykonywać obtrysk na metalowym podłożu?
Tworzywo można formować na elemencie metalowym, jednak branża produkcyjna klasyfikuje ten proces jako formowanie z wkładką, a nie formowanie wielokomponentowe. Formowanie wielokomponentowe oznacza konkretnie formowanie drugiego tworzywa na pierwszym podłożu z tworzywa. Gdy wstępnie umieszczonym elementem jest metal, standardowym terminem jest formowanie z wkładką, niezależnie od rodzaju polimeru wtryskiwanego wokół niego. Rozróżnienie to jest istotne, ponieważ parametry procesu, konstrukcja oprzyrządowania i mechanizmy łączenia znacznie różnią się w obu metodach, a stosowanie prawidłowej terminologii zapewnia jednoznaczną komunikację z producentem form i zespołem produkcyjnym.
Jakie materiały są powszechnie stosowane do nadformowania?
Do najczęściej stosowanych materiałów do obtrysku należą: TPE (elastomer termoplastyczny) do ogólnych zastosowań wymagających miękkiej powierzchni, TPU (termoplastyczny poliuretan) zapewniający odporność na zużycie i elastyczność, SEBS (styren-etylen/butylen-styren) do produktów motoryzacyjnych i konsumenckich wymagających odporności chemicznej, TPV (termoplastyczny wulkanizat) do uszczelnień motoryzacyjnych pracujących pod maską oraz TPR (guma termoplastyczna) do powierzchni chwytowych. Dobór materiału zależy przede wszystkim od zgodności chemicznej z materiałem podłoża umożliwiającej uzyskanie trwałego połączenia, wymaganego zakresu twardości w skali Shore A, środowiskowych warunków pracy, w tym temperatury i narażenia na substancje chemiczne, oraz wymagań prawnych, takich jak zgodność z FDA lub USP Class VI w zastosowaniach medycznych.
Jak mocne jest połączenie w obtryskiwaniu?
Wytrzymałość połączenia różni się znacznie w zależności od kombinacji materiałów, przygotowania powierzchni i konstrukcji części. Obtryski łączone chemicznie z użyciem kompatybilnych par materiałów, takich jak ABS i TPE, osiągają zwykle wytrzymałość na odrywanie 15–30 N/mm w badaniu zgodnym z normą ASTM D903. Mechaniczne połączenia kształtowe wykorzystujące podcięcia, rowki teowe i otwory przelotowe zapewniają dodatkową wytrzymałość zamocowania niezależną od warunków wiązania chemicznego. Najbardziej niezawodne obtryski produkcyjne łączą mechanizmy wiązania chemicznego i mechanicznego, aby zapewnić stałe właściwości mimo zmian parametrów procesu oraz przez cały okres eksploatacji produktu w rzeczywistych warunkach pracy.
Które branże najczęściej korzystają z formowania z wkładkami?
Największymi odbiorcami technologii formowania z wkładkami są przemysł elektroniczny (obudowy złączy z osadzonymi metalowymi pinami, korpusy czujników z uszczelnionymi zaciskami, zespoły anten montowane na płytkach PCB), producenci wyrobów medycznych (narzędzia chirurgiczne z elementami ze stali nierdzewnej, systemy podawania leków z obsadami igieł, urządzenia diagnostyczne z osadzonymi elektrodami), sektor motoryzacyjny (elementy mocujące wyposażenia wnętrza, wsporniki montażowe deski rozdzielczej, klipsy przewodów do komory silnika z gwintowanymi wkładkami mosiężnymi) oraz producenci sprzętu gospodarstwa domowego (obudowy ze zintegrowanymi punktami mocowania i gwintowanymi słupkami dystansowymi). Każda branża wymagająca trwałych elementów metalowych trwale zintegrowanych z częściami z tworzyw wykorzystuje formowanie z wkładkami jako podstawowy proces produkcyjny.
Czy formowanie z insertami i obtryskiwanie można połączyć w jednej części?
Tak, procesy hybrydowe łączące formowanie wkładek i obtrysk są powszechnie stosowane w złożonych zespołach wielomateriałowych. Typowym przykładem jest złącze elektroniczne, w którym metalowe styki najpierw zatapia się metodą formowania wkładek w sztywnej obudowie z tworzywa, a następnie cały podzespół obtryskuje miękkim uszczelnieniem TPE zapewniającym ochronę środowiskową IP67. To zaawansowane podejście obejmujące trzy materiały i wiele procesów wymaga jednak starannego ustalenia kolejności operacji, znacznie większych nakładów na oprzyrządowanie oraz rygorystycznej kontroli jakości na każdym etapie produkcji, aby przez całą serię zachować dokładność wymiarową i integralność połączeń.
Jaką tolerancję wymiarową można uzyskać w częściach formowanych z wkładkami?
Części formowane z wkładkami zazwyczaj osiągają tolerancje od ±0,05 do ±0,15 mm dla wymiarów krytycznych, zgodnie z wytycznymi normy ISO 20457:2018 dotyczącymi elementów formowanych wtryskowo. Same wkładki metalowe obrabia się z dużo węższymi tolerancjami (±0,01–0,02 mm), a głównym wyzwaniem jest utrzymanie dokładności ich położenia podczas wtrysku pod wysokim ciśnieniem. Na tolerancję końcową wpływają: skurcz tworzywa, dokładność osadzenia wkładki, położenie przewężki i schemat przepływu, równomierność chłodzenia części oraz sztywność konstrukcji podpierającej wkładkę w gnieździe formującym podczas cyklu wtrysku.
formowanie z wkładką: Formowanie z wkładką to jednoetapowy proces formowania wtryskowego, w którym wstępnie uformowany element (zwykle metalowy) umieszcza się w gnieździe formy przed wtryśnięciem wokół niego tworzywa, uzyskując trwałe połączenie mechaniczne dzięki pasowaniu skurczowemu i zazębianiu się powierzchni. ↩
formowanie obtryskowe: Formowanie obtryskowe to dwuetapowy proces, w którym drugi materiał formuje się na wcześniej uformowanym podłożu. Wytrzymałość połączenia zgodnych par (ABS/TPE) wynosi zwykle 15–30 N/mm w próbie odrywania według ASTM D903. ↩
formowanie dwukomponentowe: Formowanie dwukomponentowe wykorzystuje formę obrotową do sekwencyjnego wtryskiwania różnych materiałów w jednym cyklu maszyny, co poprawia powtarzalność i ogranicza manipulowanie między wtryskami. ↩