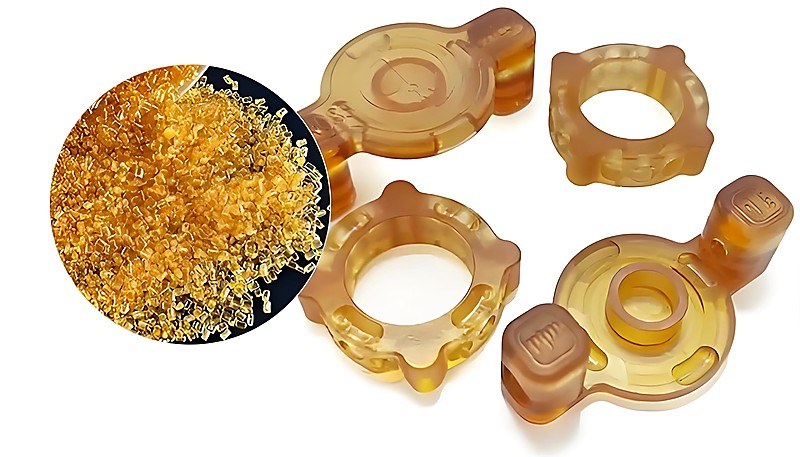
Uw productierun loopt soepel. Dan, bij schot 60,000, mailt een klant een foto van braamvorming op uw onderdeel — het soort braam dat om 2 a.m. hun assemblagefixture blokkeert. U reconstrueert de afgelopen drie maanden en beseft: na schot 50,000 heeft niemand in die matrijs gekeken.
Matrijsinspectie is het systematisch onderzoeken van een spuitgietmatrijs om slijtage, verontreiniging, maatafwijkingen en schade op te sporen voordat deze uitval veroorzaken of een productielijn stilleggen. Correct uitgevoerd is dit de activiteit met het hoogste rendement binnen matrijsbeheer. Slecht uitgevoerd — of overgeslagen — verandert een reinigingsbeurt van $200 in een noodreparatie van $20,000.
- Matrijsinspectie detecteert slijtage en verontreiniging voordat deze uitval of ongeplande stilstand veroorzaken.
- Een gestructureerd inspectieschema — geactiveerd door het aantal shots, niet door de kalender — is betrouwbaarder dan plannen op vaste intervallen.
- De deellijn, ontluchtingen en uitwerppennen zijn de drie zones met de hoogste slijtage in elke productiematrijs.
- Een preventieve inspectie om de 50,000 cycli kost slechts een fractie van één ongeplande productiestilstand.
- De combinatie van visuele controles, maatmetingen en functionele tests geeft het meest complete beeld van de staat van de matrijs.
Wat is matrijsinspectie?
Matrijsinspectie is een gestructureerde beoordeling van elke functionele zone van een spuitgietmatrijs — holteoppervlakken, scheidingslijn1, ontluchtingen, aanspuitkanalen, uitwerpsysteem, koelkanalen en klemcomponenten — om slijtage te meten, verontreiniging op te sporen en de maatnauwkeurigheid aan de oorspronkelijke specificaties te toetsen.
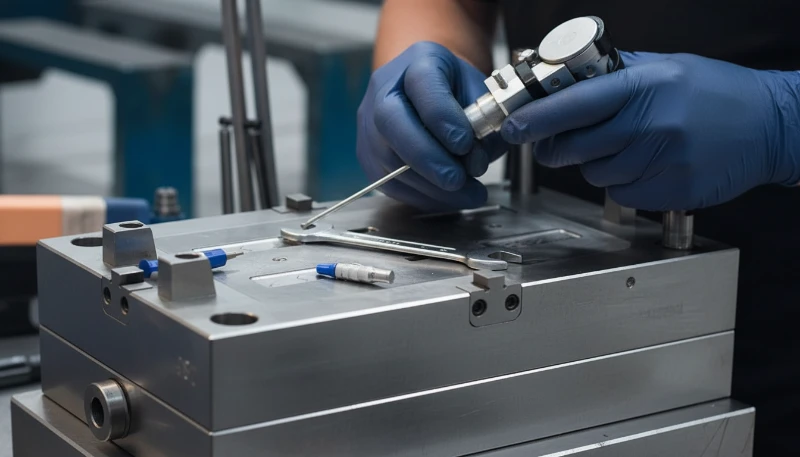
Dit is geen vluchtige visuele controle. Een goede inspectie gebruikt een vaste checklist, gekalibreerde meetmiddelen (meetklokken, luchtmeters, borescopen voor koelkanalen) en gedocumenteerde resultaten die worden vergeleken met de basislijn van de eerste matrijskwalificatie. De uitkomst is geen goed-/afkeuringsstempel, maar een geprioriteerde actielijst: nu reinigen, deze punten bewaken, vóór de volgende run vervangen.
Het onderscheid tussen inspectie en onderhoud is belangrijk. Inspectie is diagnostisch: u bepaalt de actuele staat van de matrijs. Onderhoud is corrigerend: u handelt op basis van de inspectie. Inspectie overslaan en direct volgens schema reinigen is als de olie van uw auto op een vaste datum verversen zonder het motorwaarschuwingslampje te controleren — u reinigt mogelijk een goede matrijs terwijl u tegelijk een gebarsten uitwerppen negeert.
Waarom matrijsinspectie belangrijker is dan de meeste teams denken
Braamvorming ontstaat binnen minder dan 3,000 cycli zodra een deelvlak meer dan 0.05mm begint te slijten — en versnelt daarna. Tegen de tijd dat een kwaliteitsinspecteur de braamvorming bij de eindinspectie ontdekt, heeft de matrijs doorgaans al 5,000–10,000 slechte cycli gedraaid. Dat is geen defectprobleem; het is een probleem door een tekortschietende inspectie.
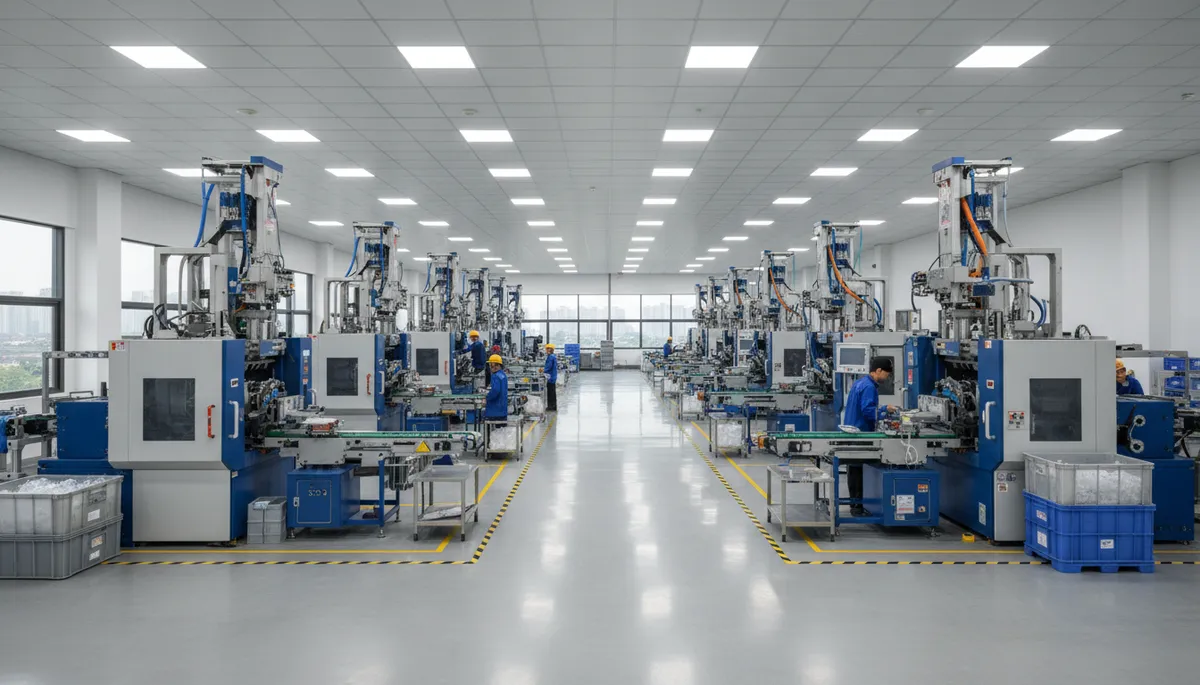
De werkelijke kostenafweging voor inspectie omvat drie categorieën. Ten eerste, uitval en nabewerking: een 16-voudige matrijs die bij 1,000 cycli/uur 2% braam produceert, verspilt 320 onderdelen per uur. Bij $0.50/onderdeel is dat $160/uur aan uitval — $3,840 per dienst van 24 uur. Ten tweede, noodreparaties: ongeplande demontage van matrijzen vereist versnelde verspaning, vaak tegen 2–3× het normale werkplaatstarief, plus de kosten van stilstand. Ten derde, een kortere matrijslevensduur: vervuiling in koelkanalen verhoogt de matrijstemperatuur, versnelt staalmoeheid en kan de levensduur met 30–40% verkorten.
Een inspectie daarentegen kost tijd en vereist een technicus. Voor een middelgrote productiematrijs duurt een grondige inspectie na 50,000 shots 4–8 uur, exclusief de kosten van onderdelen. De rekensom is eenvoudig: zelfs één voorkomen productieonderbreking rechtvaardigt een volledig jaar aan geplande inspecties.
Bij ZetarMold inspecteren we productiematrijzen verplicht om de 50,000 shots. Gereedschappen zonder geplande inspectie ontwikkelen 3× sneller braam — preventieve reiniging na 50k shots kost minder dan 1% van een ongeplande productiestop die de assemblagelijn van een klant stillegt.
De zes zones die elke matrijsinspectie moet bestrijken
Zes zones zijn verantwoordelijk voor 90%+ van alle matrijsstoringen; een grondige inspectie controleert ze allemaal systematisch.
Zone 1 — Scheidingslijn en matrijsvlak: de scheidingslijn is het voornaamste slijtagepunt in elke matrijs. Controleer op oppervlakteschade, metaalvervorming en spleten die braamvorming toelaten. Gebruik een voelermaat rondom de volledige omtrek; elke waarde boven 0,03 mm in een precisiematrijs is een waarschuwing. Inspecteer het matrijsvlak op putcorrosie, roest of afzettingen door kunststofdegradatie.
Zone 2 — Holte- en kernoppervlakken: onderzoek de holteoppervlakken met een felle lamp en vergrootglas. Let op krassen, erosie bij aanspuitingen, afzetting van afgebroken materiaal en veranderingen in de oppervlakteafwerking die zichtbaar zouden worden op het onderdeel. Vergelijk de oppervlakteruwheid met de oorspronkelijke afwerkingsregistratie, indien aanwezig. Bij optische onderdelen of onderdelen van klasse A is elke zichtbare markering in de holte een defect dat afkeur veroorzaakt.
Zone 3 — Ontluchting: ontluchtingen raken bij elke shotcyclus verstopt doordat vluchtige stoffen uit de kunststof zich op het ontluchtingsvlak afzetten. Een geblokkeerde ontluchting verhoogt de holtedruk, verbrandt de kunststof bij het laatst gevulde punt en kan na verloop van tijd het staal doen scheuren. Meet ontluchtingsdiepte en landbreedte volgens specificatie — typische diepten zijn 0.015–0.025mm voor amorfe harsen en 0.025–0.038mm voor semikristallijne harsen.
| Zonegebied | Belangrijkste controle | Gereedschap | Actiedrempel |
|---|---|---|---|
| Scheidingslijn | Speling / vlakheid | Voelermaat | > 0.03mm → markeren |
| Caviteit / kern | Oppervlaktegesteldheid | 10× loep, LED-licht | Elke put of kras → documenteren |
| Ontluchting | Ontluchtingsdiepte en reinheid | Dieptemicrometer | Geblokkeerd of buiten specificatie → reinigen |
| Uitwerpsysteem | Pendiameter, vastlopen | Penmaat, handmatige slag | Klemmen of ondermaat → vervangen |
| Koelkanalen | Aanslag, debiet | Borescoop, debietmeter | 15% debietverlies → ontkalken |
| Aanspuitkanaal / aanspuiting | Erosiemeting | Dieptemicrometer | > 0.1mm erosie → insert vervangen |
Zone 4 — Uitwerpstelsel: Controleer elke uitwerperpen op braam, buiging en binding. Een enkele vastzittende pen kan het product breken, het oppervlak beschadigen of de matrijs onder sluitdruk laten hangen. Controleer terugveren op vermoeidheid en zorg dat de uitwerperplaat vrij over de volledige slag beweegt. Uitwerperpen-gaten moeten op rondheid gemeten worden als het gereedschap meer dan 500.000 shots heeft gedraaid.
Zone 5 — Koelsysteem: Inspectie van de koelkanalen is de meest over het hoofd geziene en meest impactvolle zone. Aanslag van slechts 0,25mm vermindert de warmteoverdrachtefficiëntie met 40%. Gebruik een borescope om kanaalwanden te controleren; meet temperatuurverschil in- en uitlaatwater (doel: binnen 3°C over de matrijs). Debiet moet worden gecontroleerd tegen de basislijn — een daling van 15% wijst op gedeeltelijke verstopping.
Zone 6 — Aanspuitkanaal en aanspuiting: Inspecteer de geometrie van het aanspuitkanaal en de aanspuiting op erosie, vooral bij aanspuitingen die met glasgevulde of abrasieve harsen werken. Erosie van de aanspuiting vergroot de effectieve aanspuitmaat, verhoogt de afschuiving van het materiaal en kan bij veranderende stromingsdynamiek vloeilijn2-defecten veroorzaken. Meet de breedte en diepte van de aanspuiting aan de hand van de tekening; vervang inzetstukken wanneer de erosie groter is dan 0.1mm.
Na het voltooien van alle zes zones moet het inspectieverslag vastleggen: zoneconditie (goed/monitor/actie vereist), meetwaarden versus uitgangswaarden, foto’s van eventuele afwijkingen, en de aanbevolen actie met urgentie (voor de volgende productierun / binnen 10.000 schoten / bij de volgende geplande preventieve onderhoudsbeurt).
Een praktische notitie: als uw matrijs geen basislijnrecord heeft — metingen genomen tijdens T1-kwalificatie — wordt de eerste inspectie de basislijn. Het is beter nu te beginnen dan te wachten op een perfect startpunt dat wellicht nooit komt.
Een inspectieplanning opstellen die echt werkt
Een effectief inspectieschema wordt geactiveerd door het aantal schoten, niet door kalendertijd — omdat een matrijs die 24/7 draait veel eerder inspectie nodig heeft dan één die twee ploegen per week draait.
“Shot count is een betrouwbaardere inspectie-trigger dan verstreken kalendertijd.”True
Matrijsslijtage is direct proportioneel aan aantal cycli, niet aan verstreken dagen. Een matrijs die drie ploegen per dag draait, bereikt 50.000 shots in ongeveer drie weken; dezelfde matrijs op één ploeg per dag heeft negen weken nodig. Kalendergebaseerde schema's inspecteren óf hoogproductieve gereedschappen te weinig óf verspillen tijd aan stilstaande.
“Alle matrijzen moeten hetzelfde inspectie-interval volgen, ongeacht het materiaal of het aantal holtes.”False
Met glasvezel gevuld nylon dat in een 32-holte matrijs draait, veroorzaakt per tijdseenheid veel meer abrasieve slijtage dan ongevuld ABS in een 4-holte matrijs. De inspectiefrequentie moet worden afgestemd op de materiaalabrasiviteit, het aantal holten en de kritiek van het onderdeel. Een eenvormig schema zal ofwel hoogslijtende matrijzen onvoldoende beschermen, ofwel middelen verspillen aan laagrisicomatrijzen.
Een praktisch trapsgewijs onderhoudsschema voor spuitgietmatrijzen ziet er als volgt uit. Bij 10.000 schoten: snelle visuele controle – flits op de scheidingslijn, uiterlijk van het onderdeel, ongebruikelijke geluiden of variatie in de cyclus. Bij 50.000 schoten: volledige inspectie van alle zes zones, reiniging van ontluchtingskanalen, smering van uitstootpennen, stromingstest van koelkanalen. Bij 200.000 schoten: dimensionale controle van holte en kern, meting van slijtage van de ingang, controle van de diameter van uitstootpennen, steekproefsgewijze hardheidsmeting van staal op zones met veel slijtage. Bij 500.000+ schoten: volledige dimensionale opname, ontkalking van koelkanalen, geleide golf ultrasoon onderzoek van staal op onderhuidse scheuren.
Deze intervallen worden verkort of verlengd op basis van materiaal. Bij 30% glasgevuld nylon: halveer de intervallen. Bij standaard ongevuld PP: verleng met 30–50%. Bij corrosieve materialen (PVC, vlamvertragende kwaliteiten met halogeen): voeg een maandelijkse pH-test van het koelwater toe en een jaarlijkse spoeling met corrosieremmer.
| Materiaal | Abrasiviteit | Aanbevolen inspectie-interval | Prioriteitszone |
|---|---|---|---|
| Ongevuld PP / PE | Laag | Elke 75.000 schoten | Ontluchtingskanalen, koeling |
| ABS / HIPS | Laag–gemiddeld | Elke 50.000 cycli | Scheidingslijn, ontluchtingskanalen |
| PA6 / PA66 ongevuld | Gemiddeld | Elke 50.000 cycli | Instroomopening, koeling |
| PA66-GF30 | Hoog | Elke 25,000 shots | Poort, holte, uitwerpers |
| POM (acetaal) | Gemiddeld | Elke 40.000 schoten | Ontluchtingskanalen, holteoppervlak |
| PVC / Gehalogeneerde Vlamvertrager | Corrosief | Elke 30.000 shots + pH-test | Koeling, scheidingslijn |
Documenteer elke inspectie in een matrijslogboek — een fysieke map bij de matrijs of een digitaal record in uw ERP/MES. Het logboek moet bevatten: matrijs-ID, shot count bij inspectie, inspecteur, toestand per zone, foto’s van slijtagegebieden, genomen acties en volgende inspectie-trigger. Een matrijs zonder volledig logboek is een risico: bij falen heeft u geen data om te bepalen of het een onderhoudsfout of ontwerpbeperking was.
Veelvoorkomende matrijsgebreken die bij inspectie worden ontdekt — en hun hoofdoorzaken
Inspectie detecteert vijf defectcategorieën die verantwoordelijk zijn voor meer dan 80% van de matrijsgerelateerde productiefouten.
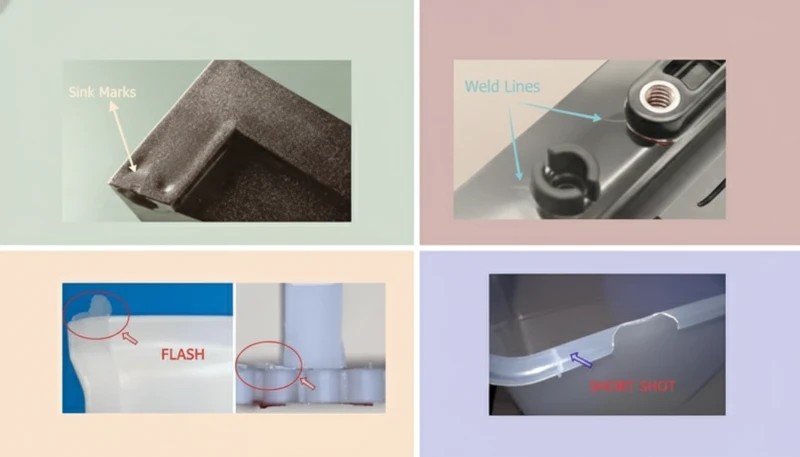
Flits is het meest voorkomende en meest zichtbare matrijsdefect. Het verschijnt als dunne plastic randjes langs de scheidingslijn, bij ontluchtingspunten, of rond uitstootpennen. Hoofdoorzaak: versleten of beschadigde scheidingslijnvlakken, onvoldoende klemkracht voor de viscositeit van het materiaal, of ontluchtingskanalen die tot de verkeerde diepte zijn gereinigd en nu materiaal doorlaten. Inspectie-aandachtspunt: controle van de vlakheid van de scheidingslijn en voelermaat-test.
Korte schoten – onderdelen die niet volledig gevuld zijn – zijn vaak terug te voeren op geblokkeerde ontluchtingskanalen, niet alleen op procesparameters. Wanneer gas niet snel genoeg uit de holte kan ontsnappen, ontstaat er een zone met terugdruk die het stromingsfront stopt. Inspectie-aandachtspunt: meting van de diepte en conditie van ontluchtingskanalen.
Zinkputjes en laslijnfouten kunnen geleidelijk ontstaan naarmate koelkanalen aangroeien. Een 0,5 mm aanslaglaag kan de holtetemperatuur met 8–12°C verhogen, wat de materiaalviscositeit aan het stromingsfront verandert en de laslijnsterkte verslechtert. Inspectie-aandachtspunt: borescope-inspectie van koelkanalen en temperatuurverschil inlaat/uitlaat.
Uitwerper- en oppervlaktedefecten
Uitwerperpenafdrukken en productvervorming wijzen op versleten of uitgelijnde uitwerpercomponenten. Wanneer pennen beginnen te binden, oefenen ze ongelijke kracht uit op het product tijdens uitwerping, wat leidt tot vervorming, oppervlakteafdrukken of directe scheurvorming. Inspectie-aandachtspunt: controle uitwerperpendiameter en bindtest (handmatige bediening van de uitwerperplaat).
Degradatie van oppervlakteafwerking – zichtbaar op optische of Klasse-A onderdelen als waas, sleepsporen of verlies van textuur – kan het gevolg zijn van holtecorrosie, slijtage van de ingang die materiaal op de holtewand afzet, of microscopische oppervlaktescheurtjes in het staal. Inspectie-aandachtspunt: onderzoek van het holteoppervlak en vergelijking met de originele oppervlakteafwerkingsstandaard.
“Geblokkeerde ontluchtingskanalen zijn een belangrijke verborgen oorzaak van korte schoten, los van injectieparameters.”True
Wanneer ontluchtingskanalen verstopt raken met vluchtige stoffen en vuil van plastic, blijft gas gevangen in de holte en biedt het weerstand tegen de stromingsfront. De spuitgietmachine registreert een stijgende druk en de operator verhoogt de vulssnelheid – waardoor het gascompressieprobleem verergert. De hoofdoorzaak is een onderhoudsprobleem, geen procesprobleem. Inspectie en reiniging van ontluchtingskanalen lossen het op; het verhogen van de injectiedruk niet.
“slijtage aan lossingshoek3 is tijdens een snelle visuele controle met het blote oog zichtbaar.”False
Erosie van de ontluikhoek van 0,1–0,3° — genoeg om consistente uitwerpweerstand of productoppervlakteschade te veroorzaken — is onzichtbaar zonder dimensionale meting. Een visuele inspectie toont de productoppervlakteafdrukken achteraf, maar tegen die tijd zijn honderden of duizenden producten al beïnvloed. Proactieve meting van ontluikopperflakken met een profielmeter of contourmeter is de enige betrouwbare detectiemethode.
Een vuistregel uit de werkvloer: als je een defect in het voltooide onderdeel kunt zien en het geleidelijk over duizenden schoten verscheen, was er vrijwel zeker een inspectiemoment voor de matrijs waarop het goedkoop had kunnen worden opgemerkt en gecorrigeerd. Het geleidelijke ontstaan van flits, korte schoten en krimpkuilen is het kenmerk van progressieve slijtage – precies het type achteruitgang waar inspectie voor bedoeld is om te onderscheppen.
Hulpmiddelen en technieken voor betere matrijsinspectie
Een goed uitgerust matrijsinspectiestation gebruikt zes categorieën gereedschappen, elk met een ander diagnostisch doel.
Visuele inspectiegereedschappen: heldere LED-werklampen (minimaal 5.000 lux), vergrootglazen of loupes van 10× en 30×, glasvezel lichtgeleiders voor toegang tot diepe holtes. Dit zijn de basishulpmiddelen die elke gereedschapskamer moet hebben. Ze signaleren oppervlakteschade, vervuiling, roest en duidelijke slijtage.
Dimensionale meting: klokkenmeters (0,001mm resolutie) voor vlakheid scheidingslijn, pennenmeters voor uitwerperpen-gaten en instroomopeningafmetingen, dieptemeters voor ontluchtingdiepte, optische comparatoren of CMM voor volledige caviteitopnames. Dimensionale meting verandert een kwalitatieve observatie in een traceerbaar getal.
Koelsysteemdiagnostiek: industriële borescopen (5–8 mm diameter, 1 m lengte) voor kanaalwandinspectie, klemdebietmeters voor waterdebiet, digitale thermometers voor temperatuurverschil inlaat/uitlaat. De gezondheid van het koelsysteem is de moeilijkst visueel te inspecteren zone van buitenaf — borescopen zijn de enige manier om kanaalwanden te zien zonder demontage.
Geavanceerde inspectiemethoden
Niet-destructief onderzoek (NDT): penetrantonderzoek (PT) voor oppervlakterekken in staal, ultrasoon onderzoek (UT) voor ondergrondse scheuren in matrijzen met veel cycli en wervelstroomonderzoek voor hardheidscontrole in slijtagezones. NDT wordt doorgaans toegepast op matrijzen na 500,000 cycli of na een botsing, overbelasting of onverklaarde storing.
Documentatiehulpmiddelen: een camera met macrofunctie om slijtagezones te fotograferen, een digitale schuifmaat met gegevensuitvoer om metingen rechtstreeks in een spreadsheet vast te leggen, en een gestandaardiseerd inspectieformulier (op papier of tablet) dat waarborgt dat elke zone iedere keer wordt gecontroleerd.
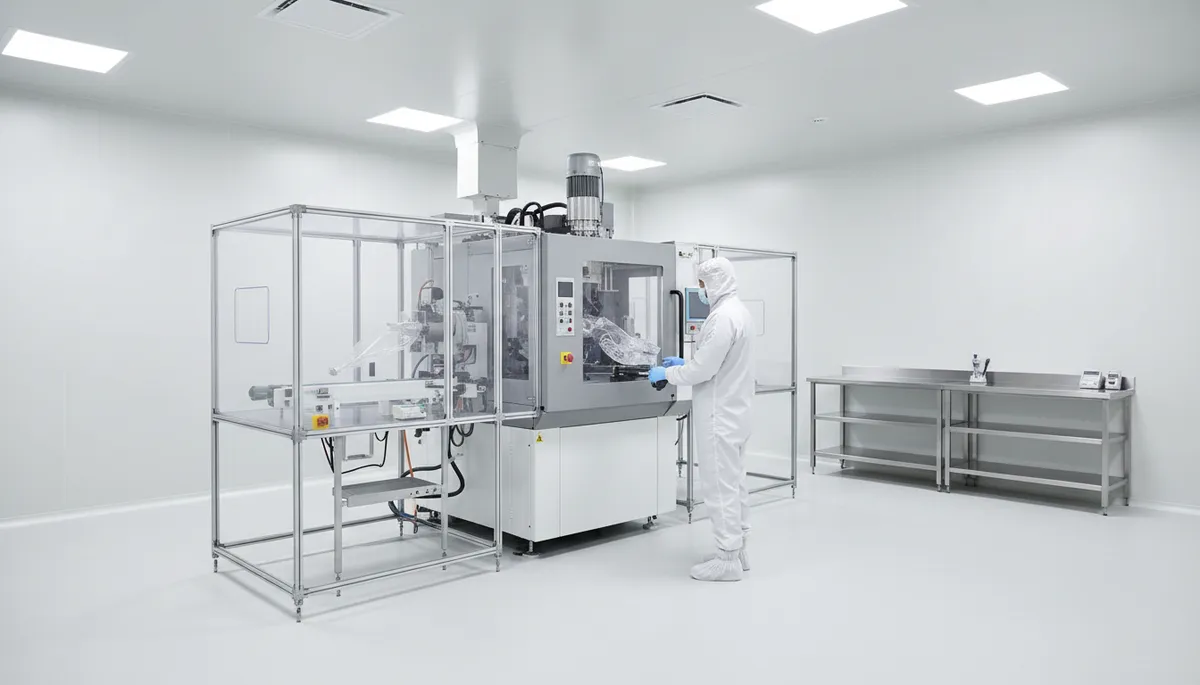
De belangrijkste gereedschapsverbetering voor de meeste bedrijven is geen betere borescope of CMM, maar een consistent inspectieformulier. Zonder gestructureerde checklist hangt de inspectiekwaliteit volledig af van de uitvoerder en de beschikbare tijd. Een formulier dwingt volledigheid af en creëert het historische dossier dat trendanalyse mogelijk maakt: wanneer vertoonde de deellijn voor het eerst meetbare slijtage? Hoe snel neemt die toe? Deze antwoorden bepalen of de matrijs nog 50,000 cycli kan draaien of direct uit productie moet.
Bij matrijzen voor spuitgietmatrijsontwerp met nauwe toleranties helpt het opnieuw uitvoeren van een matrijsstroomsimulatie na grote reparaties om vóór de productiestart te bevestigen dat de gecorrigeerde geometrie nog steeds goed wordt gevuld.
Zo verbetert u uw matrijsinspectieprogramma
Betere matrijsinspectie draait niet om betere apparatuur, maar om een systeem dat achteruitgang zo vroeg mogelijk detecteert en bevindingen voldoende documenteert voor datagedreven beslissingen.
Stappen 1–3: Bouw de basis
Stap 1: Controleer hoe volledig uw huidige matrijslogboeken zijn. Loop elke productiematrijs na en controleer of deze een matrijslogboek heeft met registraties van het aantal cycli, de laatste inspectiedatum en de historie van de toestand. Bij de meeste bedrijven blijkt uit deze controle dat 30–50% van de matrijzen onvolledige of geen registraties heeft. Daar ligt het eerste verbeterpunt — het aanvullen van die registraties heeft de hoogste prioriteit.
Stap 2: overstappen op triggers op basis van het aantal schoten. Als u inspecties momenteel per kalendermaand plant, schakel dan over op triggers op basis van het aantal schoten. Hiervoor moeten gegevens van schottellers van de spuitgietmachines in uw planningssysteem worden geïntegreerd. De meeste moderne spuitgietmachines leveren schotgegevens via een Euromap- of OPC-UA-interface; oudere machines hebben mogelijk een eenvoudige mechanische tellerretrofit van minder dan $200 nodig.
Stap 3: standaardiseer uw inspectiechecklist. Maak één formulier van één pagina voor alle zes zones. Elke inspecteur gebruikt hetzelfde formulier, registreert metingen (niet alleen goed/afkeur) en ondertekent. Beoordeel de formulieren maandelijks om trends in het matrijzenpark te herkennen.
Stappen 4–6: Stimuleer continue verbetering
Stap 4: Implementeer vroegtijdige waarschuwingsindicatoren op basis van productiegegevens. Een variatie in cyclustijd van meer dan ±0.5 seconden tussen opeenvolgende shots is vaak het eerste signaal van een matrijsprobleem — nog voordat een defect aan het onderdeel zichtbaar is. Gegevens van een matrijsholtedruksensor (indien aanwezig) kunnen aantonen dat zich over duizenden shots een onbalans in de vulling ontwikkelt. Met deze voorlopende indicatoren kunt u de matrijs voor inspectie uit productie nemen voordat defecten ontstaan.
Stap 5: train operators om afwijkingen realtime te melden. De persoon aan de pers vormt de eerste lijn van matrijsbewaking. Ongewone geluiden, zichtbare braam op onderdeel 1 van een dienst of kleven bij uitwerpen zijn inspectietriggers, maar alleen als de operator direct escaleert in plaats van door te produceren. Een eenvoudig ‘stop en bel’-protocol voor specifieke afwijkingen verdient zich terug zodra iemand een beginnende blokkade van een uitwerppen ontdekt.
Stap 6: Sluit de terugkoppellus tussen inspectieresultaten en ontwerp. Wanneer dezelfde zone herhaaldelijk faalt—bijvoorbeeld wanneer het aanspuitgebied ondanks gepland onderhoud elke 30,000 shots erodeert—is dat een ontwerpsignaal, niet alleen een onderhoudsprobleem. De oplossing kan een harder materiaal voor het aanspuitinzetstuk, een geometriewijziging of een matrijsstroomanalyse zijn om te begrijpen waarom de schuifspanning zich daar concentreert. Inspectiegegevens die terugvloeien naar ontwerpverbetering zijn de meest geavanceerde toepassing van deze informatie.
Deze zes stappen zijn geen eenmalig project, maar een doorlopende operationele discipline. Bedrijven die ze consequent uitvoeren, melden minder noodstops voor matrijsuitname, een langere gemiddelde standtijd en minder uitval. Uit onze ervaring met 47 spuitgietmachines in drie ploegen blijkt dat het verschil tussen een goed uitgevoerd inspectieprogramma en reactief onderhoud doorgaans 15–20% van de totale jaarlijkse gereedschapskosten aan vermijdbare uitgaven bedraagt.
Een laatste praktische opmerking: begin met het gereedschap dat u hebt. Een voelermaat, een heldere zaklamp en een notitieboek zijn genoeg om basisgegevens van uw belangrijkste matrijzen vast te leggen. Perfecte apparatuur komt later — nadat u de discipline hebt bewezen. De discipline om te kijken — consequent en gedocumenteerd — is in de beginfase van elk inspectieprogramma het belangrijkst. U kunt niet verbeteren wat u niet meet, en u kunt niet meten wat u niet volgens een consequent, gedocumenteerd schema inspecteert.
Waar te beginnen
Voor teams die overstappen op spuitgieten in lage volumes of prototypematrijzen kunnen de inspectie-intervallen ruimer zijn, maar hetzelfde raamwerk met zes zones blijft gelden. Het doel blijft gelijk: ken de actuele staat van de matrijs vóór de volgende run, niet pas nadat zich het volgende productieprobleem voordoet.
De meest gestelde vraag van klanten die hun inspectieprogramma verbeteren, is: ‘Waar beginnen we?’ Het antwoord is altijd hetzelfde — begin met uw gereedschap met het hoogste volume en risico. Zoek het matrijslogboek ervan (of maak er vanaf nul een, waarbij vandaag dag nul is). Haal de matrijs uit de pers, inspecteer deze in alle zes zones met behulp van de checklist in dit artikel en registreer elke meting die u uitvoert, niet alleen de zones die er slecht uitzien. Plan de volgende inspectie op basis van het aantal shots, het materiaal en het aantal holten. Al het andere — betere hulpmiddelen, gegevensintegratie, opleiding van operators — volgt vanzelf uit die eerste goed gedocumenteerde inspectiecyclus.
Veelgestelde vragen over matrijsinspectie
Hoe vaak moet een spuitgietmal worden geïnspecteerd?
Inspecteer standaardproductiematrijzen minimaal elke 50.000 cycli. Toepassingen met hoge slijtage — glasgevulde harsen van 30% of meer, gereedschappen met veel holtes of corrosieve materialen zoals PVC — vereisen elke 25.000 cycli inspectie. Prototypematrijzen voor kleine volumes met ongevulde materialen kunnen tot 100.000 cycli tussen volledige inspecties gaan. Baseer inspectie altijd op het aantal cycli, niet op kalenderduur. Een matrijs die één dienst per week draait, verzamelt veel langzamer cycli dan een productiegereedschap dat 24/7 draait; een kalenderschema leidt daarom afhankelijk van het productievolume tot te veel of te weinig inspecties.
Wat zijn de meest voorkomende defecten die tijdens een mollen inspectie worden gevonden?
Braamvorming langs de deelnaad vertegenwoordigt 35–40% van de defecten die bij routinematige matrijsinspectie worden gevonden, gevolgd door verstopte ontluchtingen (25%), slijtage of vastlopen van uitwerppennen (15%), verontreiniging of beschadiging van het holteoppervlak (12%) en kalkaanslag in koelkanalen (8%). Elk defecttype hoort rechtstreeks bij een specifieke inspectiezone en meetmethode. Braamvorming wijst op slijtage van de deelnaad; onvolledige vulling op geblokkeerde ontluchting; oppervlaktesporen op problemen met uitwerpers; en inval of maatverloop is vaak terug te voeren op kalkaanslag in het koelsysteem, waardoor de holtetemperatuur stijgt en de vuldynamiek verandert.
Kan schimmelcontrole worden uitgevoerd zonder de mal uit de pers te verwijderen?
Gedeeltelijke inspectie kan tussen de cycli in de pers worden uitgevoerd: visuele controle van de deelnaad op braamvorming, onderzoek van het productoppervlak op sleepstrepen of veranderingen in de oppervlakteafwerking, en controle op bramen bij de ontluchtingsopeningen. Een volledige inspectie — van ontluchtingen, koelkanalen, uitwerpsysteem en matrijsholteafmetingen — vereist echter dat de matrijs uit de pers wordt gehaald en op een inspectiebank met geschikte verlichting en meetgereedschap wordt geplaatst. Controles in de pers dienen als vroegtijdige bewaking tussen geplande volledige inspecties, maar vervangen geen grondige beoordeling buiten de pers.
Wat is de kosten van een typische schimmel inspectie?
Een volledige inspectie van een tweedelige matrijs met gemiddelde complexiteit vergt 4–8 technicusuren en kost $200–$600 aan arbeid, plus de verbruiksartikelen voor reiniging en smering. Tel daar de tijd voor maatmetingen bij op — doorgaans nog eens 2–4 uur — als een volledige controle van de caviteit is inbegrepen. Dit totaal van $400–$1,000 staat in direct contrast met de kosten van één ongeplande productiestilstand, die doorgaans $5,000–$50,000 bedraagt aan productieverlies, spoedreparaties en boetes van klanten. Een geplande inspectie na 50,000 shots verdient zichzelf terug zodra daarmee voor het eerst een noodstop en demontage van de matrijs wordt voorkomen.
Welke tools zijn nodig voor een professionele inspectie van mallen?
Essentieel gereedschap omvat een heldere LED-werklamp van minimaal 5,000 lux, een 10×-loep, voelermaatjes voor de deelnaadspleet, een meetklok voor vlakheid, penmaten voor uitwerpergaten en aanspuitafmetingen, een dieptemicrometer voor ontluchtingsdiepte en een digitale camera voor documentatie. Geavanceerde inspectie voegt een industriële endoscoop van 5–8mm toe voor koelkanalen, een draagbare CMM of optische comparator voor caviteitsmaten en een kleurpenetrantset voor oppervlaktescheuren. De meeste bedrijven starten met de basisset en breiden uit naarmate matrijscomplexiteit en volumes groeien.
Hoe verhoudt schimmelinspectie zich tot schimmelonderhoud?
Inspectie is diagnostisch; onderhoud is corrigerend. Inspectie bepaalt wat nodig is, zoals ontluchtingen reinigen, een versleten uitwerperpen vervangen of een koelkanaal ontkalken. Onderhoud voert dit uit. Vast gepland onderhoud zonder inspectie kan tijd verspillen aan een goede matrijs terwijl een gescheurd onderdeel in een naburig gereedschap wordt gemist. De juiste volgorde is altijd eerst inspectie en daarna gericht onderhoud op basis van bevindingen.
Welke gegevens moeten worden bijgehouden voor elke matrijsinspectie?
Registreer het aantal shots op het moment van inspectie, de datum en de naam van de inspecteur. Documenteer de toestandsbeoordeling voor elk van de zes zones — matrijsoppervlak, deellijn, ontluchtingen, uitwerpsysteem, koelkanalen en runner/aanspuiting — met werkelijke meetwaarden ten opzichte van de basislijn, niet alleen een goed-/afkeurstatus. Fotografeer slijtage of afwijkingen. Leg de tijdens deze inspectie uitgevoerde acties vast en stel de volgende inspectietrigger op basis van het aantal shots vast. Een volledig matrijslogboek maakt trendanalyse over meerdere inspectiecycli mogelijk, de waardevolste informatie die een inspectieprogramma kan opleveren.
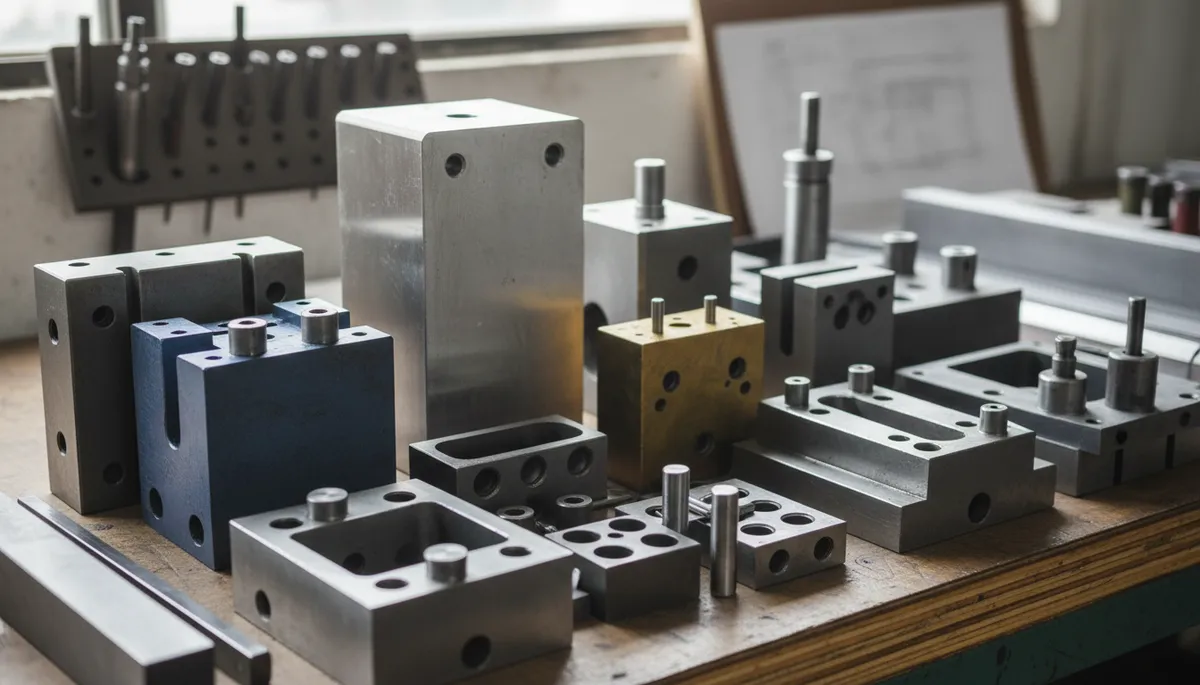
Praktische regel: inspecteer standaardmatrijzen na 50,000 cycli en bij abrasieve materialen na 25,000 cycli. Leg elke bevinding vast met meetwaarden, niet met indrukken. Als dezelfde zone twee keer achter elkaar faalt, beschouw dit dan als een ontwerpsignaal en niet alleen als een onderhoudsprobleem. En als uw matrijzen geen cyclustellerregistratie hebben, begin daar dan vandaag mee; die gegevens vormen de basis voor al het overige.
scheidingslijn: Een scheidingslijn is de naad op een gevormd onderdeel waar de twee matrijshelften bij het uitwerpen samenkomen en uit elkaar gaan; deze is vaak de eerste aanwijzing voor matrijsslijtage of braamvorming, en de vlakheid ervan wordt bij elke gestructureerde matrijsinspectie gemeten. ↩
vloeilijn: Een vloeilijn is de zichtbare naad die ontstaat wanneer twee kunststofstromingsfronten in de matrijsholte samenkomen en onvolledig versmelten, wat meestal wijst op een onbalans in koeling of druk die bij inspectie kan worden vastgesteld. ↩
lossingshoek: De lossingshoek wordt in graden gemeten en is de schuinte die op verticale matrijsoppervlakken wordt aangebracht zodat het onderdeel bij het uitwerpen soepel loskomt; een onvoldoende lossingshoek is een veelvoorkomende hoofdoorzaak van uitwerpschade die bij routine-inspecties wordt vastgesteld. ↩
Ontvang concurrerende prijzen, DFM-feedback en een productieplanning van het engineeringteam van ZetarMold.
Vraag een gratis offerte aan → Bekijk onze complete gids voor spuitgieten voor een uitgebreid overzicht. Bekijk onze complete gids voor spuitgieten voor een uitgebreid overzicht.