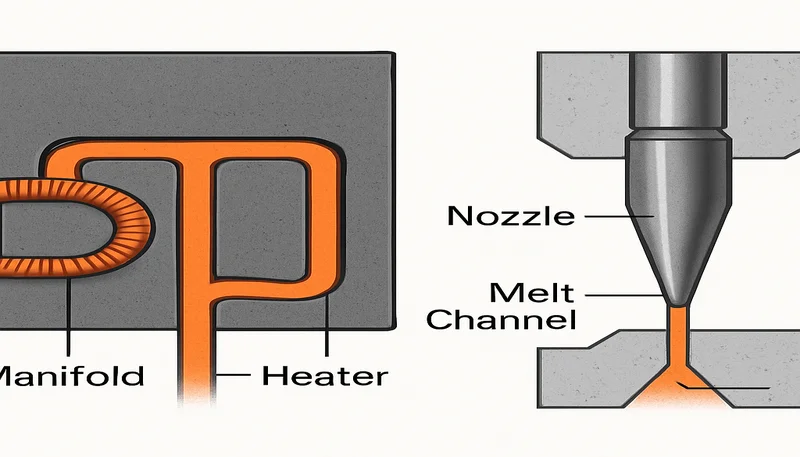
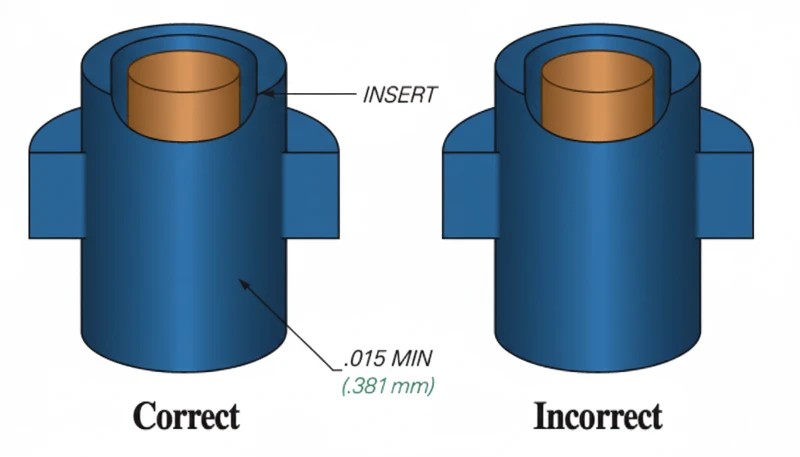
Ürün tasarımınız bir elektrikli alet sapında yumuşak dokulu tutma yüzeyi gerektiriyor ancak satın alma ekibi üst kalıplama takımı için 12.000 $ fiyat veriyor; bu, tek malzemeli bir kalıptan yaklaşık %40 daha yüksek. Üst kalıplamanın ne olduğunu anladığınızda ekonomik gerekçe nettir: bu bir ikincil enjeksiyon1 kalıplama sürecidir; süreçte yumuşak bir termoplastik elastomer (TPE) veya TPU, iki aşamalı bir sırayla sert plastik altlık2 üzerine kalıplanarak tek fikstürde kalıcı biçimde bağlanmış çok malzemeli parça oluşturur. Ek kalıp maliyeti, ilk baskı altlığını ikinci baskı sırasında konumlandırıp sızdırmaz kılmak için gereken hassasiyetten; çapak ve katman ayrılmasını önleyen vakum kanallarından, kapama yüzeylerinden ve daha dar toleranslardan kaynaklanır.
Ancak kullanıcı deneyiminin, marka farklılaşmasının ve ergonomik güvenliğin önemli olduğu hacimli üretimde üst kalıplama; tampon baskı, yapışkan film veya montaj sonrası kaplamanın sağlayamayacağı avantajlar sunar. Bu kılavuz, ZetarMold’un Şanghay tesisinde 20+ yıldır yürüttüğümüz üst kalıplama üretiminden öğrendiklerimize dayanarak malzeme seçiminden kalıp tasarım kurallarına, proses parametrelerinden yaygın hatalara kadar tüm iş akışını açıklar.
- Üst kalıplama, yumuşak TPE/TPU'yu sert plastik alt tabakalara bağlayan ikincil bir enjeksiyon kalıplama prosesidir.
- Alt tabakanın konumlandırılması ve sızdırmazlık gereksinimleri nedeniyle kalıp maliyetleri tek malzemeli kalıplardan 25–40% daha yüksektir.
- Alt tabaka ve üzeri kalıplama malzemeleri kimyasal olarak uyumlu olmalı; aksi halde güvenilir yapışma için bağlayıcı katmanlar kullanılmalıdır.
- İkinci enjeksiyon sırasında alt tabakanın erimesini önlemek için proses sıcaklıkları en az 20°C farklı olmalıdır.
- Üzeri kalıplama, ikincil dekorasyon işlemlerini ortadan kaldırır ve kalıcı, çizilmeye dayanıklı grafikler üretir.
Üzerine Kalıplama Nedir?
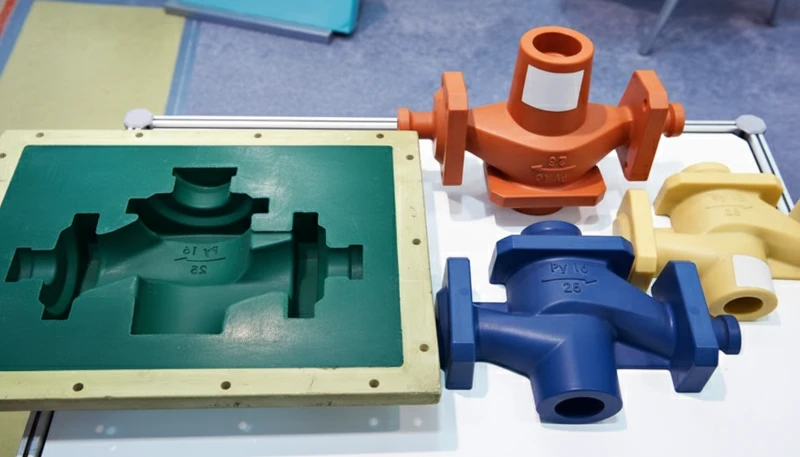
Üst kalıplama, iki farklı malzemenin tek ve bütünleşik bir parça oluşturmak üzere sırayla kalıplandığı özel bir enjeksiyon kalıplama tekniğidir. Proses, genellikle ABS, polikarbonat (PC) veya polipropilenden (PP) yapılan yapısal bir bileşen olan rijit altlığı üreten ilk baskıyla başlar. Bu altlık daha sonra robotla veya elle, üst kalıp malzemesinin enjekte edildiği ikinci boşluğa aktarılır. İkinci enjeksiyon sırasında erimiş üst kalıp malzemesi altlık yüzeyine kimyasal olarak bağlanır ve normal kullanım koşullarında soyulmaya ve ayrılmaya dirençli kalıcı bir arayüz oluşturur.
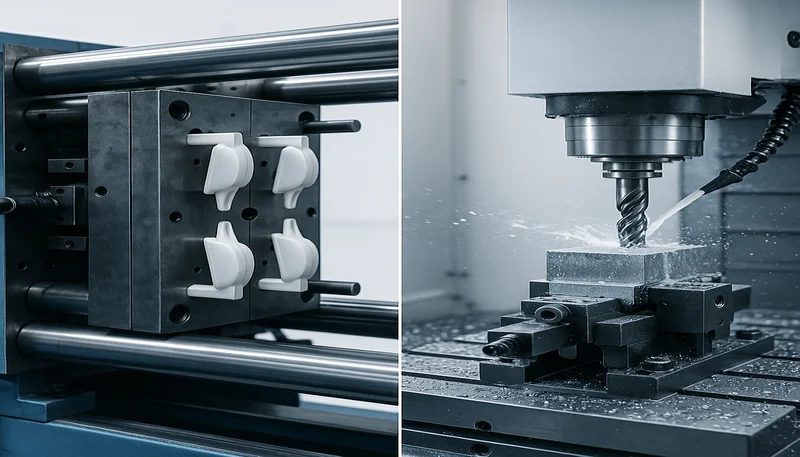
Teknoloji, ergonomi ve kayma direncinin kullanıcı memnuniyetini doğrudan etkilediği elektrikli el aleti sapları ve diş fırçası tutma yüzeyleri için tüketici elektroniği sektöründe ortaya çıkmıştır. Üzeri kalıplama daha sonra tıbbi cihaz muhafazalarına, otomotiv iç parçalarına ve tüketici ürünü kasalarına yayılmıştır. Yumuşak dokulu tutma yüzeyine sahip bir matkap veya kauçuk tamponu hiç soyulmayan bir akıllı telefon kılıfı kullandıysanız üzeri kalıplamayı deneyimlemişsinizdir.
Standart enjeksiyon kalıplama sonrasında tampon baskı veya yapışkanlı etiket gibi ikincil dekorasyon yöntemleri uygulamakla karşılaştırıldığında üst kalıplama, işlevsel yüzeyin parçanın yapısıyla bütünleştiği bir ürün oluşturur. Zamanla bozulabilecek yapışkan katman, aşınarak çıkabilecek mürekkep ve çevrim süresiyle maliyeti artıran kalıplama sonrası montaj adımları yoktur. Bunun karşılığında daha yüksek takım yatırımı ve daha karmaşık süreç kurulumu gerekir; ancak elde edilen parça kalitesi ve dayanıklılık, seri üretilen tüketici ve sanayi ürünlerinin çoğunda bu yatırımı haklı çıkarır.
"Üst kalıplanmış parçalar, parça tahrip edilmeden bileşen malzemelerine ayrılamaz."True
İkinci enjeksiyon, alt tabaka ile üst kalıplama malzemesi arasında ana malzemenin kendisi kadar veya ondan daha güçlü bir kimyasal bağ oluşturur. İki malzemeyi soymaya veya ayırmaya çalışmak, genellikle arayüz bozulmadan önce birinin veya her ikisinin kırılmasına neden olur.
"Mevcut bir kalıpta değişiklik yapmadan üst kalıp rengini veya malzemesini değiştirebilirsiniz."False
Üzeri kalıplama boşluğunun geometrisi, kalıp üretildikten sonra sabitlenir. Üzeri kalıplama malzemesinin değiştirilmesi — özellikle farklı durometreler veya TPE ile TPU gibi farklı malzeme aileleri arasında geçiş yapılması — bağ kalitesini korumak için çoğu zaman yolluk girişi, havalandırma ya da sıcaklık profili ayarları gerektirir. Gerçek bir üzeri kalıplama takım değişikliği, makinede yalnızca malzeme değiştirmeyi değil, mühendislik yeterlilik çalışmasını gerektirir.
Üst Kalıplama Prosesi Nasıl Çalışır?
Üst kalıplama prosesi, bu bölümde açıklanan aşama ve ayarlar üzerinden ilerleyen kontrollü bir proses dizisidir. Üst kalıplama, iki renkli enjeksiyon kalıplamadan kritik bir yönden ayrılan özgün bir sıra izler: iki baskı aynı çevrimde eş zamanlı değil, ayrı kalıplarda veya farklı kavitelerde gerçekleşir. Bu ayrım malzeme seçimi ve parça geometrisinde çok daha fazla esneklik sağlar; ancak sıkı kontrol edilmesi gereken elleçleme ve konumlandırma zorlukları da yaratır. Alt tabaka üretiminden bitmiş parçanın çıkarılmasına kadar üst kalıplama iş akışının tam açıklaması aşağıdadır.
Adım 1: İlk Enjeksiyon—Altlık Kalıplama
Süreç, rijit altlığın geleneksel tek malzemeli bir enjeksiyon kalıbında kalıplanmasıyla başlar. Bu kalıp, ikinci baskıda üzeri kalıplanacak sert plastik gövdeyi, yani çekirdek yapısal bileşeni üretir. Bu aşamada altlık kritik kalite ölçütlerini karşılamalıdır: üzeri kalıplama boşluğuyla temas edecek yüzeylerde ±0.05 mm ölçü hassasiyeti, ikinci kalıba doğru oturmayı engelleyecek çarpılmayı önleyen tutarlı soğutma ve ikincil enjeksiyon sırasında üzeri kalıplama malzemesinin güvenilir biçimde bağlanmasını sağlamak için kalıp sıcaklığı kontrolü gibi yüzey hazırlıkları.
Adım 2: Alt Tabakanın Aktarılması
Alt tabaka ilk kalıptan çıkarıldıktan sonra ikinci kalıp kavitesine aktarılmalıdır. Manuel operasyonlarda operatörler, yapışma yüzeyini kirletmemek için eldiven veya özel tutucularla elle aktarım yapar. Tam otomatik üretimde vakumlu tutucular veya mekanik kelepçelerle donatılmış robot kol, alt tabakayı alıp üst kalıplama kavitesindeki hassas konumlandırma unsurlarına yerleştirir. Konumlandırma doğruluğu kritiktir; 0.1 mm üzerindeki kaçıklıklar eşit olmayan üst kalıplama kalınlığına, birleşme çizgisinde çapağa veya alt tabakanın ikinci kaviteye hiç oturmamasına yol açabilir.
Adım 3: Alt Tabakanın Konumlandırılması ve Sızdırmazlık
Üzeri kalıplama kavitesi, ikinci enjeksiyon başlamadan önce alt tabakayı hizalayıp sızdırmazlık sağlayan hassas özellikler içerir. Bunlar; alt tabakadaki karşılıklarıyla eşleşen konumlandırma pimleri veya referans yüzeyleri, kaviteyle açık alt tabaka yüzeyleri arasında conta oluşturan kapama yüzeyleri ve bazı gelişmiş tasarımlarda alt tabakayı kavite duvarına düz biçimde çeken vakum kanallarıdır. Doğru konumlandırma, üzeri kalıplama malzemesinin boşluk, ince bölge veya alt tabakanın tam kapsüllenmediği alanlar oluşturmadan eşit dolmasını sağlar. Fabrikamızda yetersiz alt tabaka sızdırmazlığının üretim kalifikasyonu sırasındaki üzeri kalıplama hurdalarının %60’tan fazlasına yol açtığını gördük; bu nedenle en kritik tasarım parametresidir.
Adım 4: İkincil Enjeksiyon
Altlık konumlandırılıp sızdırmaz hâle getirildikten sonra üst kalıp malzemesi boşluğa enjekte edilir. Enjeksiyon sıcaklığı ve hızı iki hedefe aynı anda ulaşmak için hassas biçimde kontrol edilir: kimyasal bağ oluşturmak üzere altlık yüzeyini eritmek ve altlığı deforme edecek ya da tamamen eritecek aşırı ısıdan kaçınmak. Altlık yüzeyindeki bağlayıcı katman3, erimiş üst kalıp malzemesiyle temas ettikten birkaç saniye içinde etkinleşerek moleküler bağ oluşturur. Enjeksiyon parametreleri malzeme çiftlerine göre büyük ölçüde değişir; örneğin PP üzerine TPE orta hızda 190–210°C gerektirirken PC üzerine TPU, PC altlığın ısıl bozunmasını önlemek için daha yavaş dolumla 230–250°C gerektirebilir.
Adım 5: Tutma Basıncı, Soğutma ve Çıkarma
Kavite dolduktan sonra çekmeyi telafi etmek ve üzeri kalıplanan malzemenin kavite geometrisine tam oturmasını sağlamak için tutma basıncı uygulanır. Soğutma aşamasında hem üzeri kalıplanan malzeme hem de bağlanma arayüzü katılaşır. Üzeri kalıplanmış parçaların soğuma süreleri, eşdeğer boyuttaki tek malzemeli parçalardan genellikle %15–25 daha uzundur; çünkü üzeri kalıplanan malzeme altlık tarafında ısı yalıtkanı görevi görerek ısı tahliyesini yavaşlatır. Soğuma tamamlandığında kalıp açılır ve bitmiş parça çıkarılır. Altlığın aktarılmasından parçanın çıkarılmasına kadar olan süreç, standart bir kalıplama işlemine kıyasla çevrim süresine genellikle 2–4 saniye ekler.
| Parametre | Standart Enjeksiyon Kalıplama | Üst kalıplama |
|---|---|---|
| Çevrim süresi (tipik parça) | 20–30 s | 25–35 s |
| Referansa göre kalıp maliyeti | Temel Çizgi | +25–40% |
| İkincil işlemler | Genellikle gereklidir (baskı, kaplama) | Ortadan kaldırıldı |
| Malzeme seçenekleri | Parça başına tek malzeme | Birden fazla malzeme entegre edildi |
| Kalıp karmaşıklığı | Standart | Yüksek (konumlandırma, sızdırmazlık) |
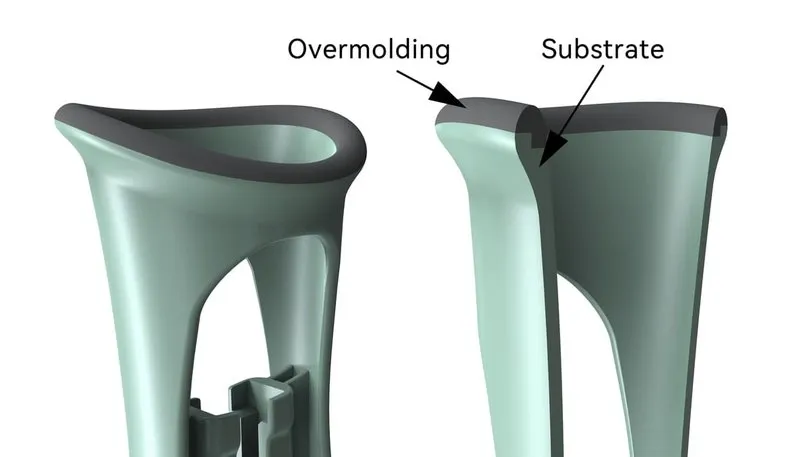
Üzeri Kalıplama İçin Hangi Malzemeler Uygundur?
Malzeme uyumluluğu, üzeri kalıplama başarısındaki en kritik etkendir. Altlık ile üzeri kalıplama malzemeleri ikincil enjeksiyon sırasında kimyasal olarak bağlanmalıdır; bu nedenle yüzey enerjileri, kimyasal yapıları ve işleme sıcaklıkları dikkatle eşleştirilmelidir. Uyumsuz malzemelerin seçilmesi delaminasyona yol açar; bu en can sıkıcı üzeri kalıplama kusurudur, çünkü üretimden haftalar sonra termal çevrim veya mekanik gerilim testi sırasında ortaya çıkabilir.
PP ve PE Alt Tabakalar—Varsayılan Seçim
Polipropilen (PP) ve polietilen (PE), özel bağlayıcı katman kimyası gerektirmeden TPE ve TPU üzerine kalıplama malzemelerine güvenilir şekilde bağlandıkları için en yaygın üzerine kalıplama altlıklarıdır. Proses penceresi nispeten toleranslıdır ve malzeme maliyetleri düşük kalır. Çoğu tüketici ürünü muhafazası, saklama kabı ve yapısal olmayan bileşen için TPE üzerine kalıplı PP altlıklar; ekonomik bir fiyatla mükemmel kavrama, aşınma direnci ve görsel markalama sağlar. Şanghay tesisimizde üzerine kalıplama üretiminin 65% oranını aşan bölümü PP altlıklarla yürütülür; üzerine kalıplama malzemesi genellikle 30–60 Shore A sertlik aralığındadır.
ABS ve PC Alt Tabakalar—Mühendislik Sınıfı
ABS ve polikarbonat (PC) alt tabakalar, daha yüksek işlem sıcaklıkları ve farklı yüzey kimyaları nedeniyle daha dikkatli malzeme eşleştirmesi gerektirir. Eriyik sıcaklığı 220–240°C arasında kontrol edildiğinde ABS genellikle TPE üzeri kalıplarla iyi bağlanır; PC ise daha yüksek termal kararlılığa sahip özel TPU formülasyonları gerektirebilir. Bağlanma aralığı PP tabanlı sistemlere göre daha dardır ve ikincil enjeksiyon sırasında alt tabakanın bozulma riski önemli ölçüde artar. Elektronik ve tıbbi cihaz müşterileri için düzenli olarak ABS ve PC üzeri kalıplama projeleri yürütüyoruz; ancak her projede kalıp taahhüdünden önce malzeme uyumluluk testi gerekti ve bu çoğu zaman yeterlilik takvimine 2–3 hafta ekledi.
TPE, TPU ve Silikon Üst Kalıplama Malzemeleri
Termoplastik elastomerler (TPE) ve termoplastik poliüretanlar (TPU), esneklik, dayanıklılık ve işlenebilirlik dengeleri sayesinde üzerine kalıplama malzemesi pazarına hâkimdir. Yumuşak dokunuş hissinin ve orta düzey aşınma direncinin yeterli olduğu tüketici ürünlerinde TPE varsayılan seçimdir; daha düşük sıcaklıklarda işlenir ve çoğu sert plastiğe güvenilir biçimde bağlanır. TPU üstün aşınma ve kimyasal direnç sunarak takım sapları, tıbbi cihaz tutamakları ve üzerine kalıplanan yüzeyin tekrarlanan aşınmaya maruz kalacağı uygulamalarda tercih edilen malzeme olur. Sıvı silikon kauçukla (LSR) üzerine kalıplama mümkündür, ancak özel LSR işleme ekipmanı ve belirgin ölçüde farklı takım tasarımları gerektirdiğinden yaygın değildir; genellikle yalnızca silikonun biyouyumluluğu ve ısıl kararlılığının zorunlu olduğu tıbbi uygulamalarda veya gıda teması uygulamalarında gerekçelendirilebilir.
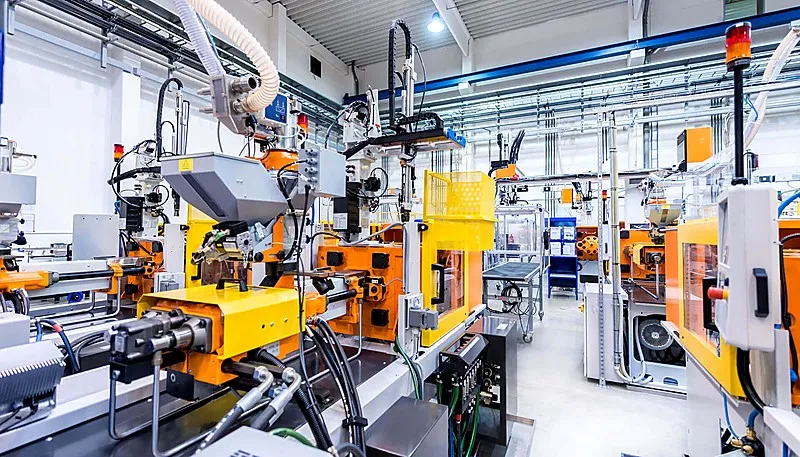
ZetarMold’da 90T ile 1850T arasında değişen 47 enjeksiyon kalıplama makinesiyle enjeksiyon kalıbı kapasitesi sağlıyor, malzeme kütüphanemizde üst kalıplamaya özel TPE ve TPU formülleri dahil 400’den fazla reçine bulunduruyoruz. 20 yılı aşkın deneyimimiz ve her üst kalıplama kalifikasyonunu denetleyen 8 kıdemli mühendisimiz sayesinde hemen her yaygın altlık-üst kalıp birleşimini test ettik ve güvenilir işleme aralıklarını belgeledik. 120’den fazla üretim operatörümüz ve İngilizce konuşan 30’dan fazla proje yöneticimiz, özel uluslararası mühendislik ekipleri olmadan yalnızca enjeksiyon kalıplama tedarikçisi seçme kılavuzuna bel bağlayan ekiplerde sık görülen bir sorun olan teknik şartnamelerin çeviride kaybolmasını önler.
Şanghay fabrikamızda 90T ile 1850T arasında 47 enjeksiyon kalıplama makinesi çalıştırıyor ve ayda 100+ kalıp setini destekleyen şirket içi kalıp imalat tesisinden yararlanıyoruz. Üst kalıplamada bu önemlidir; çünkü altlık kapama yüzeyi, sızdırmazlık çeliği ve ikinci atım denemeleri, tasarım seri üretime ulaşmadan önce takım ve üretim ekipleri tarafından kontrol edilebilir.
Üzerine Kalıplama Takımlarını Hangi Tasarım Kuralları Belirler?
Bu bölüm, üst kalıplama takımlarını belirleyen tasarım kuralları ile bunların maliyet, kalite, zamanlama ve tedarik riski üzerindeki etkisini ele alır. Üst kalıplama takımları standart enjeksiyon kalıbı tasarımından birkaç kritik açıdan ayrılır. Bu farklar isteğe bağlı iyileştirmeler değildir; bir üst kalıplama projesinin düşük hurda oranıyla güvenilir biçimde çalışmasını veya sürekli bir üretim kâbusuna dönüşmesini belirleyen zorunlu özelliklerdir. İşlevsel bir üst kalıplama takımını pahalı bir kâğıt ağırlığından ayıran tasarım kuralları şunlardır.
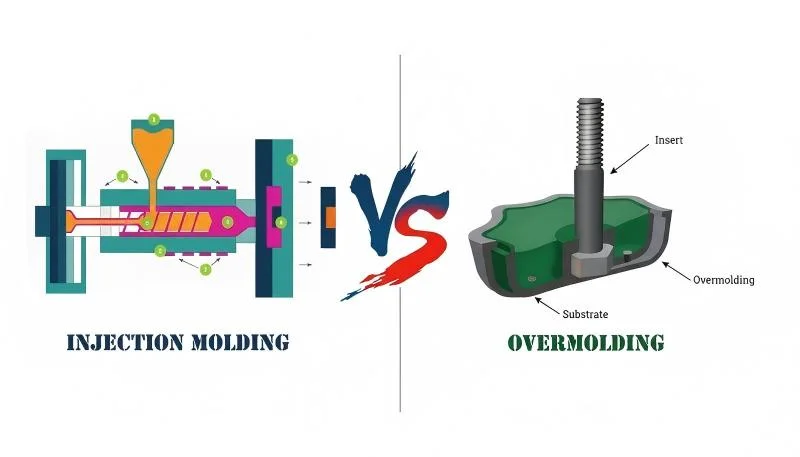
Alt Tabaka Sızdırmazlığı ve Kapatma Yüzeyleri
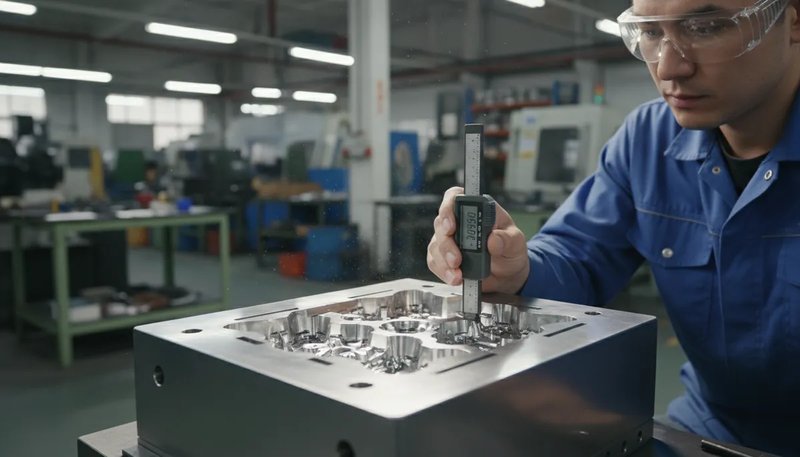
Çapak oluşmasını, yani boşluklardan kaçarak kalıp boşluğunun dışına çıkan istenmeyen ince plastik filmi önlemek için üst kalıp boşluğu alt parçanın çevresini tamamen sızdırmaz biçimde kapatmalıdır. Kapatma yüzeyleri alt parça yüzeyinden 0.05–0.10 mm boşlukla tasarlanır; bu aralık çapağı önleyecek kadar dar, yerleştirme sırasında alt parçayı sürtmeyecek veya zedelemeyecek kadar geniştir. En kritik sızdırmazlık yüzeyleri, çapağın oluşma olasılığının en yüksek olduğu noktalar olan alt parça kenarları ve köşeleriyle temas eden yüzeylerdir. Deneyimlerimize göre yetersiz kapatma tasarımı, ilk üretim serilerinde üst kalıplama hurda oranının %10’u aşmasının başlıca nedenidir.
Konumlandırma Özellikleri ve Toleranslar
Üzeri kalıplama kavitesi; ikincil enjeksiyon sırasında altlığı hassas konumda tutan konumlandırma pimleri, datum yüzeyleri ve bazen mekanik kelepçeler içerir. Üzeri kalıplanan malzemenin altlık çevresinde eşit akmasını sağlamak için bu özellikler ±0.05 mm konumlandırma hassasiyetini korumalıdır. Altlık enjeksiyon sırasında çok az bile kayarsa üzeri kalıplama kalınlığı değişir; malzemenin çok ince olduğu yerlerde zayıf noktalar, kavitenin fazla açıldığı yerlerde ise çapak oluşur. Konum toleransı altlığın ölçüsel değişkenliğiyle birikimlidir; bu nedenle ilk baskı kalıbı, geleneksel tek malzemeli bir kalıptan daha dar spesifikasyonda parçalar üretmelidir. Üzeri kalıplama kavitesiyle temas eden yüzeylerde bu değer genellikle ±0.025 mm’dir.
Yolluk Girişi Konumu ve Akış Tasarımı
Üzerine kalıplama girişi, erimiş malzemenin kritik bağ yüzeylerini kesen kaynak çizgileri oluşturmadan altlık üzerinden akmasını sağlayacak biçimde konumlandırılmalıdır. Standart kalıplamada giriş yerleşimi dolum desenini ve estetik görünümü optimize eder. Üzerine kalıplamada giriş yerleşimi ayrıca eriyiğin doğrudan altlık yüzeyine püskürtülmesini önlemelidir; bu, yerel erimeye veya deformasyona yol açabilir. Giriş izi mümkün olduğunda kritik olmayan bir üzerine kalıplama yüzeyinde, yalnızca malzeme çifti ısıl şoka bozunmadan dayanabiliyorsa altlık üzerinde kalmalıdır. Yanlış giriş tasarımının altlık yüzeyinde görünür yanık izlerine neden olduğu ve ilk denemeden sonra kalıbın tamamen yeniden tasarlanmasını gerektirdiği projeler gördük.
Fırlatma Sistemi Tasarımı
İtici pimler, görünür iz bırakacak veya bağı zayıflatacak şekilde üst kalıplama malzemesinden geçemez. Bu kısıt, kalıp tasarımcısını çoğu zaman tüm çıkarmayı maça tarafından (altlık tarafından) yönlendirmeye veya kuvveti tüm parça yüzeyine eşit uygulayan sıyırıcı plakalar ve hava üflemeli çıkarma sistemleri kullanmaya zorlar. Tasarım çözülebilir ancak bilinçli planlama gerektirir—eski üst kalıplama kalıplarında itici pimlerin kavrama yüzeyinde görünür izler bıraktığı, işlevsel olarak sağlam parçaları kozmetik açıdan kabul edilemez hale getirdiği örneklerle karşılaştık.
"Üzerine kalıplama kalıpları, standart enjeksiyon kalıplarına göre daha sıkı toleranslar ve ek sızdırmazlık özellikleri gerektirir."True
İkincil enjeksiyon sırasında alt tabakanın konumlandırılması ve sızdırmazlığının sağlanması ihtiyacı; ±0.05 mm konumlandırma gereklilikleri, 0.05–0.10 mm boşluklu kapama yüzeyleri ve vakumlu veya mekanik bağlama özellikleri ekler. Bu eklemeler, kalıp maliyetini genellikle karşılaştırılabilir tek malzemeli bir kalıba göre 25–40% artırır.
"Her standart enjeksiyon kalıbını yalnızca ikinci bir kavite ekleyerek üzeri kalıplamaya dönüştürebilirsiniz."False
Standart bir kalıp, güvenilir üst kalıplama için gerekli altlık konumlandırma, sızdırmazlık ve itme tasarımı özelliklerine sahip değildir. Dönüşüm; yeni kalıp boşluklarının işlenmesini, kapatma yüzeylerinin eklenmesini ve muhtemelen itme sisteminin yeniden tasarlanmasını gerektirir. Bu maliyetler çoğu zaman sıfırdan yeni bir üst kalıplama kalıbı üretme maliyetini aşar.
Bu tasarım kuralları isteğe bağlı değildir. Bir kalıp üreticisi kalıp maliyetini düşürmek için kapama yüzeylerini atlamayı önerirse veya yüksek hacimli bir projede altlığın elle konumlandırılmasını tavsiye ederse itiraz edin. İlk kalıp tasarruflarının tam üretimde 15%‘yi aşan hurda oranlarıyla ve ilk parça partisinin yeterlilik testlerini geçememesinden sonraki yeniden kalıplama maliyetiyle silindiği çok fazla proje gördük.
Üst Kalıplama Kalitesini Hangi Proses Parametreleri Kontrol Eder?
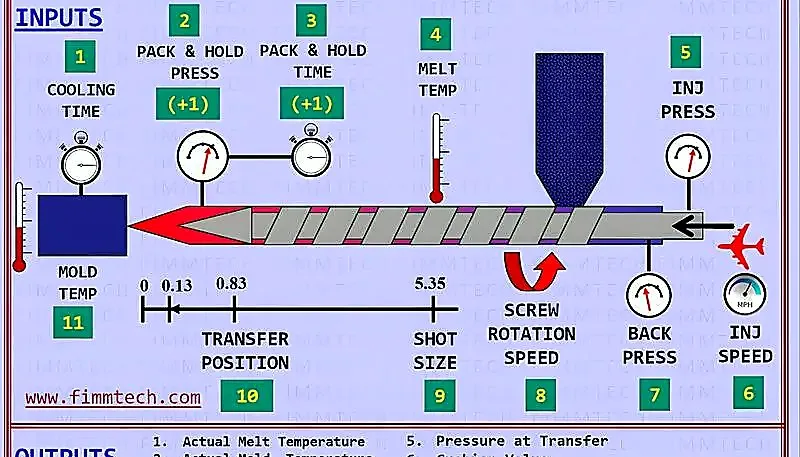
Üzerine kalıplama yalnızca doğru kalıba sahip olmak değildir — makine parametreleri standart kalıplamadan daha sıkı kontrol gerektirir. Proses penceresinin dışına çıktığında en fazla hurdaya neden olan dört değişken şunlardır.
Çevrimler Arasındaki Sıcaklık Farkı
Üst kalıplama malzemesi, altlık yüzeyindeki bağlayıcı katmanı etkinleştirecek kadar yüksek ancak altlığı deforme edecek veya eritecek kadar yüksek olmayan bir sıcaklıkta enjekte edilmelidir. Genel kural, üst kalıplama eriyik sıcaklığının altlığın camsı geçiş sıcaklığından veya yumuşama noktasından 20–40°C yüksek olmasıdır. TPE ile üst kalıplanan PP altlıklarda bu, altlık 200–220°C’de kalıplanmışken üst kalıplamanın genellikle 190–210°C’de yapılması anlamına gelir. TPU ile üst kalıplanan PC altlıklarda fark 15–20°C’ye iner; çünkü PC’nin işlem sıcaklığı, birçok TPU formülasyonunun bozunmadan dayanabildiği üst sınıra zaten yakındır.
Enjeksiyon Hızı ve Profili
Enjeksiyon hızı, üst kalıplama malzemesinin alt tabaka çevresinde nasıl aktığını doğrudan etkiler. Çok hızlı akışta eriyik cephesi alt tabakayı yuvasından iterek çapak veya hizasızlık oluşturabilir. Çok yavaş akışta ise malzeme soğumadan önce bağlayıcı katman tam etkinleşmeyebilir ve zayıf yapışma oluşur. Çoğu üst kalıplama prosesinde çok kademeli dolum profili kullanılır: alt tabaka çevresindeki akışı oluşturmak için başlangıçta daha yavaş, eriyik cephesi kararlı hâle geldiğinde daha hızlı. Genellikle baskının ilk 40%‘ında standart enjeksiyon hızının 50–70%‘ini hedefler, ardından kalıp boşluğu dolumunun kalanında tam hıza çıkarız.
Tutma Basıncı ve Süresi
Ütüleme basıncı, üzeri kalıplanan malzemenin kavite geometrisine tam olarak uymasını ve soğuma sırasında altlık yüzeyiyle yakın temasını korumasını sağlar. Basınç çok düşük olursa üst kalıp malzemesi altlık özelliklerini tamamen kapsamayabilir ve boşluklar veya ince bölgeler bırakabilir. Basınç çok yüksek olursa kavite, üst kalıp malzemesini altlık arayüzündeki mikro boşluklara iterek çapak oluşturabilir veya birleşme hattını zayıflatabilir. Üzeri kalıplamada genellikle standart ütüleme basıncının %60–80 değerini uygular, çıkarma öncesinde bağ arayüzünün tamamen katılaşması için ütüleme süresini %10–20 uzatırız.
Kalıp Sıcaklığı Farkı
Kalıp gözü tarafı (üzerine kalıplama tarafı), ikincil enjeksiyon sırasında altlığı aşırı ısıdan korumak için genellikle maça tarafından (altlık tarafı) 5–10°C daha düşük sıcaklıkta çalışır. Bu sıcaklık farkı, üzerine kalıplama malzemesinin altlıkta ısıl deformasyona yol açmadan akmasını ve bağlanmasını sağlar. Çok gözlü kalıplarda bu sıcaklık farkını tüm gözlerde tutarlı biçimde korumak, hurdayı azaltan en etkili proses kontrollerinden biridir—gözler arasındaki 3°C üzerindeki sapmalar, parça ailesi genelinde tutarsız bağ kalitesiyle sıklıkla ilişkilidir.
En Yaygın Üst Kalıplama Kusurları Nelerdir?
Her üst kalıplama kusuru dört temel nedenden birine dayanır: altlık konumlandırma, eriyik akışı, termal yönetim veya malzeme uyumluluğu. Üretim sahasında en sık gördüğümüz sorunlar ve her birine yönelik çözümlerimiz aşağıdadır.
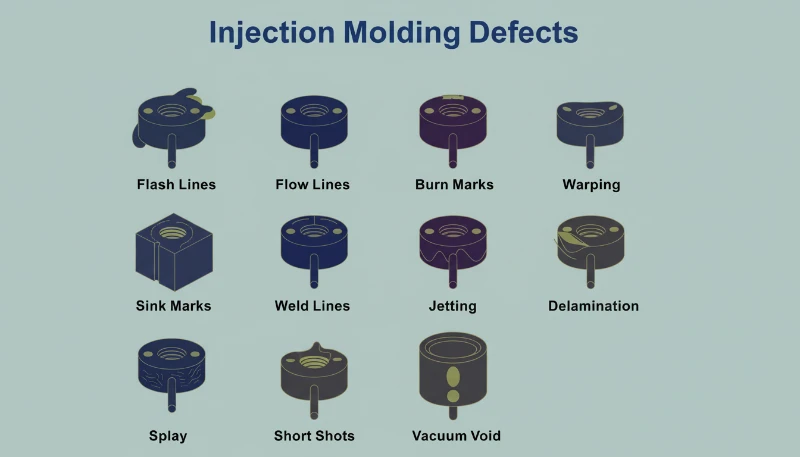
| Kusur | Karşı yüzeyde çökme izlerini önler | Düzeltme |
|---|---|---|
| Birleşme hattında çapak | Yetersiz kapatma boşluğu veya aşırı ütüleme basıncı | Kapama yüzeyini 0.05–0.10 mm değerine sıkın; tutma basıncını 10–20% azaltın |
| Delaminasyon / soyulma | Uyumsuz malzemeler veya yetersiz eriyik sıcaklığı | Malzeme uyumluluk testini doğrulayın; üst kalıplama sıcaklığını 5–10°C artırın |
| İnce bölgeler / eksik dolum | Alt tabakanın yerine oturmaması veya hapsolmuş hava | Altlık konumunu kontrol edin; ince bölgelerin yakınına hava tahliyeleri ekleyin |
| Altlık deformasyonu | Üzeri kalıplama sıcaklığı çok yüksek veya çevrim süresi çok uzun | Üzeri kalıplama sıcaklığını düşürün; çevrimi kısaltın veya soğutma ekleyin |
| Görünür itici izleri | Üzeri kalıplanmış kavrama yüzeyinden geçen pimler | Parça çıkarma sistemini sıyırıcı plaka veya hava üfleme olarak yeniden tasarlayın |
| Bağ yüzeyinde kaynak çizgisi | Gate yerleşimi, akış önlerinin kritik interface'de buluşmasını sağlar | Besleme ağzını taşı; akış geometrisini değiştir |
Yukarıdaki kusurlar tecrübemize göre kabaca overmold hurdasının ‘ini oluşturur. Geri kalan ise sınır durumlardır—statik deşarjın malzeme akışını etkilemesi, parti-parti malzeme değişimi ve uzun üretim serilerinde kalıp aşınmasının sızdırmazlık kalitesini etkilemesi. Önemli olan desen, çoğu kusurun önceden uygun kalıp tasarımı ve üretim sırasında disiplinli proses kontrolü ile önlenebilir olmasıdır. Kalıp doğru tasarlandığında ve malzeme çifti testlerle doğrulandığında, proses penceresi standart operatörlerin sürekli mühendislik müdahalesi olmadan kaliteyi koruyabileceği kadar geniştir.
Overmolding Seçildiğinde?
Overmolding, her çok malzemeli ürün için doğru çözüm değildir. Kısa seriler veya hızla değişen grafiklere sahip parçalar için, kalıp maliyeti ve malzeme minimum sipariş miktarları ekonomik anlam ifade etmeyebilir. İşte ZetarMold’da müşterilerimize önerdiğimiz karar çerçevesi.
Overmolding Seçildiğinde:
Annual production volume exceeds 50,000 units. Overmold tooling’in fixed cost amortizes quickly at scale, ve ikinci operations’ların ortadan kaldırılması—pad printing veya adhesive coating—economically significant olur. Parça permanent, durable surface properties gerektirir—soft-touch grip, abrasion resistance, veya chemical resistance—coatings veya films ile achieve edilemez, zamanla degrade olabilir. Brand differentiation ve visual quality competitive requirements’dır ve integrated graphics, logos, veya color blocking istiyorsunuz, normal use altında peel, fade, veya scratch off olmaz. Product geometry, overmold cavity’de clean substrate seating sağlar—deep undercuts, extreme draft angles, veya complex 3D contours reliable positioning’i engelleyen warning signs’dır.
Secondary Decoration Stick Edildiğinde:
Yıllık hacim 20.000 birimin altındadır. Grafikler veya yüzey işlemleri küçük partiler arasında sık değişir—promosyon serileri, bölgesel varyantlar, sınırlı sayıda baskılar veya mevsimsel ambalajlar. Parça geometrisi güvenilir substrat oturması için çok karmaşıktır—aşırı alt kesimler, canlı menteşeler veya 2:1’i aşan çekme oranları overmolding’i pratik olmaktan çıkarır. Malzeme uyumluluğu şüphelidir ve kalifikasyon zaman çizelgesi proje programını aşacaktır. Bu durumlarda, tampon baskı, serigrafi baskı veya yapışkanlı filmler daha düşük başlangıç maliyeti ve riskle kabul edilebilir sonuçlar sağlayabilir.
Bir orta yol da vardır: özel iki renkli makinelerde iki bileşenli kalıplama, geometrinin eş zamanlı kalıplamaya izin verdiği yüksek hacimli ürünlerde daha kısa çevrim süresiyle üst kalıplamaya benzer sonuçlar verebilir. Esas olan, daha ileri göründüğü için varsayılan olarak üst kalıplamayı seçmek yerine dekorasyon teknolojisini parçanın geometrisi, hacmi ve dayanıklılık gereklilikleriyle eşleştirmektir. Hacimleri yatırımı haklı çıkarmadığında veya geometrileri alt parçanın güvenilir biçimde yerleşmesini olanaksız kıldığında müşterilere üst kalıplamayı önermediğimiz oldu; dürüst yönlendirme, üretimde çalışmayacak bir teknolojiyi abartılı satmaktan daha uzun ilişkiler kurar.
Sıkça Sorulan Sorular
Overmold ne anlama gelir?
Overmold, kalıcı olarak bağlanmış çok malzemeli bir parça oluşturmak için yumuşak bir plastik malzemenin—genellikle TPE veya TPU—sert bir plastik substrat üzerine enjekte edildiği ikincil bir enjeksiyon kalıplama işlemini ifade eder. Terim özellikle sıralı iki aşamalı işlemi tanımlar; aynı döngüde her iki malzemeyi eşzamanlı enjekte edebilen iki renkli kalıplamadan farklıdır. Overmoldlanmış parçalar, tutuş, konfor veya dayanıklılığın ürün satın alma kararlarını ve marka bağlılığını doğrudan etkileyen kritik kullanıcı deneyimi faktörleri olduğu elektrikli el aletleri, diş fırçaları ve elektronik kasa gibi tüketici ürünlerinde yaygındır.
Kalıp ve overmold arasındaki fark nedir?
Mold genellikle injection molding’de plastic parts’i shape için kullanılan tooling veya die referans eder—part geometry’i form eden cavity ve core. Overmold spesifik olarak existing part veya substrate üzerine second material applying process’i describe eder. Mold tool’dur, overmold multi-material parts’i create eden technique’dir. Overmold project multiple molds veya cavities gerektirir—one for the first shot substrate ve one or more for the secondary injection—standard molding project single mold cavity gerektirebilir. Bu distinction’ı understanding, overmold manufacturing sourcing için tooling requirements’ı accurately specify etmenize yardımcı olur.
Substrate ve overmold arasındaki fark nedir?
Substrat, overmoldlanmış bir parçada yapısal destek sağlayan sert taban malzemesidir—genellikle çekirdek bileşeni oluşturan ABS, PC veya PP gibi bir mühendislik plastiğidir. Overmold ise ikincil enjeksiyonda substrat üzerine uygulanan yumuşak malzemedir, genellikle tutuş, yastıklama veya yüzey koruması sağlayan TPE veya TPU’dur. Substrat yapısal yükleri taşır ve parça geometrisini belirlerken, overmold fonksiyonel yüzey özellikleri sağlar. İki malzeme overmolding işlemi sırasında kimyasal olarak bağlanır ve overmold’un tahrip edilmeden substrattan ayrılamayacağı tek bir entegre parça oluşturur.
Bir şey üzerine kalıplama ne anlama gelir?
Bir şey üzerine kalıplama, molten plastic material’in pre-existing part veya substrate üzerine veya etrafında enjekte edildiği overmolding process’i referans eder. Substrate mold cavity’ye yerleştirilir ve overmold material enjekte edilir, substrate geometry’ye etrafında akar ve conforms eder. Enjeksiyon sırasında, overmold material’in ısısı substrate’in surface’ini activate eder, chemical bond oluşturur. Sonuç, two materials’in permanently integrated olduğu single part’tır, molding sonrasında assembled veya adhered together değildir. Bu nedenle overmolding, adhesive-based assembly methods’ın plague olan delamination riskini ortadan kaldırır.
Overmold tooling, standart kalıplara karşılaştırıldığında ne kadar maliyetlidir?
Overmold kalıpları genellikle benzer boyut ve cavity count’a sahip standart kalıplardan 25-40 oranında fazla maliyetlidir. Premium, substrat positioning features, shut-off surfaces for sealing, cavity geometry’de tighter tolerances, ve genellikle overmold surface’i marklamayı engellemek için more complex ejection systems’den gelir. Bir consumer product housing için typical 4-cavity overmold kalıp, comparable single-material kalıp üzerine ek 8,000 to 15,000 dollars anlamına gelir. Ancak, ikinci dekorasyon operations’ların ortadan kaldırılması—pad printing veya adhesive coating—genellikle bu premium’u ilk 100,000 to 200,000 units produced içinde geri kazanır.
Overmolding ne kadar döngü zamanı cezası ekler?
Overmolding, standart enjeksiyon kalıplama ile karşılaştırıldığında, benzer bir parça için genellikle döngü zamanına 15-25 oranında ekleme yapar. Ek zaman, substrat transfer adımından gelir—manuel veya robotik—ve overmold malzemesi substrat tarafında ısıl yalıtkan olarak hareket ettiği için gereken hafif uzun soğuma zamanından gelir. 20-saniye standart döngüye sahip bir parça için, overmolding ile 23-25 saniye bekleyin. Ceza, transfer zamanı toplam döngü zamanının küçük bir parçası olduğu büyük parçalarda azalır ve genellikle ikinci dekorasyon adımlarının tamamen ortadan kaldırılmasıyla haklı gösterilir.
Overmoldlanmış parçalar geri dönüştürülebilir mi?
Overmolded parçaların geri dönüşümü zordur, çünkü moleküler seviyede bağlanmış iki veya daha fazla farklı plastik içerirler. PP, ABS, TPE, TPU—her biri kendi akışlarında geri dönüştürülebilir olan bireysel malzemeler, kaliteyi düşüren mekanik veya kimyasal işlem olmadan kolayca bileşen malzemelere geri ayrılamazlar. Son-of-life dikkatleriyle yüksek hacimli üretim için, malzemelerin geri dönüşüm potansiyelini maksimize etmek için—PP substrat ile PP-based TPE overmold—uyumlu malzemelerin öncelikli olarak seçilmesi gereklidir. Environmental impact en iyi product design stage’de değerlendirilir, tooling tamamlandıktan sonra değil.
ikincil enjeksiyon: İkincil enjeksiyon, nihai çok malzemeli parçayı oluşturmak için üst kalıp malzemesinin önceden biçimlendirilmiş altlığın çevresine veya üzerine enjekte edildiği ikinci kalıplama çevrimidir. ↩
altlık: Altlık, üst kalıplanmış bir parçanın yapısal destek sağlayan ve üzerine üst kalıp malzemesi uygulanan, genellikle sert plastikten yapılmış temel malzemesi veya çekirdeğidir. ↩
bağlayıcı katman: Bağlayıcı katman, farklı plastikler arasında kimyasal bağlanmayı güçlendirmek ve yapışma dayanımını artırmak için altlık ile üst kalıp malzemesi arasına uygulanan yapışkan katman veya yüzey işlemidir. ↩