 Overslaan naar inhoud

- Maak spuitgietmallen elke 50.000–100.000 schoten schoon, of wanneer defecten zoals flits, brandvlekken of oppervlaktewaas verschijnen.
- Volg een vijf-staps sequentie: droog reinigen, solvent wipe, diepe reiniging, roestbehandeling, dan lubricatie.
- Gebruik altijd messing borstels op gepolijste holte-oppervlakken — nooit staaldraad of schuurpads.
- Dry-ice stralen verwijdert zware koolstofafzettingen zonder demontage of chemisch afval in 30–60 minuten.
- Registreer elke schoonmaakactie met datum, methode en technicusnaam om een voorspellend onderhoudsschema op te bouwen.
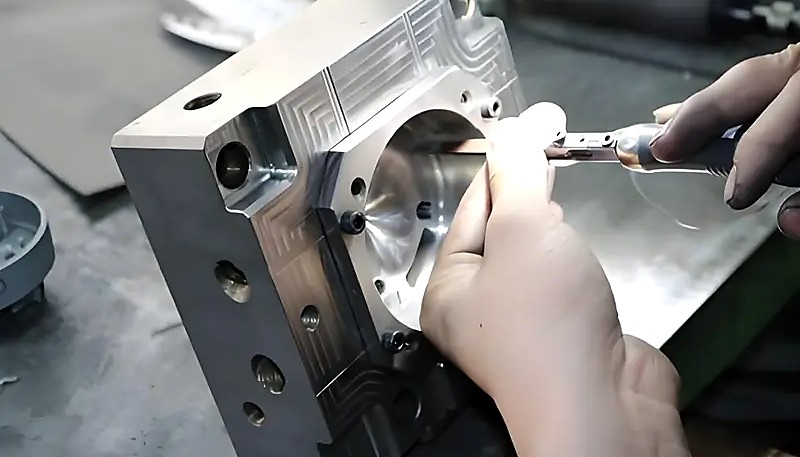
Je bent drie uur in een productierun wanneer de QC-technicus naar je toe komt en een onderdeel op de tafel legt. Daar is het — een lichtbruine streep over het oppervlak, bijna onzichtbaar bij eerste inspectie. Twee shifts geleden maakte de matrijs perfecte onderdelen. Nu heeft elke vijfde shot een brandmerk. Je stopt de lijn, haalt de matrijs eruit en ontdekt wat je al vermoedde: de ventilatiekanalen zijn volledig volgepakt met gecarboniseerde kunststof. Een reiniging van 30 minuten die twee dagen geleden zou moeten zijn uitgevoerd kost je nu vier uur downtime en een volledige tray afval.
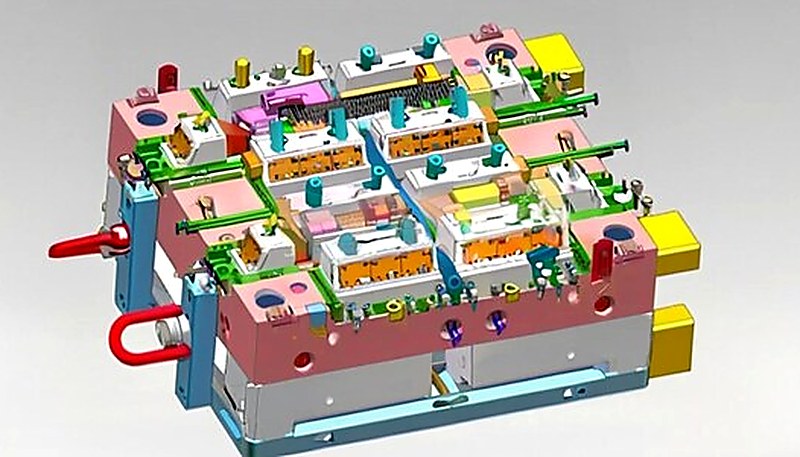
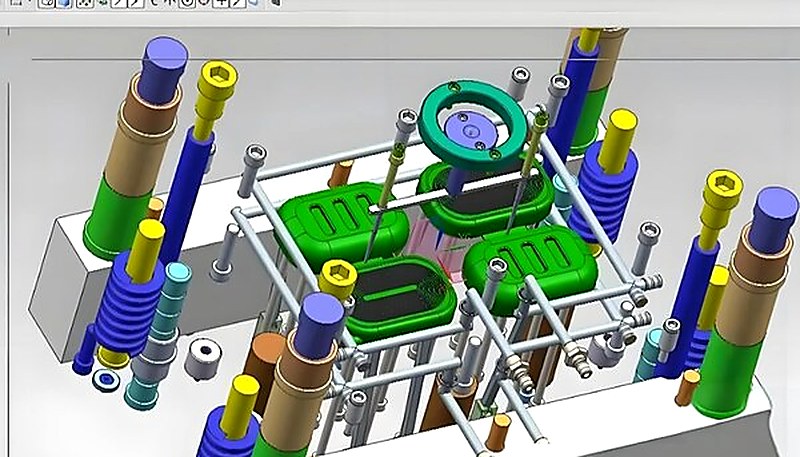
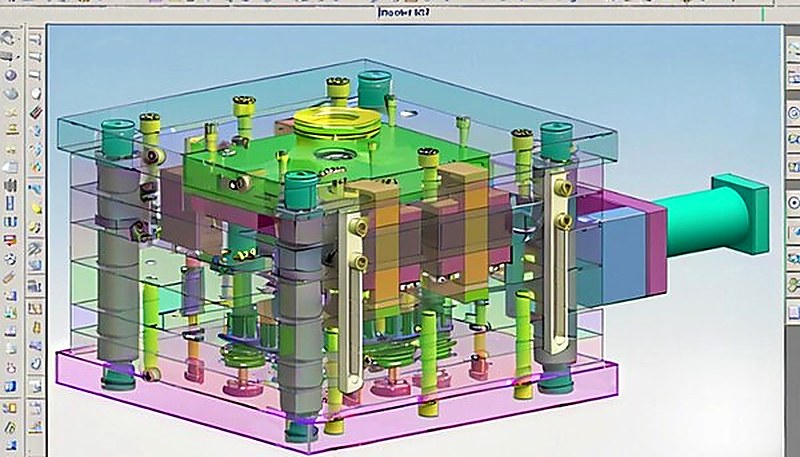
For readers comparing spuitgieten1 options, this article connects the spuitgietvorm2, kunststofmateriaalgedrag, supplier evaluation, en kwaliteitscontrolebeslissingen die bepalen of een project van ontwerp naar herhaalbare productie kan overgaan.
Onze 8 senior engineers — elk met 10+ jaar ervaring in mallenonderhoud — volgen een 6-stappen kwaliteitswerkstroom die begint met inkomende malleninspectie en eindigt met uitgaande kwaliteitscontrole. We hebben gezien hoe het overslaan van de oppervlakte-inspectiestap na het schoonmaken leidt tot gemiste micro-pitting die later flitsdefecten op productieonderdelen veroorzaakt.
In onze fabriek draaien we 47 spuitgieten machines over drie ploegen. We hebben op de harde manier geleerd dat het schoonmaken van mallen geen taak is die je uitvoert wanneer problemen opduiken — het is een discipline die je in elk productieschema inbouwt. Deze gids behandelt het exacte vijfstappenproces dat onze technici volgen, hoe je de juiste schoonmaakmethode kiest, en de fouten die mallen beschadigen, zelfs wanneer operators denken dat ze het goed doen.
Waarom het reinigen van spuitgietmatrijzen belangrijk is voor de kwaliteit van onderdelen
Schimmelverontreiniging is de belangrijkste oorzaak van onderdeeldefecten bij spuitgieten. Residuen hopen zich op uit vier bronnen: afgebroken polymeerafzettingen (koolstof en was), ophoping van vormlosmiddel, migratie van smeermiddel uit uitstootpennen en oxidatie op onbeschermde stalen oppervlakken.
| Defect | Root Cause | Impact op productie |
|---|---|---|
| Ontwerpen voor spuitgieten draait fundamenteel om het begrijpen van hoe gesmolten plastic zich gedraagt in een stalen holte. Elke ontwerpbeslissing — wanddikte, ontlophoeken, ribben, plaatsing van de ingang, materiaalkeuze — heeft een direct, meetbaar effect op de onderdeelkwaliteit, de cyclustijd en de gereedschapskosten. | Gecarboniseerde kunststof in ventilatiekanalen (dieseleffect) | Cosmetische afkeuring, carbonpitting op cavity |
| Flash | Frettingafzettingen op scheidingsvlakken | Secundaire trimming, dimensionaal afval |
| Short shots | Blokkeerde ventilatiekanalen of gates | 100% afval, lijnstop |
| Oppervlaktewaas | Losmiddel of koolstoflaag op de holte | Glansverlies, klachten van klanten |
| Moeilijke uitwerping | Residu op uitwerppennen of holtewanden | Pinbreuk, onderdeelschade |
Industrieonderhoudsdata laat zien dat matrijzen op een gedocumenteerd preventief onderhoudsschema een 2–3× langere levensduur bereiken dan matrijzen die alleen worden gereinigd wanneer defecten optreden. Voor een matrijs van $20.000–$80.000, betekent die multiplier direct een lagere kosten-per-onderdeel en snellere amortisatie van gereedschap. Matrijsreiniging is geen kostenpost — het is een strategie voor kapitaalbescherming.
“Geplande matrijsreiniging bij 50.000–100.000 shots voorkomt de meeste oppervlaktegerelateerde onderdeeldefecten voordat ze de kwaliteitsinspectietafel bereiken.”Echt
Residuophoping versnelt na de eerste 50.000 shots als bijproducten van polymerdegradatie en uitgegaste additieven zich op ventilatieoppervlakken accumuleren. Reiniging binnen dit interval verwijderd contaminatie voordat deze chemisch aan de matrijsstaal3, houdt holte-oppervlakken binnen de oppervlakteafwerkingsspecificatie, en behoudt de ontluchtingsgeometrie op de ontworpen 0.01–0.03 mm diepte.
“Je hoeft een spuitgietvorm alleen schoon te maken wanneer zichtbare defecten op onderdelen verschijnen.”Vals
Tegen de tijd dat defecten zichtbaar zijn, is de vorm al voldoende verontreinigd om afval te produceren — en de verontreiniging kan chemisch aan de holtestaal zijn gaan hechten. Onzichtbare residulagen verslechteren nog steeds de oppervlakteafwerking Ra-waarden en beperken de ventilatiestroom, wat stille non-conformiteiten veroorzaakt die aan visuele inspectie ontsnappen. Proactieve geplande reiniging kost een fractie van de stilstandtijd en afvalverlies van reactieve noodrevisie.
Wanneer schoonmaken: Triggers en frequentierichtlijnen
Reinig een spuitgietmatrijs wanneer het aantal shots 50.000–100.000 bereikt voor standaard technische thermoplasten, of direct wanneer onderdeeldefecten optreden. Het juiste interval hangt af van het type kunststof, de complexiteit van het onderdeel en de waargenomen kwaliteitsdata — niet van een vast universeel aantal. Kunststoffen met hoog vulpercentage en corrosieve materialen vereisen kortere intervallen. Een goed bijgehouden reinigingslogboek is de enige manier om nauwkeurige, matrijs-specifieke preventieve onderhoudsschema's op te stellen. Begrijpen hoe spuitgietproces parameters — harstemperatuur, vul snelheid, en houddruk — de vorming van afzettingen beïnvloeden helpt bij het instellen van het juiste schoonmaakinterval voor elk gereedschap.
| Trigger | Vereiste actie | Downtime-estimate |
|---|---|---|
| Elke 50.000–100.000 shots (standaard kunststoffen) | Volledige 5-staps preventieve reiniging | 4–8 uur |
| Elke 25.000–50.000 schoten (GF/CF-gevuld of FR-harsen) | Volledige 5-staps reiniging + ventilatiecontrole | 4–8 uur |
| Brandsporen op onderdelen | Ventilatie reiniging + holte oplosmiddel afvegen | 1–2 uur |
| Flash bij de splitsingslijn | Scheidingsvlak inspectie en opnieuw stenen | 1–3 uur |
| Oppervlak haze of glansverlies | Oplosmiddel reiniging + holtepolijstbeoordeling | 2–4 hours |
| Na stilstand >2 weken | Anti-corrosie behandeling + controle van de smering | 1–2 uur |
| Na PVC of brandvertragende run | Direct solvent reinigen + ventilatie spoelen | 2–3 hours |
Met glasvezel (GF) en koolstofvezel (CF) gevulde harsen laten slijtende deeltjes achter in ontluchtingskanalen en op holte-oppervlakken, waardoor elke 25.000–50.000 schoten reiniging vereist is. PVC geeft zoutzuurgas af dat onbeschermd matrijsstaal binnen enkele uren bij bedrijfstemperatuur aantast. Vlamvertragende harsen geven corrosieve gassen af (fosfor- en broomverbindingen) die gepolijste oppervlakken etsen. Voor deze materialen behandelen we het einde van elke productierun als een reinigingstrigger — volledige reiniging met oplosmiddel voordat de matrijs wordt opgeslagen.
5-staps reinigingsproces voor spuitgietmatrijzen
De vijfstaps malreinigingsprocedure is: droog reinigen bij 40–60°C, solvent afvegen, diep reinigen, corrosiebehandeling en smering. Elke stap is vereist — het overslaan van de corrosiebehandeling of de laatste smering na reiniging maakt de mal kwetsbaar voor corrosie en versnelde slijtage tijdens de volgende productierun.
Stap 1: Droogreiniging
Terwijl de mal nog warm is bij 40–60°C na de laatste injectie, gebruik een zachte koperen borstel of houten prikker om losse polymerflash, gate-resten en oppervlakteafzettingen van niet-gepolijste zones te verwijderen. Gebruik nooit staalborstels op gepolijste holtevlakken — koper is zacht genoeg om te reinigen zonder krassen te veroorzaken op gehard gereedschapstaal. Gebruik gefilterde, olievrije perslucht met maximaal 0,3 MPa om residu uit ventilatiekanalen, ejectorpinholen en splitsingslijnrecessen te blazen. Een vacuüm is beter dan perslucht voor afgesloten zones om te voorkomen dat deeltjes naar al gereinigde oppervlakken worden verdeeld.
| Gereedschap / Materiaal | Toepassing | Belangrijke beperking |
|---|---|---|
| Messenborstel (zachte haren) | Niet gepolijste holtegebieden, runner-systeem | Nooit gebruiken op gepolijste of spiegelgladde oppervlakken |
| Houten prikker / bamboespies | Diepe hoeken, ribbasis, fijne holtedetails | Geen risico voor krassen — veilig op elk oppervlak |
| Stofvrije stofzuiger | Ontluchtingskanalen, uitstootpen gaten, scheidingslijn spleten | Voorkeur boven perslucht in afgesloten ruimtes |
| Gefilterde perslucht (≤0,3 MPa) | Opwaaiend vuil uit ventilatiekanalen en openingen | Moet olievrij en vochtvrij zijn |
| Wattenstaafjes | Precisiezones, tekstgravures, O-ringgroeven | Eenmalig gebruik — niet dubbeldippen |
Stap 2: Oplosmiddel Reiniging
Breng een matrijsveilig oplosmiddel aan op een stofvrije doek of schuimapplicator. Isopropylalcohol (IPA) met 99% zuiverheid is de veiligste algemene keuze voor gepolijste en gecoate oppervlakken. Aceton is effectief op niet-gepolijst staal maar tast bepaalde chroom- en PVD-coatings aan. Speciaal geformuleerde matrijsreinigers zijn de gouden standaard voor productieomgevingen — ze zijn pH-gebalanceerd voor specifieke staalsoorten en verontreinigingschemie. Veeg holte-oppervlakken in één richting — nooit in cirkels schrobben, wat slijtende deeltjes van de doek in het gepolijste staal drukt in een karakteristiek zwermpatroon zichtbaar bij 10× vergroting.
Vermijd gechloreerde oplosmiddelen zoals trichloorethyleen of methylenchloride op chroom-, nickel- of PVD-gecoat oppervlakken — ze tasten de coating aan en versnellen delaminatie. Controleer altijd de compatibiliteit van het oplosmiddel met uw matrijsstaaltype en oppervlaktebehandeling voordat u het voor de eerste keer op productiegereedschap gebruikt. Laat het oplosmiddel volledig verdampen voordat u naar stap 3 gaat.
Stap 3: Diep reinigen (droogijs of ultrasoon)
Voor zware koolstofafzettingen, verbrande hars of ontoegankelijke gebieden voor handmatige reiniging zijn twee geavanceerde methoden beschikbaar. Droogijsstralen gebruikt vaste CO₂-pellets die met hoge snelheid worden versneld — ze sublimeren bij contact en tillen verontreinigingen op zonder secundair afval of vocht achter te laten. Het kan worden uitgevoerd met de matrijs in de pers, vereist geen demontage en produceert geen chemisch afval. Het reinigen van een eenholte matrijs duurt 30–60 minuten. Dit is de voorkeursmethode voor diepe reiniging bij grootschalige productie omdat het stilstandtijd minimaliseert.
Ultrasone reiniging dompelt gedemonteerde matrijsscomponenten onder in een verwarmde reinigingsoplossing van 60–80°C, geagiteerd door 20–40 kHz ultrasone golven. Cavitatiebellen dringen door in fijne ontluchtingsgleuven van 0,01–0,03 mm diepte, uitstootpen spelinggaten en koelkanalen inlaten — oppervlakken waar geen handgereedschap bij kan. Plan ultrasone reiniging in bij grote revisies, meestal elke 500.000 schoten of jaarlijks. Demontage voegt 2–4 uur toe aan de totale reinigingstijd, dus deze methode is voorbehouden aan gepland onderhoud in plaats van routine-PM.
Stap 4: Roestbehandeling en oppervlakte-inspectie
Na reiniging inspecteer alle holteoppervlakken, scheidingslijnvlakken en ejector-pin openingen onder fel strijklicht of met een 10× loupe. Voor licht oppervlakroest (witachtige oxidatiefilm, geen putjes), gebruik een fosforzuur-gebaseerd roestverwijderingsmiddel, laat 5–15 minuten inwerken volgens fabrikantinstructies, neutraliseer met schoon water, droog direct met gefilterde perslucht en breng roestpreventieve olie binnen 15 minuten aan. Voor matige putjes is mechanische polijsting met 400 tot 2000 korrelpapier, vervolgens 6 µm en 1 µm diamantpaste nodig om het originele oppervlakafwerking Ra te herstellen.
| Ernst | Beschrijving | Behandelingsmethode |
|---|---|---|
| Licht (oppervlakfilm) | Wittige oxidatie, geen zichtbare putjes | Corrosieverwijderaar + corrosiepreventieve olie — geen polijsten nodig |
| Matig (oppervlakkige putjes) | Roodachtige vlekken, Ra-waarde verslechterd | Roestverwijderaar + 1200–2000 korrelpapier + 1 µm diamantpasta |
| Zwaar (putvorming >0,1 mm) | Zichtbaar staalverlies, dimensionale impact | Matrijswerkplaats: TIG-lasreparatie of EDM-hervonken |
| Fretting (scheidingslijn) | Microbraamsels, afdichtingsfalen onder klemkracht | Opnieuw stenen met fijn wetsteen, opnieuw lappen tot vlakheid |
Stap 5: Smering en Corrosiebescherming
Breng een dunne, gelijkmatige laag matrijsgraadsmeermiddel aan op alle bewegende componenten: uitstoterpennen en -bussen, geleidingspennen en geleidingsbussen, schuifrails en hefstangen. Gebruik het type smeermiddel dat voor uw matrijs is gespecificeerd — PTFE-gebaseerd droog smeermiddel voor medische of voedselcontactmatrijzen, siliconengebaseerde vet voor matrijstemperaturen boven 100°C en lithiumvet voor standaardproductie onder zware mechanische belasting. Breng spaarzaam aan en veeg alle overtollige onmiddellijk weg — overtollig smeermiddel migreert binnen de eerste paar shots naar het holteoppervlak en veroorzaakt defecten door onderdeelverontreiniging.
Als de mal langer dan 48 uur stil staat, breng roestwerende olie of was aan op alle holte- en kernvlakken. Voor langdurige opslag van meer dan een maand, wikkel componenten in VCI (vluchtige corrosieremmer) folie na het aanbrengen van roestwerende olie. Bewaar horizontaal in een temperatuur- en vochtigheidsgecontroleerde omgeving: idealiter 20–25°C, RV onder 60%. Controleer elke 90 dagen opnieuw tijdens opslag.
De juiste reinigingsmethode kiezen voor uw matrijs
Handmatige reiniging met oplosmiddel is het beste voor routinematig onderhoud (1–2 uur), droogijsstralen voor diepe reiniging in de pers (0,5–1 uur) en ultrasoon reinigen voor grote revisies met intervallen van 500.000 shots (4–8 uur). Stem de methode af op uw verontreinigingsniveau en beschikbare stilstandtijd.
| Method | Beste voor | Oppervlak Veilig? | Stilstand | Chemisch Afval |
|---|---|---|---|---|
| Handmatig (messingborstel + oplosmiddel) | Lichte oppervlakteafzettingen, routinematig PM-reinigen | Ja — alleen messingborstel op gepolijste oppervlakken | 1–2 uur | Minimal |
| Droogijsstralen | Zware koolstofafzettingen, reiniging in pers | Ja — veilig voor spiegelglanzende oppervlakken | 0,5–1 uur | None |
| Ultrasone reiniging | Complexe geometrie, diepe ontluchtingen, volledige revisie | Ja — controleer de compatibiliteit van de reinigingsoplossing | 4–8 uur (demontage vereist) | Afvoer van reinigingsoplossing |
| Laserreiniging | Precisie medische/optische mallen, non-contact | Ja — geen schurend contact | 1–3 uur | None |
| Chemisch ontlakken | Ernstige polymerenhechting, coatingverwijdering | Afhankelijk van coatingtype | 2–6 uur | Aanzienlijk — correcte afvoer vereist |
Goed ontwerp van spuitgietmatrijzen speelt een cruciale rol in hoe goed een matrijs schoon te maken is. Diepe, smalle ribben met ontwerphellingen onder 0,5° zijn bijna onbereikbaar met handgereedschap. Ontluchtingsgleuven ondieper dan 0,01 mm op de scheidingslijn raken sneller verstopt en vereisen vaker aandacht. Wanneer we nieuwe gereedschappen in onze fabriek beoordelen, is reinigbaarheid een van onze DFM (design for manufacturability) evaluatiecriteria — een matrijs die gemakkelijker schoon te maken is, zal gedurende zijn volledige levensduur minder onderhoudskosten met zich meebrengen.
“Droogijsstralen bij 0,3–0,6 MPa is veilig voor SPI A1 en A2 spiegelglanzende spuitgietmatrijs-holtevlakken.”Echt
CO₂-pellets sublimeren bij contact en genereren geen secundair schurend residu. Het -78°C temperatuurverschil tussen de pellet en het warme matrijzenstaal zorgt ervoor dat verontreinigingslagen bros worden en schoon van het oppervlak afschilferen zonder mechanische abrasie. Correcte procesparameters — nozzleafstand 150–300 mm en gecontroleerde bewegingssnelheid — zijn essentieel. Voer altijd een testpassage uit op een niet-kritiek gebied met een nieuwe straaleenheid of operator voordat precisieoppervlakken worden gereinigd.
“Ultrasoon reinigen is de snelste optie voor routinematig matrijsonderhoud tussen productieruns door.”Vals
Ultrasoon reinigen vereist volledige demontage van de matrijs, onderdompeling van componenten, een reinigingscyclus van 20–40 minuten en hermontage — wat 2–4 uur toevoegt aan het basisproces. Het is de meest grondige methode voor interne oppervlakken, maar is veel te tijdrovend voor routinematige onderhoudsintervallen. Handmatige reiniging met oplosmiddel en droogijsstralen zijn de juiste gereedschappen voor onderhoud tussen productieruns; ultrasoon reinigen hoort thuis bij geplande grote revisies.
Veelvoorkomende schoonmaakfouten die spuitgietmallen beschadigen
Een stalen draadborstel is het meest schadelijke gereedschap bij matrijsreiniging — het verhoogt permanent de oppervlakteruwheid Ra op gepolijste holtes. Eenmaal aangebracht vereist slijpschade volledig mechanisch herpolijsten van 400 tot 2000 korrel plus diamantpasta om te herstellen. Verkeerde timing en ontbrekende onderhoudslogboeken zijn de volgende meest kostbare fouten.
Drie categorieën dekken de meeste reinigingsschade: verkeerde gereedschapskeuze (schurende materialen op gepolijste oppervlakken), verkeerde timing (een koude matrijs reinigen, of wachten tot defecten verschijnen), en verkeerde techniek (overmatige smering, cirkelvormig afvegen, het reinigen van ontluchtingen volledig overslaan). De vierde categorie — geen documentatie — beschadigt de matrijs niet direct, maar maakt elke toekomstige beslissing over reinigingsintervallen een gok.
Verkeerd Gereedschap, Verkeerde Timing: De Twee Oorzakelijke Factoren
“Het wegblazen van los vuil met perslucht voordat oplosmiddel wordt aangebracht, voorkomt reinigings-geïnduceerde microkrassen op gepolijste holtevlakken.”Echt
Losse schuurdeeltjes — polymeerflitsfragmenten, koolstofschilfers en metaalslijtpuin — werken als een slijppasta wanneer ze onder een doek over gepolijst staal worden gesleept. Ze eerst wegblazen met gefilterde perslucht (0,3 MPa, olievrij) vóór elk contact met oplosmiddel of doek elimineert dit slijpmechanisme. Deze ene stap behoudt de Ra-oppervlakteafwerking tussen geplande polijstcycli en is de meest kosteneffectieve gewoonte voor schadepreventie in elk matrijsonderhoudsprogramma.
“Staalwol of fijn schuurpapier kan worden gebruikt om hardnekkige afzettingen snel van injectiemalholtevlakken te verwijderen.”Vals
Zelfs 400-korrel schuurpapier laat krassen achter die bij 10× vergroting zichtbaar zijn op gehard gereedschapsstaal. Deze krassen verhogen permanent de oppervlakteruwheid Ra, veroorzaken uitstootweerstand, creëren spanningsconcentratiepunten in dunne wanden en brengen textuur over op gespoten onderdelen. Eenmaal aangebracht vereist slijpschade gecontroleerd mechanisch polijsten via een volledige 400–600–800–1200–2000 korrelreeks plus diamantpasta om de specificatie te herstellen. Gebruik altijd eerst messing gereedschappen, houten prikkers of goedgekeurde chemische methoden.
Aanvullende hoogfrequente fouten: het reinigen van een volledig afgekoelde mal (residu is harder en plakkeriger onder 40°C — reinigen bij 40–60°C is meetbaar effectiever), overmatig smeren van uitstoters (overtollig vet migreert naar het holtevlak en verontreinigt de eerste paar shots van de volgende run), het overslaan van ontluchtingsreiniging omdat het onderdeel 'er goed uitziet' (verstopte ontluchtingen veroorzaken brandvlekken die routinematig verkeerd worden gediagnosticeerd als injectiesnelheid- of houddrukproblemen), en het niet vastleggen van reinigingsevenementen (zonder logboek is er geen voorspellend schema — alleen reactief brandjes blussen).
Schoonmaken integreren in een totaal mallenonderhoudsprogramma
Reiniging is een pijler van een compleet matrijsonderhoudsprogramma. Een totaal PM-schema integreert reinigingsevenementen met dimensionale verificatie, vervanging van slijtonderdelen, koelkanaal-doorstroomtesten en einde-levensduurbeoordeling. Het doel is het maximaliseren van het totale schotaantal over de ontworpen levensduur van de matrijs: typisch 500.000–1.000.000 schoten voor P20 voorgehard matrijzenstaal, en 1.000.000–2.000.000 schoten voor H13 of S136 gehard roestvrij staal. In onze fabriek heeft elke matrijs een onderhoudslogboek — fysiek of digitaal — dat elk reinigingsevenement, elk gevonden defect en elke uitgevoerde reparatie vastlegt.
Onderhoud van koelkanalen wordt vaak over het hoofd gezien in routinematige PM-programma's. Kalkaanslag, biologische groei en roestafzettingen in koelkanalen isoleren de kanaalwanden en verminderen de koelvloeistofsnelheid, waardoor de warmteoverdrachtsefficiëntie in ernstige gevallen met 20–40% daalt. Wij voeren tijdens elke grote revisie een ontkalkingsspoeling en debietmeting uit bij elk inlaat-uitlaat paar. Het herstellen van de koel efficiëntie naar specificatie vermindert direct de cyclustijd en verbetert de consistentie van onderdeel tot onderdeel — twee verbeteringen die niets kosten buiten de geplande stilstand.
Koelkanaalonderhoud: De over het hoofd geziene prioriteit
We integreren ook een formele matrijsconditiebeoordeling bij elke 250.000-schot interval — halverwege tussen volledige revisies. Tijdens deze beoordeling inspecteert een gereedschapsmaker het holte-oppervlak Ra op drie referentiepunten met een oppervlakteprofilometer, meet de uitstoterpen-speling tegen de originele specificatie en controleert de scheidingslijnvlakheid met een precisie-rechtkant. Elke afwijking buiten 50% van de tolerantieband leidt tot onmiddellijke corrigerende actie in plaats van te wachten op de volgende geplande revisie. Deze mid-cycle beoordeling voorkomt dat kleine problemen uitgroeien tot dure reparaties.
Documentatie is het meest onderschatte element van elk matrijsonderhoudsprogramma. Zonder een volledig onderhoudslogboek kun je geen voorspellend schema opbouwen — je reageert altijd op defecten in plaats van ze te voorkomen. Ons logboekformaat registreert: matrijs-ID, datum, schotaantal bij reiniging, gebruikte reinigingsmethode, gevonden defecten, uitgevoerde reparaties en technicus-handtekening. Na zes maanden data ontstaan patronen die ons in staat stellen PM-intervallen te verkorten of verlengen op basis van daadwerkelijk matrijsgedrag in plaats van algemene industrierichtlijnen. Een $15 notitieboekje of een eenvoudige spreadsheet verandert reactief onderhoud in preventief onderhoud.
| Mijlpaal | Action | Key Check |
|---|---|---|
| Elke PM-reiniging (50K–100K schoten) | 5-staps reinigingssequentie | Ventdiepte, holte Ra, scheidingslijn vlakheid |
| 250.000 shots (midden cyclus) | Conditiebeoordeling + dimensionale controle | Pen-speling, oppervlakte Ra op 3 referentiepunten |
| 500.000 shots (revisie) | Volledige demontage, ultrasoon reinigen, koelspoeling | Doorstroomsnelheid per kanaal, vervanging van slijtonderdelen |
| Jaarlijks (of 1 miljoen shots) | Volledige inspectie + gereedschapslevensduurbeoordeling | Staalhardheid steekproef, holte-inzetpassing |
“Het doorspoelen van koelkanalen van spuitgietmatrijzen met ontkalkingsoplossing bij elke revisie na 500.000 shots voorkomt een verlies van 20–40% aan warmteoverdrachtsefficiëntie door kalkaanslag.”Echt
Mineraalaanslag van hard water zet lagen af op de binnenste kanaalwanden, wat werkt als thermische isolatie. Een commerciaal ontkalkingsmiddel (meestal op basis van citroenzuur of fosforzuur, gecirculeerd op 40–60°C gedurende 30–60 minuten) lost calciumcarbonaat en ijzeroxide-afzettingen op zonder de kanaalwanden te beschadigen. Spoel na met schoon water en meet de doorstroomsnelheid bij elk kanaalpaar om volledige verwijdering van verstopping te bevestigen voor remontage.
“Een schoon holteoppervlak is het enige dat telt voor de prestaties van een spuitgietmatrijs — de conditie van de koelkanalen is secundair.”Vals
Holte-oppervlakreinheid beïnvloedt oppervlakteafwerking en onderdeeluitstoting, maar een vervuild koelsysteem beïnvloedt tegelijkertijd cyclustijd, dimensionale stabiliteit en kromtrekken. In onze productie-ervaring veroorzaakt verslechterde koeling onderdeel-tot-onderdeel variatie die moeilijk te diagnosticeren is zonder thermische beeldvorming, omdat het zich manifesteert als inconsistente krimp in plaats van zichtbare oppervlaktedefecten. Koelkanaalconditie is even belangrijk als holte-oppervlakconditie — beide vereisen gepland onderhoud.
Veelgestelde vragen over spuitgietvormreiniging?
Veelgestelde vragen
Hoe vaak moet u een spuitgietmatrijs schoonmaken?
Reinig elke 50.000–100.000 schoten als basis-PM-interval voor standaard technische thermoplasten zoals ABS, PP en nylon. Hoogvulharsen (GF30, CF15), vlamvertragende kwaliteiten en PVC-gebaseerde materialen vereisen reiniging elke 25.000–50.000 schoten omdat ze agressiever residu afzetten of corrosieve gassen vrijgeven. Reinig altijd onmiddellijk na elke run waarbij brandvlekken, uitstulpingen of oppervlakteverkleuring op onderdelen verschenen, ongeacht het aantal schoten. Houd reinigingsdata en schotaantallen bij in een onderhoudslogboek om trends te identificeren en uw interval te verfijnen op basis van daadwerkelijk matrijs- en materiaalgedrag.
Wat is het veiligste oplosmiddel voor het reinigen van gepolijste spuitgietmatrijsholtes?
Isopropylalcohol (IPA) met een zuiverheid van 99% is het veiligste universele oplosmiddel voor gepolijste holteoppervlakken. Het lost de meeste thermoplastische residuen op — inclusief polyolefinewasafzettingen, styreenpolymerenopbouw en losmiddelfilms — zonder chroomplating, PVD-coatings of gepolijst gereedschapsstaal aan te tasten. Voor zwaardere koolstofafzettingen die IPA niet kan oplossen, gebruik een speciaal geformuleerde matrijsreiniger zoals Moldklenz of Slide Mold Cleaner. Aceton is effectief op niet-gepolijst staal, maar kan bepaalde coatings aantasten. Controleer altijd de compatibiliteit van het oplosmiddel met de staalkwaliteit en oppervlaktebehandeling van uw matrijs voordat u het voor het eerst gebruikt op productiegereedschap.
Kun je een spuitgietmatrijs reinigen terwijl deze nog in de pers staat?
Ja — zowel droogijsstralen als handmatige oplosmiddelreiniging kunnen in-pers worden uitgevoerd zonder de matrijs uit de machine te verwijderen. Houd de matrijs op 40–60°C (warm van de laatste productierun) voor maximale reinigingseffectiviteit en zorg ervoor dat de pers zich in volledige lockout/tagout (LOTO)-toestand bevindt om onbedoelde matrijs-sluiting tijdens het reinigen te voorkomen. In-pers reinigen elimineert arbeid voor matrijs-omwisseling, vermijdt het risico van montagefouten en is de standaardaanpak in hoogvolume faciliteiten waar het maximaliseren van pers-uptime een primair operationeel doel is. Alleen ultrasoon reinigen vereist volledige matrijsverwijdering en demontage.
Hoe verwijder je roest uit holtes van spuitgietmatrijzen?
Breng een op fosforzuur gebaseerde roestverwijderaar aan die speciaal is geformuleerd voor matrijsstaal, volgens de inwerktijd van de fabrikant — meestal 5–15 minuten, afhankelijk van de ernst van de roest. Neutraliseer met schoon water of een verdunde baking soda-oplossing (10 g/L), droog dan onmiddellijk af met gefilterde perslucht om flitsroesten te voorkomen. Breng roestwerende olie aan binnen 15 minuten na het drogen. Voor matige putvorming is mechanisch polijsten nodig, van 600 korrel tot 2000 korrel schuurpapier, vervolgens 6 µm en 1 µm diamantpasta, om het oorspronkelijke oppervlakteafwerkingsniveau Ra te herstellen. Als putten dieper zijn dan 0,1 mm, raadpleeg dan een matrijzenwerkplaats — dit niveau vereist meestal TIG-lasreparatie of EDM-hervonken.
Welk smeermiddel moet u gebruiken op ejectorpennen van spuitgietmatrijzen?
Gebruik PTFE-gebaseerde droge smeermiddelen voor cleanroom-, medische hulpmiddelen- of voedselcontactmatrijzen waar migratie van siliconen of vet op onderdeeloppervlakken onaanvaardbaar is. Voor standaard productiematrijzen is matrijsklasse lithiumvet, spaarzaam aangebracht, effectief voor ejectorpennen, geleidingspennen en lagers onder normale belasting. Siliconengebaseerd vet heeft de voorkeur voor hoge-temperatuur matrijstoepassingen (matrijstemperatuur boven 100°C) waar lithiumvet kan degraderen of overmatig kan vloeien. Veeg altijd direct na aanbrengen overtollig smeermiddel weg — overtollig smeermiddel migreert binnen de eerste paar shots naar het holteoppervlak en veroorzaakt vervuilingsdefecten op het onderdeeloppervlak.
-
spuitgieten: spuitgieten verwijst naar het productieproces dat kunststof smelt, het in een matrijsholte injecteert, het onderdeel afkoelt en de cyclus herhaalt voor stabiele volumeproductie. ↩
-
spuitgietvorm: injectiematrijs verwijst naar een injectiematrijs is het precisiegereedschap dat onderdeelgeometrie, koelgedrag, ejectie, gating, oppervlakafwerking en reproduceerbaarheid definieert. ↩
-
matrijsstaal: Matrijzenstaal verwijst naar een categorie gereedschapsstalen geselecteerd voor spuitgietmatrijsconstructie op basis van hardheid, corrosiebestendigheid en polijstbaarheid, waaronder kwaliteiten zoals P20, H13 en S136. ↩


