 콘텐츠로 건너뛰기

- Uniform wall thickness is the single most impactful DFM parameter — it controls fill, cooling, cycle time, and part strength simultaneously.
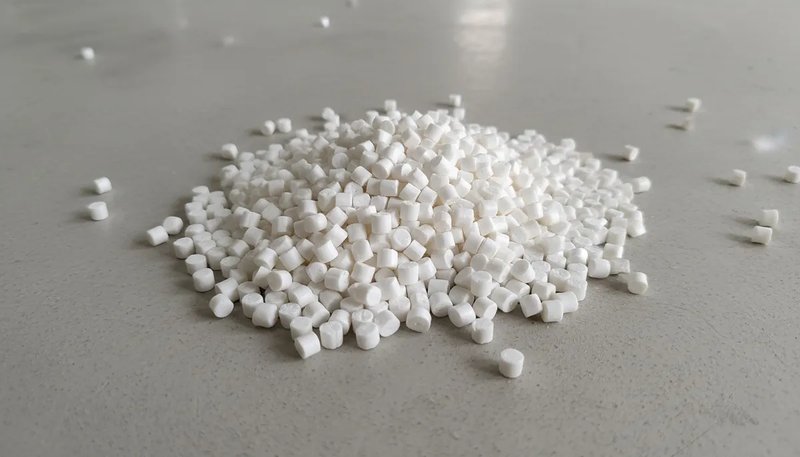
- Material-specific minimums: ABS 1.0–3.5mm, PC 1.0–4.0mm, PA6 0.8–3.0mm, PP 0.8–3.8mm, PEEK 0.4–6.5mm.
- Ribs must be 50–60% of nominal wall thickness and no taller than 3× wall to prevent sink marks and warpage.
- Every wall thickness transition requires a taper of at least 3:1 (length:thickness change) to avoid stress concentrations and knit lines.
- ZetarMold’s DFM audit shows wall thickness violations account for 40%+ of first-article failures — catching them before steel cuts saves $5,000–$25,000 per mold.
Why Does Wall Thickness Control Everything in Injection Molding?
A design engineer once brought us a PC housing with walls ranging from 0.8mm to 6.2mm in the same part. The tool ran for three weeks before we could hold a consistent cycle time. Wall thickness variation was the entire problem. When walls are uneven, thinner sections freeze first and restrict flow to thicker areas — causing short shots, sink marks, and unpredictable warpage. For the full injection molding process context, see our Injection Molding Complete Guide.
Uniform wall thickness is not a cosmetic preference. It governs fill pressure, cooling uniformity, cycle time, and structural performance. 열가소성 플라스틱1 shrink as they cool, and non-uniform cooling creates differential 수축2 — the root cause of warpage. Parts that look good in CAD can be structurally unsound and dimensionally unstable if wall thickness is not controlled from the design stage. For mold design specifications and tooling decisions, see our Injection Mold Complete Guide.
At ZetarMold, wall thickness violations account for 40%+ of first-article DFM failures in our review queue. The most common error: ribs designed at 100% of nominal wall — not the recommended 50–60% — causing sink marks on Class-A surfaces within the first 500 shots. Catching this in DFM review costs 4 hours; fixing it after T1 costs 2–4 weeks and $3,000–$8,000 in steel rework.
What Are the Wall Thickness Ranges for Common Injection Molding Materials?
Every thermoplastic has a processable wall thickness range determined by its melt viscosity, thermal conductivity, and shrinkage rate. Outside this range, you get either short shots (too thin) or excessive sink marks and cycle time (too thick). These ranges assume standard processing conditions; thin-wall applications with high injection speed and optimized tooling can push below the minimums.
| 재료 | Min (mm) | Typical (mm) | Max (mm) | 참고 |
|---|---|---|---|---|
| ABS | 1.0 | 1.5–3.0 | 3.5 | Good flow; cosmetic grades need uniform wall for sink control |
| PC | 1.0 | 2.0–3.5 | 4.0 | High viscosity; avoid sharp corners, requires generous draft |
| PA6 (Nylon) | 0.8 | 1.5–3.0 | 3.0 | Hygroscopic; dry before processing; low warpage at uniform thickness |
| PP | 0.8 | 1.5–3.5 | 3.8 | High shrinkage (1.5–2.0%); warpage-prone with non-uniform walls |
| PEEK | 0.4 | 1.0–4.5 | 6.5 | High processing temp (380°C+); excellent dimensional stability |
| PC/ABS | 1.0 | 1.5–3.0 | 3.5 | Balanced flow/strength; preferred for enclosures |
| PA66-GF30 | 1.0 | 1.5–3.5 | 4.0 | Reduced shrinkage vs unfilled; anisotropic warpage risk |
How Do You Design Ribs and Bosses Without Causing Sink Marks?
Ribs are the leading cause of sink marks on Class-A surfaces. The rule is simple but frequently violated: rib thickness must be 50–60% of nominal wall thickness. At 100% wall thickness, the rib base creates a localized thick section that takes longer to cool — pulling material from the outer surface and creating a visible depression. At 40% or less, the rib fills poorly and has insufficient structural strength.
Rib height adds a second constraint: no taller than 3× the nominal wall thickness. Taller ribs cause jetting, poor fill, and high ejection stress. For cosmetic surfaces, limit rib height to 2× wall and ensure the draft angle is at minimum 0.5° per side — 1° preferred — to prevent scoring during ejection.
Bosses follow the same 50–60% rule for outer wall thickness relative to the nominal part wall. The boss core diameter determines the screw thread size; the outer wall is what creates sink risk. Add a rib from the boss to a nearby structural wall if the boss height exceeds 2× its outer diameter — unsupported bosses crack under torque loading in assembly.
What Happens When Wall Thickness Transitions Are Too Abrupt?
Abrupt wall transitions create two problems simultaneously: flow hesitation and stress concentration. When melt hits a sudden thick section after a thin one, it can hesitate and create a weld line or cold slug. When a thin section follows a thick one, the thin section freezes first and constrains the still-cooling thick section — generating residual stress that warps the part after ejection.
The design rule is a taper of at least 3:1 — for every 1mm of thickness change, allow 3mm of taper length. For critical structural parts or optical components, use 5:1 or greater. 금형 흐름 분석3 reliably identifies abrupt transitions before steel is cut; any thickness ratio above 2:1 between adjacent wall sections should trigger a flow simulation review.
How Does Wall Thickness Affect Cycle Time and Cost?
Cycle time is dominated by cooling time, and cooling time scales with the square of wall thickness. A part with 3mm walls takes approximately 4× longer to cool than a 1.5mm wall part — not 2×. This is the most important formula in injection molding economics: doubling wall thickness quadruples cooling time, which directly multiplies unit cost at high volume.
For structural enclosures where thick walls seem necessary, evaluate rib-reinforced thin walls instead. A 1.5mm wall with properly designed ribs can match the structural performance of a 3.0mm solid wall at half the cycle time. The tooling cost increase for ribbed design is typically $2,000–$5,000; the savings at 500,000 parts/year often exceeds $80,000 annually in cycle time reduction alone.
How to Calculate Optimal Wall Thickness for Your Part
At our factory, switching from 3.0mm to 1.8mm wall thickness on a PC/ABS enclosure program reduced cycle time from 48 seconds to 31 seconds — a 35% reduction. At 400,000 parts/year on a 4-cavity tool, this saved the customer $62,000 annually in machine time, while the rib-reinforced 1.8mm wall met the same structural drop-test requirements as the original 3.0mm design.
The cost penalty of over-thick walls compounds at production volume. A 0.5mm reduction in wall thickness — from 2.5mm to 2.0mm — reduces cooling time by 36%. On a 16-cavity tool running 2 million parts per year, that 36% cycle time reduction can save $40,000–$80,000 annually in machine time. The tooling modification cost for a wall thickness adjustment is typically $500–$2,000 — one of the highest ROI changes available before T1.
Gate location relative to thick sections is the second critical parameter after wall thickness uniformity. Placing the gate at the thickest section ensures fill pressure reaches thin areas before the thick section freezes. Gating into a thin section causes hesitation marks and incomplete fill in thick zones. Mold flow analysis verifies gate position for any design where wall ratio exceeds 1.5:1 between gate-proximal and gate-distal sections.
“Uniform wall thickness is the highest-ROI DFM change available before tooling authorization.”True
Wall thickness uniformity affects fill, cooling, shrinkage, cycle time, and structural performance simultaneously. A DFM audit that enforces uniform wall — typically a 4-hour engineering review — prevents the most common causes of first-article failure. At our factory, wall thickness corrections caught in DFM review save an average of 2.3 revision rounds per mold, worth $6,000–$20,000 in steel rework avoidance.
“Thicker walls always produce stronger injection molded parts.”False
Beyond material-specific optimal thickness ranges, additional wall thickness adds weight and cycle time without proportional strength gain. Structural efficiency peaks at 1.5–3.0mm for most engineering thermoplastics. Above this range, the dominant failure modes shift from material strength to residual stress, warpage, and sink marks — all of which reduce effective load-bearing performance. Ribbed thin-wall designs consistently outperform solid thick-wall equivalents in both strength-to-weight ratio and dimensional stability.
Wall thickness decisions cascade through the entire manufacturing process. A part designed with 3.0mm walls where 1.5mm would suffice carries 4× the cooling time penalty — and that penalty compounds across every production run. Mold flow analysis quantifies these tradeoffs before tooling authorization, giving engineering teams the data to make informed thickness decisions rather than conservative overestimates. Accounting for these dynamics early — in the concept design phase, not after T0 — is the difference between a program that runs on schedule and one that spends months in revision cycles chasing dimensional stability.
“Mold flow analysis can predict wall thickness-related defects before T1 samples are cut.”True
Modern mold flow simulation accurately predicts fill pressure, weld line location, sink mark depth, and warpage magnitude caused by wall thickness variation. Mold flow analysis catches 80%+ of thickness-related defects before steel is cut, at a cost of $500–$2,000 per simulation run. For production programs above 100,000 parts/year, mold flow analysis delivers positive ROI on every program by eliminating at least one T1 revision cycle.
“Rib thickness equal to nominal wall thickness is acceptable for non-cosmetic surfaces.”False
과도하게 두꺼운 리브로 인한 싱크 마크는 표면 외관에만 국한되지 않습니다 — 이는 국부적인 수축 차이를 나타내며 내부 응력을 생성하고 피로 수명을 감소시킵니다. 비외관 표면에서도, 벽 두께의 100%에 달하는 리브는 조립 적합성에 영향을 미치는 치수 변동을 유발합니다. 50–60% 리브 두께 규칙은 외관 분류에 관계없이 적용됩니다; 유일한 예외는 FEA 해석으로 확인된 하중 지지 구조용 리브입니다.
Frequently Asked Questions About Injection Mold Wall Thickness

사출 성형의 최소 벽 두께는 얼마입니까?
최소 벽 두께는 재료와 부품 형상에 따라 다릅니다. 표준 ABS 및 PC의 경우, 일반 금형을 사용할 때 실용적인 최소값은 1.0mm입니다. 나일론(PA6/PA66) 및 PP의 경우, 최적화된 게이트 설계와 고속 사출로 0.8mm가 가능합니다. PEEK 및 LCP는 특수 박벽 금형에서 0.4mm까지 도달할 수 있습니다. 최소 두께 미만에서는 캐비티가 완전히 충전되기 전에 용융물이 고화되어 단충 현상이 발생합니다. 우리 공장에서는 금형 승인 전에 1.2mm 미만의 모든 벽 두께를 몰드 흐름 해석으로 검증하여 95% 이상의 충전 신뢰도를 확인합니다.
벽 두께는 수축과 뒤틀림에 어떤 영향을 미치나요?
불균일한 벽 두께는 차등 수축을 유발합니다 — 두꺼운 단면은 얇은 단면보다 더 느리게 냉각되고 더 많이 수축합니다. 이 차등 수축은 이젝션 후 부품을 뒤틀리게 하는 내부 응력을 생성합니다. PP 및 PA6과 같은 반결정성 재료의 경우, 두꺼운 단면에서 수축률이 1.5–2.5%에 달할 수 있는 반면, 얇은 단면에서는 0.5–1.0%로 — 3배의 차이로 인해 혼합된 벽 두께를 가진 부품에서 상당한 뒤틀림이 발생합니다. 해결책은 10–15% 변동 범위 내의 균일한 벽 두께와 균형 잡힌 냉각을 확인하기 위한 몰드 흐름 해석 보완입니다. 뒤틀림 시뮬레이션은 몰드 제작 전에 처짐 크기를 정확하게 예측합니다.
벽 두께가 다양한 부품을 사출 성형할 수 있습니까?
예, 하지만 변화는 점진적인 전환을 통해 관리되어야 합니다. 설계 규칙은 3:1 테이퍼 비율입니다 — 두께 변화 1mm당 3mm의 테이퍼 길이. 급격한 전환은 흐름 정체, 용접선 및 잔류 응력을 생성합니다. 중요한 광학 또는 구조 부품의 경우 5:1 이상을 사용하십시오. 단일 부품 내에서 벽 두께가 50% 이상 변동할 때는 몰드 흐름 해석이 필수적입니다. 우리 공장에서는 벽 두께 비율이 2:1 이상인 모든 설계를 DFM 승인 전 필수 흐름 시뮬레이션 대상으로 지정합니다.
사출 성형 부품의 이상적인 리브 대 벽 두께 비율은 얼마입니까?
표준 비율은 기준 벽 두께의 50–60%입니다. 기준 벽 두께 2.0mm의 경우, 리브의 기부 두께는 1.0–1.2mm여야 합니다. 70% 이상이 되면, 초기 100–500 샷 내에서 반대 표면에 싱크 마크가 보이기 시작합니다. 40% 이하이면, 리브는 충전이 불량하고 구조적 하중을 충분히 지지하지 못합니다. 리브 높이는 기준 벽 두께의 3배를 초과해서는 안 되며, 드래프트 각도는 측면당 최소 0.5° 이상이어야 합니다. 이 규칙은 재료에 관계없이 적용됩니다 — ABS, PC, 나일론, PP 모두 수축에 의한 싱크 마크 형성의 물리학은 동일합니다.
벽 두께가 사출 성형 비용에 얼마나 영향을 미치나요?
벽 두께는 사이클 시간을 통해 비용에 직접적이고 상당한 영향을 미칩니다. 냉각 시간 — 사출 성형 사이클 시간의 지배적 구성 요소 — 은 벽 두께의 제곱에 비례하여 증가합니다. 3.0mm 벽 두께의 부품은 1.5mm의 동일 부품보다 약 4배 더 오래 냉각되며, 이는 생산량에서 단위 비용을 직접적으로 배가시킵니다. 연간 500,000개 부품 생산 시, 이 차이는 연간 제조 비용에서 $60,000–$120,000을 나타낼 수 있습니다. 또한, 1.0mm 미만 또는 4.0mm 이상의 벽 두께는 특수 공구 및 가공이 필요하여 선행 공구 비용에 $5,000–$20,000을 추가합니다.
벽 두께는 냉각 시간과 사이클 비용에 어떤 영향을 미치나요?
냉각 시간은 벽 두께의 제곱에 비례하여 증가합니다 — 벽 두께를 두 배로 하면 냉각 시간은 대략 네 배가 되어 사이클 시간과 부품당 비용을 직접적으로 증가시킵니다. 따라서 균일한 벽 두께 유지는 구조적 요구사항이자 생산 효율성 요건입니다. 두꺼운 단면은 싱크 마크와 뒤틀림의 위험을 초래할 뿐만 아니라 성형 사이클을 크게 연장하여 교대당 프레스 생산량을 감소시킵니다.
- Rosato, D.V. & Rosato, M.G. Injection Molding Handbook, 3판. Springer, 2000 — 열가소성 플라스틱의 벽 두께 설계 원칙.
- Harper, C.A. (편집) 플라스틱 기술 핸드북. McGraw-Hill, 2006 — 재료별 가공 범위 및 수축 데이터.
- Bryce, D.M. 플라스틱 사출 성형: 몰드 설계 및 제작 기본 원리. SME, 1998 — 리브와 보스 설계 규칙, 테이퍼 비율.
-
thermoplastics: 열가소성 플라스틱은 가열하면 녹고 냉각하면 고화되어 반복 가공이 가능한 고분자입니다. 사출 성형의 주된 재료군으로, ABS, PC, PA6, PP 및 수백 가지 엔지니어링 등급을 포함합니다. ↩
-
shrinkage: 수축은 성형 부품이 용융 온도에서 실온으로 냉각되면서 겪는 체적 감소를 의미합니다. 불균일한 벽 두께로 인한 불균일한 수축은 뒤틀림과 싱크 마크의 주요 원인입니다. ↩
-
mold flow analysis: 몰드 흐름 해석은 강철 절삭 전에 몰드 캐비티 내부의 플라스틱 용융 흐름, 냉각 및 수축을 모델링하는 컴퓨터 시뮬레이션입니다. 이는 벽 두께 변동으로 인한 충전 불균형, 용접선 및 열적 핫스팟을 식별합니다. ↩


