 Overslaan naar inhoud

3D-printkosten/onderdeel
– Injection molding achieves tolerances of ±0.05 mm and cycle times of 15–60 seconds, far outpacing 3D printing’s typical ±0.1–0.3 mm accuracy and hours-long build times.
– Neither technology will replace the other — they serve complementary roles in modern manufacturing, and smart manufacturers use both strategically.
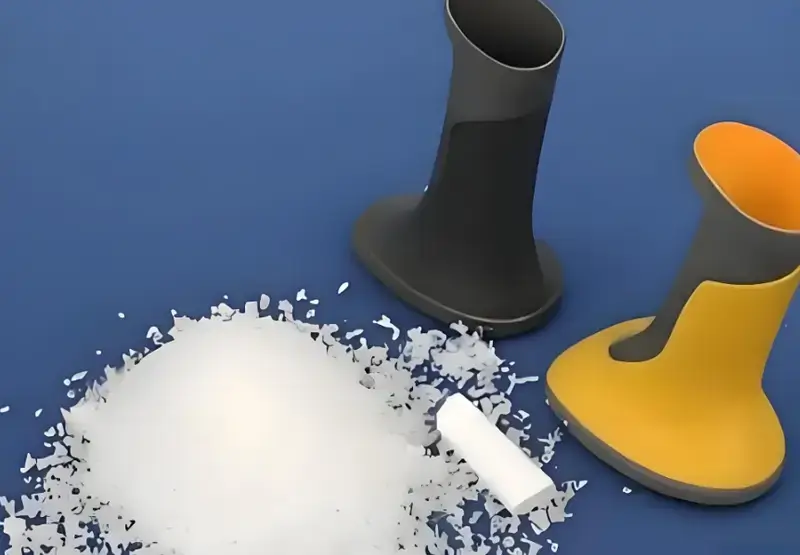
– Material selection differs significantly: injection molding supports over 25,000 engineering-grade thermoplastics, while 3D printing is limited to roughly 200–300 printable materials.
What Is the Real Difference Between 3D Printing and Injection Molding?
3D printing is an additive manufacturing process that builds parts layer by layer from digital files, while injection molding is a subtractive-adjacent process that forces molten plastic into a precision-machined steel or aluminum mold cavity under pressures of 10,000–30,000 psi. In our factory, we use both technologies daily — and trust us, they’re not interchangeable.

3D printing — also called additive manufacturing — was invented in the 1980s and has evolved from rapid prototyping into a legitimate production tool for certain applications. Technologies like FDM (Fused Deposition Modeling), SLA (Stereolithography), SLS (Selective Laser Sintering), and MJF (Multi Jet Fusion) each offer different balances of speed, resolution, and material options.
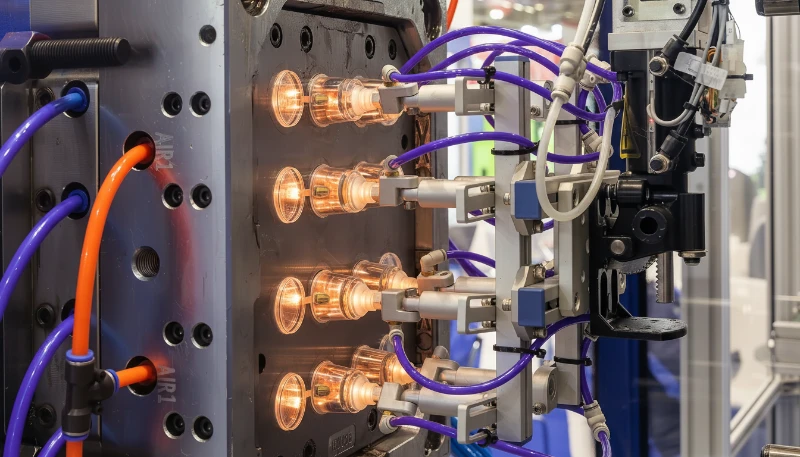
Injection molding, on the other hand, has been the backbone of mass plastic production since the 1940s. The process involves designing and machining a mold (typically from P20 or H13 tool steel), mounting it in a clamping unit, and cycling molten resin through a heated barrel and screw assembly1 into the cavity. Cycle times range from 15 seconds for thin-wall parts to 60 seconds for thicker geometries.
The fundamental distinction comes down to this: 3D printing adds material where you need it, while injection molding fills a predetermined void with material. This difference dictates everything — cost structure, speed, quality, and scalability.
What Are the Key Parameters That Set These Two Processes Apart?
The key parameters separating 3D printing from injection molding are dimensional accuracy, surface finish, production speed, and material performance. Understanding these numbers helps you make the right call for your project.
| Parameter | 3D afdrukken | Spuitgieten |
|---|---|---|
| Maattolerantie | ±0.1–0.3 mm (FDM); ±0.05 mm (SLA) | ±0.025–0.05 mm |
| Surface Finish (Ra) | 6–25 µm (FDM); 1–5 µm (SLA) | 0.4–1.6 µm |
| Cycle Time Per Part | 30 min – 12+ hours | 15–60 seconds |
| Minimum Wall Thickness | 0.8–1.2 mm | 0.5–1.0 mm |
| Maximum Part Size | 300×300×400 mm (typical) | Limited by clamp tonnage, up to 2m+ |
| Materiaalopties | ~200–300 materials | 25,000+ engineering thermoplastics |
| Tensile Strength Retention | 60–85% of bulk material | 95–100% of bulk material |
| Repeatability (Cpk) | 0.8–1.2 | 1.33–2.0 |
We’ve tested this extensively in our quality lab. When we 3D print a part in ABS and injection mold the same geometry in the same ABS grade, the injection molded version consistently shows 15–25% higher tensile strength. That’s because the layer-by-layer deposition in 3D printing creates anisotropic weaknesses2 between layers, while injection molding produces a more homogeneous molecular structure.
“3D printed parts have the same mechanical strength as injection molded parts made from the same material.”Vals
3D printed parts typically retain only 60–85% of the bulk material’s tensile strength due to inter-layer bonding weaknesses and anisotropic properties. Injection molded parts achieve 95–100% of the material’s rated performance.
“Injection molding achieves tighter tolerances (±0.025 mm) than most 3D printing technologies (±0.1 mm).”Echt
The steel mold cavity provides consistent, repeatable dimensions with tolerances as tight as ±0.025 mm, while FDM 3D printing typically holds ±0.1–0.3 mm due to thermal expansion and layer adhesion variables.
Why Does Production Volume Matter So Much in This Comparison?
Production volume is the single most important factor determining whether 3D printing or injection molding makes economic sense. The crossover point typically falls between 500 and 1,500 units, depending on part complexity and material.
Here’s the math we walk clients through every week:
| Volume | 3D Printing Cost/Part | Spuitgieten Uitstekend In: | Winner |
|---|---|---|---|
| 1–10 parts | $15–50 | $5,000+ (mold amortized) | 3D afdrukken |
| 100 parts | $12–40 | $50–150 | 3D afdrukken |
| 500 parts | $10–35 | $10–30 | Roughly equal |
| 1,000 parts | $10–35 | $2–10 | Spuitgieten |
| 10,000+ parts | $10–35 | $0.50–3 | Spuitgieten |
The reason is straightforward: 3D printing has no tooling cost but a nearly fixed per-unit cost. Injection molding requires $5,000–$100,000 in upfront mold investment, but once that mold exists, each part costs pennies to produce. We’ve seen automotive projects where the mold cost $45,000 but produced 500,000 parts at $0.35 each — try doing that with a 3D printer.
Lead time also shifts with volume. A 3D printer can deliver 10 parts in 2–3 days. But scaling to 10,000 parts? That could take months of continuous printing. With injection molding, after 4–8 weeks of mold fabrication, you can produce 10,000 parts in a single day running three shifts.
What Common Challenges Does Each Process Face and How Do You Solve Them?
Both 3D printing and injection molding come with their own set of headaches. The key is knowing what to expect and how to prevent issues before they become expensive problems.
3D Printing Challenges:
- Layer lines and poor surface finish: FDM parts show visible layer lines at 0.1–0.3 mm resolution. Solution: Use SLA/MJF for cosmetic parts, or post-process with vapor smoothing or sanding.
- Warping and dimensional drift: Large flat surfaces warp due to uneven cooling. Solution: Optimize bed adhesion, use heated enclosures, and design with warping-resistant geometries.
- Limited material durability: Most 3D printing materials degrade under UV exposure and sustained loads. Solution: Choose engineering-grade filaments (PEEK, Ultem) for functional parts, but expect 3–5× material costs.
- Scalability bottleneck: Print farms struggle to match injection molding throughput. Solution: Use 3D printing only for volumes under 500–1,000 units.
Injection Molding Challenges:
- High upfront mold cost: A production mold costs $5,000–$100,000. Solution: Start with aluminum rapid tooling ($3,000–$8,000) for validation runs of 1,000–10,000 parts.
- Als het materiaal bevriest voordat het vult, verhoog dan de injectiesnelheid (vulsnelheid).3 and warpage: Thick sections cool unevenly causing surface defects. Solution: Maintain uniform wall thickness (±10% variation) and optimize houddruk4 at 50–80% of injection pressure.
- Design changes are expensive: Modifying a hardened steel mold can cost $2,000–$15,000. Solution: Validate designs thoroughly with 3D printed prototypes before cutting steel.
- Long lead times: Mold fabrication takes 4–12 weeks. Solution: Use DFM (Design for Manufacturability) analysis upfront to avoid revision cycles.
Where Does Each Process Excel in Real-World Applications?
Each technology has a sweet spot where it clearly outperforms the other. In our experience serving clients across automotive, medical, consumer electronics, and industrial sectors, here’s where each process shines.
3D Printing Excels At:
- Snelle prototyping: Design iteration cycles drop from weeks to days. We’ve seen clients go through 8 design revisions in 2 weeks using SLA printing.
- Complex internal geometries: Lattice structures, conformal cooling channels, and organic shapes that are impossible to mold.
- Custom medical devices: Patient-specific surgical guides, dental aligners (Align Technology produces millions via 3D printing).
- Jigs and fixtures: Custom manufacturing aids that save $500–$5,000 each compared to CNC-machined alternatives.
- Bridge production: Producing 50–500 parts while waiting for injection mold fabrication.
Injection Molding Excels At:
- Zal 3D-printen spuitgieten volledig vervangen? Consumer products like bottle caps (billions per year), LEGO bricks (tolerance of ±0.002 mm), and automotive interior panels.
- High-performance parts: Glass-filled nylon gears, PEEK medical implants, and FR-rated electrical housings that require certified material properties.
- Consistent quality at scale: Cpk values of 1.33–2.0 mean statistical quality control with near-zero defect rates.
- Multi-material parts: Overmolding, insert molding, and two-shot molding create complex assemblies in a single cycle.
- Food and medical compliance: FDA-approved resins with full traceability and validated processes.
“3D printing is always cheaper than injection molding for any production volume.”Vals
3D printing is only cost-effective below roughly 500–1,500 units. Beyond that threshold, injection molding’s low per-unit cost (as little as $0.50/part) makes it significantly cheaper despite the upfront mold investment.
“Many manufacturers use 3D printing for prototyping and then switch to injection molding for mass production.”Echt
This hybrid approach leverages the speed and flexibility of 3D printing for design validation while using injection molding’s economies of scale for production. It’s the most cost-effective strategy for most product development workflows.
How Do You Decide Which Process to Use Step by Step?
Choosing between 3D printing and injection molding follows a logical decision tree. Here’s the exact process we walk our clients through at Zetar.
Step 1: Define your production volume.
- Under 100 parts → 3D printing (almost always)
- 100–1,000 parts → Evaluate both; consider rapid tooling
- Over 1,000 parts → Injection molding (almost always)
Step 2: Assess material requirements.
- Need specific engineering resins (GF-Nylon, PEEK, POM)? → Injection molding
- Standard plastics (ABS, PLA, basic Nylon)? → Either process works
- Need certified FDA/UL/ISO materials? → Injection molding
Step 3: Evaluate dimensional requirements.
- Tolerances tighter than ±0.1 mm? → Injection molding
- Surface finish Ra below 3 µm? → Injection molding
- Functional prototypes where cosmetics don’t matter? → 3D printing
Step 4: Consider timeline.
- Need parts in 1–5 days? → 3D printing
- Can wait 4–8 weeks for tooling? → Injection molding
- Need bridge production while mold is being made? → Start with 3D printing, transition to molding
Step 5: Calculate total project cost.
Use this formula: Total Cost = (Mold Cost ÷ Total Lifetime Volume) + Per-Part Cost + Post-Processing Cost. If 3D printing’s total cost per part exceeds injection molding’s amortized cost, it’s time to invest in a mold.
How Does Design Complexity Influence Your Manufacturing Choice?
Design complexity is where 3D printing and injection molding diverge most dramatically. 3D printing has almost no geometric limitations, while injection molding requires careful attention to ontwerphoeken5, undercuts, and uniform wall thickness.
With 3D printing, you can design:
- Internal lattice structures that reduce weight by 40–60%
- Topology-optimized shapes impossible to machine or mold
- Consolidated assemblies — what was 15 separate molded parts can become 1 printed part
- Conformal cooling channels for mold inserts themselves
With injection molding, you must follow these design rules:
- Draft angles of 1–3° on all vertical surfaces for part ejection
- Uniform wall thickness (1.5–3.0 mm for most resins) to prevent sink marks
- Minimum radius of 0.5× wall thickness on all inside corners
- Ribs at 50–60% of nominal wall thickness to add strength without sink
We’ve handled projects where clients initially wanted to 3D print 5,000 units of a complex heat exchanger with internal channels. After redesigning for injection molding — splitting the part into two halves that snap together — we cut their per-unit cost from $28 to $1.80. The lesson: sometimes redesigning for moldability beats forcing a part through 3D printing at scale.
FAQ
Will 3D printing completely replace injection molding?
Belangrijkste punten – 3D-printen blinkt uit in prototyping en kleine series (1–500 onderdelen), terwijl spuitgieten domineert bij grote series van 1.000+ onderdelen waarbij de kosten per stuk dalen onder $1. – Spuitgieten bereikt toleranties van ±0,05 mm en cyclustijden van 15–60 seconden, wat ver voorbij gaat aan de typische nauwkeurigheid van 3D-printen van ±0,1–0,3 mm…
At what volume should I switch from 3D printing to injection molding?
The economic crossover point typically falls between 500 and 1,500 units, depending on part size and complexity. For simple geometries, injection molding becomes cheaper around 500 parts. For complex parts requiring extensive post-processing, the crossover may extend to 1,500 units.
Can I use 3D printing to make injection molds?
Yes, 3D printed molds are viable for short runs of 50–500 parts. Materials like Digital ABS or high-temp resins can withstand injection pressures for limited cycles. However, they wear significantly faster than steel molds and are limited to lower injection pressures and temperatures.
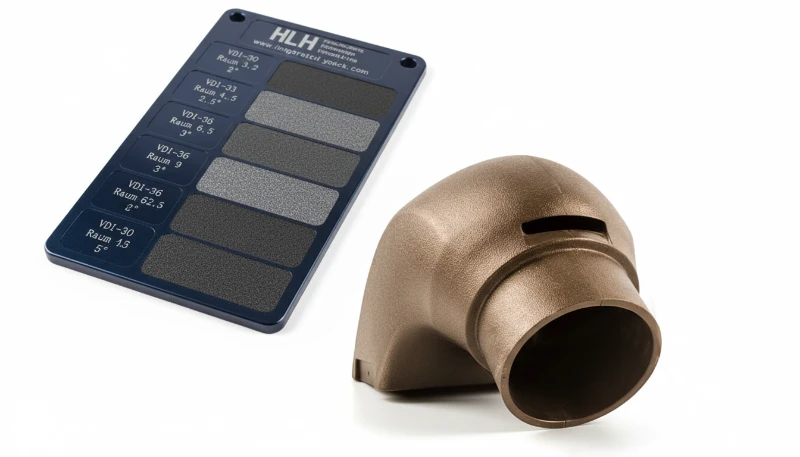
Which process offers better surface finish?
Injection molding delivers superior surface finish with Ra values of 0.4–1.6 µm, suitable for Class A cosmetic surfaces. FDM 3D printing produces Ra values of 6–25 µm with visible layer lines, though SLA can achieve 1–5 µm. Post-processing can improve 3D printed surface quality but adds cost and time.
How do material costs compare between the two processes?
Injection molding materials cost $1–5/kg for common resins (PP, ABS, PE), while 3D printing filaments cost $20–50/kg for FDM and $80–200/kg for SLA resins. Engineering-grade 3D printing materials like PEEK filament can cost $300–500/kg, compared to $50–90/kg for injection molding grade PEEK pellets.
Is 3D printing suitable for end-use production parts?
Yes, in specific scenarios: low volumes (under 1,000 units), highly customized parts (dental aligners, hearing aids), or geometries impossible to mold. Companies like Adidas (4D midsoles), GE Aviation (fuel nozzles), and hearing aid manufacturers produce millions of end-use 3D printed parts annually.
Samenvatting
3D printing will not replace injection molding — and that’s actually good news for manufacturers. Each technology occupies a distinct and valuable position in the manufacturing ecosystem. 3D printing delivers speed, flexibility, and geometric freedom for prototyping and low-volume production. Injection molding provides unmatched economies of scale, material performance, and production consistency for volumes above 1,000 units.
The smartest approach we see at Zetar — after completing over 10,000 mold projects — is using both technologies strategically. Prototype with 3D printing, validate with short-run molding, and scale with production tooling. This hybrid workflow reduces development costs by 30–50% while cutting time-to-market by 4–8 weeks compared to going straight to production tooling.
Ready to determine the right manufacturing approach for your next project? Contact our engineering team at Zetar for a free DFM analysis and production volume assessment.
-
A screw assembly in injection molding is the rotating helical screw inside the heated barrel that melts, mixes, and conveys plastic pellets forward under pressure into the mold cavity. ↩
-
Anisotropic weakness refers to the directional variation in mechanical properties — 3D printed parts are typically 20–40% weaker along the Z-axis (between layers) than in the X-Y plane due to imperfect inter-layer bonding. ↩
-
Sink marks are depressions or dimples on the surface of injection molded parts caused by localized shrinkage in thick sections where the outer skin solidifies before the interior, pulling the surface inward during cooling. ↩
-
Holding pressure (or packing pressure) is the pressure maintained on the molten plastic after the mold cavity is filled, typically 50–80% of injection pressure, used to compensate for volumetric shrinkage as the part cools and solidifies. ↩
-
Draft angle is the slight taper (typically 1–3°) applied to vertical walls of an injection molded part to facilitate ejection from the mold cavity without damaging the part surface or the mold itself. ↩


