 콘텐츠로 건너뛰기

You just finished your first 3D-printed prototype. It looks right on the bench, but you already know plastic prints won’t survive real use. Now you need injection-molded parts — hundreds of thousands of them — and someone just suggested China. The question isn’t whether China can do it. It’s whether you can navigate the gap between a working prototype and stable, repeatable mass production without wasting six months and $50,000 on avoidable mistakes.
This article walks through the full prototype-to-production path as it actually works inside a Chinese injection molding factory — not the idealized version, the real one with DFM revisions, steel choices that matter, and timelines you can plan around.
- Prototype molds (soft tooling) handle 1,000–10,000 shots; production molds handle 1M+.
- DFM review before tooling cuts modification costs by up to 60%.
- Typical prototype-to-production timeline: 8–16 weeks.
- China offers 30–50% cost savings without sacrificing ISO-grade quality.
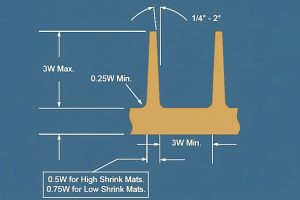
- Gate location and wall thickness decisions during prototyping lock in your production quality.
What Is the Prototype-to-Production Process in Injection Molding?
The prototype-to-production process in injection molding is defined by the function, constraints, and tradeoffs explained in this section. The prototype-to-production process is a three-phase manufacturing workflow: design validation through rapid prototyping, bridge tooling for short-run testing, then full production tooling for volume manufacturing. Each phase narrows your risk and locks in decisions that are expensive to reverse later.
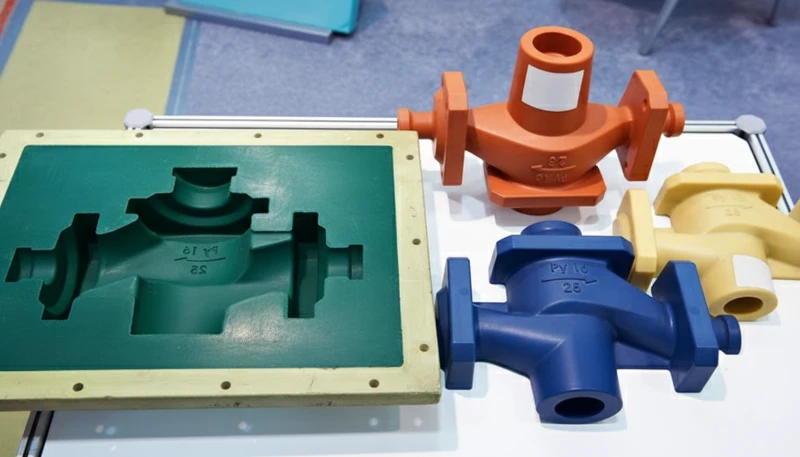
Phase one is about answering one question: does this part work? You’re testing fit, function, and basic material performance. 3D printing or CNC machining works here because you need speed, not precision or scale. But the moment you need 500+ parts in the actual production material, you’ve outgrown prototyping methods.
Phase two — bridge tooling — is where most engineers underestimate the complexity. A soft mold (usually aluminum or low-grade steel) gives you real injection-molded parts in the correct material, but it won’t last. You get 1,000 to maybe 10,000 shots before wear affects dimensions. That’s enough for market testing, regulatory submissions, and initial assembly trials.
Phase three is production tooling. This is where steel grade, cavity count, gate design, and cooling layout become permanent decisions. A well-designed production mold in P20 or H13 steel runs a million cycles or more with consistent part quality. Getting here without surprises is what separates a smooth launch from a costly one.
How Does Prototyping Differ from Production Molding?
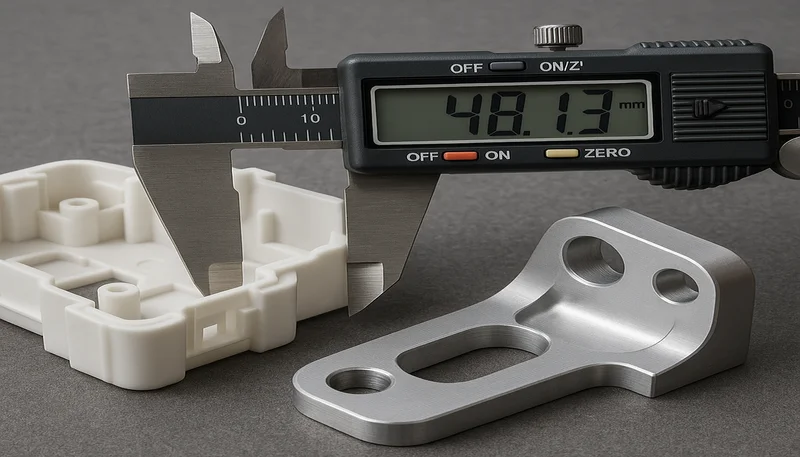
The difference between prototype molding and production molding is mold steel, cycle consistency, and per-part cost at volume. A prototype mold uses aluminum or mild steel, costs $1,500–$8,000, and delivers parts with ±0.1 mm tolerance. A production mold uses hardened tool steel (P20, H13, S136), costs $15,000–$100,000+, and holds ±0.02 mm tolerance across hundreds of thousands of cycles.
| 매개변수 | Prototype Mold | Production Mold |
|---|---|---|
| 금형 강철 | Aluminum / 5052 | P20 / H13 / S136 |
| 툴링 비용 | $1,500–$8,000 | $15,000–$100,000+ |
| Shot Life | 1,000–10,000 | 500,000–1,000,000+ |
| Tolerance | ±0.1 mm | ±0.02 mm |
| 리드 타임 | 7–15 days | 30–60 days |
| Cavity Count | Single | Multi-cavity possible |
| 표면 마감 | Limited options | Full range (SPI A-1 to D-3) |
The mistake engineers make is treating the prototype mold as a “draft” of the production mold. In reality, the two serve different purposes. Your prototype mold validates geometry and material flow. Your production mold optimizes for cycle time, longevity, and part-to-part consistency. The design intent is different, even when the part geometry looks identical.
One practical note: if your part has tight tolerances on critical features (snap-fits, bearing bores, sealing surfaces), build those features into the prototype mold from the start. Testing fit and function with oversimplified geometry and then redesigning for production is how projects lose three weeks.
Another difference that catches people off guard: cycle time. A prototype mold often runs at sub-optimal cooling because aluminum dissipates heat differently than hardened steel. What takes 30 seconds on a production mold might take 45 seconds on a prototype tool. This doesn’t matter for 500 parts, but it matters if you try to run 10,000 parts on soft tooling — your unit economics shift significantly.
“A prototype mold (soft tooling) typically lasts 1,000–10,000 shots before dimensional wear becomes measurable.”True
Aluminum and mild steel molds deform under repeated injection pressure and heat cycling. After approximately 10,000 cycles, cavity surfaces begin showing erosion and dimensional drift exceeding ±0.05 mm, making them unsuitable for tight-tolerance production parts.
“Production molds and prototype molds use the same steel grade and only differ in cavity count.”False
Production molds use hardened tool steels like P20 (pre-hardened to 28–32 HRC) or H13 (heat-treated to 48–52 HRC), while prototype molds typically use aluminum 6061-T6 or mild steel 1045. The steel grade directly determines mold life, surface finish capability, and dimensional stability over time.
Why Do Engineers Choose China for Injection Molding Production?
China is a preferred production base because it combines 30–50% lower tooling costs with mature ISO-certified supply chains. The cost advantage comes from integrated supply chains (steel, machining, polishing all under one roof) and higher machine utilization rates, not from cutting corners on quality.
A production mold that costs $45,000 in the US typically runs $25,000–$30,000 at a qualified Chinese facility. For multi-cavity production tools or family molds, the savings compound. When you’re running 500,000 parts per year at $0.08 less per part, the math speaks for itself.
Cost comparison is straightforward. But there’s a nuance most cost analyses miss: the total cost of ownership includes communication overhead, revision cycles, and shipping logistics. A supplier with in-house English-speaking engineers reduces communication friction to near zero. A supplier without that capability generates hidden costs in misunderstood specifications, delayed feedback loops, and rework.
The real advantage isn’t just cost — it’s vertical integration. Factories with in-house 사출 금형 manufacturing capability handle DFM review, mold design, tool building, sampling, and volume production under one roof. That eliminates the back-and-forth between a US design shop and an overseas toolmaker that adds weeks to every project.
Communication is the variable most engineers worry about. It’s a valid concern. The difference between a smooth project and a frustrating one often comes down to whether your supplier has English-speaking project managers who understand engineering intent, not just order details. A team that can push back on a bad gate location during DFM review is worth more than any unit price discount.
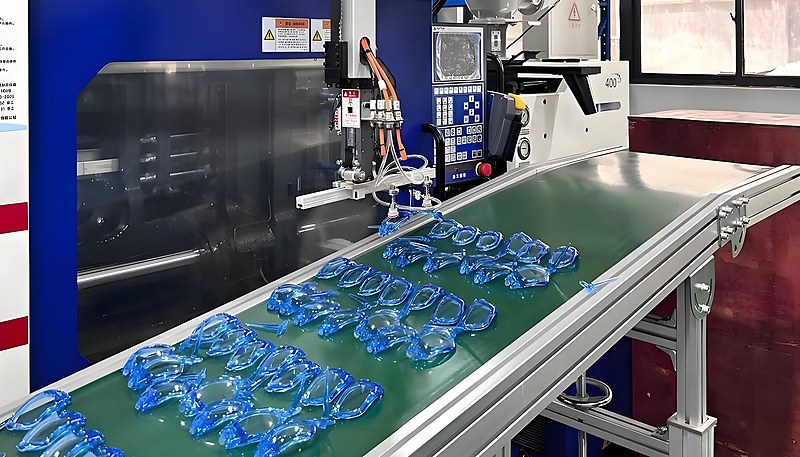
우리의 injection molding supplier sourcing guide makes lead-time planning easier. Chinese molders with 40+ injection molding machines can run tool building and production sampling in parallel, compressing the overall timeline. When your supplier has dedicated CNC, EDM, and wire-cut equipment for mold building, you’re not waiting in a queue behind other customers’ production jobs. The mold shop runs on its own schedule.
Material selection flexibility matters too. Chinese molders working with 400+ materials can source engineering-grade resins — glass-filled nylon, medical-grade polycarbonate, PEEK — domestically, often at prices 15–25% below Western distributors. For projects requiring material certification (UL94 flame ratings, FDA-compliant grades), verify that your supplier sources from authorized distributors and provides material certification with lot traceability for every production batch.
How Do You Transition from Prototype to Mass Production?
The transition from prototype to mass production is a five-step workflow. Those steps are DFM review, tooling design approval, T1 sampling, process optimization, and PPAP1 sign-off. Skipping any step saves time upfront but costs it back in production defects.
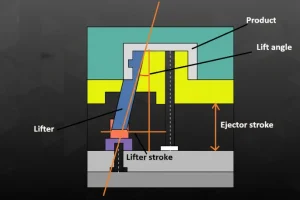
Step 1: DFM review. Before any steel is cut, your supplier should run a complete design-for-manufacturability analysis. This is where you catch undercuts that need side-actions, wall thickness variations that will cause sink marks, and gate locations that affect weld-line positioning. A thorough DFM review takes 2–3 days and prevents 80% of tool modifications.
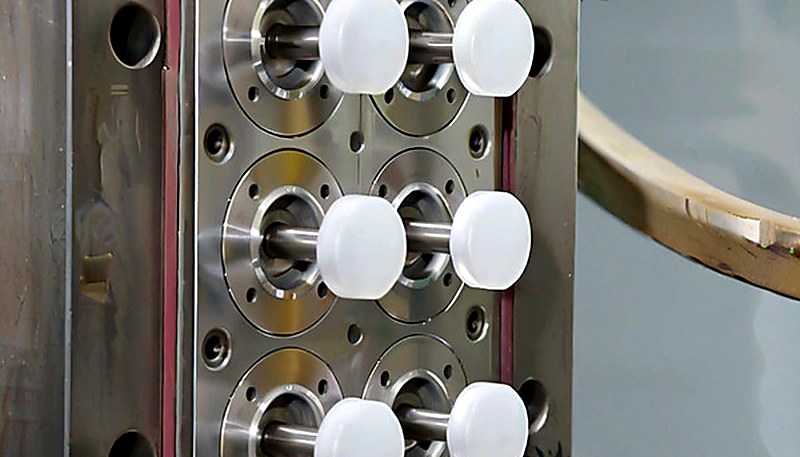
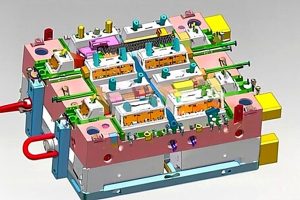
Step 2: Tooling design approval. The mold design (2D layout + 3D model) should be reviewed and approved in writing before machining starts. Check cavity layout, cooling channel routing, ejection method, and gate type. Changes after this point mean re-machining, which means cost and delay.
Step 3: T1 sampling. First-off samples from the completed mold reveal what simulation predicted and what it didn’t — actual fill patterns, real shrinkage values, weld line visibility. Expect 1–3 rounds of sampling with minor adjustments before sign-off.
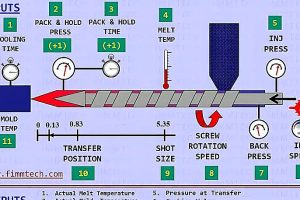
Step 4: Process optimization. Lock in injection parameters (temperature profile, pressure curve, hold time, cooling time) using mold flow analysis data and actual trial results. Document everything. These parameters become your production standard.
Step 5: PPAP or equivalent sign-off. For regulated industries (medical, automotive), you need documented first article inspection2 reports, dimensional data, and material certifications. Even without regulatory requirements, a formal sign-off with golden samples prevents scope disputes later.
What Timeline Should You Expect from Prototype to Production?
In our production programs, the typical prototype-to-production timeline is 8–16 weeks. DFM runs in week 1–2, tooling in week 3–8, sampling in week 7–10, and process validation in week 10–14. Rush timelines of 4–6 weeks are possible but trade testing cycles for speed.
| Phase | Duration | Key Deliverable |
|---|---|---|
| DFM Review | 3–5 days | Approved design report |
| 금형 설계 | 5–7 days | 2D/3D mold drawings |
| Tool Building | 25–35 days | Completed mold |
| T1 샘플링 | 5–10 days | First article samples |
| Revisions (1–2 rounds) | 5–10 days | Approved samples |
| 프로세스 유효성 검사 | 3–5 days | Locked process parameters |
| Total | 8–12 weeks | Production-ready |
Where do delays happen? Mold steel procurement (add 5–7 days if using imported steel), design changes after tooling starts (each change = 3–10 days), and shipping sample parts for approval (use express courier, budget 3–5 days international). The biggest single delay source is late design changes — every week you wait to finalize geometry adds a week to delivery.
For engineers working with Chinese suppliers, time zone differences can actually help. Your DFM feedback sent at 5 PM EST gets processed during their morning shift and is ready when you start your next day. The key is structuring your review cycles to minimize round-trips. Give consolidated feedback in one batch, not drips.
“A thorough DFM review before tooling starts can reduce mold modification costs by up to 60%.”True
Industry data shows that 70–80% of post-tooling modifications trace back to issues identifiable during DFM: inadequate draft angles, non-uniform wall thickness, gate placement causing weld lines on cosmetic surfaces, and missing shut-off angles. Catching these on screen takes hours; fixing them in steel takes days and thousands of dollars.
“You must complete 100% of prototyping and testing before starting production tooling.”False
In practice, most projects overlap the final prototype validation phase with production tooling design. As long as critical dimensions and material selection are locked, the mold design can begin while final functional testing completes. This parallel approach compresses the overall timeline by 2–4 weeks without increasing risk.
What Quality Standards Should Your Chinese Molder Meet?
The baseline certifications are ISO 9001:2015 for general manufacturing, ISO 13485 for medical devices, and IATF 16949 for automotive parts. Certification alone isn’t enough — request recent audit reports and verify that the certificate covers the specific facility producing your parts.
Beyond certification, look for a six-step quality process: incoming material inspection (IQC), in-process sample checks, process inspection, packaging and assembly inspection, final quality control (FQC), and outgoing quality control (OQC). A supplier who can walk you through their inspection frequency, AQL3 levels, and corrective action process is one who actually uses their quality system — not just frames the certificate.
Dimensional verification equipment matters too. Coordinate Measuring Machines (CMM), profile projectors, and hardness testers should be calibrated and available for first article inspection. Ask to see a sample FAI report before you commit. The level of detail in that report tells you more about a supplier’s quality culture than any sales pitch.
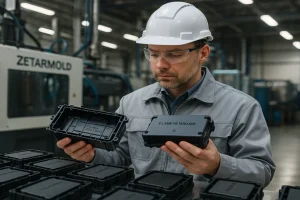
One thing we’ve learned running production molds for overseas clients: the first three production runs are where stability is proven. If dimensional data is consistent across runs 1, 2, and 3, you have a stable process. If dimensions drift, the process needs locking down before volume ramps. This is why ZetarMold’s 8 senior engineers (each with 10+ years of experience) monitor the first runs personally — it’s cheaper to catch drift early than to sort 50,000 non-conforming parts.
For overseas clients who cannot visit the factory, request a video call during the first production run. Watching the machine run, seeing the parts eject, and reviewing CMM data in real time gives you more confidence than any inspection report sent after the fact.
What Are Common Mistakes When Scaling from Prototype to Production?
The most costly mistake is treating prototype geometry as final production geometry without running a DFM review. Features that 3D print easily — undercuts, uniform wall thickness regardless of function, zero draft angles — become expensive problems in production tooling.
Mistake 1: Ignoring draft angles. Every vertical surface needs 0.5°–2° draft for clean ejection. Zero-draft walls work in 3D printing. In injection molding, they cause sticking, scoring, and damaged parts. Adding draft late means re-machining cavity surfaces — expensive and avoidable.
Mistake 2: Specifying tight tolerances everywhere. Not every dimension needs ±0.02 mm. Over-tolerancing drives up mold cost (more precision machining) and inspection time (more CMM measurements). Apply tight tolerances only to functional interfaces — bearing fits, seal surfaces, alignment features — and leave cosmetic dimensions at ±0.1 mm.
Mistake 3: Choosing the wrong mold steel. P20 works for most applications up to 500,000 cycles. But if you’re running glass-filled nylon (abrasive) or need 1M+ cycles, H13 or S136 is the right choice from the start. Retooling because you under-specified steel costs more than upgrading upfront.
Mistake 4: Skipping process documentation. When your production parameters live only in a technician’s head, every shift change is a quality gamble. Document temperature profiles, pressure curves, and timing sequences. Lock them into the machine controller. The 사출 성형 공정 is repeatable — but only when the process is actually repeated identically.
Mistake 5: Not planning for part removal and packaging. This sounds trivial until you’re molding 50,000 parts per month and realize your parts scratch during ejection or deform in transit. Ejection method (pin, sleeve, stripper plate) should be decided during mold design, not after first articles. Packaging specifications (bagging, tray type, stacking limits) should be defined before the first production shipment.
Mistake 6: Assuming all Chinese molders are the same. The gap between a $5,000 mold from a back-alley workshop and a $25,000 mold from an ISO-certified facility is not just price — it’s dimensional consistency, surface finish, mold life, and the ability to actually hit your spec on the first T1. Choosing solely on price is how projects end up with molds that need $10,000 in modifications before they produce acceptable parts.
How Much Does the Full Process Cost in China?
The full prototype-to-production cost in China is usually $20,000 to $120,000+. The final number depends on part complexity, mold steel, cavity count, and annual volume. Tooling represents 60–80% of the initial investment; per-part pricing drops significantly as volume increases.
| Item | Low Complexity | High Complexity |
|---|---|---|
| Prototype Mold (Soft Tooling) | $1,500–$3,000 | $5,000–$8,000 |
| Production Mold (Hardened Steel) | $15,000–$25,000 | $50,000–$100,000+ |
| T1 Sampling (per round) | $200–$500 | $500–$1,500 |
| 개별 부품 비용 (1천–1만 개 수량) | $0.50–$2.00 | $1.50–$5.00 |
| 개별 부품 비용 (10만 개 이상 수량) | $0.10–$0.50 | $0.30–$1.50 |
| 배송 (샘플 특송) | $50–$150 | $100–$300 |
| 첫 해 총 비용 (1만 개 부품) | $18,000–$32,000 | $55,000–$115,000+ |
대부분의 엔지니어가 간과하는 두 가지 비용 요소는 수정 예산과 배송 물류입니다. 예상되는 수정(잘 설계된 금형도 T1 후 약간의 조정이 필요함)을 위해 금형 비용의 10~15%를 예산으로 책정하세요. 그리고 공장 인도 가격뿐만 아니라 도착 비용(해상 운송비, 관세, 창고 보관료가 목적지에 따라 8~15% 추가됨)을 계산하세요.
연간 10,000개 미만의 저용량 사출 성형을 고려하는 기업의 경우, 바로 생산 금형으로 넘어가는 것보다 브리지 툴링이 종종 경제적으로 더 합리적입니다. 실제 생산 재료로 진짜 사출 성형 부품을 금형 투자 비용의 일부로 얻을 수 있습니다. 트레이드오프는 개당 부품 비용이 더 높고 수명이 제한된다는 점이지만, 설계가 변경될 가능성이 있다면 그 유연성은 실질적인 가치가 있습니다.
예산 산정을 위한 간편 규칙: 카드 한 벌 크기의 부품에 대한 단일 캐비티 P20 금형은 중국에서 약 $12,000–$18,000 정도 듭니다. 각 추가 캐비티마다 금형 비용이 40–60% 증가하지만, 개별 부품 가격은 거의 절반으로 떨어집니다. 다중 캐비티 금형이 본전을 찾는 전환점은 일반적으로 기하학적 구조와 재료에 따라 총 20,000–30,000개 부품 정도입니다.
중국에서의 시제품 양산 사출 성형에 대해 구매자들은 무엇을 묻나요?
자주 묻는 질문
중국에서 프로토타입부터 생산 사출 성형까지 가는 데 얼마나 걸리나요?
승인된 3D CAD 데이터부터 첫 생산 런까지의 일반적인 타임라인은 8~16주입니다. DFM 검토는 3~5일, 금형 설계는 5~7일, 툴 제작은 25~35일, 샘플링 및 수정은 10~20일이 소요됩니다. 4~6주의 긴급 타임라인도 가능하지만, 테스트 사이클이 줄어들고 출시 후 수정 위험이 증가합니다. 자체 금형 제작 시설과 40대 이상의 장비를 보유한 자격 있는 공급업체의 경우, 병목 현상은 일반적으로 생산 능력이 아닌 설계 반복 라운드입니다. 피드백 사이클을 효율적으로 계획하는 것(증분적 변경보다는 일괄 통합된 의견)은 품질을 저하시키지 않고 전체 일정에서 1~2주를 단축할 수 있습니다.
중국에서 사출 성형의 최소 주문량(MOQ)은 어떻게 되나요?
최소 주문 수량(MOQ)은 공급업체와 부품 복잡성에 따라 다르며, 일반적으로 양산 런 기준 500개에서 5,000개 사이입니다. 시제품 또는 브리지 툴링 주문은 100개부터 시작할 수 있습니다. MOQ가 존재하는 이유는 런 크기와 관계없이 기계 설정, 재료 준비, 초도품 검사에 고정 비용이 발생하기 때문입니다. ZetarMold는 월 100개 이상의 금형 세트 생산 능력을 보유하여 소량 및 대량 프로젝트 모두를 스케줄 충돌 없이 지원합니다. 초기 주문의 경우, 양산 금형과 더 많은 수량에 투자하기 전에 500–1,000개의 브리지 툴링으로 디자인을 검증하는 것부터 시작하는 것을 고려해보세요.
프로토타입 금형을 초기 생산 런에 사용할 수 있나요?
네, 프로토타입 금형(소프트 툴링)은 올바른 생산 재료로 1,000~10,000개의 부품을 생산할 수 있습니다. 시장 테스트, 규제 승인 제출, 그리고 생산 금형이 병렬로 제작되는 동안 초기 재고 구축에 잘 적합합니다. 그러나 경화 강재 생산 툴링에 비해 공차 변동이 더 넓고(±0.1 mm 대 ±0.02 mm) 금형 수명이 짧습니다. 또한 알루미늄 금형의 경우 표면 마감 옵션이 제한적입니다(최대 SPI B 또는 C 등급). 제품에 외관 요구사항이 있는 경우, 전체 생산 주문을 확정하기 전에 프로토타입 툴에서 표면 마감을 검증하세요.
중국 사출 성형 공급업체는 어떤 인증을 보유해야 하나요?
최소한 일반 제조 품질 관리에는 ISO 9001:2015가 필요합니다. 의료 기기 부품은 ISO 13485가 필요하고, 자동차 부품은 IATF 16949 인증이 필요합니다. ZetarMold는 각각 품질 관리, 의료 기기, 환경 관리, 직업 건강 및 안전을 다루는 ISO 9001, ISO 13485, ISO 14001, ISO 45001 인증을 보유하고 있습니다. 인증서 자체를 넘어서, 인증 범위가 부품이 제조될 특정 시설을 포함하는지 확인하세요. 최근 감사 보고서 사본을 요청하고 인증 기관이 국제적으로 인정받는 기관(TUV, SGS, BSI 등)인지 확인하세요.
중국에서 사출 성형 부품을 제조할 때 품질을 어떻게 보장하나요?
최소한 네 단계를 포함하는 문서화된 품질 프로세스를 요구하세요: 입고 재료 검사(IQC), 성형 중 공정 검사, 최종 품질 관리(FQC), 출하 품질 관리(OQC). 모든 중요 치수에 대한 CMM 치수 데이터가 포함된 초도품 검사 보고서를 요청하세요. 인증서가 특정 생산 시설을 포함하는지 확인하세요. 생산 현장, QC 실험실, 교정 기록을 포함하는 초기 공장 감사(현장 또는 가상)를 실시하세요. 첫 생산 런이 시작되기 전에 명확한 AQL 수용 기준(일반적으로 치명적 결함 0.65, 주요 결함 1.0, 경미한 결함 2.5)을 수립하세요.
브리지 툴링과 양산 툴링의 차이는 무엇인가요?
브리지 툴링은 알루미늄 또는 연강 금형을 사용하여 1,000~10,000개의 부품을 저비용($1,500~$8,000)으로 단기 생산합니다. 생산 툴링은 P20(사전 경화, 28–32 HRC) 또는 H13(열처리, 48–52 HRC)과 같은 경화 강재를 사용하여 500,000개 이상의 부품을 고비용($15,000–$100,000+)으로 대량 생산합니다. 브리지 툴링은 실제 생산 재료로 진짜 사출 성형 부품을 제공하므로 설계 검증, 시장 테스트, 규제 승인 제출에 이상적입니다. 생산 툴링은 우수한 치수 안정성, 표면 마감 옵션, 장기적 비용 효율성을 위한 다중 캐비티 기능을 제공합니다.
양산 금형 주문 전에 공장을 방문해야 할까요?
For first-time orders above $30,000 in tooling investment, an on-site factory visit is strongly recommended. You’ll see the production floor organization, QC equipment calibration status, mold shop capability, and working conditions firsthand. For smaller initial orders, a virtual audit via live video call covering the production floor, QC laboratory, and sample room is a practical alternative. ZetarMold’s Shanghai facility welcomes both on-site visits and provides detailed video walk-throughs for remote clients. The key observation during any audit is whether the factory is organized and systematic — tool boards, labeled material bins, and documented process sheets indicate a professional operation.


 EN
EN  ES
ES  FR
FR  DE
DE  PT
PT  AR
AR  RU
RU  JA
JA  KO
KO  IT
IT  NL
NL  TR
TR  PL
PL 