 Skip to content
Explore Advanced PolyJet 3D Printing Solutions
Discover precise and versatile PolyJet 3D printing at Zetarmold, perfect for intricate designs and prototypes. Enhance your project today!
Resources for The Complete Guide to PolyJet 3D Printing
What is PolyJet 3D Printing?
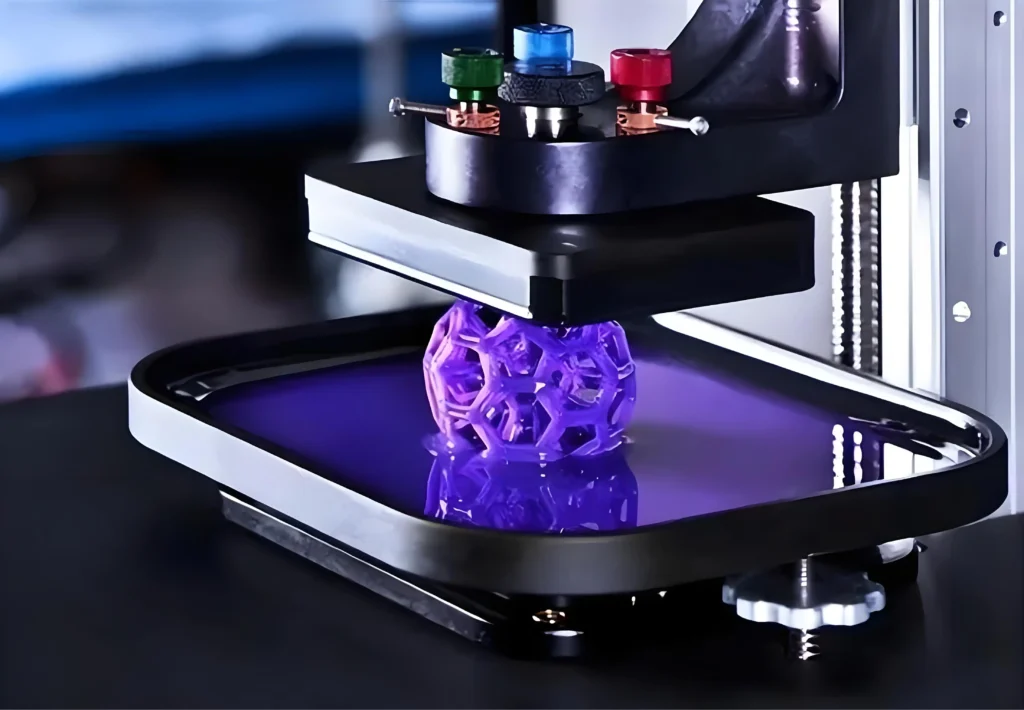
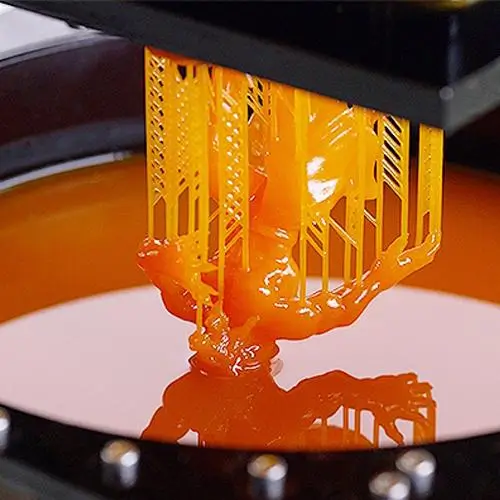
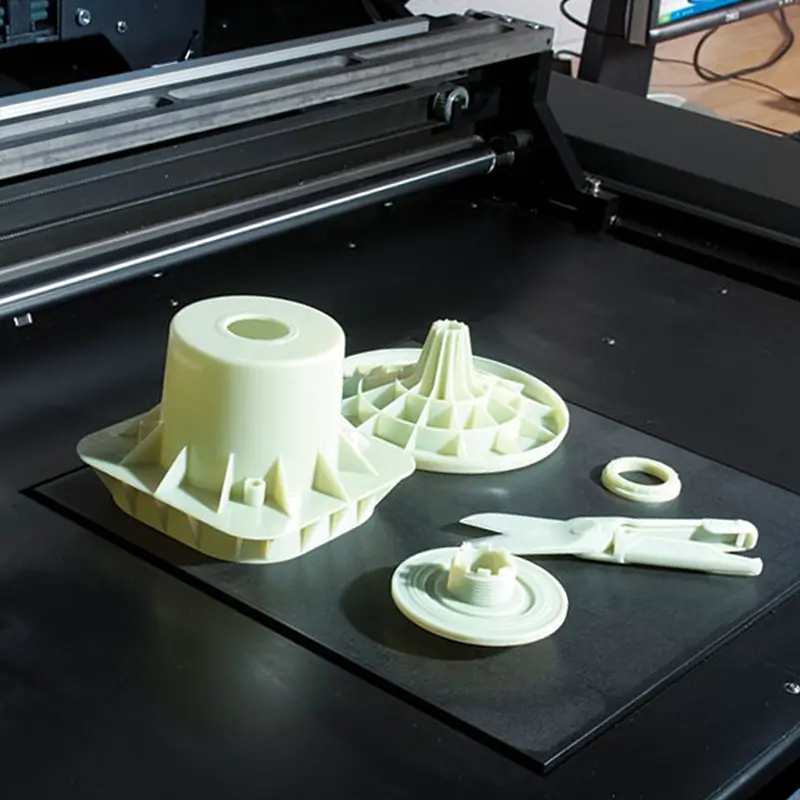
PolyJet is an industrial 3D printing technology renowned for its ability to produce parts with exceptionally high resolution, smooth surfaces, and intricate detail. It is a powerful tool for creating realistic prototypes, complex anatomical models, and precise manufacturing aids that closely mimic the look, feel, and function of final products.
At its core, PolyJet is a material jetting process. It operates by depositing micro-droplets of liquid photopolymer resin onto a build platform and instantly curing them with ultraviolet (UV) light. This layer-by-layer approach, combined with the technology’s unique ability to jet multiple materials simultaneously, sets it apart from all other additive manufacturing methods. It is the go-to technology when aesthetic fidelity, fine features, and multi-material properties are the primary requirements.
1. The Core Principle (Material Jetting Technology):
To understand PolyJet, imagine a highly advanced 2D inkjet printer, but instead of jetting ink onto paper, it jets liquid plastic onto a build tray and builds up a three-dimensional object.
① Material Deposition: Piezoelectric print heads, similar to those in desktop printers, selectively jet picoliter-sized droplets of photopolymer resin.
② UV Curing: Immediately after deposition, two powerful UV lamps, which travel alongside the print heads, cure and solidify the material.
③ Layer-by-Layer Construction: The build platform lowers by a fraction of a millimeter (typically 16-32 microns), and the process repeats, building the part one ultra-thin layer at a time.
2. Key Characteristics at a Glance:
PolyJet technology is defined by a unique combination of attributes that make it indispensable for specific applications:
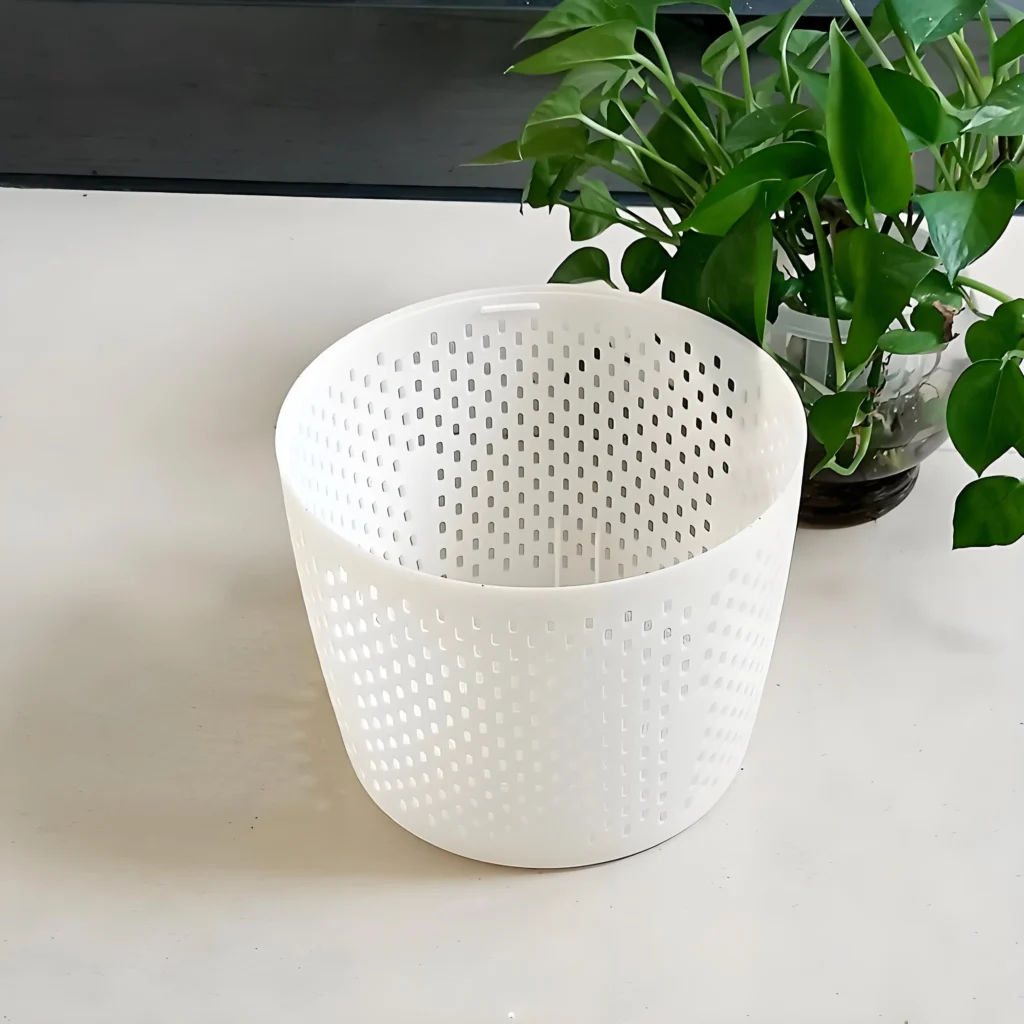
① Exceptional Resolution: Achieves some of the finest layer heights in the 3D printing industry (as low as 16 µm), resulting in a surface finish that is exceptionally smooth and free of visible stepping or layer lines.
② Multi-Material Capabilities: The most significant advantage of PolyJet is its ability to print with multiple materials in a single build. This allows for the creation of parts with varying hardness, color, and transparency.
③ Full-Color Printing: Advanced PolyJet systems can print in over 500,000 distinct colors, including gradients and textures, and are Pantone® validated, ensuring unparalleled color accuracy for realistic prototypes.
④ High Precision: The technology delivers outstanding dimensional accuracy, making it ideal for form and fit testing, jigs and fixtures, and complex assemblies.
How Does It Work? The Step-by-Step Process
Stage 1: Pre-Processing and Digital File Preparation:
The journey begins with a 3D digital model created in Computer-Aided Design (CAD) software.
① CAD File to Print-Ready Format:
The initial 3D model is typically exported in a standard 3D printing format, such as STL, OBJ, or the more advanced 3MF. While STL is the most common, formats like 3MF and VRML are preferred for multi-material and full-color prints as they can contain the necessary color and material assignment data within a single file.
② Slicing and Job Setup:
The file is then imported into specialized slicing software, such as Stratasys GrabCAD Print™. In this software, the user performs several critical tasks:
- Orientation: The part is oriented on the virtual build tray to optimize for print time, surface quality, and support structure minimization.
- Material Assignment: For multi-material prints, different materials are assigned to specific shells or bodies of the CAD model. Users can select from a wide range of base resins or create “Digital Materials” by combining properties.
- Finish Selection: The user chooses between a “matte” or “glossy” finish. The software automatically generates the necessary support structures based on this choice and the part’s geometry.
- Slicing: The software slices the digital model into hundreds or thousands of horizontal layers, creating a detailed instruction file for the 3D printer.
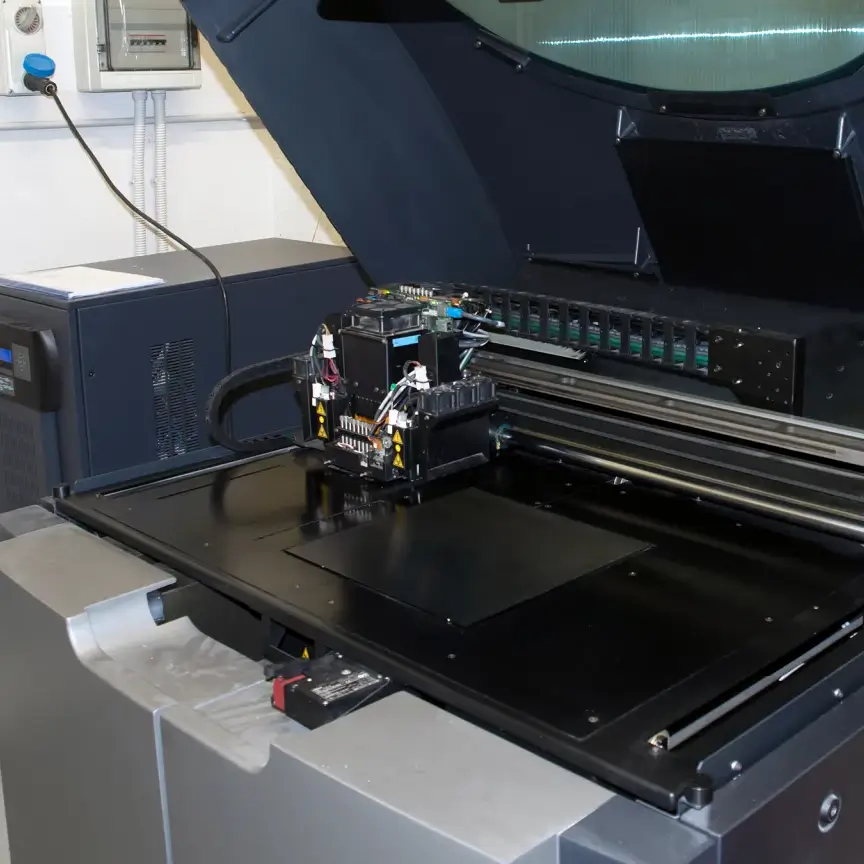
Stage 2: The Printing Process – A Microscopic Look:
Once the job is sent to the printer, the automated physical creation process begins.
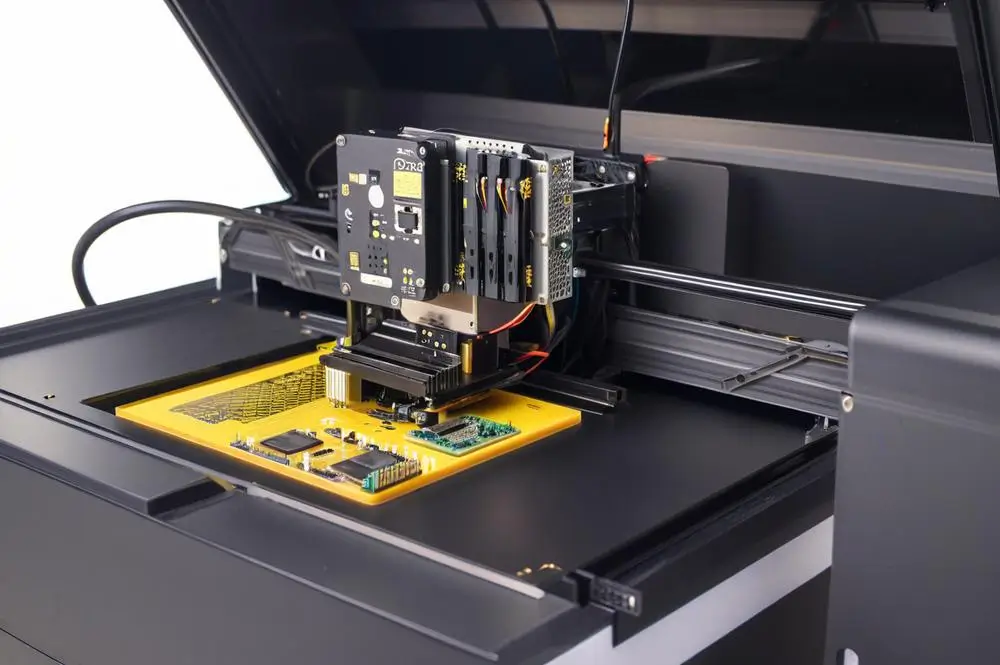
① Print Head Jetting Mechanism:
The PolyJet printer’s carriage, containing multiple piezoelectric print heads, sweeps across the build platform. Each print head contains hundreds of tiny nozzles. An electrical charge causes the piezoelectric material within the head to deform, ejecting a precise, picoliter-sized droplet of photopolymer resin from a specific nozzle.
② Simultaneous Material and Support Deposition:
As the carriage moves, the print heads jet both the model material(s) and a separate, gel-like support material.
- Model Material: Forms the actual part. For multi-material prints, different heads jet different resins, which can even be mixed mid-air before landing on the build tray to form Digital Materials.
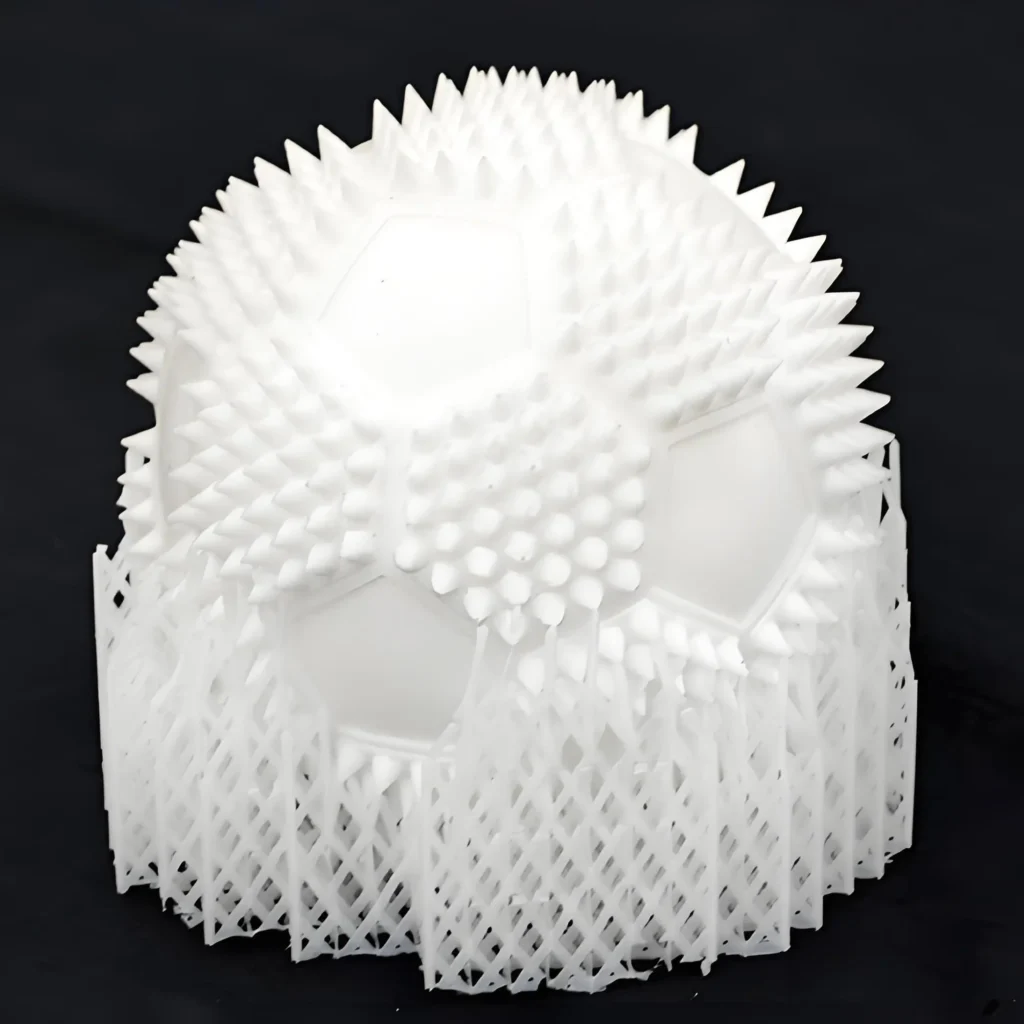
- Support Material: A dedicated material (e.g., SUP705™ or the water-soluble SUP706B™) is jetted to fill voids, support overhangs, and encase the part. This ensures geometric stability and accuracy during the build.
③ Instantaneous UV Curing:
Trailing just behind the print heads are powerful UV lamps. As soon as a layer of liquid resin is deposited, the UV light passes over it, initiating a photochemical reaction called photopolymerization. This instantly solidifies the droplets, bonding them to the layer below. This “cure-on-the-fly” process ensures that parts are fully cured and stable as they are built.
④ Z-Axis Progression:
After each layer is jetted and cured, the build platform lowers with extreme precision (e.g., by 16 microns). The carriage then begins its next pass, depositing the subsequent layer. This cycle repeats until the part is complete.
Stage 3: Post-Processing and Part Finalization:
Once the printing is finished, the part, encased in support material, is removed from the build platform and moves to the final stage. This will be covered in detail in the Post-Processing Options section.
Comparison with Other 3D Printing Technologies
Choosing the right 3D printing technology depends entirely on the application’s requirements. Here’s how PolyJet stacks up against other leading technologies.
1. PolyJet vs. Stereolithography (SLA):
SLA and PolyJet are often compared as they both use photopolymer resins and produce high-detail parts.
① Similarities: Both create parts with excellent surface finish and fine feature detail. Both are ideal for visual prototypes where aesthetics are paramount.
② Key Differences:
- Process: PolyJet jets material layer by layer, while SLA uses a UV laser or projector to cure resin in a large vat.
- Multi-Material: PolyJet excels at true multi-material and multi-color printing within a single part. Standard SLA is limited to a single material per build.
- Support Removal: PolyJet’s gel-like or water-soluble supports are generally much easier and faster to remove than SLA’s lattice supports, which must be manually clipped and sanded.
- Accuracy: Both are highly accurate, but PolyJet’s jetting process can offer slightly more control over the properties of Digital Materials.
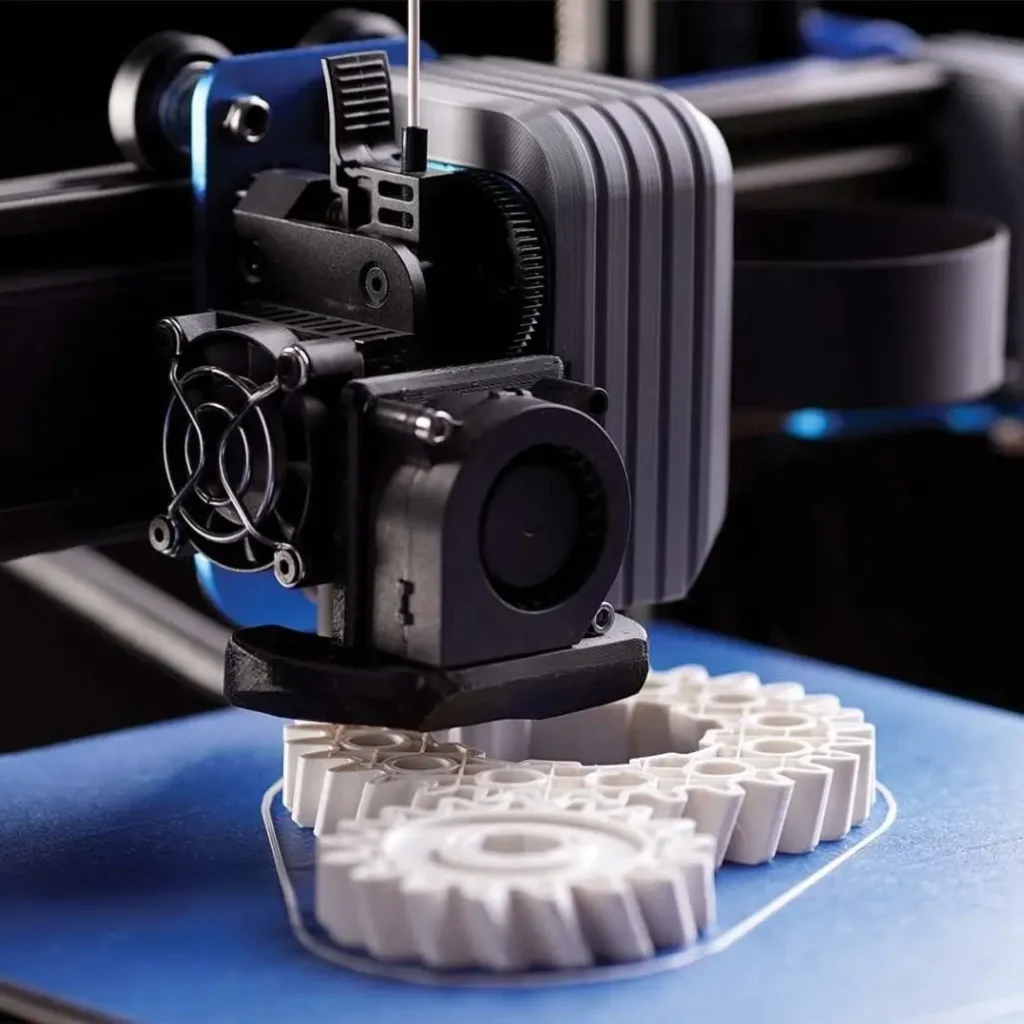
2. PolyJet vs. Fused Deposition Modeling (FDM):
FDM is one of the most common 3D printing technologies, known for its strong thermoplastic materials. Key Differentiators:
① Resolution and Surface Finish: PolyJet is vastly superior. FDM parts have visible layer lines and a much rougher finish, whereas PolyJet parts are smooth to the touch, resembling injection-molded quality.
② Material: PolyJet uses thermoset photopolymers, while FDM uses engineering-grade thermoplastics (e.g., ABS, PC, ULTEM™). FDM parts are generally stronger, more durable, and have better thermal resistance.
③ Detail and Complexity: PolyJet can produce far more intricate and delicate features than FDM.
④ Color and Multi-Material: FDM has very limited multi-color/material capabilities (typically dual extrusion), whereas this is a core strength of PolyJet.
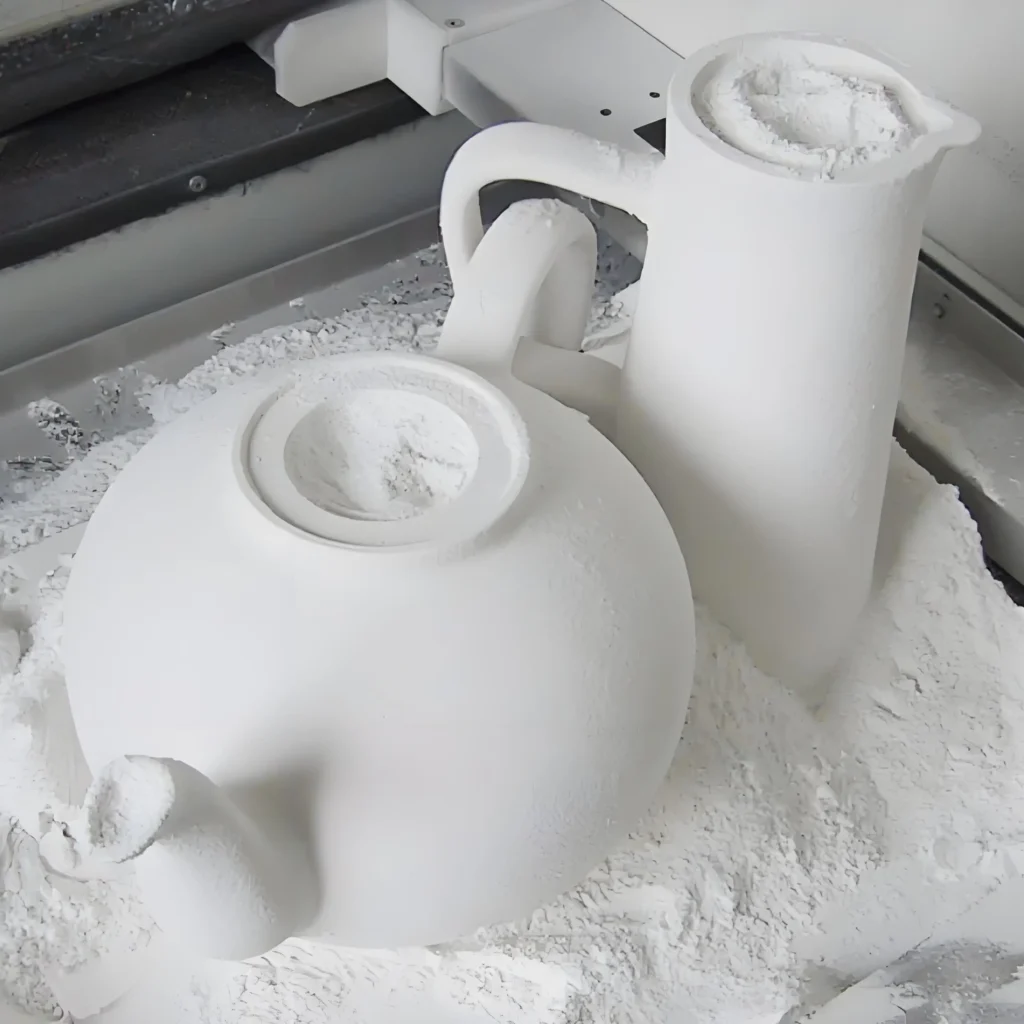
3. PolyJet vs. Selective Laser Sintering (SLS):
SLS is a powder bed fusion technology known for producing tough, functional nylon parts. Fundamental Contrasts:
① Material: PolyJet uses liquid resins; SLS uses powdered polymers (typically Nylon).
② Support Structures: SLS is self-supporting, as the unsintered powder in the build chamber supports the part. PolyJet requires dedicated support structures that must be removed.
③ Application Focus: PolyJet is for high-fidelity, realistic prototypes. SLS is for durable, functional prototypes and end-use parts that require good mechanical properties.
④ Surface Finish & Color: PolyJet parts are smooth and can be full-color. SLS parts have a characteristic grainy surface finish and are typically white or gray (though they can be dyed post-process).
Summary Comparison Table:
| Feature | PolyJet | SLA | FDM | SLS |
|---|---|---|---|---|
| Technology | Material Jetting | Vat Photopolymerization | Material Extrusion | Powder Bed Fusion |
| Materials | Photopolymer Resins | Photopolymer Resins | Thermoplastics | Thermoplastic Powders |
| Resolution | Very High (16-32 µm) | Very High (25-100 µm) | Low to Medium (100-400 µm) | Medium (100-120 µm) |
| Surface Finish | Excellent, very smooth | Excellent, smooth | Fair, visible layers | Good, slightly grainy |
| Multi-Material | Yes, extensive | No (typically) | Limited (dual extrusion) | No |
| Full Color | Yes, Pantone Validated | No (monochromatic) | Very Limited | No (can be dyed) |
| Mechanical Strength | Moderate | Moderate to Low | High (engineering grade) | Very High (Nylon) |
| Best For | Realistic Prototypes | Detailed Prototypes, Molds | Functional Parts, Jigs | Functional Parts, Complex Geo |
| Support Removal | Easy (WaterJet/Soluble) | Medium (Manual clipping) | Easy to Hard (Breakaway/Soluble) | Not Required |
What Are the Key Advantages of PolyJet Printing?
PolyJet’s unique process delivers a powerful set of advantages that unlock new possibilities in product development and manufacturing.
1. Unmatched Realism and Surface Finish:
PolyJet produces the smoothest surface finish of any major 3D printing technology. The ultra-fine layers (thinner than a human hair) eliminate the staircase effect common in other processes. This makes PolyJet parts ideal for:
① Marketing and sales models that look and feel like the final product.
② Wind tunnel testing where surface smoothness is critical.
③ Ergonomic studies where tactile feel is important.
2. Multi-Material and Multi-Color Capabilities:
This is the defining strength of PolyJet. The ability to combine different materials in a single print job is a game-changer.
① Digital Materials: Engineering Custom Properties:
PolyJet printers don’t just print with base resins; they combine them at the droplet level to create “Digital Materials.” This allows for the precise engineering of mechanical properties. For example:
- Shore A Hardness: By mixing a rigid material (like Vero™) and a flexible material (like Agilus30™), a full spectrum of Shore A values can be created, perfectly simulating rubber or silicone of varying hardness.
- Overmolding Simulation: A single part can be printed with a rigid core and a soft, rubber-like exterior, perfectly replicating the overmolding process used in manufacturing power tools, phone cases, and kitchen utensils.
② Full-Color Realism with Pantone Validation:
Advanced systems like the Stratasys J-series can combine cyan, magenta, yellow, black, white, and clear base resins to produce over 500,000 verifiable colors. This includes:
- Color Gradients: Smooth transitions between colors.
- Texture Mapping: Applying digital textures (like wood grain or carbon fiber) directly onto the part’s surface.
- Pantone® Validation: The ability to match specific Pantone colors ensures brand consistency and removes the guesswork from color-critical prototyping.
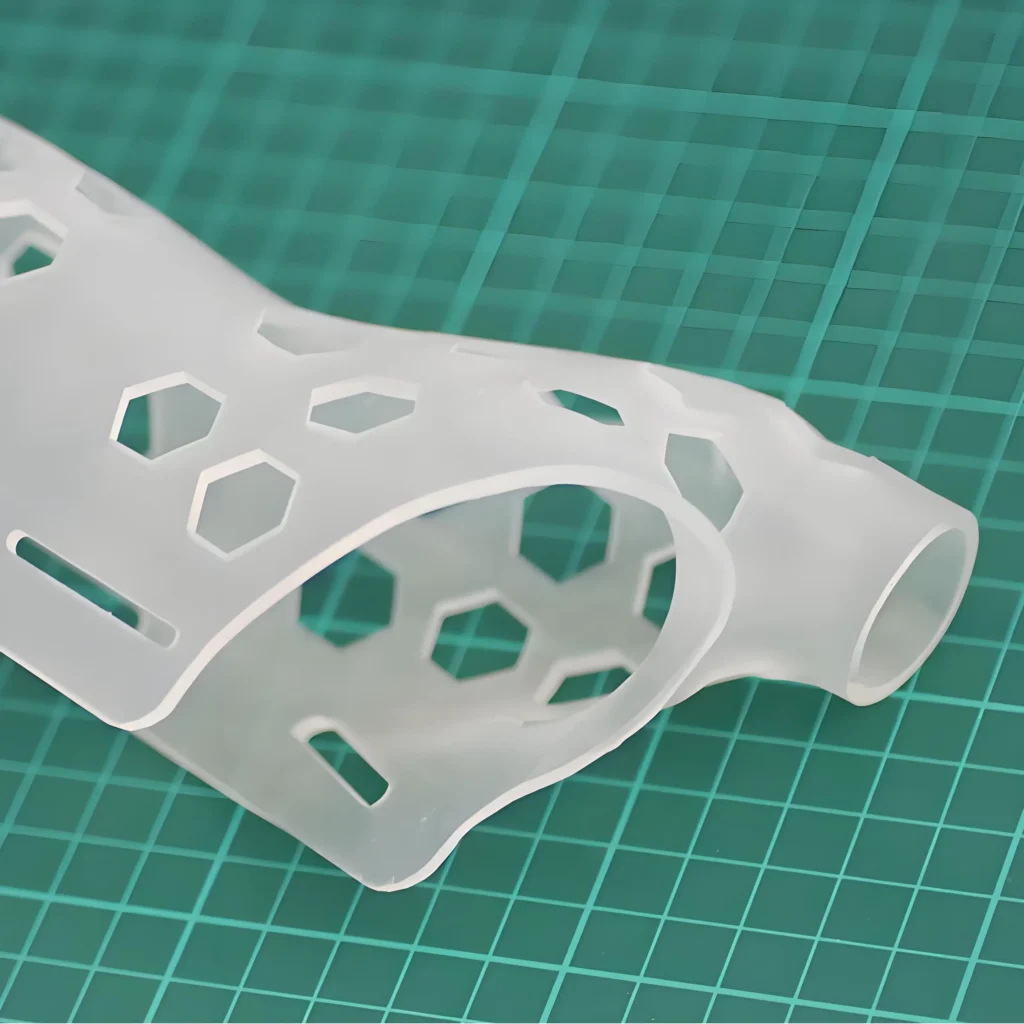
3. Exceptional Precision and Fine Detail:
The combination of high resolution and a precise jetting process allows PolyJet to reproduce incredibly fine details, such as:
① Engraved or embossed text.
② Complex textures and patterns.
③ Thin walls and sharp edges.
④ Tiny, intricate components for medical devices or electronics.
4. Speed for High-Mix, Low-Volume Production:
While a single large part may print faster on other machines, PolyJet excels in efficiency when printing a build tray packed with multiple, different parts. Because the print head passes over the entire tray regardless of what is being printed, filling the tray with many small, complex, or multi-material parts does not significantly increase the print time.
5. Material Versatility in a Single Print:
The ability to combine disparate material properties in one go is a powerful tool for functional prototyping. A single print can contain:
① Rigid sections for structural integrity.
② Flexible sections for gaskets, seals, or living hinges.
③ Transparent sections for lenses, light pipes, or fluidic analysis.
What Are the Limitations of PolyJet Printing?
While powerful, PolyJet is not the solution for every application. Acknowledging its limitations is key to successful implementation.
1. Mechanical Properties and Durability:
PolyJet parts are made from acrylic-based photopolymers (thermosets). While they can be made tougher with Digital Materials like Digital ABS Plus™, they generally do not possess the same strength, toughness, or temperature resistance as parts made from engineering thermoplastics (like Nylon or PC) via FDM or SLS. They can be brittle and are not typically suitable for high-stress, long-term functional applications.
2. UV Sensitivity and Material Stability:
As photopolymers, PolyJet parts are inherently sensitive to ultraviolet (UV) light. Prolonged exposure to sunlight can cause the parts to yellow, become more brittle, and lose their intended properties. While clear coats can mitigate this, they are best suited for indoor use. Materials can also exhibit some "creep" (deformation under constant load) over time.
3. Higher Material Cost:
The proprietary photopolymer resins used in PolyJet systems are significantly more expensive per kilogram than FDM filaments or SLS powders. The support material, which is used liberally, also adds to the overall cost of a print. This makes the technology less cost-effective for simple massing models or large, bulky parts where detail is not a priority.
4. Requirement for Support Structures:
Nearly every PolyJet part requires support material, which must be removed in a post-processing step. While the removal process is relatively easy (especially with soluble supports), it still adds time, labor, and cost to the overall workflow.

What Materials Are Used in PolyJet 3D Printing?
The vast library of materials is central to PolyJet’s versatility. Materials are generally categorized by their primary property.
1. The Vero™ Family (Rigid Opaque):
This is the workhorse family of PolyJet materials, known for providing excellent detail, strength, and stability.
- VeroWhitePlus™, VeroBlackPlus™, VeroGray™, VeroBlue™: Standard colors for general-purpose modeling.
- VeroVivid™ Colors: The cyan, magenta, and yellow bases for full-color printing.
- VeroClear™: A transparent material for simulating PMMA (acrylic) or glass. Can be polished for high clarity.
- VeroFlex™: A unique material that provides both flexibility and durability, ideal for eyeglass prototyping.
2. The Agilus30™ Family (Flexible, Rubber-like):
This family of materials simulates rubber with varying degrees of tear resistance and elongation at break.
- Agilus30™ Clear, Black, and White: Used for prototyping gaskets, seals, living hinges, and soft-touch surfaces. Can be combined with Vero materials to create a wide range of Shore A hardness values.
3. Digital Materials (On-the-Fly Composites):
These are not base resins but are created by the printer by mixing two or three base resins in specific concentrations.
- Digital ABS Plus™: Created by combining Rigur™ and another material to provide improved toughness and heat resistance (up to 90°C), simulating standard ABS plastic. Ideal for functional prototypes, molds, and manufacturing tools.
- Simulated Polypropylene (Endur™ & Durus™): Materials that offer the flexibility and durability of polypropylene, excellent for parts with snap-fit closures and living hinges.
- Variable Shore A Hardness: By combining Vero and Agilus30, hundreds of intermediate flexible states can be achieved in a single part.
4. Specialized Materials:
- Biocompatible (MED610™): A clear material with certifications for bodily contact (e.g., ISO 10993), making it suitable for surgical guides, dental trays, and medical device prototypes that will contact skin or mucous membranes.
- High Temperature (RGD525™): Offers a higher heat deflection temperature (HDT), making it suitable for static functional tests or parts exposed to hot air or water, such as faucet or pipe prototypes.
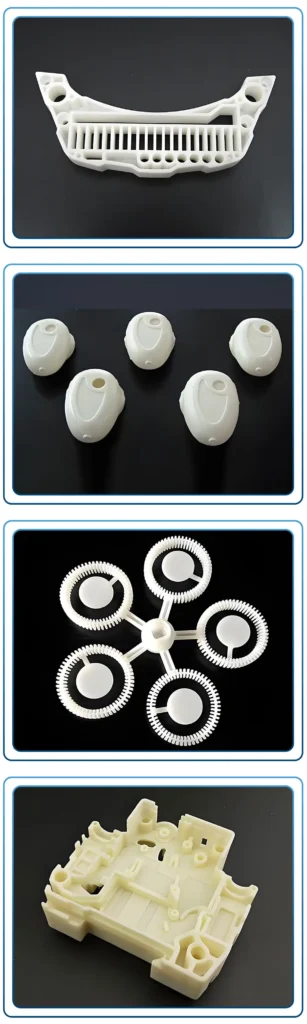
High-Precision PolyJet 3D Printing Services
Discover professional PolyJet 3D printing services for ultra-fine detail, smooth finishes, and multi-material capabilities.
Resources for The Complete Guide to PolyJet 3D Printing
What Are the Main Applications of PolyJet Printing?
The unique benefits of PolyJet translate into a wide range of high-impact applications across various industries.
1. Prototyping and Product Development:
This is the primary application domain for PolyJet.
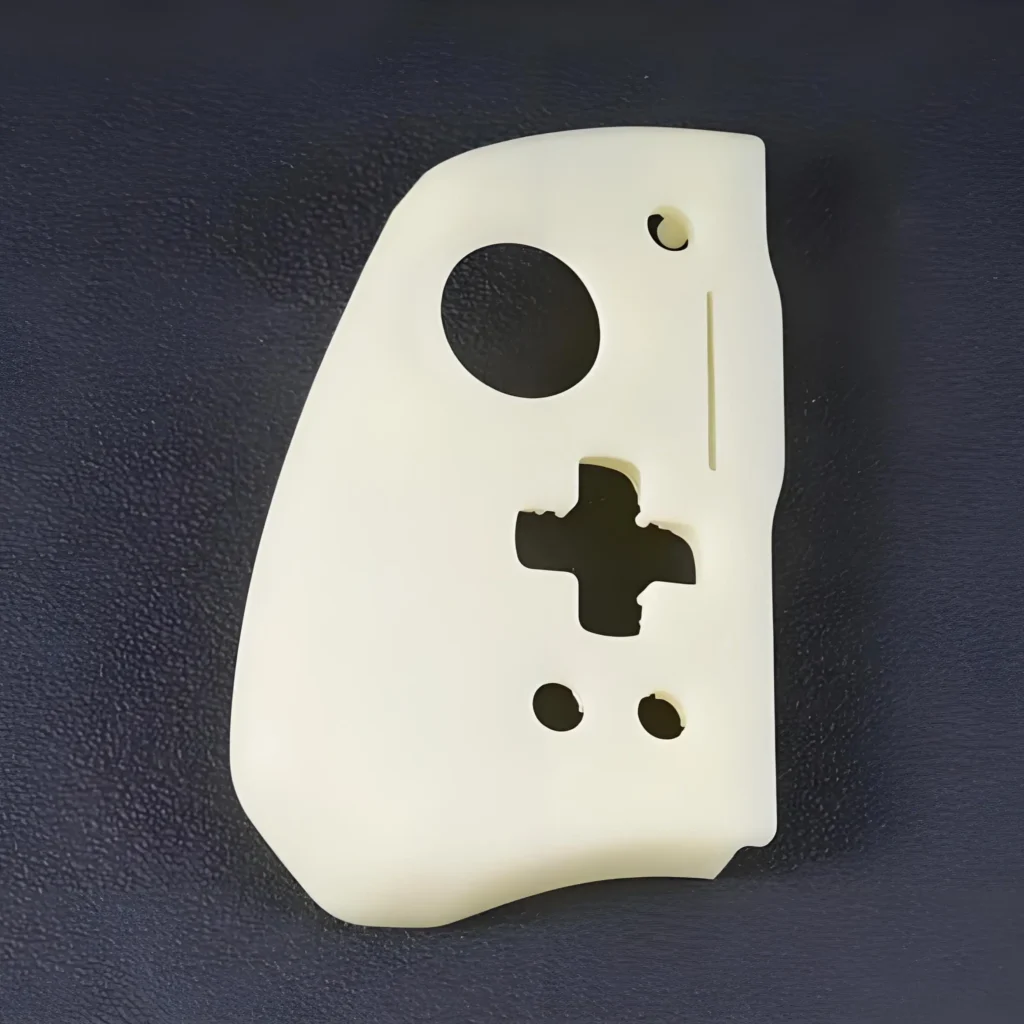
① High-Fidelity Visual Prototypes:
PolyJet allows designers and engineers to create models that are virtually indistinguishable from the final product. These are invaluable for:
- Early-stage design reviews and stakeholder feedback.
- Marketing photography and consumer focus groups.
- Securing funding or project approval with a tangible, realistic model.
② Form, Fit, and Feel Testing:
The technology’s high accuracy and multi-material capabilities enable true functional evaluation:
- Form: Verifying that a part’s shape and aesthetics meet design intent.
- Fit: Testing assemblies by printing multiple components that fit together perfectly.
- Feel: Using overmolded rubber-like materials to test the ergonomics of grips and handles.
2. Medical and Healthcare:
PolyJet is transforming medicine by providing patient-specific tools and models.
① Surgical Planning Models:
Surgeons can print a 3D model of a patient’s organ or bone structure (derived from CT or MRI scans) using a combination of rigid, flexible, and color materials. This allows them to:
- Practice complex procedures before entering the operating room.
- Explain the surgery to patients with a clear, physical model.
- Reduce operating time and improve patient outcomes.
② Medical Device Prototyping:
Using biocompatible materials, companies can rapidly prototype devices like hearing aids, surgical instruments, and delivery systems that require both rigidity and flexibility.
3. Consumer Goods and Electronics:
PolyJet helps accelerate the design cycle for consumer products. Applications include prototyping mobile phone cases, kitchen appliances, wearable technology, and packaging with realistic colors, textures, and overmolded features.
4. Jigs, Fixtures, and Manufacturing Aids:
While not as durable as FDM or SLS parts, PolyJet is excellent for creating highly accurate, custom jigs and fixtures for assembly or quality control lines. Its smooth surface finish ensures that it won’t scratch or mar delicate components.
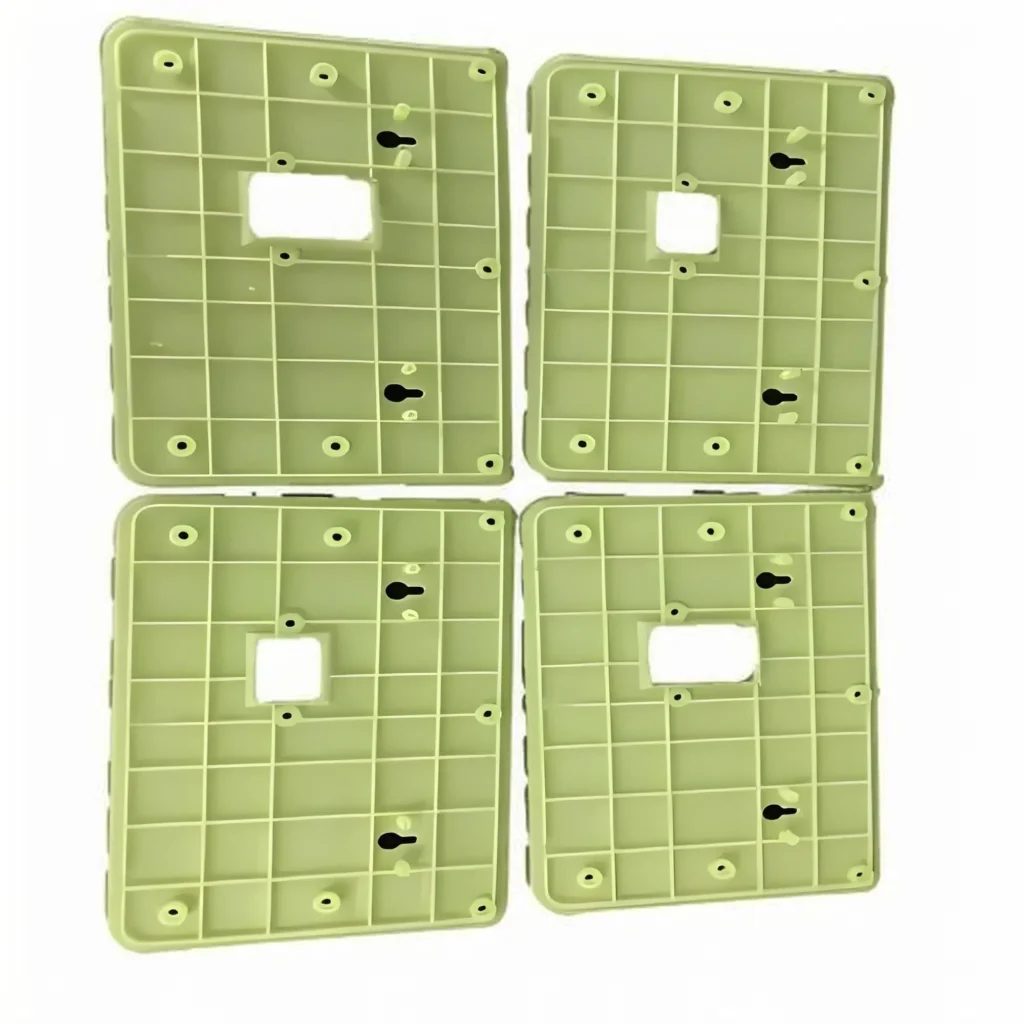
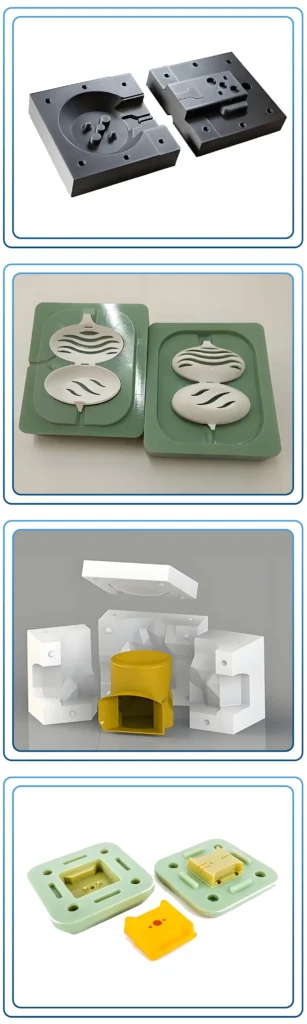
PolyJet Printing for Mold Making
A highly advanced application of PolyJet is its use in creating injection mold tooling, a process known as rapid tooling.
1. What is Rapid Tooling with PolyJet?
Rapid tooling involves 3D printing a mold cavity and core, which is then used in a standard injection molding machine to produce a small batch of parts (typically 10-100 units) in the final production plastic.
2. The Process Explained:
① Mold Design & Printing: The mold is designed in CAD with standard features like gates, runners, and ejector pin locations. It is then printed using a high-strength, high-temperature PolyJet material like Digital ABS Plus™.
② Mold Preparation: The printed mold may require minimal polishing on the cavity surfaces for a better part finish. It is then assembled into a standard mold base.
③ Injection Molding: The mold is placed in a molding press. A low-temperature thermoplastic (e.g., Polypropylene, HDPE, TPE) is injected under relatively low pressure to create the final parts.
3. Advantages of PolyJet Molds:
① Speed: A PolyJet mold can be printed and ready for use in a matter of hours or days, compared to the weeks or months required for traditional CNC machining of steel or aluminum molds.
② Cost-Effectiveness: For short runs, the cost is a fraction of that of a metal mold, allowing for affordable validation with production-grade materials.
③ Design Iteration: It enables true agile product development. Teams can test a design, receive feedback, modify the CAD file, and print a new mold overnight.
4. Limitations and Considerations:
① Limited Mold Life: PolyJet molds are not as durable as metal and can typically withstand only 10 to 100 shots, depending on the part geometry and molding parameters.
② Material Compatibility: They are suitable only for thermoplastics with lower melting temperatures and injection pressures.
③ Thermal Conductivity: Plastic molds do not dissipate heat as well as metal molds, which can lead to longer cycle times.
Design Guidelines for PolyJet Printing
Adhering to Design for Additive Manufacturing (DfAM) principles is essential for maximizing the quality and success of your PolyJet prints.
1. General Best Practices:
① Minimum Wall Thickness:
To ensure parts are strong enough to withstand post-processing and handling, follow these guidelines:
- Rigid Materials (Vero family): 0.6 mm (0.024 in) for standard applications.
- Flexible Materials (Agilus30): 1.0 mm (0.040 in) to maintain structural integrity.
② Minimum Feature Size:
PolyJet’s high resolution allows for tiny features, but there are practical limits:
- Pins/Rods: A minimum diameter of 0.5 mm is recommended.
- Engraved/Embossed Text: Use a font size of at least 6 points with a depth/height of 0.2 mm.
③ Tolerances:
PolyJet is highly accurate. Typical dimensional tolerances are within ±0.1 mm for the first 25 mm, and ±0.05 mm for each additional 25 mm. However, this can vary based on geometry and orientation.
2. Designing for Multi-Material Parts:
① File Preparation:
To assign different materials to different sections of a part, your design must be structured correctly:
- Separate Shells/Bodies: The most reliable method is to design the part as an assembly of distinct, non-overlapping bodies within your CAD software.
- File Format: Export the assembly as a single STL (where each body is a separate shell) or, preferably, as a 3MF or VRML file, which can preserve material and color assignments.
3. Optimizing for Support Structures:
① Part Orientation:
Orientation is a critical decision that impacts surface finish, accuracy, and print time.
- For best finish: Orient critical surfaces to face upwards, as these will not have contact with support material and can be printed with a “glossy” finish.
- For accuracy: Orient circular holes with their central axis perpendicular to the build platform (in the Z-direction) to ensure the best roundness.
② Choosing the Right Finish (Glossy vs. Matte):
- Matte Finish: The entire part is encapsulated in support material. This results in a uniform, non-reflective finish on all surfaces but requires more support material and cleaning time.
- Glossy Finish: Only overhangs and undersides are supported. Up-facing surfaces are printed without support contact, resulting in a very smooth, glossy finish. This is the default and most common choice.
Post-Processing Options
The final steps after printing are crucial for achieving the desired look and feel.
1. Support Removal (The Essential First Step):
This is the primary post-processing activity for all PolyJet parts.
① WaterJetting: The most common and effective method. A high-pressure water jet system (like a Stratasys WaterJet) is used to blast away the gel-like support material (SUP705™) without damaging the part itself.
② Soluble Support Removal: For delicate parts with intricate internal channels, water-soluble support material (SUP706B™) is used. The part is simply submerged in a bath of cleaning solution, and the support material dissolves away, requiring minimal manual labor.
③ Manual Removal: For simpler parts, support can be picked away by hand using small tools or removed by soaking the part in a water/caustic soda solution.
2. Aesthetic Finishing Techniques:
① Sanding and Polishing:
- Sanding: Wet sanding with progressively finer grits of sandpaper can be used to remove any remaining support marks or to achieve an even smoother, matte finish.
- Polishing: For transparent parts made with VeroClear™, sanding and polishing with a polishing compound can yield near-optical clarity.
② Painting and Dyeing: Although PolyJet offers full-color printing, parts can still be painted to achieve specific metallic finishes or to match a non-Pantone color. A primer is recommended for best adhesion.
③ Clear Coating: Applying a UV-resistant clear coat is highly recommended for parts that will be handled frequently or exposed to sunlight. It enhances the appearance and significantly improves the part’s long-term durability and UV stability.
Why Choose Our PolyJet Printing Services?
When precision, realism, and speed matter, partnering with the right service provider is critical. Here’s why we are the industry leader for your PolyJet needs.
1. State-of-the-Art Technology:
We operate a fleet of the latest Stratasys PolyJet printers, including the J850 Pro and J55 Prime systems. This ensures you have access to the full spectrum of multi-material capabilities, Pantone-validated full color, and specialized materials like VeroUltraClear and flexible Agilus30.
2. Unrivaled Expertise:
Our team of engineers and technicians has decades of combined experience in additive manufacturing. We go beyond just printing your file; we provide expert Design for Additive Manufacturing (DfAM) consultation to optimize your part for cost, speed, and performance.
3. Comprehensive Material Library:
We stock an extensive range of PolyJet materials, from rigid opaque and transparent to flexible rubber-like, biocompatible, and high-temperature resins. Our ability to create thousands of Digital Material combinations means we can perfectly match your property requirements.
4. ISO 9001 Certified Quality Assurance:
Our production process is governed by a strict, ISO 9001:2015 certified quality management system. Every part undergoes a rigorous inspection to ensure it meets your specifications for dimensional accuracy and aesthetic quality.
5. End-to-End Solutions:
We are your one-stop-shop for product development. From initial design consultation and file preparation to printing, comprehensive post-processing (including polishing, painting, and clear coating), and final assembly, we manage every step of the process to deliver presentation-ready parts.
Frequently Asked Questions (FAQ) About PolyJet Printing
PolyJet is one of 3D printing technologies available. You can expect tolerances of ±0.1 mm for the first 25 mm of a part, and ±0.05 mm for each additional 25 mm. This accuracy is ideal for form and fit testing of complex assemblies.
PolyJet parts have moderate strength and are best suited for visual and functional prototypes rather than high-load, end-use applications. While materials like Digital ABS Plus™ offer enhanced toughness, for applications requiring high mechanical strength and durability, technologies like FDM or SLS with engineering-grade materials may be more appropriate.
The best way is to design your part as an assembly of separate, non-overlapping bodies in your CAD software. Assign each body a unique name or color. Then, export the entire assembly as a single 3MF, VRML, or OBJ file. When you submit the file to us, you can specify which material should be applied to each body.
Our large-format systems, like the Stratasys J850, have a build volume of up to 490 x 390 x 200 mm (19.3 x 15.3 x 7.9 in). Larger parts can be created by printing them in sections and bonding them together in post-processing.
Due to their inherent sensitivity to UV light, standard PolyJet parts are not recommended for long-term outdoor use, as they can become brittle and discolored. However, applying a UV-resistant clear coat can significantly extend their life and durability in such conditions.
A glossy finish is achieved when up-facing surfaces are printed without contact from support material, resulting in a very smooth, shiny surface. A matte finish occurs when the entire part is encased in support material, giving all surfaces a uniform, non-reflective texture. Glossy is the more common and cost-effective choice.

Injection Molding Supplier Project Management: How Buyers Keep Tooling and Production on Track
Managing an injection molding project with an overseas supplier is not just about placing a purchase order and waiting for parts to arrive. Between your initial tooling investment and first

Injection Molding Supplier Production Monitoring for Overseas Buyers
When you source injection molding parts from overseas, the distance between you and the production floor creates a visibility gap. You place a purchase order, wait weeks or months, and
Injection Molding Supplier PPAP Checklist for Tooling, Samples, and Mass Production
If you are sourcing injection molded parts from an overseas supplier, PPAP is the gatekeeper between a prototype that looks fine and a production run that meets specs consistently. In
Optimization Solutions Provided For Free
- Provide Design Feedback and Optimization Solutions
- Optimize Structure and Reduce Mold Costs
- Talk Directly With Engineers One-On-One

