...

FDM 3D Printing Service & Custom FDM Parts

Explore FDM 3D printing technology and learn its advantages, working principles, materials, and applications. Discover expert tips for design optimization, filament selection, post-processing, and troubleshooting. Upload your 3D model for a custom quote today!

What is FDM 3D Printing Technology and How Does It Work?

Fused Deposition Modeling (FDM) is a widely-used additive manufacturing technology that fabricates objects layer by layer using thermoplastic filaments. It’s an economical and versatile solution for producing durable prototypes and functional parts across multiple industries.

How FDM Works: A Detailed Step-by-Step Process

1

Filament Loading

Thermoplastic filament spools are loaded into the printer, serving as the raw material for the build.

2

Heating & Extrusion

The filament is directed through a heated nozzle, where it turns into a molten state.

3

Layer-by-Layer Deposition

The printer deposits the melted filament onto a build platform, following the cross-sectional geometry of the CAD model.

4

Cooling & Solidifying

As the molten filament is laid down, it cools and solidifies almost instantaneously.

5

Final Object Completion

After all layers are built, a finished part emerges that can be removed and post-processed.

Close-up of a 3D printer in operation, extruding material onto a glass platform in a laboratory setting.
Illustration showing the FDM 3D printing workflow with steps from filament loading to part removal.

FDM vs. Stereolithography (SLA) and Selective Laser Sintering (SLS)

Comparing FDM with SLA and SLS helps identify the best printing technology for your specific application.

Feature FDM (Fused Deposition Modeling) SLA (Stereolithography) SLS (Selective Laser Sintering)
Material Type Thermoplastic filaments Photopolymer resin Powder-based polymers
Strength Durable, functional parts for mechanical applications High precision; suitable for detailed and aesthetic parts Strong and suitable for intricate geometries
Surface Finish Visible layer lines Smooth, polished finishes Slightly rough, matte finish due to powder residue
Support Structures Required for overhangs and complex geometries Required for unsupported geometries No supports needed (powder provides support)
Cost Affordable setup and material costs Higher material and operational costs Expensive industrial-grade technology
Ease of Use User-friendly and widely available Moderate complexity; requires resin handling Complex and requires specialized equipment
Best Applications Prototypes, functional parts, and low-volume production High-resolution models such as dental and jewelry parts Complex, high-detail batch production

FDM vs. SLA

Opt for FDM if durability and cost are priorities, especially for functional mechanical parts. Use SLA for highly detailed aesthetic prototypes requiring high precision, such as dental models and jewelry designs.

FDM: Thermoplastics, durable, budget-friendly, visible layer lines

SLA: Light-sensitive resin, precise, smooth finish, higher cost

FDM vs. SLS

FDM's affordability shines for small batches and prototyping needs, while SLS excels in scalability and intricate geometries for series production.

FDM: Thermoplastic filaments, requires supports, simple operation

SLS: Powder-based, no supports needed, complex industrial-grade

FDM vs. Injection Molding

Injection molding and FDM serve different purposes depending on volume requirements and production timelines.

Production Volume

FDM: Low to medium | Injection Molding: High

Lead Time

FDM: Rapid (days) | Injection Molding: Prolonged (weeks/months)

Setup Cost

FDM: Minimal | Injection Molding: High (tooling)

Pro Tip

Maximize efficiency by prototyping with FDM before scaling production—and save time and resources.

A display of colorful and black industrial molded plastic parts on a workshop surface.

FDM

Injection Molding

FDM vs. CNC Machined Parts

FDM and CNC machining deliver unique advantages depending on design requirements and material choice.

Cost Efficiency

FDM

Lower production costs for custom or complex parts

CNC

Higher cost due to material waste and machining

Material Types

FDM

Focuses on thermoplastic filaments

CNC

Wider range: metals, plastics, composites

Complex Geometries

FDM

Suitable for internal cavities, overhangs, lightweight structures

CNC

Best for high-tolerance flat or symmetrical geometries

Collection of colorful 3D plastic parts including gears, octopus, toy car, and various shapes.

FDM

Various plastic molded parts in different shapes and colors displayed on a white background.

CNC Machining

How to Choose the Right FDM Filaments?

The right filament choice is crucial for optimizing strength, functionality, and overall performance.

Five spools of 3D printer filaments labeled: PLA (easy printing), ABS (durable), PETG (chemical resistant), Nylon (flexible), and Polycarbonate (high strength).

PLA

Offers ease of printing and affordability, making it perfect for visual prototypes.

ABS

Stronger and heat-resistant but requires ventilation. Commonly used for durable functional parts.

PETG

Combines strength and chemical resistance. Ideal for parts exposed to moisture or chemicals.

Nylon

Provides excellent flexibility and impact resistance, suitable for industrial-grade applications.

Polycarbonate (PC)

Heat-resistant and extremely durable for advanced engineering parts.

Filament Selection Tips:

Consider mechanical strength requirements, printer capabilities, and environmental factors when choosing filament types. For high-precision parts, engineering filaments like Nylon and PC provide superior performance.

Get expert advice from our team to optimize material selection for your project.

What are the Applications of FDM?

FDM transforms ideas into tangible solutions across a wide array of industries, offering versatility, cost efficiency, and functional reliability:

3D-printed plastic bracket with a lattice structure on technical drawings, surrounded by calipers and precision tools.

1. Aerospace:

Lightweight components improve fuel efficiency, while low-cost jigs, fixtures, and on-demand tooling enable swift design iterations during the development process.
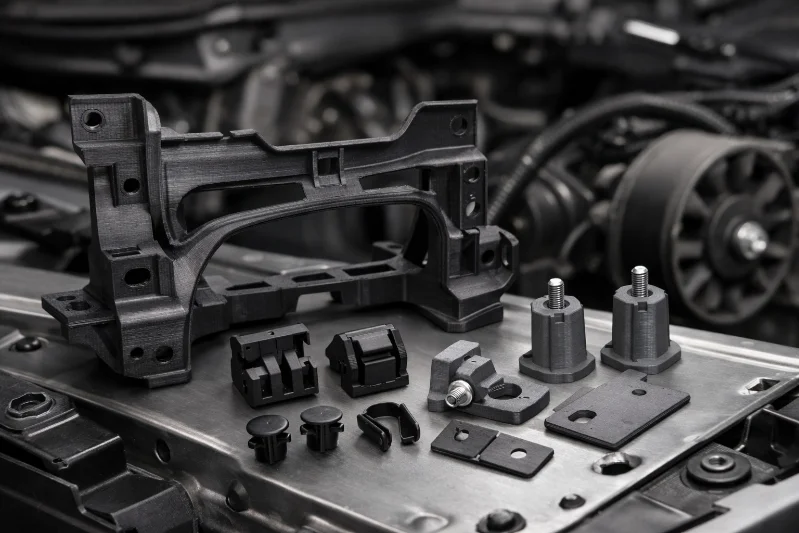
Various plastic injection molded components displayed on a metal surface in an industrial setting.

2. Automotive:

Functional prototypes, such as brackets, fixtures, dashboards, and spare parts, help reduce development timelines and facilitate custom or low-volume precision manufacturing.
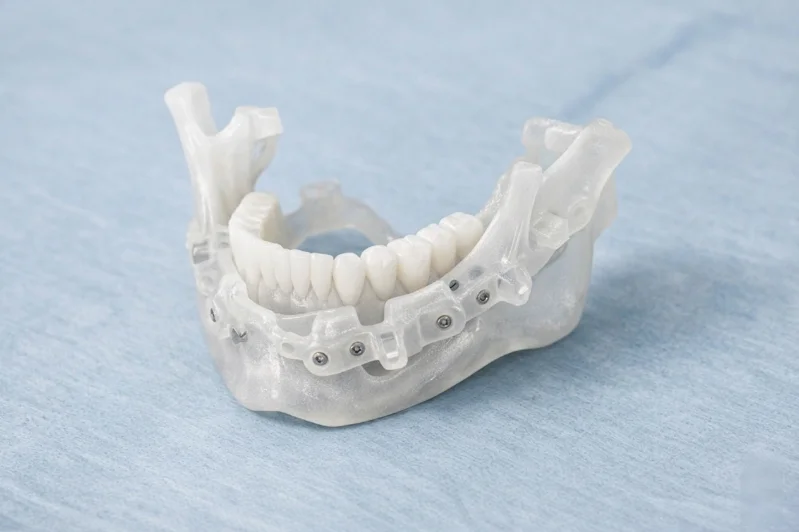
Close-up of a 3D printed dental prosthetic model showcasing artificial teeth and transparent support structure on a blue surface.

3. Healthcare:

Anatomical models aid surgical planning, prosthetics tailored to patients offer better usability, and specialized surgical tools ensure durability during sterilization procedures.
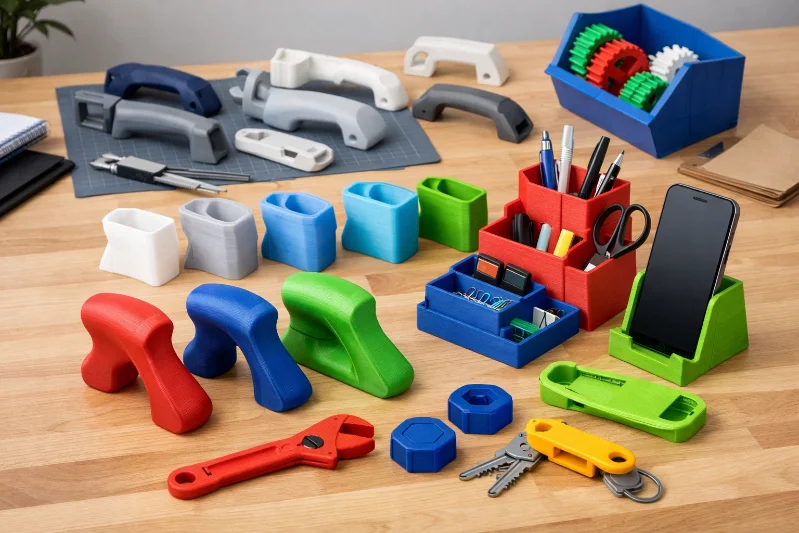
Workbench with robotics projects, including robot models, drones, and mechanical parts.

4. Consumer Goods:

Designers leverage FDM for ergonomic products, packaging prototypes, and affordable iterations of toys, gadgets, and home solutions to validate functionality before production.

Assorted plastic organizers and tools on a wooden table, including phone holder and pen containers.

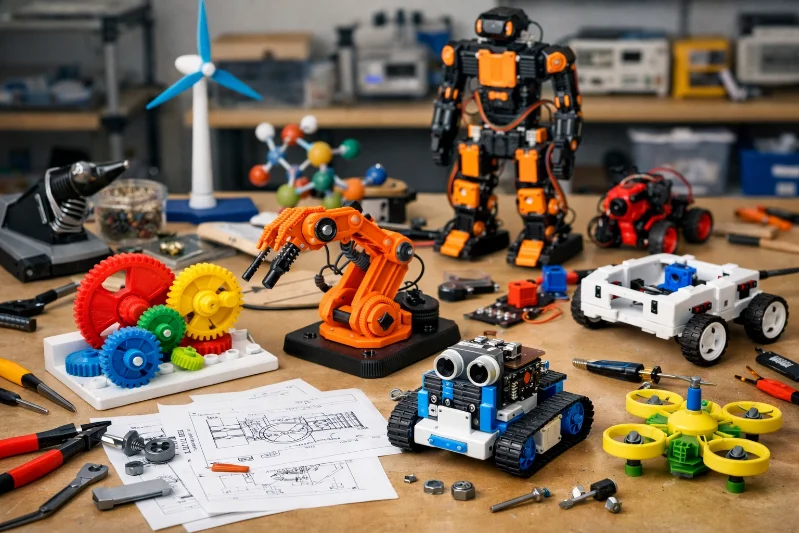
5. Education and Research:

FDM provides cost-effective tools for teaching engineering and STEM concepts and enables universities to prototype innovative designs for academic research projects.
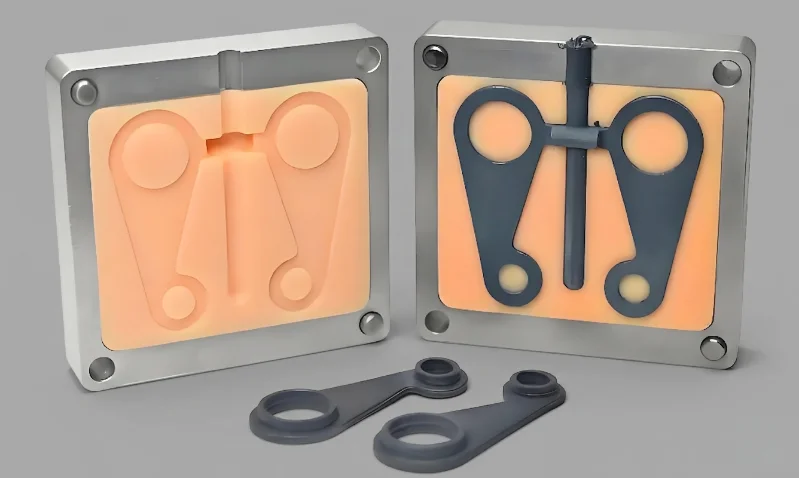
Two parts of a plastic injection mold with molded components displayed in front.

6. Industrial:

FDM supports the creation of custom assembly tools such as jigs, fixtures, robotic end-effectors, and tooling parts for streamlining workflows and optimizing processes.
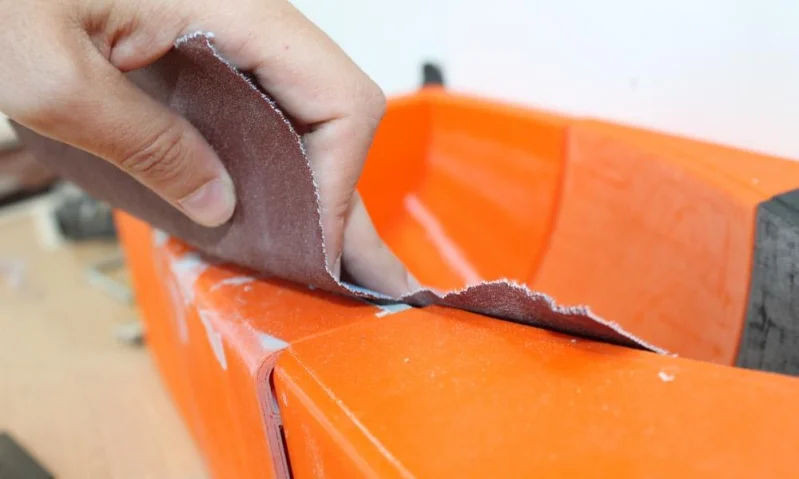
FDM 3D Printing Service & Custom FDM Parts

Learn everything about FDM 3D printing, from how it works to its applications across industries. Upload your model for a quote today!

Key Design for Manufacturing (DFM) Guidelines for FDM

To optimize FDM outcomes, follow these essential guidelines:

  • Wall Thickness: Thicker walls (minimum 1.2mm) improve overall structural integrity.
  • Overhang Angles: Overhangs should not exceed 45°, or they require support structures.
  • Infill Density: For strength-critical parts, infill ≥ 50% is recommended, balancing durability with print efficiency.
  • Layer Height: For fine details, use lower layer heights (≤0.2mm). Thicker layers (≥0.3mm) are better for faster production.
  • Rounded Corners & Fillets: Rounded geometric edges reduce stress concentrations and warping risks.
Close-up image of a white robotic joint with intricate mechanical components.

Common Post-Processing Techniques for FDM Prints

Post-processing plays a vital role in enhancing the quality and functionality of FDM-printed parts. These techniques elevate basic 3D prints into polished and professional-grade components:

Hand holding sandpaper to smooth the edge of an orange plastic surface during finishing.

1. Sanding:

Sanding is a manual process that removes visible layer lines and imperfections. Start with coarse-grit sandpaper to smooth out rough surfaces, then gradually move to finer grits for a polished and uniform finish. It is especially useful for flat areas and curved surfaces, serving as a foundation for further steps like painting or coating.

DIY anodizing setup with a glass container of orange liquid and connected metal device using tubes for the anodizing process.

2. Chemical Smoothing:

For materials like ABS, chemical smoothing with acetone vapor is a popular method to create a smooth, glossy appearance. The vapor melts the outer surface slightly, eliminating layer lines without extensive manual effort. This method requires precise handling to prevent over-smoothing or distorting intricate details.

Three 3D printed objects: a bronze dragon, gold goblet, silver hand.

3. Painting:

After preparation through sanding, parts can be primed with a base coat to ensure even paint application and fill minor imperfections. A variety of paints, including sprays and brush-based options, can then be applied to achieve vibrant colors, patterns, or even realistic textures for a professional aesthetic.
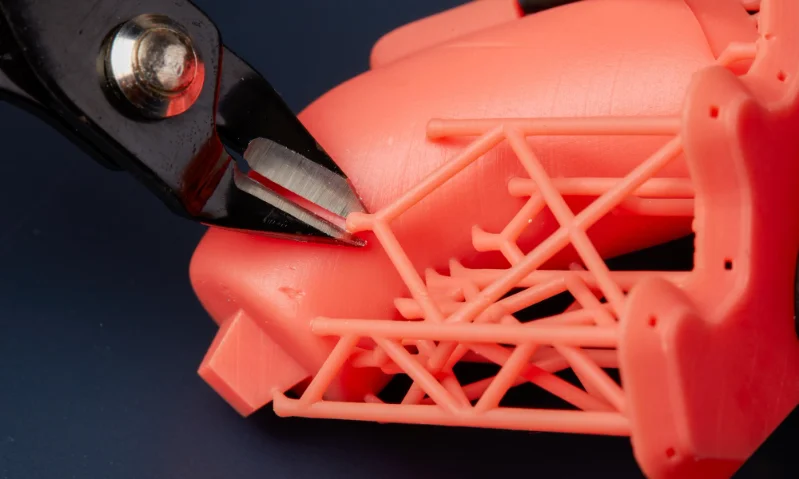
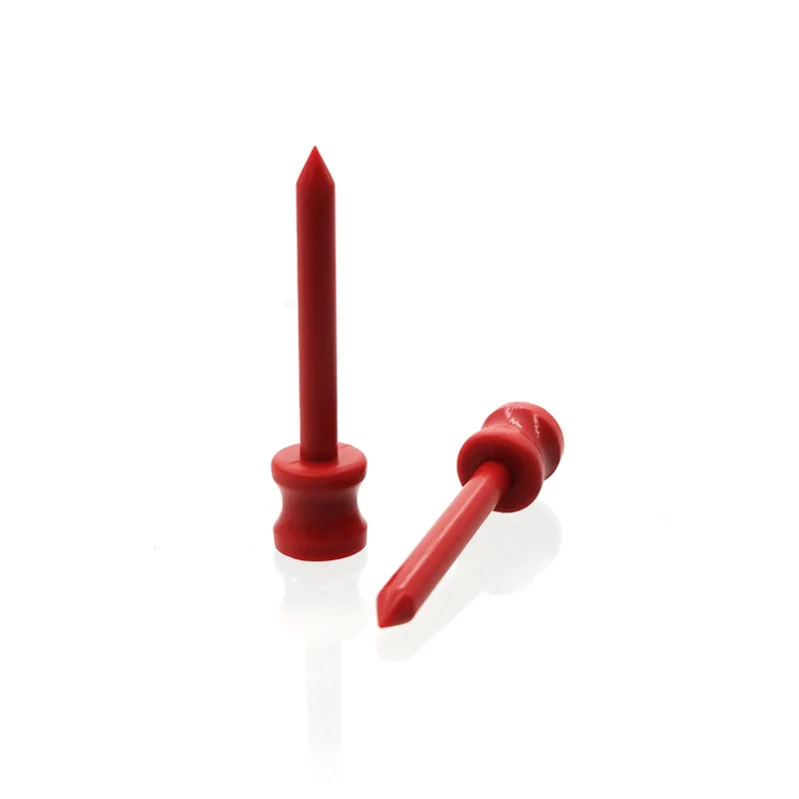
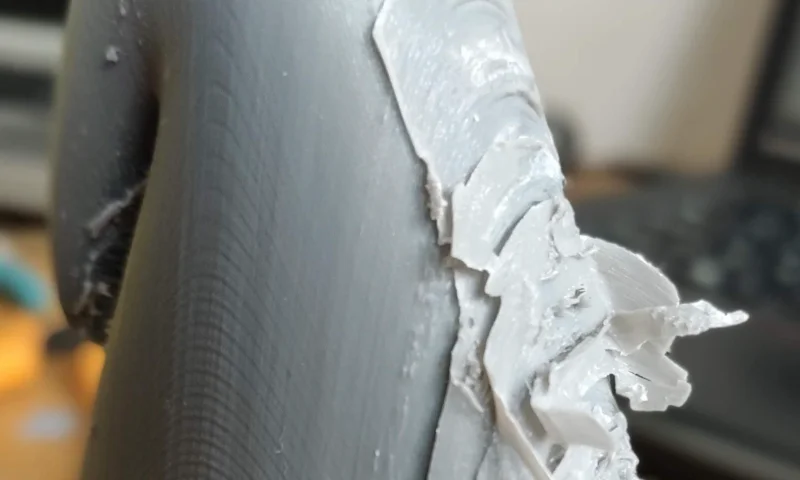
Tool trimming excess sprues from a plastic mold with delicate design.

4. Support Removal:

Post-printing, supports need to be carefully removed to avoid damaging the finished part. Design optimization can simplify the removal process by minimizing unnecessary supports. After removal, refined sanding or scraping may be necessary to smooth any marks left at attachment points.

XTC-3D brush-on coating kit for 3D printed parts with bottles, brush, stir sticks.

5. Filling and Sealing:

Imperfections, gaps, or unwanted roughness in prints can be addressed using fillers such as putty. To improve strength or make parts watertight, sealing with epoxy resin or similar coatings is often applied, ensuring long-term durability and protection from environmental factors.

Close-ups of a person inserting and smoothing a metal thread into a black 3D-printed part using a soldering tool.

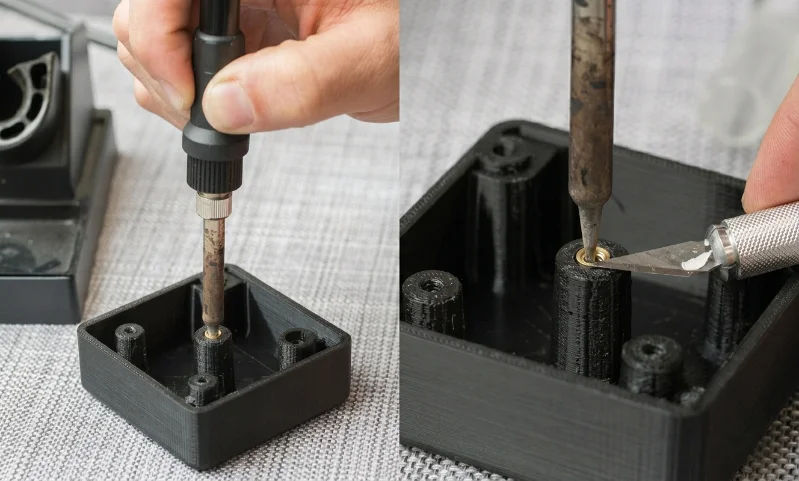
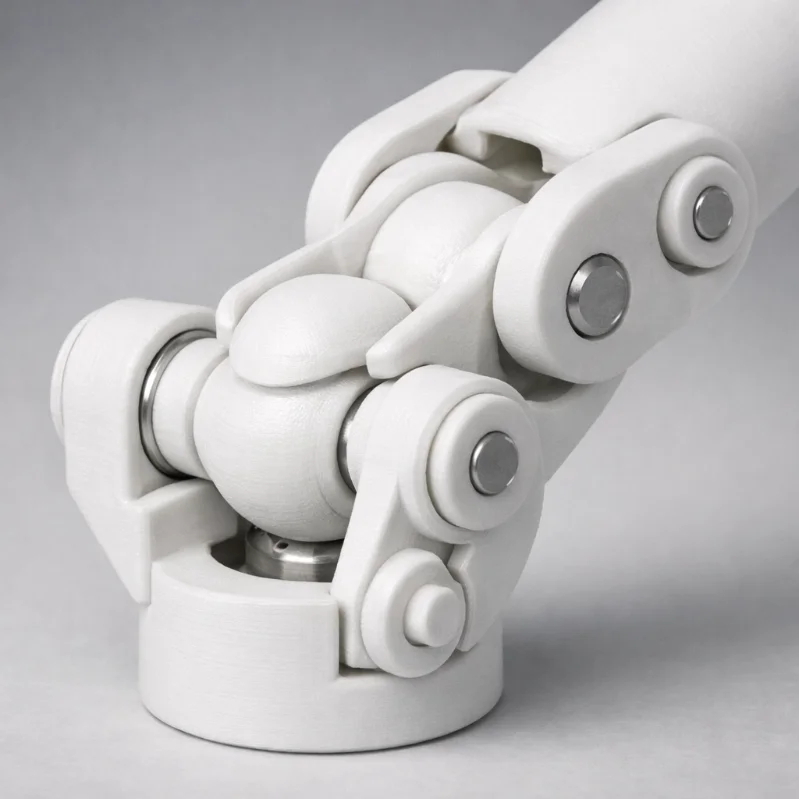
6. Assembly and Finishing

For prints intended for functional use or multi-part assembly, additional steps like drilling, threading, or tapping may be required to refine tolerances and achieve the desired fit. This technique ensures precision and structural reliability for assembled components.

The Role of Post-Processing in FDM:

Post-processing is critical for refining FDM prints, whether for aesthetics, functionality, or improved durability. By combining and tailoring these techniques to suit different materials and applications, manufacturers can bridge the gap between concept and a finished, market-ready product.

Consult with our team to elevate your project’s performance.

What Factors Affect the Strength of FDM Printed Parts?

Understanding the key variables that influence FDM part durability and mechanical performance.

Material Properties

The choice of filament significantly impacts part strength. PETG, Polycarbonate (PC), ABS, and carbon fiber-reinforced composites offer superior tensile strength and durability compared to standard PLA.

  • High tensile strength materials
  • Thermal resistance requirements
  • Flexibility and elasticity

Layer Bonding

Strong inter-layer adhesion is crucial for durability. Poor bonding creates weak spots and increases failure risk.

  • Proper nozzle temperatures
  • Controlled cooling rates
  • Consistent extrusion flow

Infill Density & Shell Thickness

Higher infill density and thicker outer shells directly enhance part strength. Demanding applications typically use 50%–100% infill with 3–4 wall layers.

  • Internal support structure
  • Impact resistance
  • Compressive strength

Print Orientation

Parts are weakest perpendicular to layer lines. Align layers parallel to load-bearing forces to minimize failure risks in critical components.

  • Load direction alignment
  • Tensile strength optimization
  • Failure risk reduction

How to Design Support Structures for Success and Easy Removal?

Master the art of designing effective support structures that ensure quality prints while minimizing post-processing effort.

Optimize Overhang Angle Orientation

Most FDM printers can handle overhangs with angles up to 45° relative to the horizontal plane without additional support. Beyond this angle, gravity and insufficient layer adhesion can result in imperfections.

  • Minimize overhangs exceeding 45°
  • Reduce support material usage
  • Simplify post-processing

Choose the Right Support Type

Different support types offer varying benefits. Soluble supports (PVA/BVOH) dissolve in water for clean surfaces, while tree-like supports minimize contact and material usage.

  • Breakaway supports for simplicity
  • Soluble supports for complex geometries
  • Tree-like supports for efficiency

Adjust Support and Part Separation

A small gap between support material and the printed part facilitates easy removal without compromising model integrity. Typical Z-axis gaps range from 0.3-0.5 mm.

  • Z-axis gap: 0.3-0.5 mm
  • Dense interface layers
  • Improved surface smoothness

Consider Support Infill Density and Patterns

Lower infill densities (10%-20%) provide sufficient strength without wasting material. Grid, triangle, and gyroid patterns offer different stability and efficiency trade-offs.

  • Optimal infill: 10%-20%
  • Gyroid patterns for efficiency
  • Reduced material and print time

Support Structure Examples:

Worker using clippers to remove excess plastic material from a part created using injection molding.

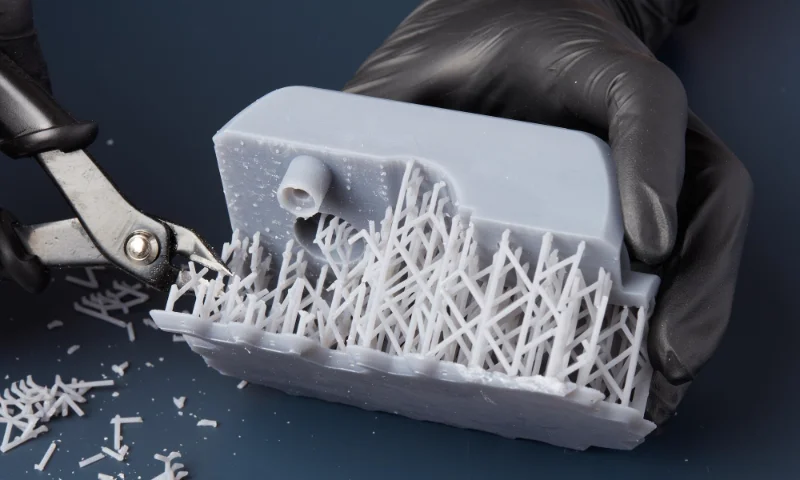
Tree-like Support Structures

Branched supports minimize contact while providing adequate support

Close-up of a plastic part with visible burrs, highlighting a defect in the injection molding process.

Support Removal Techniques

Proper tools and techniques ensure clean removal without damaging parts

A gold-colored 3D printed dog model with geometric design and visible support structures on a printer bed.

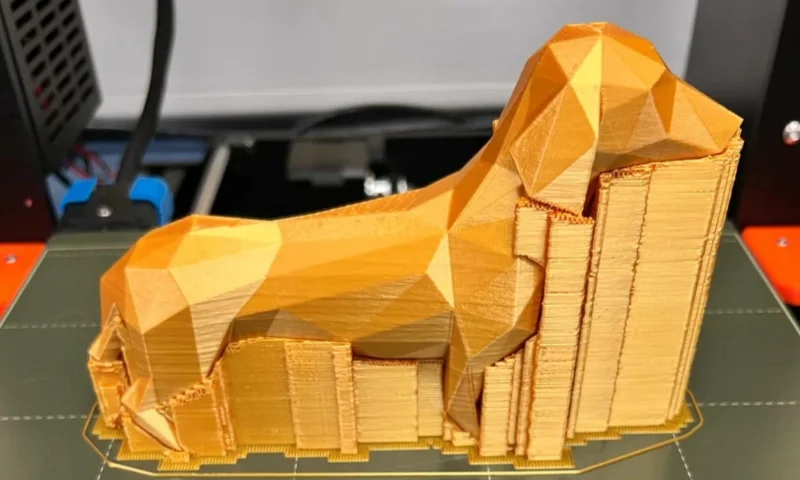
Support Pattern Comparison

Different patterns offer varying stability and material efficiency

3D printed object with complex support structure, showcasing intricate design and precision manufacturing.

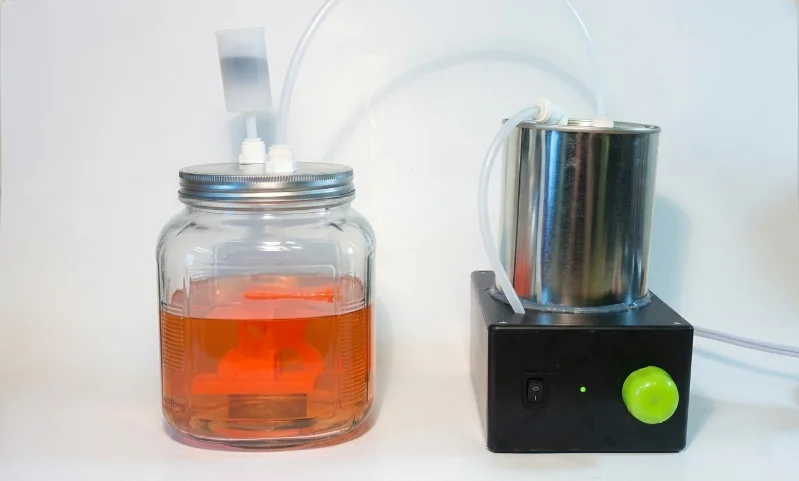
Soluble Support Materials

PVA and BVOH supports dissolve in water for pristine surfaces

How to Quickly Diagnose and Fix Common FDM Printing Issues?

FDM 3D printing is a versatile technology, but it can present challenges. Here are some common problems you might encounter and practical steps to address them.

Warping:

Uneven cooling causes layers to contract, lifting corners off the print bed and creating dimensional inaccuracies.

Solutions:

  • Use heated bed at recommended temperature
  • Apply adhesives (glue stick, painter's tape, hairspray)
  • Use enclosure to maintain consistent temperature

Under-Extrusion:

Weak, thin layers or missing sections result in structurally compromised parts with reduced strength.

Solutions:

  • Unclog nozzle and inspect for blockages
  • Verify filament diameter in slicer settings
  • Increase extrusion multiplier or flow rate

Layer Shifting or Misalignment:

Horizontal misalignment between layers caused by mechanical issues or movement during printing.

Solutions:

  • Tighten printer belt system
  • Level print bed and gantry properly
  • Reduce print speed for high-speed movements

Stringing (Oozing):

Melted filament leaks from nozzle during travel moves, leaving thin threads across the print.

Solutions:

  • Lower nozzle temperature slightly
  • Enable and optimize retraction settings
  • Check for filament moisture

Frequently Asked Questions (FAQs)

What file formats do you accept for FDM printing orders?

We accept STL, STEP, OBJ, and IGES formats. STEP is recommended for complex assemblies as it retains dimensional accuracy.

What is the minimum order quantity (MOQ) for FDM printed parts?

There is no minimum order quantity. We support single prototype orders as well as batch production runs.

How do you ensure dimensional accuracy and consistency across multiple parts?

Each batch undergoes quality inspection using calibrated measuring tools. We maintain tolerances of ±0.1mm or 0.2% of part dimension.

What is the typical lead time for FDM orders?

Standard orders are fulfilled within 3–5 business days. Rush orders can be accommodated within 24–48 hours depending on complexity and volume.

Can you sign an NDA to protect our design files and intellectual property?

Yes. We routinely sign NDAs prior to receiving any design files and all data is handled under strict confidentiality protocols.

Do you provide material certifications or test reports for engineering-grade filaments?

Yes. Material datasheets and certifications are available for engineering-grade materials including PETG, Nylon, and Polycarbonate upon request.

Can FDM parts be used as end-use production components, or only for prototyping?

FDM parts can serve as functional end-use components, especially in low-volume production, jigs, fixtures, and enclosures — not just prototypes.

How do you handle design issues or DFM concerns before printing?

Our engineering team reviews every submitted file and proactively flags potential issues such as wall thickness, unsupported overhangs, or tolerance conflicts before production begins.

Optimization Solutions Provided For Free

Or fill out the contact form below:

Ask For A Quick Quote

Send drawings and detailed requirements via 

Emial:[email protected]

Or Fill Out The Contact Form Below:

Ask For A Quick Quote

Send drawings and detailed requirements via 

Emial:[email protected]

Or Fill Out The Contact Form Below:

Ask For A Quick Quote

Send drawings and detailed requirements via 

Emial:[email protected]

Or Fill Out The Contact Form Below:

Ask For A Quick Quote

Send drawings and detailed requirements via 

Emial:[email protected]

Or Fill Out The Contact Form Below:

Ask For A Quick Quote

Send drawings and detailed requirements via 

Emial:[email protected]

Or Fill Out The Contact Form Below:

Ask For A Quick Quote

Send drawings and detailed requirements via 

Emial:[email protected]

Or Fill Out The Contact Form Below:

Ask For A Quick Quote For Your Brand

Send drawings and detailed requirements via 

Emial:[email protected]

Or Fill Out The Contact Form Below:

Спросите быструю цитату

Мы свяжемся с вами в течение одного рабочего дня, обратите внимание на письмо с суффиксом «[email protected]».

Ask For A Quick Quote

Send drawings and detailed requirements via 

Emial:[email protected]

Or Fill Out The Contact Form Below: