 Ir al contenido
Servicio de impresión 3D por sinterizado láser selectivo (SLS)
Explore soluciones de sinterizado selectivo por láser (SLS) de primera categoría para necesidades de impresión 3D complejas.
Guía completa de la impresión 3D por sinterizado selectivo por láser (SLS)
¿Qué es el sinterizado selectivo por láser (SLS)?
El sinterizado selectivo por láser (SLS) es una tecnología avanzada de fabricación aditiva (AM) que pertenece al fusión en lecho de polvo (PBF) familia. Utiliza un láser de alta potencia para fusionar selectivamente, o sinterizar, pequeñas partículas de polvo de polímero en un objeto sólido tridimensional, capa por capa.
1. Una definición técnica:
En esencia, el SLS fabrica piezas a partir de un modelo digital en 3D (por ejemplo, un archivo CAD). El proceso tiene lugar dentro de una cámara que contiene un lecho de polvo termoplástico, que se calienta a una temperatura justo por debajo del punto de fusión del material. A continuación, un láser de CO₂ de precisión escanea la sección transversal del modelo 3D sobre la superficie del lecho de polvo, elevando la temperatura de las partículas específicas hasta su punto de fusión y haciendo que se fusionen. Una vez completada una capa, la plataforma de construcción desciende, se aplica una nueva capa de polvo y el proceso se repite hasta que se forma todo el objeto.
2. El principio básico (sinterizar, no sólo fundir):
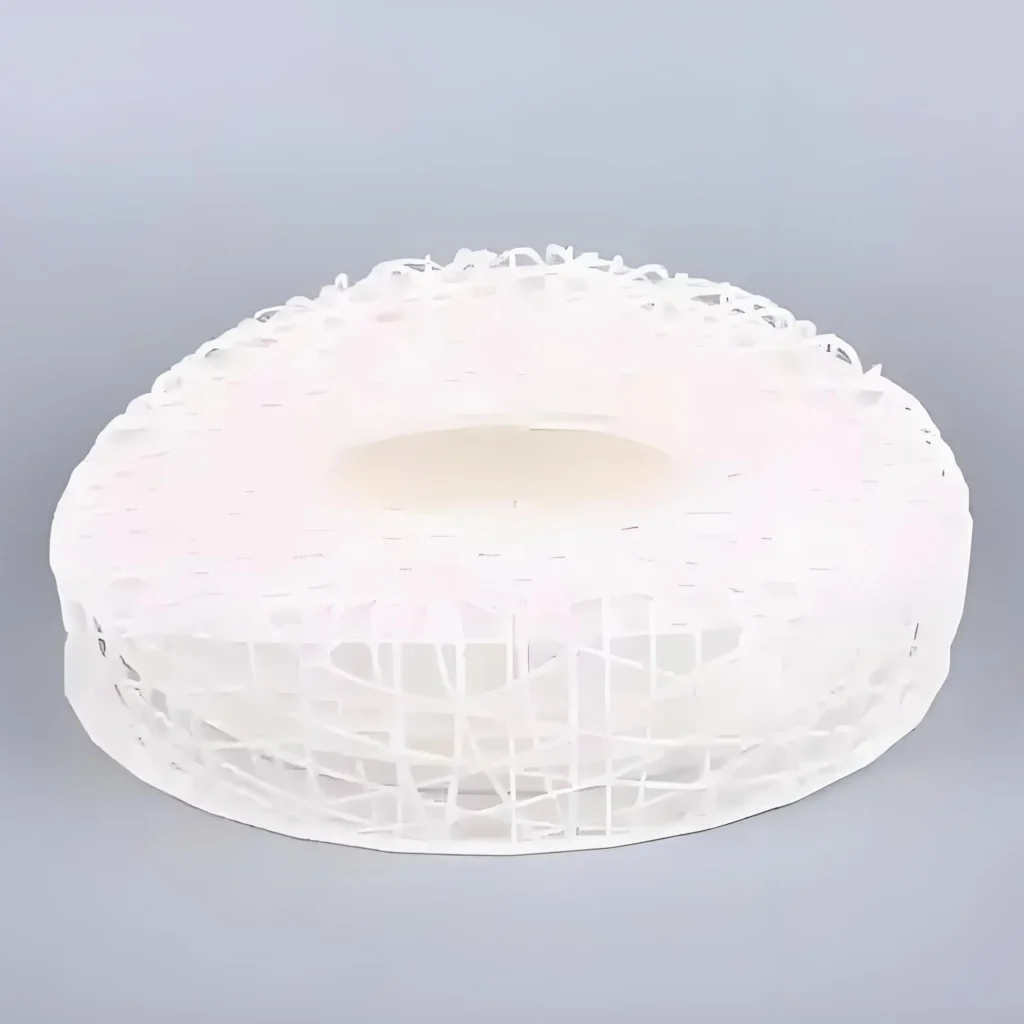
El término "sinterización" es clave. A diferencia de los procesos que funden completamente el material (como la fusión selectiva por láser para metales), la sinterización es un proceso térmico en el que las partículas se unen y fusionan a nivel molecular sin licuarse por completo. Esto crea piezas que no sólo son fuertes, sino que también poseen una microestructura ligeramente porosa. El polvo sin sinterizar que rodea la cámara de fabricación actúa como una estructura de soporte natural integrada para la pieza que se está imprimiendo. Esta naturaleza autoportante es una de las ventajas más significativas de la tecnología SLS.
3. Resumen de las principales características:
Para entender rápidamente lo que hace único al SLS, considere estas características definitorias:
- Familia tecnológica: Fusión del lecho de polvo (PBF)
- Materiales primarios: Polímeros termoplásticos, principalmente nylon (PA 11, PA 12).
- Estructuras de apoyo: No es necesario; el polvo no utilizado soporta la pieza.
- Propiedades de las piezas: Excelente resistencia mecánica, durabilidad y resistencia a la temperatura. Adecuado para aplicaciones funcionales.
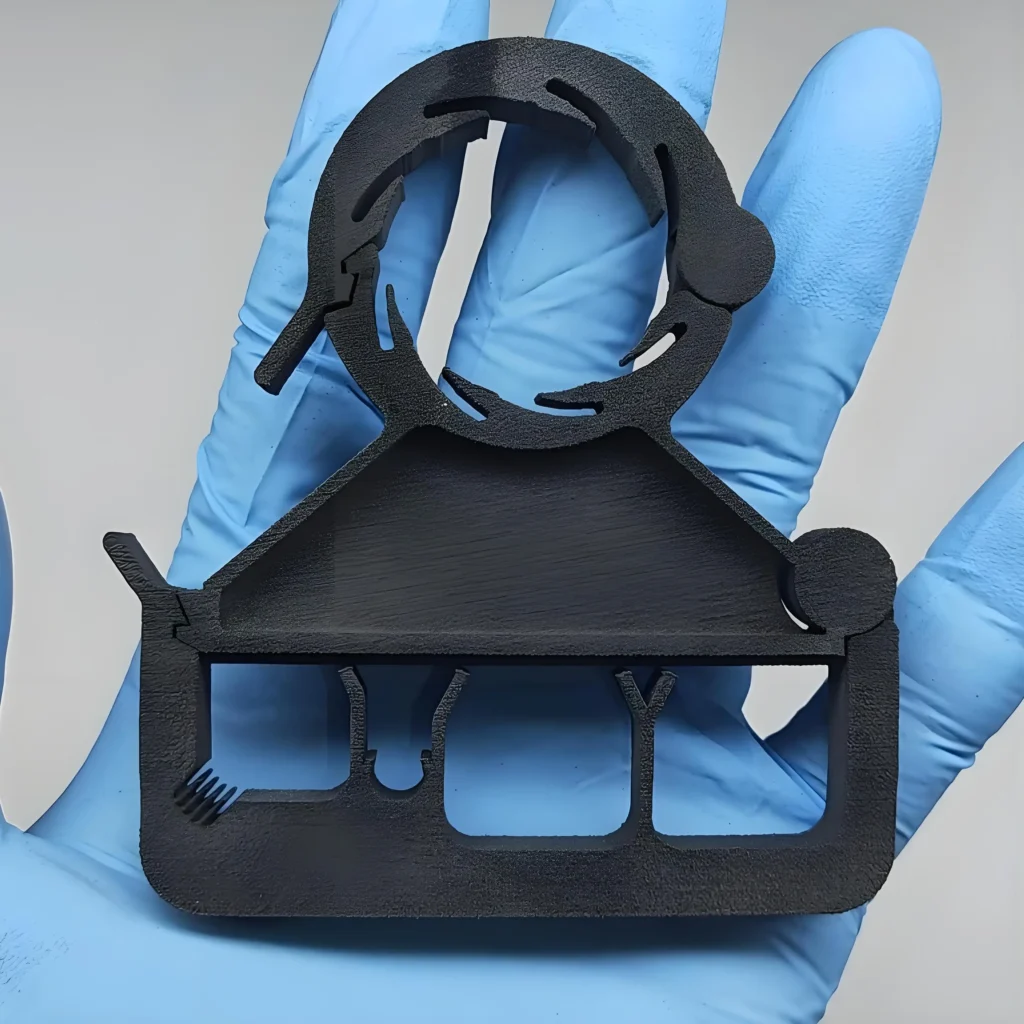
- Acabado superficial: Mate, con una textura ligeramente granulosa o arenosa.
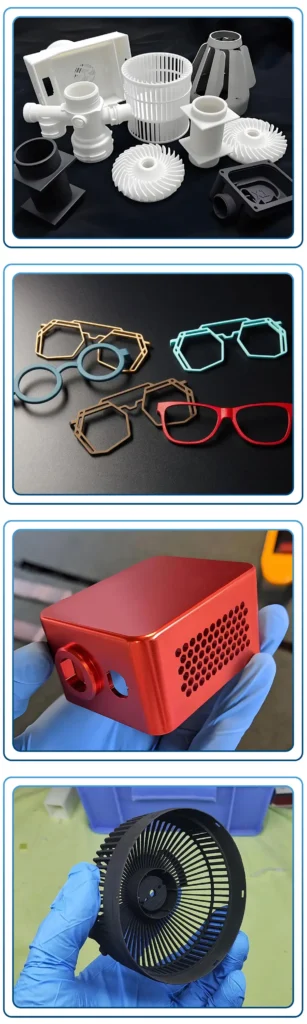
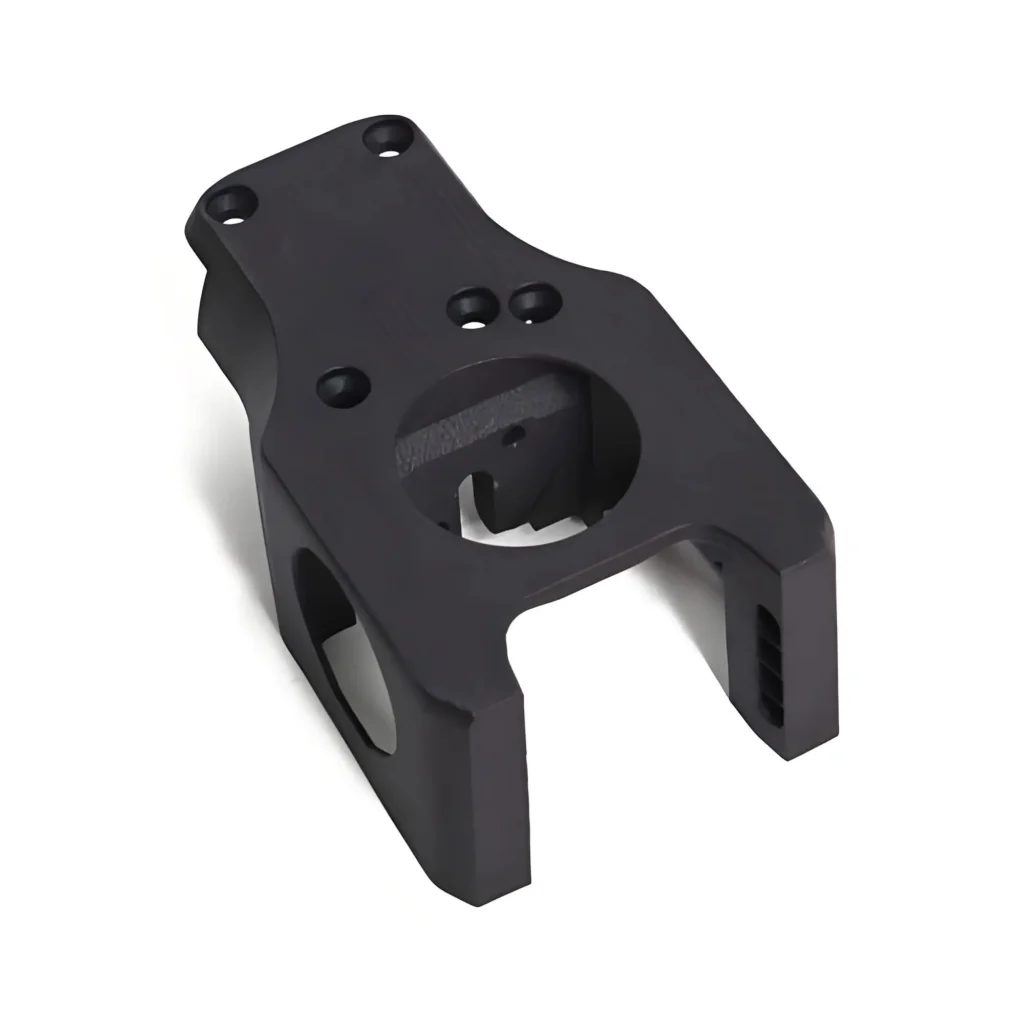
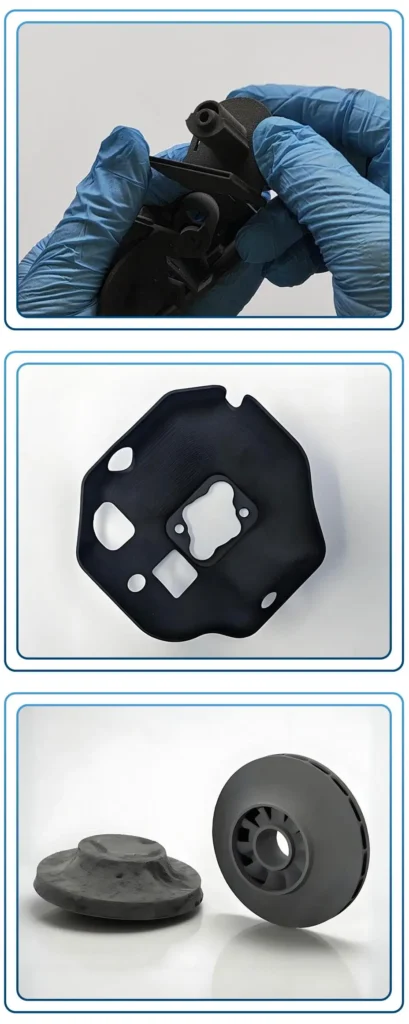
- Casos de uso principales: Prototipos funcionales, piezas de uso final complejas, fabricación de volumen bajo a medio y componentes con geometrías intrincadas, como bisagras vivas y encajes a presión.
¿Cómo funciona la impresión 3D SLS?
Para entender el proceso de SLS es necesario observar tanto el flujo de trabajo digital como las intrincadas operaciones mecánicas que tienen lugar dentro de la impresora.
1. El flujo de trabajo de digital a físico:
El viaje desde un concepto hasta una pieza física sigue una ruta de fabricación digital estándar:
① Creación de modelos 3D: Todo comienza con un archivo CAD (diseño asistido por ordenador) en 3D. A continuación, este modelo se exporta en un formato imprimible en 3D, normalmente STL (Standard Tessellation Language) o 3MF (3D Manufacturing Format).
② Rebanado y preparación de la construcción: El modelo 3D se importa en un software especializado. Este software "corta" digitalmente el modelo en cientos o miles de capas finas y horizontales. También permite al operario orientar y "anidar" varias piezas dentro del volumen de fabricación para maximizar la eficiencia.
③ Funcionamiento de la máquina: El archivo preparado se envía a la máquina SLS, que ejecuta el proceso de impresión automatizado.
④ Post-procesamiento: Una vez finalizadas la impresión y el enfriamiento, las piezas se retiran de la máquina y se someten a los pasos de limpieza y acabado necesarios.
2. El proceso mecánico: Desglose por capas:
La magia se produce dentro de la cámara de fabricación de la impresora SLS. El proceso puede dividirse en cinco pasos mecánicos clave que se repiten para cada capa.
Paso 1: Preparación de la cama y calentamiento: Antes de que comience la impresión, toda la cámara de impresión, incluido el lecho de polvo y la zona circundante, se calienta a una temperatura precisa justo por debajo del punto de sinterización del polímero. Este precalentamiento es fundamental, ya que minimiza la distorsión térmica (alabeo) al reducir el gradiente de temperatura entre las zonas sinterizadas y no sinterizadas. Esto garantiza la estabilidad dimensional y la precisión de la pieza.
Paso 2: Deposición del polvo: Un mecanismo de recubrimiento, que puede ser una cuchilla o un rodillo, se desplaza por la plataforma de construcción, depositando una capa fina y uniforme de polvo (normalmente de 100-150 micras de espesor) procedente de un depósito de polvo. Garantizar que esta capa sea perfectamente plana y uniforme es esencial para la calidad de la pieza final.
Paso 3: Sinterización láser: Este es el núcleo del proceso SLS. Un potente láser de CO₂, guiado por un conjunto de espejos dinámicos (galvanómetros), se dirige hacia el lecho de polvo. El láser traza la geometría transversal de la capa actual, definida por el archivo cortado. La energía del láser calienta rápidamente las partículas de polvo hasta su punto de fusión, lo que provoca su fusión en una capa sólida. Las zonas no afectadas por el láser permanecen como polvo suelto.
Paso 4: Bajada de la plataforma: Una vez que la capa está totalmente sinterizada, la plataforma de construcción, sobre la que descansa la pieza, desciende una distancia igual al grosor de una sola capa. Esto deja espacio para la siguiente capa de polvo.
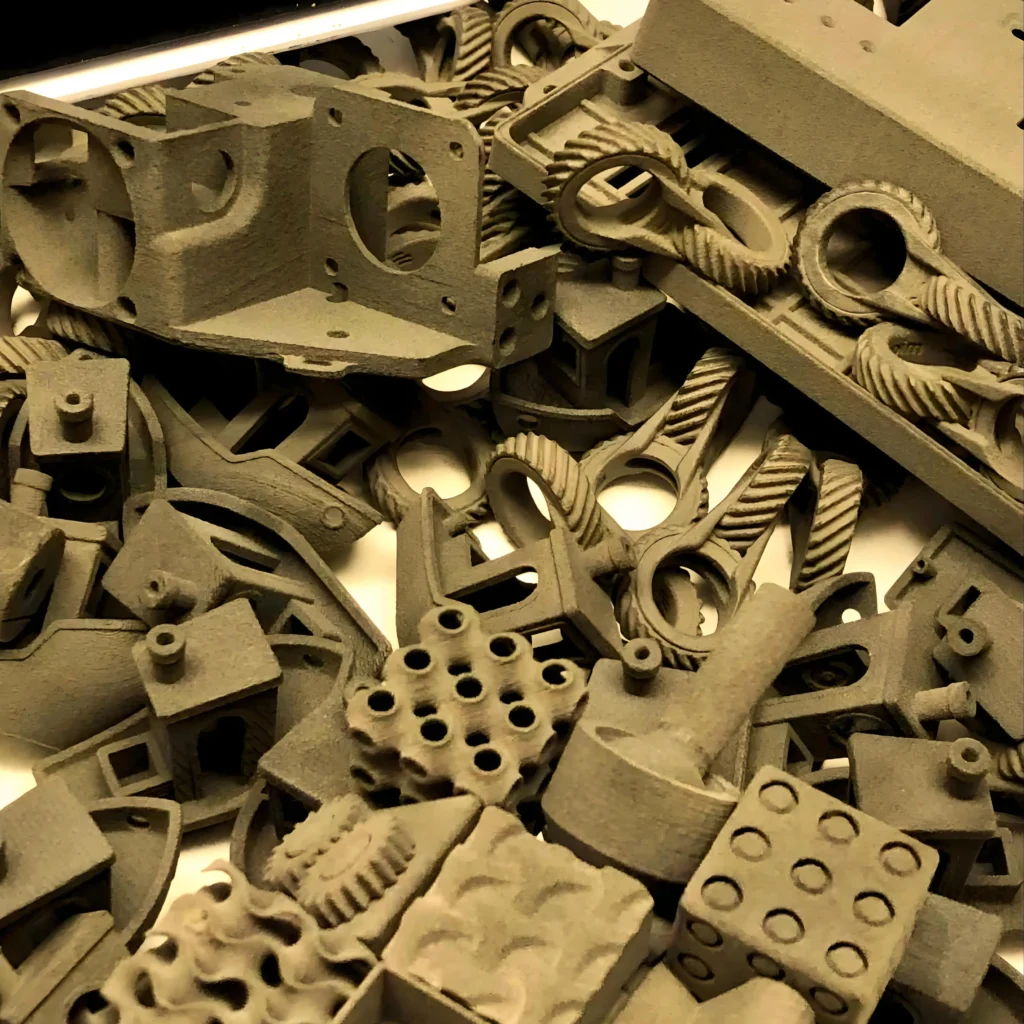
Paso 5: Repetición y finalización de la construcción: La cuchilla de repaso aplica una nueva capa de polvo sobre la capa sinterizada anteriormente (Paso 2), y el láser sinteriza la siguiente sección transversal (Paso 3). Este ciclo de deposición de polvo, sinterización y descenso de la plataforma se repite hasta que se han construido todas las capas de la pieza. Las piezas acabadas están ahora encerradas en un bloque sólido de polvo sin sinterizar, a menudo denominado "torta".
3. La fase de enfriamiento: Un paso crítico que no se ve:
Esta es una de las fases más cruciales del proceso de SLS, aunque a menudo se pasa por alto. Una vez sinterizada la última capa, toda la torta de polvo -que contiene las piezas acabadas- debe dejarse enfriar lenta y uniformemente dentro de la impresora o en una estación de refrigeración independiente. Este proceso de enfriamiento controlado puede durar muchas horas (a veces hasta 40-50% del tiempo total del proceso). Si se apresura este paso, se producirá una contracción desigual y un alabeo significativo, lo que arruinará las piezas.
¿Qué materiales se utilizan en la impresión SLS?
La versatilidad del SLS se debe en gran medida a la gama de materiales termoplásticos robustos que puede procesar. Aunque los nylons son los más frecuentes, también hay disponibles otros polímeros especializados.
1. Poliamidas (Nylons):
Los nylons son los materiales más utilizados en SLS debido a su excelente equilibrio entre resistencia, flexibilidad y resistencia térmica/química.
① PA 12 (nailon 12):
La PA 12 es el patrón oro y el material más popular para SLS.
- Propiedades: Alta resistencia, rigidez y excelente resistencia a productos químicos, grasas, aceites y álcalis. Presenta una buena estabilidad a largo plazo y resistencia al agrietamiento por tensión.
- Aplicaciones: Ideal para prototipos funcionales, piezas de uso final con encajes a presión, ensamblajes complejos y carcasas duraderas.
② PA 11 (nailon 11):
El PA 11 es un polímero bioderivado (fabricado a partir de aceite de ricino) y es conocido por su mayor elasticidad y resistencia al impacto en comparación con el PA 12.
- Propiedades: Excelente ductilidad, alta resistencia al impacto y mejor resistencia térmica. Es más flexible que la PA 12, por lo que resulta adecuada para piezas que deban doblarse o soportar impactos repetidos.
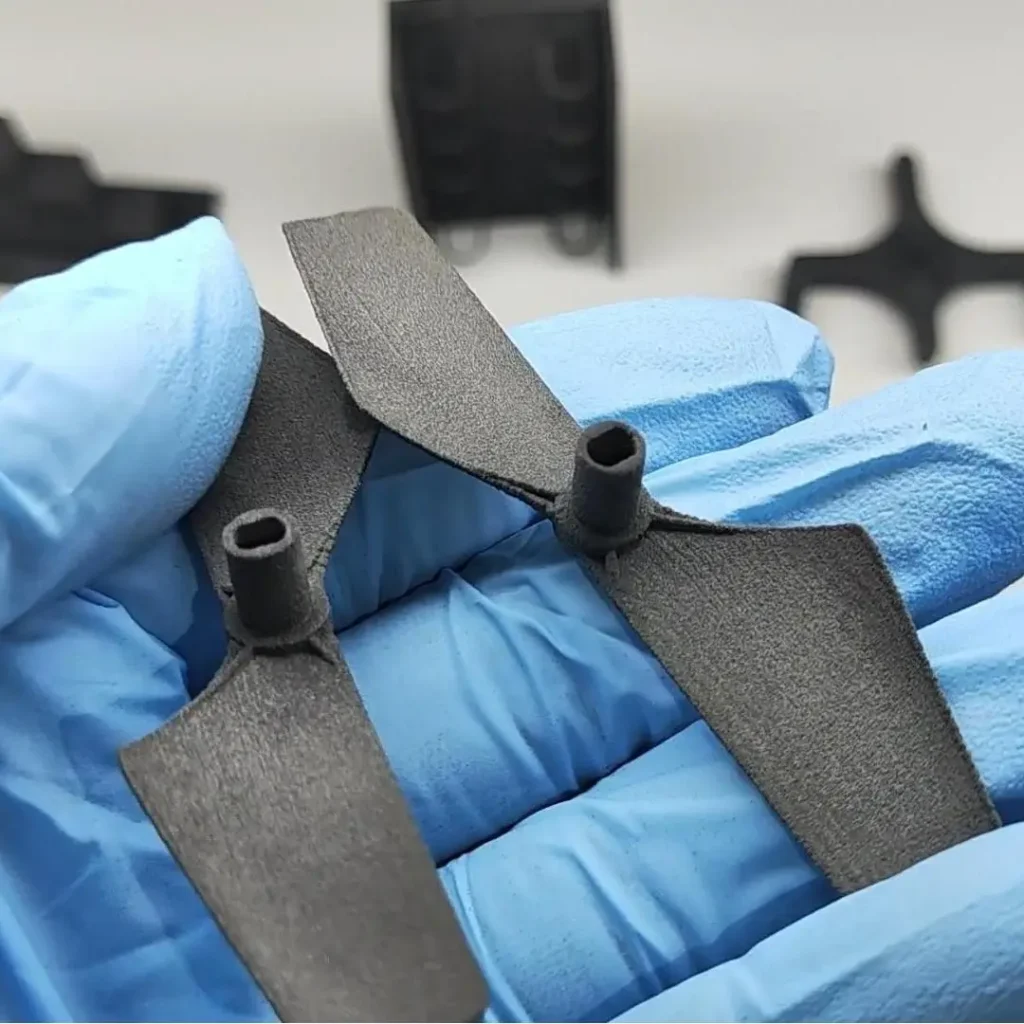
- Aplicaciones: Bisagras vivas, prótesis, equipamiento deportivo, componentes de drones y otras aplicaciones que requieren una gran tenacidad.
③ Poliamidas rellenas (materiales compuestos):
Para mejorar determinadas propiedades, los nilones base pueden mezclarse con cargas.
- Nylon relleno de vidrio (PA-GF): El polvo de nailon se mezcla con perlas de vidrio. Este compuesto ofrece una rigidez y una resistencia térmica considerablemente mayores que el nailon estándar, pero a costa de ser más quebradizo. Se utiliza en piezas sometidas a altas temperaturas o cargas, como componentes de automoción, herramientas y carcasas.
- Nylon relleno de carbono (PA-CF / Carbonmide): Infundido con fibras de carbono, este material es extremadamente rígido, fuerte y ligero. También tiene propiedades de disipación electrostática (ESD). Entre sus aplicaciones se encuentran las plantillas de alto rendimiento, las fijaciones, los componentes para deportes de motor y los efectores finales robóticos.
- Nylon relleno de aluminio (Alumide): Mezcla de PA 12 y finas partículas de aluminio. Da como resultado piezas con un aspecto metálico y una mayor rigidez y conductividad térmica. Suele utilizarse para prototipos visuales que necesitan un aspecto metálico, así como para utillajes y herramientas personalizados.
2. Poliuretano termoplástico (TPU):
El TPU es un elastómero flexible similar al caucho. Permite a SLS producir piezas resistentes y duraderas que pueden doblarse y estirarse.
- Propiedades: Alta resistencia a la abrasión, resistencia al desgarro y elasticidad. La dureza Shore puede variar en función del grado específico.
- Aplicaciones: Juntas, sellos, mangueras flexibles, componentes de calzado, carcasas protectoras y elementos amortiguadores de vibraciones.
3. Polipropileno (PP):
El polipropileno es un polímero ligero y muy resistente a los productos químicos.
- Propiedades: Excelente resistencia química (especialmente a ácidos y bases), baja absorción de humedad, buena resistencia a la fatiga y soldabilidad. También es biocompatible y puede esterilizarse.
- Aplicaciones: Sistemas de fluidos, componentes de automoción, dispositivos médicos y recipientes que requieran resistencia química.
4 Polímeros de alto rendimiento (PEEK y PEKK):
Estos materiales están en la vanguardia de la tecnología SLS y requieren máquinas de alta temperatura.
- Poliéter éter cetona (PEEK) y poliéter cetona cetona (PEKK): Miembros de la familia PAEK, son polímeros de alto rendimiento con una excepcional resistencia mecánica, biocompatibilidad y resistencia a temperaturas extremas y productos químicos agresivos. Suelen utilizarse como alternativa ligera al metal.
- Aplicaciones: Componentes aeroespaciales, implantes médicos y piezas industriales de alta temperatura.
¿Cuáles son los pasos del proceso de impresión SLS?
Esta sección esboza el flujo de trabajo operativo de extremo a extremo, proporcionando una visión práctica desde la perspectiva de un operador o proveedor de servicios.
Paso 1: Preparación del modelo digital:
El proceso comienza con un modelo CAD 3D finalizado. Este modelo debe ser "estanco" (un sólido cerrado y múltiple) y no tener errores geométricos. A continuación, se exporta como archivo STL o 3MF.
Paso 2: Configuración de la construcción y anidamiento:
El archivo se carga en el software de preparación de la impresión. Aquí, se realizan dos acciones críticas:
- Orientación: La pieza se orienta para optimizar la resistencia, el acabado superficial y la precisión. Por ejemplo, orientar una superficie plana paralela a la placa de impresión evitará el "escalonamiento".
- Nido: Dado que el SLS no requiere estructuras de soporte, es posible agrupar varias piezas en tres dimensiones dentro del volumen de fabricación. Este "anidamiento" aumenta drásticamente el rendimiento y reduce el coste por pieza, lo que hace que el SLS sea muy eficiente para la producción por lotes.
Paso 3: Configuración de la máquina y carga del polvo:
El operario prepara la máquina SLS. Esto implica limpiar la cámara de impresión de la tirada anterior y cargarla con polvo de polímero. Un concepto clave aquí es la tasa de renovación, una mezcla de polvo nuevo (virgen) y polvo reciclado del trabajo de impresión anterior. Una tasa de renovación típica es de 50%, lo que significa que la estructura se compone de 50% de polvo virgen y 50% de polvo reciclado. Esto es crucial tanto para la rentabilidad como para mantener las propiedades del material.
Paso 4: El ciclo automatizado de impresión y enfriamiento:
Una vez iniciada la fabricación, el proceso está totalmente automatizado. La máquina se calienta, deposita y sinteriza el polvo capa a capa y, por último, inicia el largo ciclo de enfriamiento controlado. Toda esta fase puede durar entre 12 horas y más de dos días, en función del tamaño y la densidad de la estructura.
Paso 5: Separación y desapoderamiento:
Una vez finalizado el ciclo de enfriamiento, se abre la cámara de fabricación y el bloque sólido de polvo (la "torta") se traslada a una estación de separación. El operario extrae cuidadosamente las piezas acabadas del polvo suelto sin sinterizar. Puede ser un proceso sucio y manual. El polvo restante se recoge para su reciclado.
Paso 6: Granallado:
Las piezas recién liberadas todavía están cubiertas por una capa de polvo residual. Se colocan en una cabina de granallado o chorreado de arena, donde se utiliza un chorro de alta presión de medios finos (como perlas de vidrio o gránulos de plástico) para limpiar cualquier resto de polvo y crear un acabado de superficie lisa, uniforme y mate.
Paso 7: Posprocesamiento avanzado (opcional):
En función de la aplicación, las piezas pueden someterse a fases de acabado adicionales, como el teñido, el alisado con vapor, la pintura o el revestimiento, para mejorar la estética, la calidad de la superficie o propiedades funcionales específicas.
¿Cuáles son los parámetros clave que afectan a la calidad del SLS?
La calidad de una pieza SLS no es accidental; es el resultado de controlar cuidadosamente una amplia gama de parámetros del proceso.
1. Parámetros relacionados con el material:
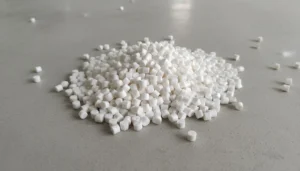
- Tamaño y distribución de partículas: El tamaño y la forma de las partículas de polvo afectan a la fluidez del polvo y a la densidad de empaquetamiento, lo que a su vez influye en la densidad y el acabado superficial de la pieza final.
- Velocidad de refresco del polvo: La proporción de polvo virgen y reciclado. Utilizar demasiado polvo reciclado puede degradar las propiedades mecánicas y la calidad de la superficie, ya que el polvo experimenta una degradación térmica con cada ciclo de impresión.
2. Parámetros relacionados con el proceso (en la impresora):
① Parámetros térmicos:
- Temperatura de la cama: La temperatura del lecho de polvo, mantenida justo por debajo del punto de sinterización. Si es demasiado baja, puede provocar deformaciones ("curvatura"). Si es demasiado alta, puede provocar una sinterización no deseada del polvo circundante ("crecimiento").
- Temperatura de la cámara: La temperatura ambiente dentro de la envolvente de fabricación. Una temperatura estable y uniforme es esencial para la consistencia de la pieza.
② Parámetros del láser:
- Densidad energética: Es el parámetro más crítico y se define como la cantidad de energía láser suministrada por unidad de superficie. Es una función de la potencia láser, la velocidad de exploración y la distancia de exploración.
- Potencia del láser (vatios): Una mayor potencia permite una sinterización más rápida, pero debe equilibrarse para evitar el sobrecalentamiento o la combustión del material.
- Velocidad de escaneado (mm/s): La velocidad a la que el rayo láser se desplaza por el polvo.
- Distancia de exploración (distancia de la escotilla): La distancia entre líneas de escaneado láser adyacentes. Un espaciado más estrecho da como resultado una pieza más densa, pero con un tiempo de fabricación más largo.
- Una densidad de energía óptima garantiza la fusión completa entre partículas y capas sin degradar el polímero.
③ Parámetros de capa:
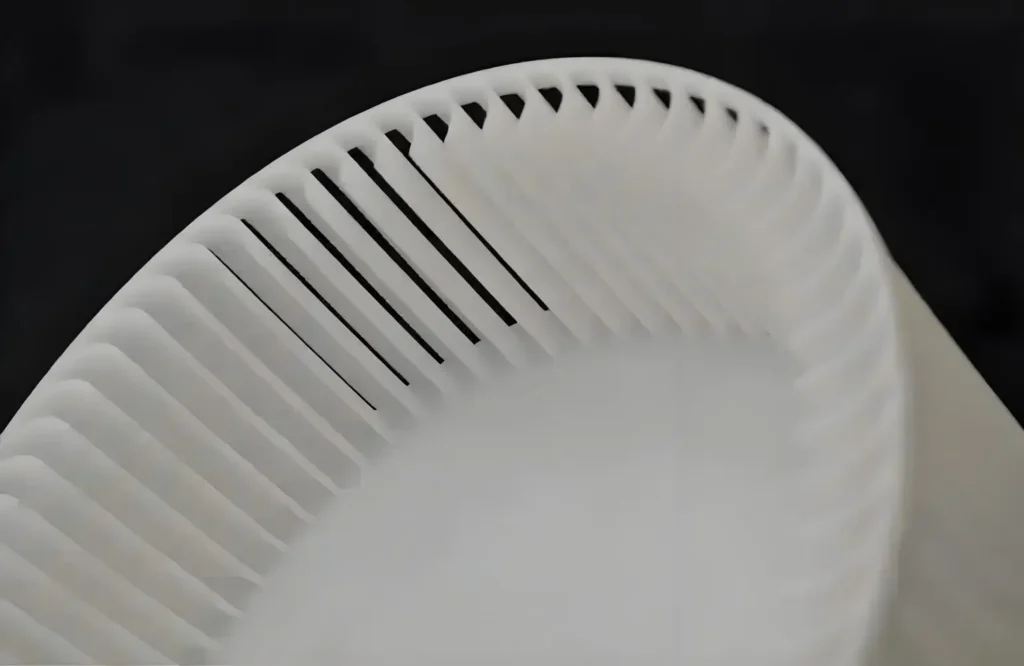
- Grosor de la capa: La altura de cada capa individual, normalmente alrededor de 0,1 mm (100 micras). Las capas más finas producen un mejor acabado superficial y detalles más precisos, especialmente en superficies curvas o en ángulo, pero aumentan considerablemente el tiempo de impresión.
3. Construir parámetros de diseño:
- Parte Orientación: Cómo se coloca una pieza en la cámara de fabricación. Esto afecta a la calidad de la superficie (efecto escalera en superficies angulosas), las propiedades mecánicas (las piezas son más fuertes a lo largo del plano X-Y) y el riesgo de alabeo.
- Parte Densidad de anidación: Aunque el anidamiento aumenta la eficacia, el empaquetado de piezas demasiado cerca puede crear puntos de calor localizados, lo que puede afectar a la precisión de los componentes cercanos.
¿Cuáles son las ventajas de la impresión 3D SLS?
El SLS es una tecnología preferida para muchas aplicaciones debido a una combinación única de ventajas.
1. Libertad de diseño: Sin necesidad de estructuras de soporte:
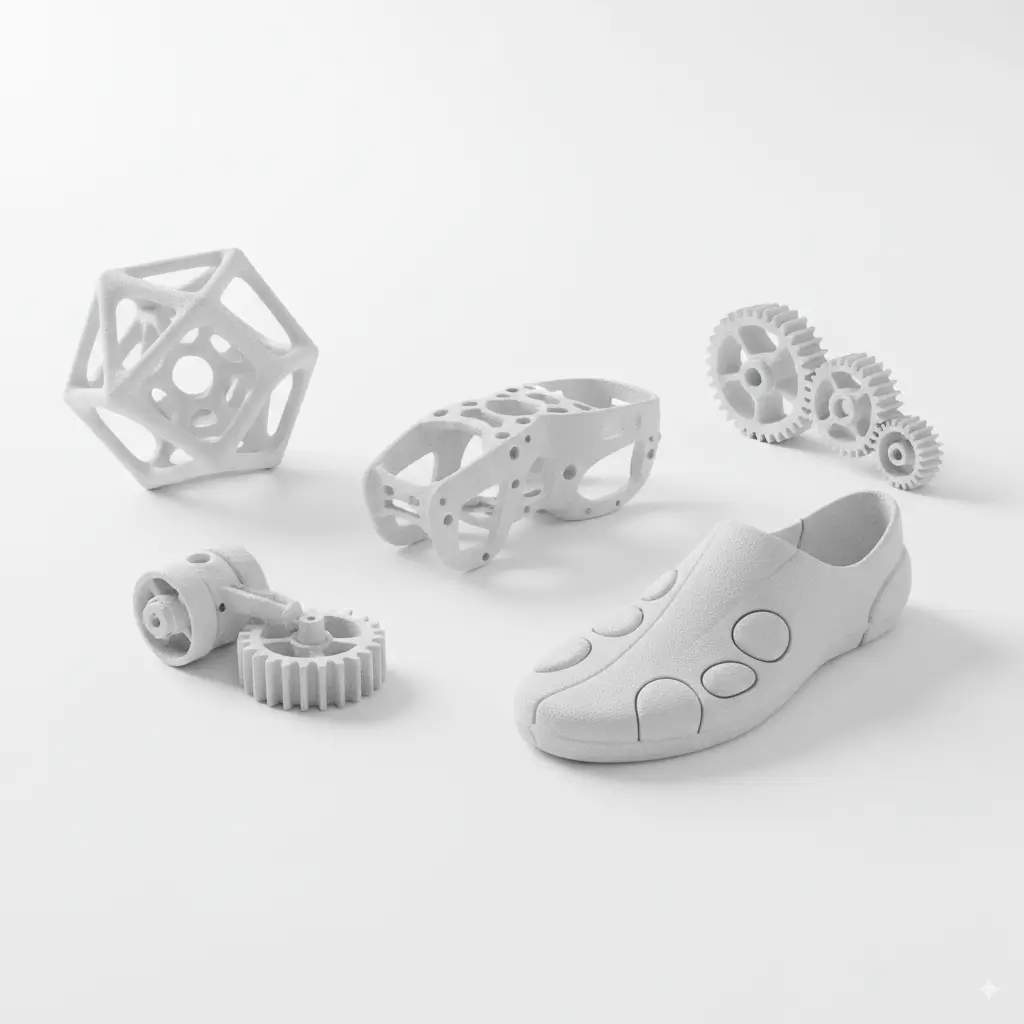
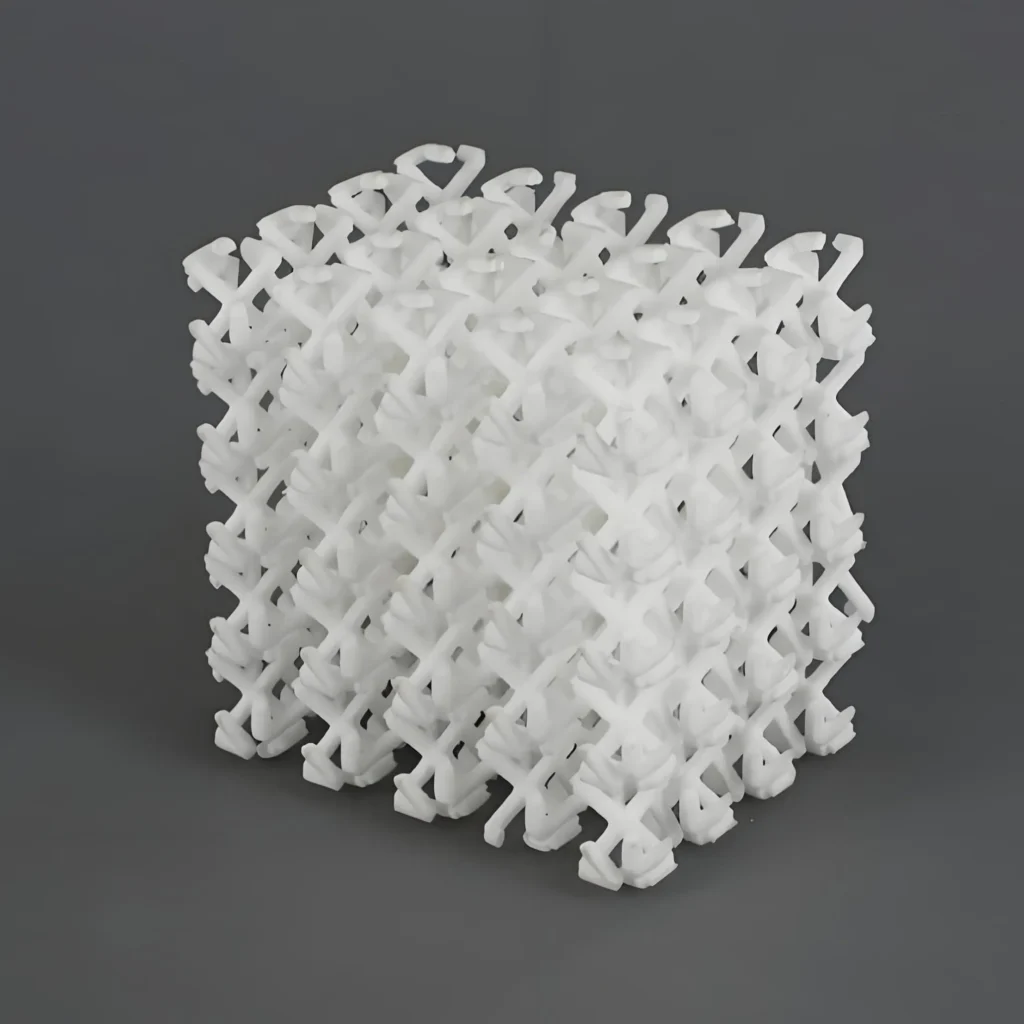
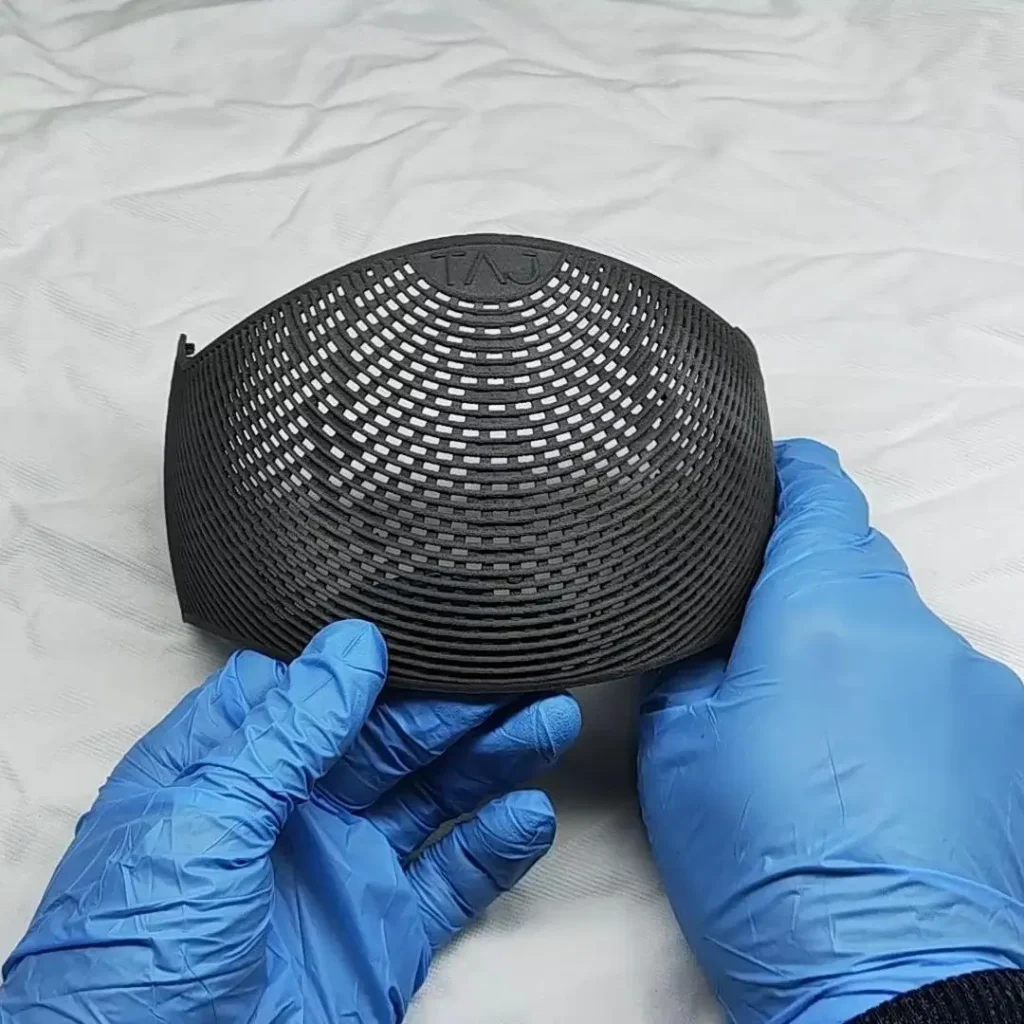
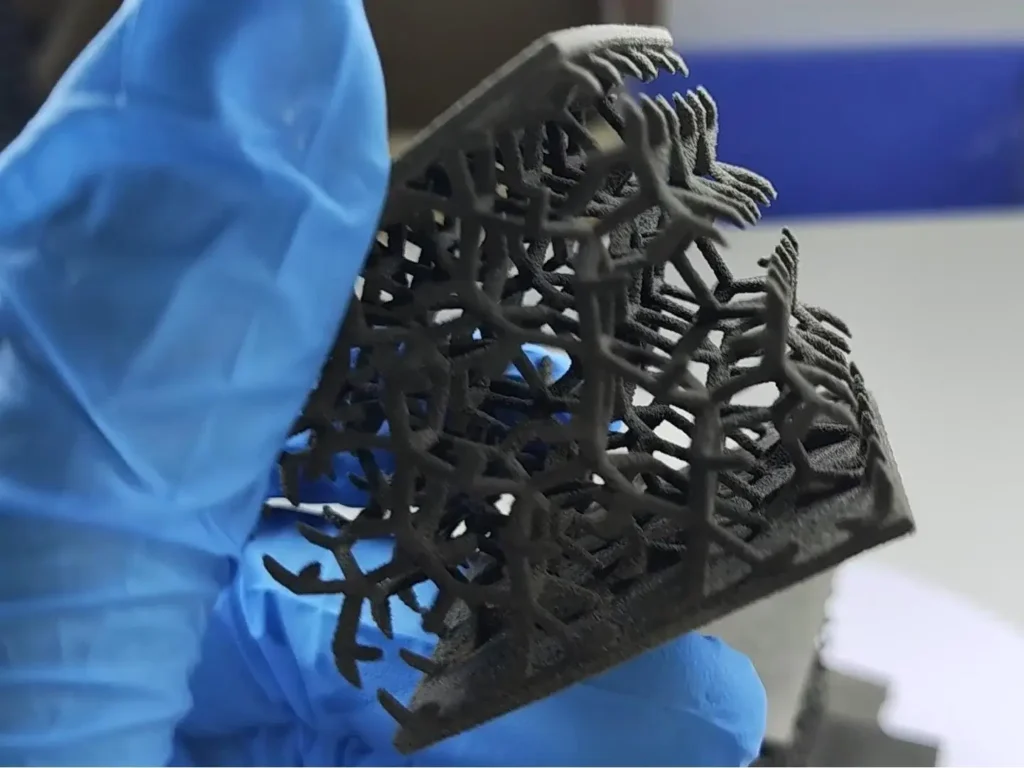
Ésta es sin duda la ventaja más significativa del SLS. El polvo no sinterizado en el volumen de construcción proporciona un soporte completo a la pieza durante la impresión. Esto permite la creación de geometrías extremadamente complejas, como canales internos, rebajes y estructuras reticulares intrincadas, que son imposibles o muy difíciles de producir con otros métodos. También elimina el paso posterior de retirada del soporte, lo que ahorra tiempo y trabajo.
2. Excelentes propiedades mecánicas:
Las piezas SLS, especialmente las fabricadas con nailon, son conocidas por su gran resistencia, rigidez y durabilidad. Se comportan de forma similar a las piezas moldeadas por inyección, lo que las hace adecuadas para pruebas funcionales rigurosas y como piezas de producción de uso final. Pueden soportar impactos, calor y exposición química.
3. Alta productividad y escalabilidad:
La capacidad de anidar docenas o incluso cientos de piezas en una sola fabricación hace que el SLS sea muy eficaz para series de producción de volumen bajo a medio. Esto maximiza el uso del volumen de fabricación de la máquina y reduce significativamente el coste por pieza en comparación con la impresión de piezas de una en una.
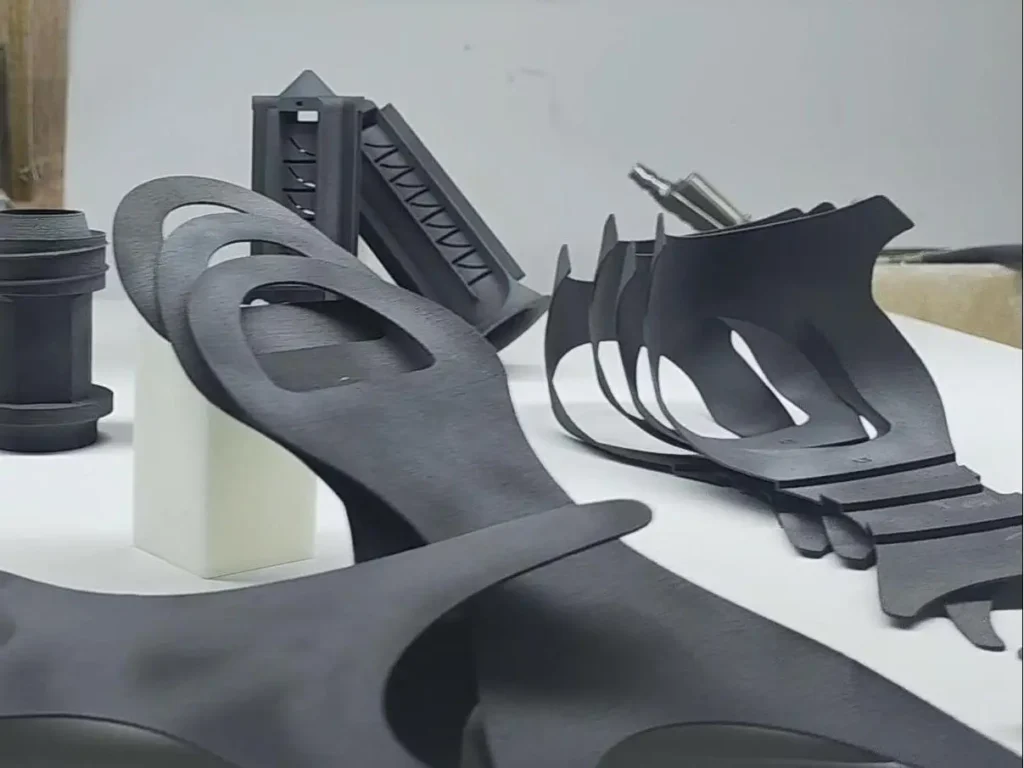
4. Geometrías complejas y detalles intrincados:
Como no hay soportes que limiten el diseño, los ingenieros pueden crear piezas optimizadas para el rendimiento más que para la fabricabilidad. Esto incluye características como bisagras vivas, uniones a presión y ensamblajes consolidados en los que varios componentes se imprimen como una sola pieza compleja.
5. Buena variedad de materiales:
SLS ofrece una amplia gama de termoplásticos de ingeniería, desde TPU flexibles hasta nylon rígido relleno de carbono y PEEK de alto rendimiento. Esto permite que la tecnología sirva para una amplia gama de aplicaciones en diferentes sectores.

Impresión 3D SLS personalizada para piezas resistentes y complejas
Obtenga piezas duraderas y detalladas con nuestros servicios de impresión 3D por sinterizado selectivo por láser (SLS).
Guía completa de la impresión 3D por sinterizado selectivo por láser (SLS)
¿Cuáles son las limitaciones del SLS en comparación con otros métodos de impresión 3D?
A pesar de sus muchos puntos fuertes, el SLS no es la solución perfecta para todas las aplicaciones. Tiene varias limitaciones que hay que tener en cuenta.
1. Acabado superficial y porosidad:
Las piezas SLS tienen naturalmente un acabado superficial mate y granulado debido a la naturaleza de la fusión de las partículas de polvo. La superficie también es ligeramente porosa. Aunque esto es aceptable para muchas piezas funcionales, las aplicaciones que requieren una superficie perfectamente lisa y estética necesitarán un tratamiento posterior exhaustivo (como el alisado con vapor). Tecnologías como SLA o Material Jetting ofrecen un acabado mucho más liso.
2. Mayor coste inicial:
Las máquinas de SLS representan una inversión de capital significativa, que a menudo cuesta más de $100.000 para los sistemas de calidad industrial. Los costes de los materiales también son superiores a los de los filamentos FDM o las resinas SLA. Esto hace que la barrera de entrada sea mayor para las empresas más pequeñas.
3. Plazos de entrega más largos:
El tiempo total del proceso de SLS puede ser largo. Esto no se debe únicamente al tiempo de impresión en sí, sino principalmente al largo periodo de enfriamiento obligatorio, que puede durar hasta 12-24 horas. Esto hace que SLS sea menos adecuado para prototipos rápidos y únicos en comparación con FDM o SLA.
4. Complejidad de la manipulación y el reciclaje de materiales:
Trabajar con polvos poliméricos finos requiere un entorno controlado y equipos de protección personal. Además, la gestión del ciclo de vida del polvo -seguimiento del uso, cálculo de las tasas de renovación y tamizado del polvo reciclado- añade complejidad operativa.
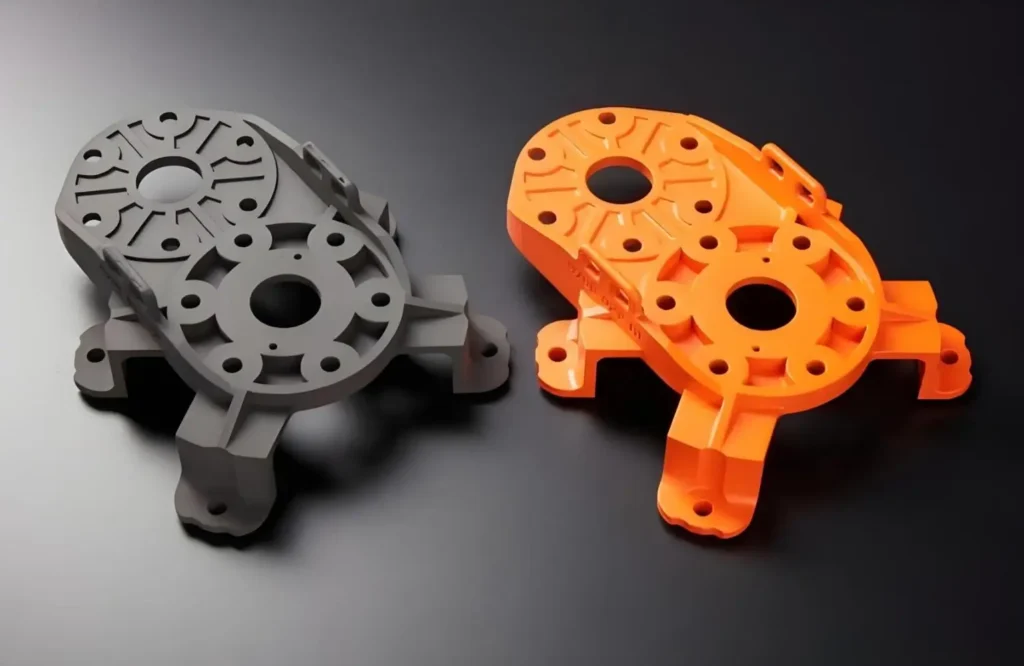
5. Opciones de color limitadas:
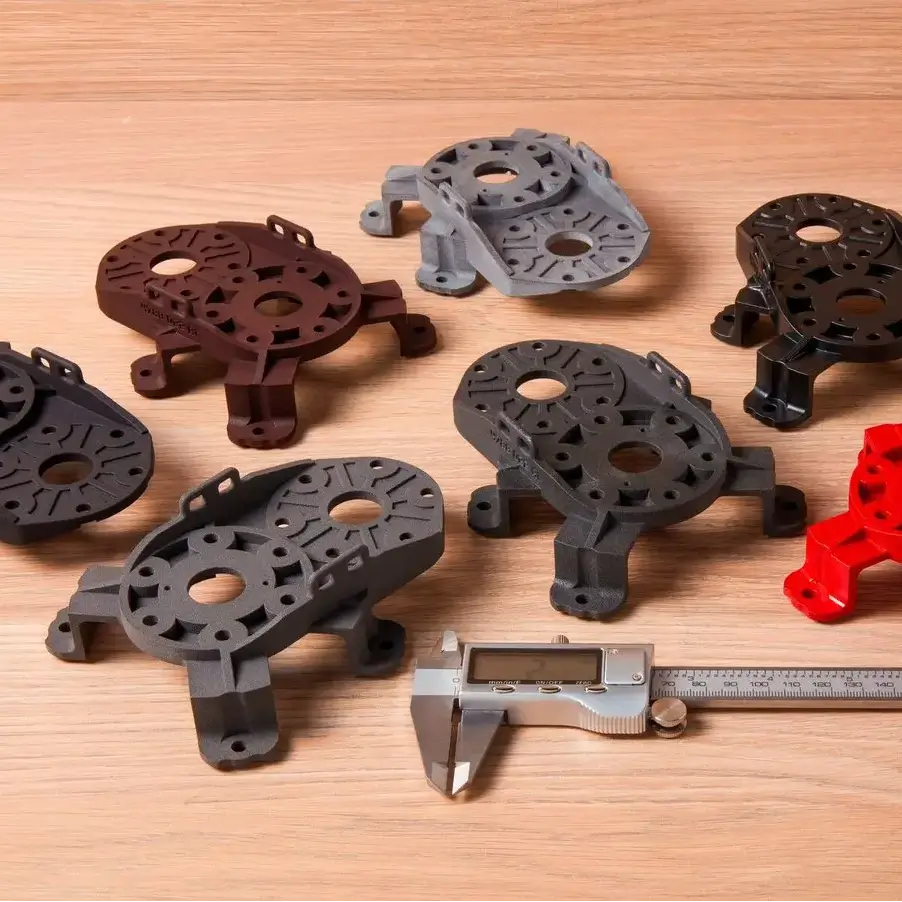
Las piezas SLS suelen imprimirse en un solo color, normalmente blanco, gris o negro, según el material. Para conseguir el color se requiere un paso secundario de postprocesado, como el teñido, que añade tiempo y costes. Tecnologías como Material Jetting o Binder Jetting ofrecen la posibilidad de imprimir a todo color.
¿Cuáles son las aplicaciones más comunes del SLS?
Las propiedades únicas de las piezas SLS han llevado a su adopción en una amplia gama de industrias para aplicaciones exigentes.
1. Creación de prototipos:
① Prototipos funcionales:
Esta es la aplicación por excelencia del SLS. Las empresas utilizan el SLS para crear prototipos de alta fidelidad que pueden someterse a pruebas en el mundo real. Como las propiedades mecánicas son tan parecidas a las de las piezas de producción finales, los ingenieros pueden comprobar de forma fiable la forma, el ajuste y la función.
- Ejemplos: Cajas para componentes electrónicos, ensamblajes a presión, estudios ergonómicos y pruebas de flujo de aire en conductos.
② Bisagras vivas y encajes a presión:
La durabilidad y flexibilidad de materiales como la PA 11 y la PA 12 los hacen perfectos para diseños de prototipos que incluyan bisagras vivas o cierres a presión de uso repetido.
2. Piezas de uso final y fabricación de bajo volumen:
El SLS ha madurado más allá de la creación de prototipos y ahora es un método de fabricación viable. Ejemplos:
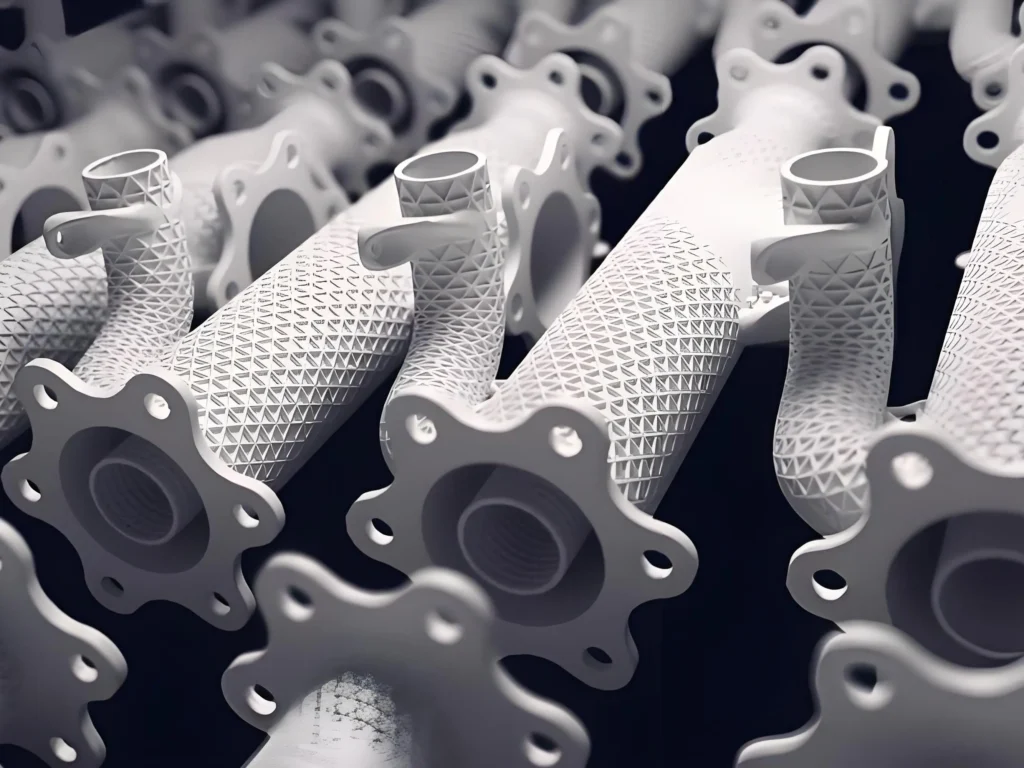
- Aeroespacial y automoción: Conductos de aire, soportes, componentes interiores a medida y carrocerías de vehículos aéreos no tripulados (drones). Las propiedades de ligereza y resistencia son ideales.
- Dispositivos médicos: Prótesis personalizadas, órtesis, guías quirúrgicas y carcasas para equipos médicos. Muchos materiales SLS son biocompatibles.
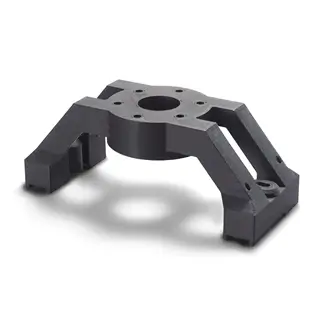
- Robótica y automatización: Pinzas personalizadas (herramientas de fin de brazo), plantillas, fijaciones y carcasas para sistemas robóticos.
- Utillaje: Creación de plantillas y utillajes personalizados para las líneas de fabricación con el fin de mejorar la eficacia y la precisión.
3. Bienes de consumo:
- Ejemplos: Monturas de gafas personalizadas de alta gama, fundas protectoras para aparatos electrónicos, componentes para artículos deportivos y productos personalizados.
¿Cuáles son los pasos de posprocesamiento de las piezas impresas por SLS?
El posprocesamiento es una etapa obligatoria en el flujo de trabajo de SLS para convertir una impresión en bruto en una pieza utilizable.
1. Postprocesado primario (Estándar):
Estos pasos se realizan en casi todas las piezas SLS.
- Desglose de piezas y depowdering: El primer paso tras el enfriamiento es extraer manualmente las piezas de la torta de polvo sin sinterizar. A menudo se utiliza aire comprimido para eliminar la mayor parte del polvo suelto.
- Explosión mediática: A continuación, las piezas se colocan en una cabina de granallado. Se dispara un chorro de abrasivo (por ejemplo, perlas de vidrio, perlas de plástico u óxido de aluminio) contra las piezas para eliminar cualquier resto de polvo fundido y crear un acabado superficial uniforme, limpio y mate.
2. Postprocesado secundario y estético (opcional):
Estos pasos se utilizan para mejorar el aspecto o la función de las piezas.
- Teñido: Es el método más habitual para añadir color. La naturaleza porosa de las piezas SLS les permite absorber muy bien el tinte. Las piezas se sumergen en un baño de tinte caliente, lo que da como resultado un color intenso y profundo que penetra en la superficie.
- Alisado químico por vapor: Proceso en el que las piezas se exponen a un disolvente vaporizado que funde ligeramente y refluye la superficie exterior. Esto sella la porosidad de la pieza, haciéndola estanca al agua y al aire, y crea un acabado liso y semibrillante comparable al del moldeo por inyección.
- Volteo / Acabado vibratorio: Para lotes de piezas más pequeñas, pueden colocarse en un bombo con material cerámico o plástico. La acción vibratoria alisa la superficie y redondea los bordes afilados.
- Pintura y revestimiento: Para colores específicos o acabados protectores, las piezas SLS pueden imprimarse y pintarse. Pueden aplicarse revestimientos como Cerakote para mejorar la durabilidad y la resistencia química.
¿Cómo mejorar el acabado superficial y la precisión dimensional en SLS?
Para obtener la máxima calidad del SLS se requiere una combinación de optimización del preprocesado, funcionamiento correcto de la máquina y postprocesado.
1. Optimización del acabado superficial:
① Optimización previa al proceso:
- Orientación de la pieza: Evite el efecto "escalera" orientando las superficies curvas o en ángulo lejos de un ángulo directo de 45 grados con respecto a la placa de impresión. Orientar las superficies críticas hacia arriba o hacia abajo suele dar los mejores resultados.
- Menor grosor de capa: El uso de una capa más fina (por ejemplo, 0,08 mm en lugar de 0,12 mm) reducirá la visibilidad de las líneas de capa, pero aumentará el tiempo de impresión.
② Soluciones posteriores al proceso:
- Granallado: El método estándar para obtener un acabado mate uniforme.
- Alisado por vapor: El método más eficaz para conseguir una superficie lisa, similar al molde de inyección. Es la mejor opción para aplicaciones que requieren superficies selladas y fáciles de limpiar.
2. Mejora de la precisión dimensional:
① Calibración de la máquina: Es esencial calibrar periódicamente los parámetros clave de la máquina. Esto incluye ajustar los factores de escala X-Y del láser para compensar cualquier imprecisión sistémica y ajustar el desplazamiento del haz láser.
② Contabilización de la contracción y el alabeo:
- Gestión térmica: Asegúrese de que los sistemas de calentamiento de la máquina funcionan correctamente para mantener un perfil de temperatura estable y uniforme. Esta es la primera línea de defensa contra el alabeo.
- Orientación de la pieza: Orientar las piezas largas y planas verticalmente en lugar de horizontalmente a veces puede mitigar el riesgo de alabeo.
- Compensación por software: El software avanzado puede aplicar factores de escala al modelo para contrarrestar la tasa de contracción natural del material durante el enfriamiento.
③ Diseño para la fabricación aditiva (DfAM):
- Grosor de pared: Cumpla las directrices de grosor mínimo de pared (normalmente 0,8-1,0 mm) para garantizar que la pieza sea robusta y se imprima correctamente.
- Tamaño de los agujeros: Los agujeros pequeños tienden a encogerse durante la sinterización. Es práctica común diseñarlos ligeramente sobredimensionados o planificar su perforación hasta la dimensión final tras la impresión.
- Detalles en relieve/grabados: Asegúrese de que el texto y los detalles finos sean lo suficientemente grandes como para que el láser los resuelva con claridad y no se pierdan durante el granallado.
¿Cómo se compara SLS con SLA, MJF y FDM?
La elección de la tecnología de impresión 3D adecuada depende de los requisitos específicos de su proyecto. A continuación le mostramos cómo se compara SLS con otros métodos populares.
1. Tabla comparativa:
| Característica | Sinterización selectiva por láser (SLS) | Estereolitografía (SLA) | Fusión multichorro (MJF) | Modelado por deposición fundida (FDM) |
|---|---|---|---|---|
| Tecnología | Fusión de lecho de polvo (láser) | Fotopolimerización en cuba (láser/proyector) | Fusión de lecho de polvo (térmica + agentes) | Extrusión de material (filamento) |
| Materiales primarios | Nylon (PA11, PA12), TPU, PP | Resinas fotopolímeras (estándar, resistentes, flexibles, moldeables) | Nylons (PA12, PA11), TPU, PP | Termoplásticos (PLA, ABS, PETG, PC, nailon) |
| Precisión dimensional | Alto (±0,25 mm) | Muy alto (±0,1 mm) | Alto (±0,25 mm) | Media a baja (±0,5 mm) |
| Acabado superficial | Mate, granulado, poroso | Muy suave, líneas de capa apenas visibles | Suave, ligeramente menos granuloso que el SLS | Líneas de capa visibles, rugosas |
| Productividad/Velocidad | Alta (piezas anidadas), pero ciclos de enfriamiento largos. | Media (depende de la altura de la pieza y de la sección transversal). | Muy alta (impresión rápida, ciclos de enfriamiento más cortos que SLS). | Lento (imprime las piezas una a una). |
| Coste | Coste elevado de la máquina, coste medio de la pieza debido al anidado. | Coste medio de la máquina, coste bajo o medio de las piezas. | Alto coste de máquina, bajo coste de pieza gracias a la velocidad y al anidado. | Bajo coste de maquinaria y material. |
| Puntos fuertes | Sin soportes, piezas funcionales duraderas, geometrías complejas. | Excelente detalle y acabado superficial, ideal para modelos visuales. | Alta velocidad, bajo coste de las piezas para la producción, buenas propiedades mecánicas. | Bajo coste, gran variedad de materiales, fácil de usar. |
| Principales puntos débiles | Superficie granulada, largos plazos de entrega, manipulación del polvo. | Requiere estructuras de soporte, las piezas pueden ser frágiles, sensibles a los rayos UV. | Materiales limitados, superficie granulada (aunque mejor que SLS). | Baja precisión y resolución, líneas de capa visibles, eje Z más débil. |
2. SLS frente a SLA:
Elija SLS para prototipos duraderos y funcionales y piezas de uso final que deban soportar tensiones mecánicas. Elija SLA cuando necesite un acabado superficial excepcional, detalles finos y precisión para modelos visuales, moldes o patrones.
3. SLS contra MJF:
SLS y MJF son competidores directos. Ambas son tecnologías de fusión de lecho de polvo ideales para producir piezas funcionales de nailon.
- MJF es generalmente más rápido y puede ofrecer un menor coste por pieza en escenarios de producción, gracias a su proceso de impresión térmica y a una gestión más eficiente del calor.
- El SLS suele proporcionar una parte cruda ligeramente más "blanca" o brillante y tiene un historial más largo con una gama potencialmente más amplia de materiales especiales disponibles en determinadas plataformas. El acabado superficial de las piezas MJF suele ser más fino que el de las SLS.
4. SLS frente a FDM:
Elija SLS cuando necesite piezas resistentes con calidad de producción y geometría compleja que FDM no puede producir sin estructuras de soporte extensas. Elija FDM para modelos conceptuales de bajo coste en fases iniciales, plantillas sencillas o cuando se necesita una amplia variedad de colores y materiales (como PLA o PETG) de forma rápida y asequible.
Preguntas frecuentes sobre la impresión 3D SLS
Sí. Las piezas SLS, especialmente las fabricadas con nailon, poseen excelentes propiedades mecánicas, como una elevada resistencia a la tracción y al impacto. Son una de las opciones de impresión 3D de polímeros más resistentes y son adecuadas para aplicaciones funcionales exigentes y piezas de uso final.
En su estado bruto, después del granallado, las piezas SLS son ligeramente porosas y absorberán humedad con el tiempo. No se consideran impermeables. Sin embargo, pueden hacerse impermeables y herméticas mediante pasos de postprocesado como el alisado químico por vapor o la aplicación de un revestimiento epoxi.
El coste depende de varios factores: el volumen de la pieza, el número de piezas anidadas en una fabricación, el material utilizado y el tratamiento posterior necesario. Aunque la inversión inicial en la máquina es elevada, el coste por pieza puede ser competitivo para series de producción de volumen bajo a medio gracias a la eficacia del anidado y a la mínima mano de obra.
La tasa de renovación es el porcentaje de polvo fresco y virgen que debe mezclarse con polvo reciclado y sin sinterizar de una fabricación anterior para crear un nuevo lote. Un porcentaje típico es 50/50. Esto es importante porque el polvo que permanece en la cámara calentada se degrada ligeramente, y reutilizarlo sin añadir polvo nuevo daría lugar a una mala calidad de la pieza. La gestión de la tasa de renovación es clave para controlar los costes y mantener unas propiedades del material uniformes.
El término "SLS" se utiliza casi exclusivamente para imprimir polímeros (plásticos). El proceso equivalente para metales se denomina Sinterización directa de metales por láser (DMLS) o Fusión selectiva por láser (SLM). Aunque el principio subyacente de utilizar un láser para fundir el polvo es similar, las máquinas DMLS/SLM utilizan láseres mucho más potentes y funcionan a temperaturas mucho más altas en una atmósfera completamente inerte para procesar polvos metálicos como aluminio, titanio y acero inoxidable.

Ángulo de Desmoldeo en Moldeo por Inyección: Guía Completa para Ingenieros
Acabas de recibir tus primeras muestras de producción y las piezas se están atascando en el molde. Los expulsores están dejando marcas. Algunas piezas incluso tienen arañazos de arrastre a lo largo del
Ventajas y Desventajas del Moldeo por Inyección: Guía Completa
Conclusiones clave El moldeo por inyección sobresale en la producción de alto volumen de piezas plásticas complejas con tolerancias ajustadas (±0,002″). El costo inicial de herramientas ($10K–$200K+) es la mayor barrera, requiriendo 5,000+ piezas para alcanzar el punto de equilibrio.
¿Qué es el Enfriamiento Conforme en el Diseño de Moldes de Inyección?
Conclusiones clave: Refrigeración conforme en el diseño de moldes de inyección Los canales de refrigeración conforme siguen la forma de la geometría de su pieza, reduciendo los tiempos de ciclo entre 20-40% en comparación con la refrigeración de perforación recta La fabricación requiere 3D
Soluciones de optimización Gratis
- Proporcionar información sobre el diseño y soluciones de optimización
- Optimice la estructura y reduzca los costes de moldeado
- Hable directamente con los ingenieros

