 Przejdź do treści

– Master Unit Die (MUD) defects often stem from the interface between the interchangeable insert and the structural frame.
– Flash issues are frequently caused by debris behind the insert or wear on the frame’s locking mechanism rather than process parameters.
– Fixing short shots requires analyzing venting pathways, which are often more restricted in compact modular inserts.
– Warpage control relies heavily on maximizing thermal conductivity, as MUD inserts may lack direct cooling channels.
What Is MUD Insert Molding and Why Do Defects Occur?
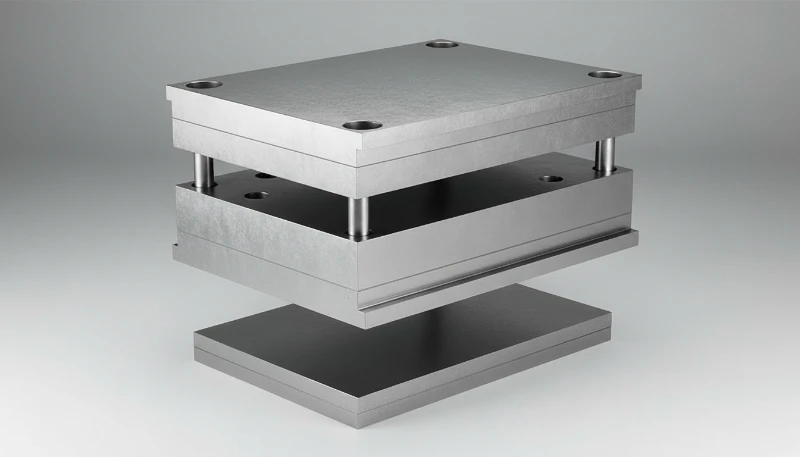
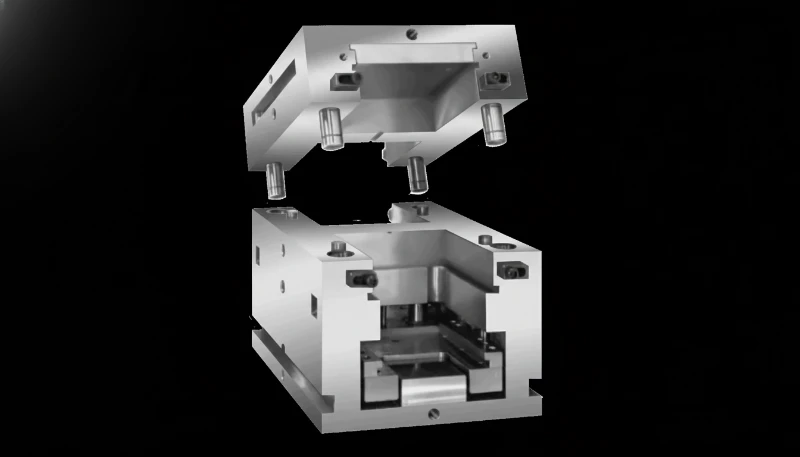
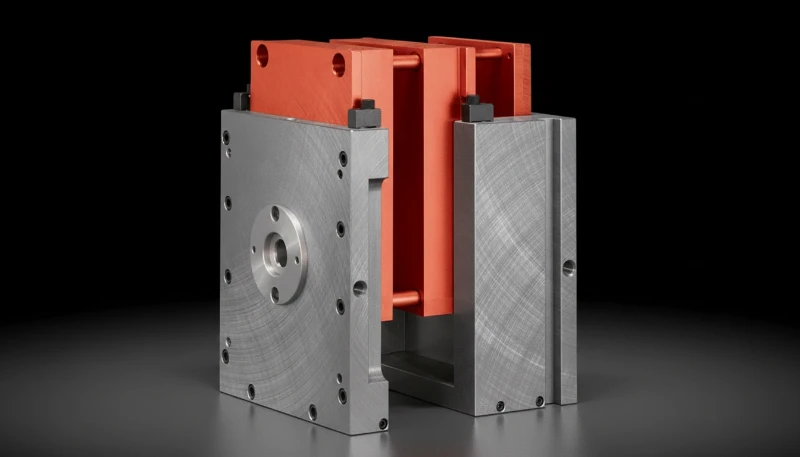
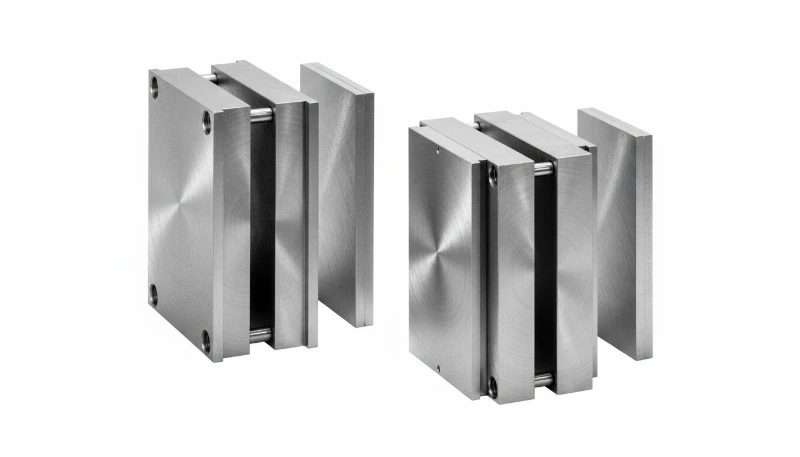
Master Unit Die (MUD) insert molding is a rapid-tooling strategy where a standard, fixed frame (the H-frame) remains in the injection molding machine, and only the core and cavity inserts are swapped out for different parts. This reduces changeover time and tooling costs.
Jednakże, MUD mold problems1 often arise from the unique modular architecture. Unlike standalone molds, MUD systems introduce an additional interface—the fit between the insert and the frame. Defects like flash, short shots, and warpage are often exacerbated by thermal conductivity discrepancies between the insert and frame, improper seating of the insert, or wear on the quick-change locking mechanisms.
What Are the Key Process Parameters for Defect Prevention?
To effectively troubleshoot injection molding defects in modular systems, engineers must adhere to specific parameter ranges. These values help establish a baseline process window.
| Parametr | Standard Range / Value | Purpose in MUD Systems |
|---|---|---|
| Siła zacisku | 2.5 – 5.0 tons/in² (projected area) | Ensures the MUD frame and insert remain closed against injection pressure to prevent flash. |
| Temperatura formy | Material Specific (e.g., PC: 80°C–120°C) | Critical for flow and cooling; MUD frames often act as heat sinks, requiring precise control. |
| Ciśnienie wtrysku | 50% – 90% of Machine Capacity | High pressure is needed to fill, but excess pressure flexes the modular insert, causing flash. |
| Głębokość odpowietrznika | 0.0005" – 0.002" (Material Dependent) | Fixing short shots2 requires adequate gas escape; MUD inserts have limited surface area for vents. |
| Insert-to-Frame Tolerance | ±0.001" (0.025 mm) | Maintains alignment; loose fits lead to movement and subsequent defects. |
MUD frames provide identical cooling efficiency to standalone standard molds.Fałsz
MUD inserts often rely on conductive heat transfer to the frame rather than direct water lines, which can result in slower or uneven cooling compared to fully channeled standalone molds.
Using thermal conductive paste between the MUD insert and frame improves cycle times and reduces warpage.Prawda
Thermal paste eliminates air gaps, enhancing heat transfer from the insert to the cooled frame, stabilizing mold temperature.

How Do You Troubleshoot Specific MUD Defects Step-by-Step?
When addressing injection molding defects in modular dies, the troubleshooting process must distinguish between process errors and hardware (frame/insert) issues.
1. Troubleshooting Flash (Excess Material)
Flash occurs when molten plastic escapes the cavity. In MUD systems, this is often a mechanical fit issue.
- Step 1: Check for Debris. Remove the insert and clean the backplates. Even a plastic granule (0.1mm) behind the insert prevents the mold from closing fully, causing flash across the parting line.
- Step 2: Inspect Heel Blocks and Wedges. Check the MUD frame’s locking clamps. Wear on these components allows the insert to "breathe" or separate during high-pressure injection.
- Step 3: Verify Tonnage. Ensure the clamp tonnage is sufficient for the projected area, keeping in mind that the force is distributed across the frame, not just the insert.
2. Fixing Short Shots (Incomplete Filling)
Fixing short shots Postępuj zgodnie z tą ścieżką logiczną, gdy
- Step 1: Analyze Venting. MUD inserts have limited perimeter space. Check if vents are crushed or clogged. Consider adding vacuum venting if the design allows.
- Step 2: Flow Leaders. If the part is thin-walled, the flow path in a cold MUD insert might freeze prematurely. Increase injection speed to fill before freezing.
- Step 3: Check Nozzle Alignment. Ensure the machine nozzle radius matches the MUD frame sprue bushing exactly to prevent pressure loss at the interface.
3. Addressing Warpage (Distortion)
Warp in plastic parts is primarily a cooling issue. In MUD systems, cooling is the biggest challenge because water lines often reside in the frame, not the insert.
- Step 1: Balance Cooling. If one side of the mold (e.g., the cavity in the frame) cools faster than the core (the insert), thermal stress creates warp. Use a mold temperature controller to run the stationary and moving sides at different temperatures to compensate.
- Step 2: Material Selection. For semi-crystalline materials like Polybutylene Terephthalate (PBT) or Polyamide (PA), the crystallization rate affects warp. Ensure the MUD insert temperature is high enough to allow uniform crystallization.
- Step 3: Packing Profile. Adjust the holding pressure profile (Decoupled Molding II or III) to pack the part uniformly without over-packing near the gate, which causes internal stress.
What Are the Advantages and Disadvantages of MUD Systems Regarding Quality?
Understanding the trade-offs helps in anticipating MUD mold problems.
| Cecha | Zalety | Wady |
|---|---|---|
| Koszt oprzyrządowania | Lower initial cost (only machining the insert). | Repairs require checking both insert and frame; diagnosing the root cause is harder. |
| Changeover Speed | Rapid changeovers (<10 mins) reduce downtime. | Hasty changeovers often lead to debris behind inserts, causing flash. |
| Elastyczność | Great for family molds and prototyping. | Limited size; difficult to optimize cooling for complex geometries, leading to warp in plastic parts. |
| Konserwacja | Inserts are small and easy to handle/clean. | The "master" frame wears out over time (clamps/bushings), affecting the quality of all inserts used in it. |
It is unnecessary to perform preventative maintenance on the MUD frame if the inserts are new.Fałsz
The frame provides the alignment and locking force; a worn frame will cause flash and mismatch defects even with brand new inserts.
Standardizing the ejector system coupling in MUD frames reduces setup errors.Prawda
A standardized quick-disconnect system for ejection prevents incorrect stroke lengths, which can damage the mold or cause part sticking.
What Are Practical Tips for Preventing Defects in MUD Molding?
- Thermal Paste Application: Apply high-temperature thermal grease between the insert and the frame. This bridges the air gap and significantly improves heat dissipation, reducing cycle time and warpage.
- Dedicated Frame for High Volume: If a specific project scales to high volume, stop using a shared MUD frame. The wear from constant changeovers will eventually compromise part quality. Transition to a standalone mold.
- Leader Pin Maintenance: The leader pins on the MUD frame align the halves. If these are worn, the insert halves will mismatch, causing "shift" defects. Replace frame bushings regularly.
- Gate Location Optimization: Since cooling is limited, locate gates to fill from thick to thin areas to prevent voids and sink marks, which are harder to fix thermally in MUD systems.
What Are the Ideal Application Scenarios for MUD Molding?
- Prototypowanie: Rapid iteration where injection molding defects3 are analyzed for design feedback rather than production rejection.
- Low-Volume Production: Batches under 10,000 units where the cost of a standalone mold is not justified.
- Small Parts: Components (e.g., connectors, fasteners) that fit easily within standard 5×8 or 8×10 MUD insert sizes.
- Elastomeric Overmolding: Using MUD frames for TPE (Thermoplastic Elastomer) overmolding where lower injection pressures reduce the risk of frame deflection.
How Should You Structure the Troubleshooting Workflow?
Follow this logic path when Rozwiązywanie problemów z wadami formy MUD: Kluczowe strategie zbadane or other defects in MUD systems:
- Isolate: Is the defect consistent across all shots? If yes, look at the mold/process. If intermittent, look at the machine feed or check ring.
- Inspect Interface: Stop the machine. Check the back of the insert and the face of the frame for plastic shavings or metal burrs.
- Check Mechanics: Verify the MUD frame clamps are tight and the insert is seated flat.
- Analyze Process: Check if the actual melt temperature matches the set point (MUD inserts lose heat fast).
- Review Water: verify turbulent flow in the frame’s water lines. A blocked line in the frame affects the insert immediately.
FAQ: MUD Insert Molding Troubleshooting
How do I stop flash from occurring on the parting line of a MUD mold?
Troubleshooting flash in MUD molds starts with checking the "shut-off" surfaces. Ensure no debris exists between the insert and the frame. Verify that the frame’s clamping mechanism isn’t worn, as loose clamps allow the insert to lift under pressure. Finally, ensure clamping tonnage is calculated based on the projected area of the part plus the runner system.
Why am I getting short shots in my MUD insert mold?
Fixing short shots often involves checking venting. MUD inserts often have insufficient venting due to space constraints. Clean existing vents and ensure the injection speed is fast enough to fill the part before the material freezes, as MUD inserts can run cooler than standard molds.
What causes severe warpage in parts molded with MUD systems?
Warp in plastic parts is usually caused by uneven cooling. MUD inserts may rely on conductive cooling through the frame rather than direct water lines. This creates hot spots. To fix this, use thermal paste behind the insert, increase cooling time, or use highly conductive materials like Beryllium Copper (BeCu) for the insert core.
Are MUD frames suitable for high-precision engineering parts?
Yes, but with caveats. To avoid MUD mold problems in precision parts, the frame must be in pristine condition. Worn guide pins in the frame will directly translate to part mismatch. For extremely tight tolerances (e.g., ±0.01mm), a dedicated standalone mold is often safer than a modular system.
How often should MUD frames be serviced to prevent defects?
The frame should be inspected weekly or every time an insert is changed. Check the locking wedges, heel blocks, and leader pins. Wear in these areas is the leading cause of injection molding defects like flash and mismatch in otherwise good inserts.
Podsumowanie
Troubleshooting MUD mold problems requires a dual focus: optimizing the standard injection process parameters and maintaining the mechanical integrity of the modular frame system. By addressing the unique cooling constraints and ensuring a perfect fit between the insert and frame, manufacturers can resolve issues like błysk, short shotsoraz warp in plastic parts while maintaining the speed and cost benefits of modular molding.


