 콘텐츠로 건너뛰기

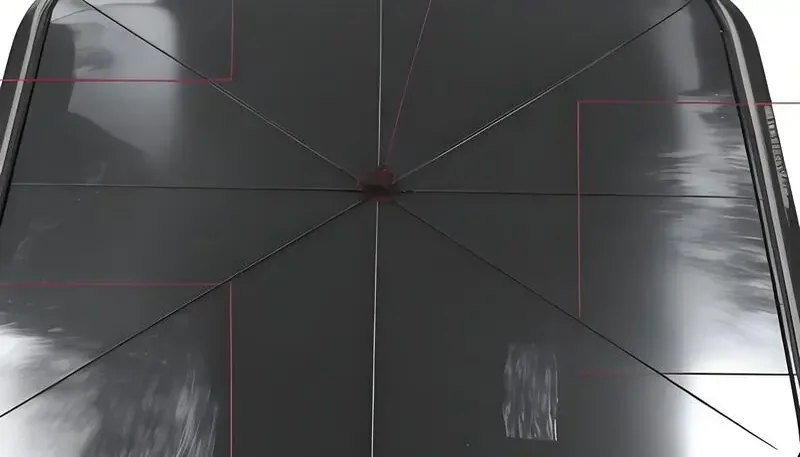
부품을 금형에서 떼어내면 거기에 있습니다 — 실버 스트릭, 깨끗해야 할 표면을 가로지르는 반짝이는 선들. 재료에 문제가 생긴 것처럼 보입니다. 첫 번째 직감은 수지를 더 오래 건조시키는 것입니다. 그 직감은 약 70%의 경우 틀렸습니다.
실버 스트릭은 가장 오진되는 결함 중 하나입니다. 사출 금형ing. Most engineers reach for the dryer first. At ZetarMold, we reach for the vent gauge. This guide breaks down exactly what causes silver streaks, how to tell them apart, and — most importantly — how to fix them without wasting 48 hours drying resin that wasn’t the problem.
- 실버 스트릭은 휘발성 물질, 수분 또는 갇힌 공기가 용융 흐름 경로를 따라 끌려가면서 발생하는 반짝이거나 은색 표면 선입니다.
- 수분, 분해 가스 및 불충분한 배기는 세 가지 근본 원인입니다 — 각각 다른 해결책이 필요합니다.
- 베팅 설계로 ZetarMold에서 70% 이상의 실버 스트릭 사례 해결 — 수지 건조에 48시간 소요하기 전에 벤트를 확인하세요.
- 증상 위치는 원인을 알려줍니다: 게이트 근처 줄무늬는 수분 또는 전단 때문; 충전 끝 줄무늬는 갇힌 공기 때문.
- 캐비티 충전 끝단에 0.025mm 벤트 슬롯을 설치하면 장시간 건조 사이클을 견뎌낸 스트릭을 제거할 수 있습니다.
사출 성형에서 은색 줄무늬란 무엇인가?
은색 줄무늬 — 스플레이 마크(splay marks) 또는 실버 스플레이(silver splay)라고도 함 — 는 사출 성형 부품 표면에 용융 흐름 방향과 평행하게 나타나는 반짝이는 길쭉한 선입니다. 이는 가스나 증기가 용융 전면과 함께 끌려가 표면에 가스의 얇은 층을 형성하여 주변 플라스틱과 다른 방식으로 빛을 반사하기 때문에 나타납니다.
스트릭은 코팅 결함이나 재료 배치 문제가 아닙니다. 그들은 용융 전면이 금형 벽에 부딪치는 순간의 몇 분의 1초 동안 금형 내부에서 형성됩니다. 용융물에 섞인 가스가 무엇이든 캐비티 표면을 따라 번져 그 특징적인 은색 또는 흰색 자국을 남깁니다.
실버 스트릭은 광범위한 범위에서 나타납니다. 열가소성 플라스틱1 — ABS, PC, PA, PP 등. 시각적 효과는 다양합니다: 어두운 부품에서는 밝고 뚜렷하게 보이며, 밝은 색상 부품에서는 부품을 직사광선 아래에서 보기 전까지는 미묘할 수 있습니다.
은색 줄무늬의 세 가지 근본 원인
세 가지 가스 원인이 생산에서 실버 스트릭의 대부분을 일으킵니다:
수분 증기 — water absorbed by hygroscopic thermoplastics flashes to steam when it hits melt temperatures. This is the one everyone blames. It’s real, but it’s not the most common root cause.
열분해 가스 — 과도한 배럴 온도 또는 체류 시간은 고분자 사슬을 분해하여 연소 부산물을 방출합니다. 이러한 스트릭은 순수한 은색이 아닌 더 어둡거나 갈색을 띠는 경우가 많습니다.
Trapped air — 배기가 불충분하여 캐비티에서 빠져나가지 못한 공기가 용융 전면과 함께 쓸려갑니다. 이는 실제 현장에서 가장 흔히 볼 수 있는 원인이지만, 진단 과정에서 가장 자주 놓치는 원인입니다.
실버 스트릭의 원인은? 근본 원인 분석
실버 스트릭에는 세 가지 뚜렷한 근본 원인이 있으며, 각각 다른 진단 특징과 해결책을 가지고 있습니다. 진단을 잘못 내리면 잘못된 해결책에 시간과 비용을 소모하게 됩니다.
원인 1: 흡습성 수지 내 수분
흡습성 수지 — PC, ABS, PA6, PA66, PBT, PET — 는 주변 공기로부터 수분을 흡수합니다. 수분 함량이 임계값(일반적으로 PC는 0.02% 미만, ABS는 0.2% 미만)을 초과하면 배럴에서 증발하여 증기 기포를 형성합니다. 이 기포들이 부품 표면에 길쭉한 은색 줄무늬로 변형됩니다.
수분으로 인한 줄무늬는 게이트 근처에 나타나 바깥쪽으로 퍼집니다. 이는 사출마다 일관되게 나타나며 캐비티 내 어디를 보든 관계없이 보입니다. 건조 시간을 늘렸을 때 줄무늬가 감소하면 수분이 원인이었습니다. 적절한 건조를 4시간 이상 진행한 후에도 줄무늬가 지속된다면 다른 원인을 살펴보세요.
Standard moisture silver streak fix: dry at the resin manufacturer’s recommended temperature (typically 80°C–120°C depending on material) for the specified time. Measure moisture content with a moisture analyzer — don’t guess by time alone. For PC, target ≤0.02% before processing.
원인 2: 열 분해
배럴 온도가 너무 높거나 체류 시간이 과도하면 고분자 사슬이 분해되어 휘발성 가스를 방출합니다. 이로 인해 갈색을 띤 은색이거나 약간의 그을림 변색이 있는 스트릭이 생깁니다. 분해 스트릭은 플라스틱이 고온에서 가장 오랜 시간 머문 충전 끝단에서 더 심각합니다.
일반적인 분해 원인: 권장 범위보다 20°C 이상 높게 설정된 히터 온도; 기계 사출량이 히터 용량에 비해 너무 작음(플라스틱이 히터에 너무 오래 머름); 과도한 스크루 백프레셔로 인한 전단 열 발생. 히터 온도를 5°C씩 낮추거나, 사출량-히터 비율을 높이거나, 백프레셔를 줄여 해결합니다.
원인 3: 갇힌 공기와 불충분한 배기
갇힌 공기는 실버 스트릭의 가장 진단되지 않는 원인입니다. 플라스틱이 캐비티를 채우면서 앞에 있는 공기를 압축합니다. 그 공기가 벤트 슬롯을 통해 빠져나가지 못하면 용융 전면으로 휩쓸려 캐비티 표면을 가로질러 실버 스플레이로 끌려갑니다. 이러한 스트릭은 게이트가 아닌 캐비티 충전 끝단 또는 그 근처에 나타납니다.
불량한 배기 설계는 또한 단사(short shot), 번 마크(burn mark), 극단적인 경우 디젤 효과(diesel effect)를 유발합니다. 갇힌 공기로 인한 은색 줄무늬는 불규칙하며, 사출 속도가 변할 때 사출 사이마다 위치가 바뀌고, 재료 건조에 반응하지 않습니다. 해결책은 배기 설계입니다 — 전략적 위치에 배기 슬롯을 추가하거나 깊게 파는 것입니다.
At ZetarMold, 70% of silver streak defect cases we diagnose are resolved by venting design — not material drying. We’ve seen customers run 48-hour drying cycles without fixing silver streaks, then eliminate the defect entirely by adding a 0.025mm vent slot at the fill end of the cavity. Venting should always be the first diagnostic step.
실버 스트릭 진단 방법: 위치가 원인을 알려줍니다
공정 매개변수를 조정하기 전에, 줄무늬가 나타나는 위치를 살펴보세요. 위치는 가장 확실한 진단 단서입니다.
| 줄무늬 위치 | Most Likely Cause | 첫 번째 시도할 해결책 |
|---|---|---|
| 게이트 근처, 사출 간 일관적 | 수분 증기 | 사양 온도/시간으로 수지 건조 |
| 게이트 근처, 갈색 기운 | 열분해 | 히터 온도 5°C씩 낮추기 |
| 캐비티 충전 말단 | 갇힌 공기 / 불량한 배기 | 배기 슬롯 추가 또는 깊이 증가 |
| 전체 표면에 걸쳐 | 복합 원인 | 먼저 벤트를 확인한 후 건조하세요 |
| Random, shifts with speed changes | Trapped air | Reduce injection speed / add vents |
| After extended shutdown restart | Moisture + degraded resin | Purge + dry fresh material |
One practical test: run 3 shots at reduced injection speed (50% of normal). If silver streaks disappear or move, trapped air is involved — the gas has more time to escape. If streaks are unchanged at slower fill, moisture or decomposition is the primary cause.
True or False: Common Silver Streak Myths
“Silver streaks can occur even when resin has been properly dried.”True
Properly dried resin eliminates moisture as a cause, but trapped air and thermal decomposition can still produce silver streaks independently. Drying removes one of three potential causes — not all of them. If venting is inadequate, silver streaks will persist regardless of moisture content.
“Silver streaks always mean the resin is too wet.”False
This is the most common misconception in injection molding troubleshooting. At ZetarMold, venting issues and thermal decomposition together account for the majority of silver streak cases. Moisture is one cause among three — and often not the primary one. Diagnosing silver streaks as purely a drying problem leads to wasted time and unchanged defects.
More Myths About Silver Streaks
Two more silver streak claims you’ve probably heard on the shop floor — one is accurate, one will send you on a troubleshooting detour. Check your assumptions here before adjusting the process. These distinctions matter because the wrong diagnosis means the wrong fix, and silver streak troubleshooting is already time-consuming enough without chasing the wrong variable. Injection speed and venting interact in ways that are not obvious: slowing fill helps confirm an air-trap diagnosis, but it is not a long-term solution. Surface defects that look cosmetic can hide structural issues.
“Increasing injection speed can worsen silver streaks caused by trapped air.”True
Higher injection speed compresses air faster in the cavity, leaving less time for it to escape through vents. This intensifies silver streaks from trapped air. The fix is adding proper venting, not reducing speed — though slowing fill temporarily during troubleshooting can help confirm the diagnosis.
“Silver streaks are purely cosmetic and do not affect part strength.”False
Silver streaks indicate that gas was present at the melt-mold interface during filling. This can mean incomplete fusion, micro-porosity, or surface delamination — all of which reduce mechanical properties. Parts with visible silver streaks on structural surfaces should be tested before accepting them as functional.
How to Fix Silver Streaks: Process Adjustments
Fix silver streaks systematically: one variable at a time, in order of likelihood based on your location diagnosis.
Venting Fixes
Start here if streaks appear at fill-end or are irregular. Standard vent slot depth for thermoplastics is 0.015–0.025mm (deep enough to let air out, shallow enough to prevent flash). Vent land length: 0.5–1.0mm. Vent width: 5–10mm per vent. Add vents at the last-fill location — this is where trapped air concentrates.
If the mold has existing vents, check if they are clogged with mold release or carbonized resin. Clean vents with a brass brush — steel will enlarge the slot. After cleaning, run 5 shots and check if silver streaks reduce. If vents are open but inadequate, deepen gradually in 0.005mm increments.
Drying and Temperature Fixes
For moisture-related streaks, use a properly calibrated dehumidifying dryer (not a hot-air dryer for critical resins). Measure residual moisture with an at-line moisture analyzer. Target values: PC ≤0.02%, ABS ≤0.1%, PA66 ≤0.2%. Use a moisture-proof hopper or sealed conveying system to prevent reabsorption during transfer.
For decomposition, reduce barrel temperature in the rear zones first. Check screw speed and backpressure — excessive shear adds 20–30°C of effective melt temperature above setpoint. Use a melt thermocouple if available to measure actual melt temperature, not just barrel setpoint.
Silver Streaks vs. Other Surface Defects: How to Tell Them Apart
Silver streaks are sometimes confused with other surface defects. Getting the identification right matters because each defect has a different root cause and fix.
Silver streaks vs. flow marks — Flow marks are concentric rings or wavy patterns caused by slow fill speed and premature skin formation. They follow the melt front shape. Silver streaks are linear and parallel to flow direction, caused by gas. Flow marks respond to increased injection speed; silver streaks from trapped air worsen with higher speed.
Silver Streaks vs. Burn Marks and Delamination
Silver streaks vs. burn marks — Burn marks (also called diesel effect) are black or dark brown discoloration at fill-end, caused by compressed air igniting under extreme pressure. They are more severe than silver streaks and usually indicate severely blocked venting. Silver streaks are a warning sign that precedes burn marks as venting deteriorates.
Silver streaks vs. weld line2 — A weld line appears where two melt fronts meet, creating a visible seam or line. Weld lines are often accompanied by a notch or groove in the surface. Silver streaks are surface reflectance anomalies without physical topology change. Different fixes: weld line problems are addressed through gate design3 and melt temperature optimization; silver streaks through venting, drying, or temperature control.
Silver streaks vs. delamination — Delamination produces layers that peel away from the part surface, usually caused by contamination (incompatible material mixed in) or excessive moisture. Silver streaks do not peel — they are a surface optical effect. If the surface lifts or flakes, contamination or severe moisture is the cause, not normal silver splay.
Preventing Silver Streaks: Design and Process Controls
Prevention is faster than troubleshooting. These controls, applied at the design and setup stage, eliminate the conditions that create silver streaks before the first shot.
Mold Design Controls
Vent at every last-fill location, at runners, and along long flow paths. Place vents at parting line, ejector pins, and through insert splits where possible. For deep or complex cavities where parting-line vents are insufficient, consider vacuum venting or porous insert venting in chronic dead-air zones.
Gate design affects silver streak tendency. Gates that are too small create high shear rates, generating heat and gas. Gates that introduce air directly into the cavity (air entrapment at gate) cause gate-proximal streaks. Proper gate design accounts for melt temperature at the gate, shear rate limits, and gate placement relative to vented areas.
Wall thickness transitions should be gradual — abrupt thick-to-thin transitions cause hesitation and turbulence, trapping air. Where thickness changes are required by design, use tapered transitions over ≥3× the wall thickness change distance.
Process and Material Controls
Establish a material drying protocol as a standard operating procedure — not just for production startup, but including maximum time in hopper before material is replaced. Thermoplastics reabsorb moisture after drying; typical safe hopper time for PC is 2–4 hours before moisture rises above threshold again.
Set barrel temperature profiles correctly for the specific resin and shot weight. Use a rear-zone temperature that is 10–20°C lower than the front zone to prevent premature plasticization and decomposition. Monitor residence time: shot weight should be at least 20–25% of barrel capacity to prevent excessive dwell at temperature.
부품에 결함이 없을 때 기준 공정 설정을 문서화하십시오. 실버 줄무늬는 종종 작업자가 생산 중 변경 사항을 기록하지 않고 매개변수를 조정할 때 서서히 발생합니다. 고정 설정점이 있는 공정 시트는 반복되는 실버 줄무늬 문제에 대한 가장 효과적인 예방 도구입니다.
자주 묻는 질문
사출 성형에서 은색 줄무늬가 발생하는 원인은 무엇인가요?
실버 줄무늬는 금형 충전 중 공동 표면을 가로질러 끌려가는 갇힌 공기, 수분 증기 또는 열분해 가스에 의해 발생합니다. 불충분한 배기로 인한 갇힌 공기는 생산 환경에서 가장 흔한 원인으로, ZetarMold에서 사례의 70% 이상을 차지합니다. 흡습성 수지의 수분은 두 번째로 빈번한 원인입니다 — 수분 함량이 임계값(예: PC의 경우 0.02%)을 초과하면 증기로 기화되어 표면 줄무늬로 전단됩니다. 과도한 배럴 온도나 긴 체류 시간으로 인한 열 분해는 갈색빛 실버 줄무늬를 생성하며 세 번째 원인입니다.
사출 성형에서 은색 줄무늬를 어떻게 수정하나요?
실버 줄무늬를 수정하려면 먼저 줄무늬 위치에서 원인을 파악하십시오. 충전 끝 부분의 줄무늬는 갇힌 공기를 나타냅니다 — 최종 충전 위치에 0.015–0.025mm 깊이의 배기 슬롯을 추가하십시오. 일관된 패턴으로 나타나는 게이트 영역 줄무늬는 수분을 나타냅니다 — 제습 건조기를 사용하여 제조업체가 지정한 수분 함량까지 수지를 건조시키십시오. 변색이 동반된 갈색빛 게이트 영역 줄무늬는 열 분해를 나타냅니다 — 배럴 온도를 5°C씩 낮추고 체류 시간을 확인하십시오. 배기 상태를 먼저 점검하지 않고 건조만으로 실버 줄무늬가 해결될 것이라고 절대 가정하지 마십시오; 막힌 배기는 가장 흔히 간과되는 원인입니다.
은색 줄무늬가 부품 강도에 영향을 미치나요?
예 — 실버 줄무늬는 표면 완전성을 저하시킬 수 있으며 부품 표면에서 미세 기공성이나 불완전 용합을 나타낼 수 있습니다. 충전 중 용융물-금형 계면에 가스가 갇히면 결과는 단순히 외관상의 문제가 아닙니다. 영향을 받은 표면 영역은 주변 재료에 비해 밀도와 결합력이 감소할 수 있습니다. 하중 지지 표면에 가시적인 실버 줄무늬가 있는 구조 부품은 승인 전에 기계적 테스트를 거쳐야 합니다. 외관 표면의 실버 줄무늬는 대부분의 OEM 사양, 특히 자동차 및 소비자 전자 제품 응용 분야에서 표준 부적합 기준입니다.
은색 줄무늬를 더 나은 재료 건조로 방지할 수 있을까요?
건조는 수분 관련 은색 줄무늬만 방지합니다. 근본 원인이 불충분한 배기로 인한 공기 포집 또는 과도한 배럴 온도로 인한 열분해인 경우, 건조는 결함을 제거하지 못합니다 — 48시간 동안 건조해도 동일한 줄무늬가 남아 있을 수 있습니다. 적절한 건조는 세 가지 예방 단계 중 하나입니다: 적절한 배기 설계는 첫 번째이자 가장 영향력 있는 제어 수단이며, 올바른 배럴 온도와 체류 시간 관리가 두 번째, 지정된 수분 함량까지의 재료 건조가 세 번째입니다. 일관된 무결함 생산을 위해서는 이 세 가지가 모두 갖추어져야 합니다.
은색 줄무늬와 스플레이 자국 사이의 차이점은 무엇인가요?
은색 줄무늬와 스프레이 마크는 동일한 결함을 가리킵니다 — 이 용어들은 금형 충전 중 가스 포집으로 인한 동일한 표면 결함을 설명합니다. '스프레이 마크'는 엔지니어링 사양 및 결함 카탈로그에서 사용되는 더 기술적인 업계 용어입니다. '은색 줄무늬'는 작업자 및 품질 검사관이 사용하는 일반적인 생산 현장 명칭입니다. 둘 다 성형 부품 표면에 용융 흐름 방향과 평행하게 길게 뻗은 반짝이는 또는 은색 선을 설명합니다. 사용하는 용어에 관계없이 진단, 근본 원인 분석 및 시정 조치는 동일합니다.
은색 줄무늬를 방지하기 위해 공기 트랩을 피하려면 통풍 슬롯의 깊이는 얼마나 되어야 합니까?
대부분의 열가소성 수지에 대한 배기 슬롯은 랜드 영역에서 깊이 0.015–0.025mm, 너비 5–10mm로 해야 하며, 랜드 뒤에 깊이 0.5–1.0mm의 배기 릴리프 채널을 두어 공기가 금형에서 자유롭게 빠져나갈 수 있도록 해야 합니다. 0.04mm 이상의 배기 깊이는 대부분의 표준 수지에서 플래시 위험을 초래합니다. 마지막 충전 위치에 배기를 추가하십시오 — 이는 캐비티 충전 중 용융 전선이 닫히면서 포집된 공기가 집중되는 곳입니다. 고점도 수지나 복잡한 형상의 경우, 배기 깊이를 늘리기 전에 배기 개수를 늘려 플래시 위험을 최소화하면서 공기 배출을 극대화하십시오.
왜 수지 로트를 변경한 후 은색 줄무늬가 나타날까요?
수지 로트 변경은 서로 다른 수분 함량, 용융 지수 변화 또는 첨가제 농도 차이를 유입하여 가공 중 휘발물 생성에 영향을 미칠 수 있습니다. 로트 변경 후 은색 줄무늬가 나타나면, 먼저 수분 분석기로 새 로트의 수분 함량을 확인하십시오 — 건조기 설정이 새 로트의 초기 수분 수준에 적절하다고 가정하지 마십시오. 그런 다음 이전 로트와의 용융 지수 변동이 배럴 온도 또는 백프레셔 조정을 필요로 하는지 확인하십시오. 더 낮은 용융 지수를 가진 새 로트는 충전을 위해 더 높은 온도나 압력을 필요로 하며, 이는 분해 임계값을 초과할 수 있습니다. 공정 로그에 로트 간 변동을 기록하십시오.
빠른 진단 규칙: 충전 끝 부분의 줄무늬 → 배기 추가; 게이트 부분의 줄무늬 → 수지 건조; 갈색 줄무늬 → 배럴 온도 낮춤. 배기를 먼저 확인하십시오 — 불필요한 48시간 건조를 절약해 주는 20분 검사입니다. 새 금형을 설계 중이라면, T0 전에 모든 마지막 충전 위치에 배기 슬롯을 배치하십시오. 사후 배기는 가능하지만, 계획된 배기가 항상 더 좋습니다.

지속적인 은색 줄무늬 진단이나 새 금형용 배기 설계에 도움이 필요하십니까? ZetarMold의 엔지니어링 팀이 결함 사례를 검토합니다 — 부품 사진과 현재 공정 시트를 가져오시면 어디를 먼저 확인해야 할지 알려드리겠습니다.
-
thermoplastics: 열가소성 수지는 가열하면 부드러워지고 성형 가능해지며 냉각 시 고체화되는 재료로 정의되는 폴리머의 한 종류로, 열경화성 수지와 달리 화학적 분해 없이 반복 가공이 가능합니다. 일반적인 예로는 ABS, PC, PA, PP가 있습니다. ↩
-
weld line: 웰드 라인은 사출 중 금형 캐비티 내에서 두 용융 전선이 만나는 지점에 형성되는 보이는 이음매 또는 약한 결합으로, 종종 기본 재료 대비 기계적 강도를 10–40% 감소시킵니다. ↩
-
gate design: 게이트 설계는 용융 플라스틱이 러너에서 금형 캐비티로 흐르는 진입점의 형상, 위치 및 크기를 의미하며, 충전 패턴, 압력 분포 및 표면 품질에 직접적인 영향을 미칩니다. ↩
Need a Quote for Your Injection Molding Project?
Get competitive pricing, DFM feedback, and production timeline from ZetarMold’s engineering team.
Request a Free Quote → See our Injection Molding Complete Guide for a comprehensive overview. See our Injection Molding Complete Guide for a comprehensive overview.


