

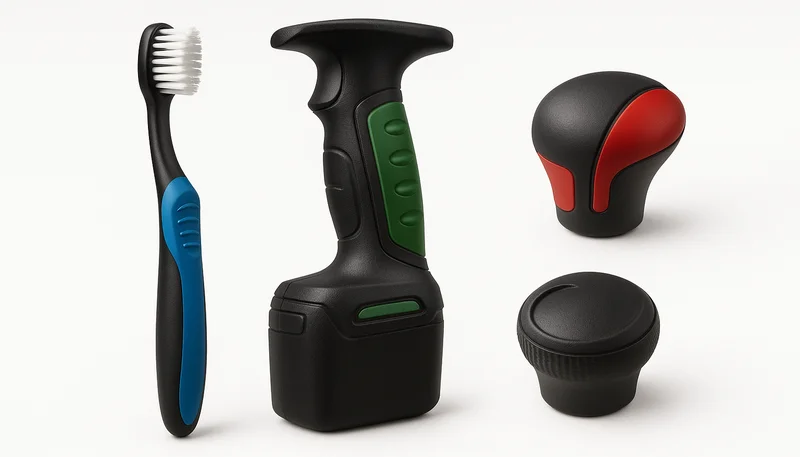
Outdoor-Ausrüstung, zweifarbige Teile
- Two-shot bonding requires compatible substrate materials — chemical or mechanical adhesion.
- TPE over ABS or PC is the most common and reliable two-shot combination.
- Melt temperature differential between shots should stay within 30–40°C for good bonding.
- Incompatible pairs cause delamination, warpage, and bond failure under stress.
- Material selection must be finalized before mold design begins — changing later is extremely costly.
Inhalt
- What Is Two-Shot Molding and Why Does Material Compatibility Matter?
- How Do Materials Bond in Two-Shot Molding?
- What Are the Most Compatible Two-Shot Material Combinations?
- Which Material Pairs Fail in Two-Shot Molding?
- What Temperature Rules Govern Two-Shot Material Selection?
- How Do You Choose the Right Material Pair for Your Project?
- What Defects Signal Material Incompatibility?
- Häufig gestellte Fragen
What Is Two-Shot Molding and Why Does Material Compatibility Matter?
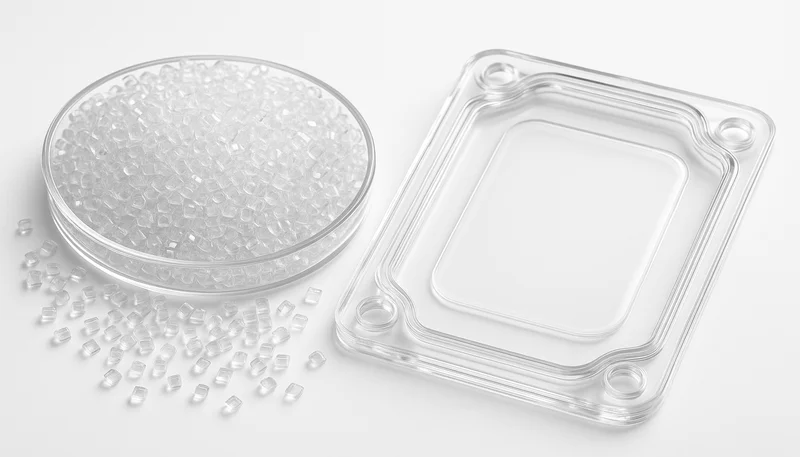
Two-shot molding (also called Zweifarben-Spritzgießen[1] or dual-shot molding) injects two different materials into the same mold in a single manufacturing cycle. The first shot forms the substrate — usually a rigid structural component — and the second shot overlays a different material on top, typically a soft elastomer or a contrasting color. The result is a multi-material part with no assembly required.
Material compatibility is the make-or-break factor. If the two resins don’t bond — chemically or mechanically — the part delaminates under load, temperature cycling, or even basic handling. In 20+ years of running two-shot production, we’ve seen projects delayed by weeks because someone chose TPE-TPV over PC-ABS without checking the adhesion data first. The mold was already built. That’s an expensive lesson.
The reason it matters so much: unlike Umspritzen[2], where you can sometimes get away with mechanical interlocks, two-shot molding relies heavily on chemical bonding because the second material is injected onto the still-warm first shot. The window for a strong bond is narrow, and it closes fast if the material pair isn’t right.
How Do Materials Bond in Two-Shot Molding?
Two-shot material bonding works through two mechanisms: chemical adhesion und mechanical interlocking. Chemical adhesion is the gold standard — it happens when the second material partially melts and interdiffuses with the still-semi-molten surface of the first shot at the molecular level. This creates a bond that’s often as strong as either material alone.
For chemical adhesion to work, three conditions must align:
- Similar polarity: Both materials need compatible surface energy. Polar materials (like polyamides) bond well with other polar materials. Non-polar materials (like polyolefins) stick to non-polar materials. Mixing polar and non-polar is where most bonding failures happen.
- Overlapping melt temperatures: The second-shot material must be processable at a temperature that won’t degrade the first shot but is hot enough to promote interdiffusion. A temperature gap of 30–40°C between the two materials’ processing temperatures is the sweet spot.
- Compatible chemistry: Materials within the same polymer family — like ABS and ASA, or PA6 and PA66 — bond readily because their molecular structures are similar enough to interdiffuse.
Mechanical interlocking is the fallback. If chemical bonding is weak, designers add undercuts, holes, or textured surfaces on the substrate so the second material physically locks into place. It works — we’ve used it for consumer products where the soft grip doesn’t carry structural load — but it’s not as reliable as a true chemical bond, especially under thermal cycling.
What Are the Most Compatible Two-Shot Material Combinations?
The most reliable two-shot combinations share chemical compatibility and overlapping processing windows. Here are the pairs we see working consistently in production, ranked by how often they show up in real projects.
| Substrate (Shot 1) | Overlay (Shot 2) | Bond Quality | Typische Anwendung |
|---|---|---|---|
| ABS | TPE (Styrenic) | Ausgezeichnet | Soft-grip tools, consumer electronics |
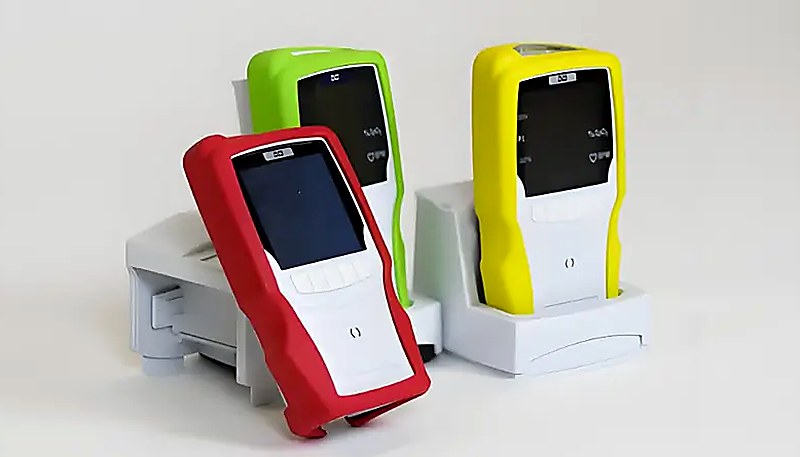
| PC | TPE (Styrenic) | Ausgezeichnet | Medical devices, power tool housings |
| PC/ABS blend | TPE (Styrenic) | Ausgezeichnet | Automotive interior trim |
| PA6 / PA66 (Nylon) | TPE (Polyamide-based) | Good to Excellent | Under-hood automotive connectors |
| PP | TPE (Olefinic / TPV) | Gut | Automotive seals, consumer packaging |
| POM (Acetal) | TPE (Modified) | Fair (needs mechanical lock) | Gear assemblies, locking mechanisms |
| ABS | ASA | Excellent (same family) | Outdoor equipment, two-color parts |
| PMMA | ABS | Gut | Eine übermäßige Temperatur beim zweiten Schuss kann die Oberfläche des ersten Schusses beeinträchtigen, was zu Gaseinschlüssen, Verfärbungen oder Maßverzerrungen führen kann. Die optimale Temperatur ist das Minimum, das zur Erzielung der Interdiffusion erforderlich ist – typischerweise 20–30°C über dem Schmelzpunkt des Überzugsmaterials, nicht höher. |
The ABS + TPE combination is the workhorse of two-shot production — probably 60% of the two-shot jobs we run use some variant of this pair. Styrenic TPEs (like SEBS-based compounds) bond chemically with ABS because both are styrenic polymers. The bond is reliable, the processing window is forgiving, and both materials are widely available at competitive prices.
For automotive applications, PA6 or PA66 paired with a polyamide-based TPE is the standard. The nylon substrate handles heat and chemical exposure, and the TPE overlay provides sealing or grip. The key here is matching the TPE chemistry to the nylon — generic styrenic TPEs won’t bond well to nylon. You need TPEs specifically formulated for polyamide adhesion, which most major suppliers (Kraiburg, GLS, Teknor Apex) offer as dedicated grades.
In our Shanghai facility, we run 45 injection molding machines from 90T to 1850T, including 3 dedicated two-shot machines added in 2024. With 400+ materials in our inventory and 8 senior engineers averaging 10+ years of experience, we typically validate material bonding with test shots before committing to production tooling. This avoids the most common — and most expensive — compatibility failure mode.
Which Material Pairs Fail in Two-Shot Molding?
Not every material pair works. Some combinations fail consistently, regardless of processing conditions. These are the pairs to avoid — or at minimum, plan for mechanical interlocking and extensive validation testing.
Polyolefins over engineering thermoplastics (PP over ABS, PC, or PA): This is the most common mistake we see. Polypropylene is non-polar and has very low surface energy. It simply doesn’t wet or bond to polar engineering resins. If someone specifies a PP substrate with a TPE overlay designed for ABS, the bond will fail. Every time. The only workaround is extensive mechanical interlocking — and even then, it’s a compromise.
POM (Acetal) with most TPEs: Acetal is notoriously difficult to bond to anything. Its low surface energy and crystalline structure resist chemical adhesion. If you must use POM as a substrate, plan for significant mechanical interlock features in the mold design, and plan extra validation time.
High-temperature materials as Shot 2: If the second-shot material requires processing temperatures above 280°C and the first shot is a lower-temperature resin like ABS (processed around 220–240°C), the second shot can deform or partially remelt the substrate. This causes dimensional distortion and weakens the bond zone.
Amorphous over semi-crystalline: Materials like PC (amorphous) over PA6 (semi-crystalline) can work, but the shrinkage differential creates internal stress at the interface. Semi-crystalline materials shrink more during cooling (1.5–2.5% vs 0.4–0.7% for amorphous), which puts shear stress on the bond line. It’s manageable if you design for it, but it’s a common source of late-stage warpage issues.
“ABS with styrenic TPE is the most reliable two-shot material pair.”Wahr
Both materials share a styrenic chemistry, enabling strong chemical adhesion without adhesion promoters. The processing temperatures overlap well (ABS at 220–250°C, styrenic TPE at 190–230°C), giving a comfortable bonding window.
“Any two thermoplastics can be bonded together in two-shot molding.”Falsch
Chemical compatibility is essential. PP and ABS, for example, are both thermoplastics but have fundamentally different surface energies and polarities — they will not form a chemical bond. Material pair selection requires checking polarity, melt temperature overlap, and chemical family compatibility.
What Temperature Rules Govern Two-Shot Material Selection?
Temperature compatibility comes down to two numbers: the processing temperature of each material und die difference between them. Here’s the practical framework we use in our factory.
Rule 1: Keep the temperature gap under 40°C. When the second shot’s melt temperature is more than 40°C above the first shot’s processing temperature, you risk deforming the substrate. When it’s more than 40°C below, the second material may not have enough thermal energy to promote interdiffusion with the first-shot surface.
Rule 2: The first shot must hold its shape. Between shots, the mold rotates or the core transfers to the second cavity. The substrate needs enough structural integrity (either through cooling or material properties) to survive this transfer without distortion. For most materials, the substrate surface temperature should be at least 20°C below its glass transition temperature (Tg) or heat deflection temperature (HDT) before the second shot hits it.
Rule 3: Mold temperature matters as much as melt temperature. A hot mold surface (80–100°C for engineering resins) keeps the first-shot surface warm enough for bonding. A cold mold (30–40°C) quenches the surface too fast, reducing adhesion. This is why two-shot molds often run with different temperature zones for each cavity.
| Material des Substrats | Melt Temp (°C) | Compatible Overlay | Overlay Melt Temp (°C) | Temp Gap (°C) |
|---|---|---|---|---|
| ABS | 220–250 | Styrenic TPE | 190–230 | 10–30 |
| PC | 280–310 | Styrenic TPE | 200–240 | 60–80* |
| PA6 | ≥ 1° pro 25 mm Ziehtiefe | PA-based TPE | 220–250 | 10–30 |
| PP | 200–230 | Olefinic TPE/TPV | 180–220 | 10–20 |
| PC/ABS | 250–280 | Styrenic TPE | 200–240 | 30–50 |
*PC + styrenic TPE pushes the temperature gap beyond 40°C. It still works because the TPE degrades gracefully — but expect longer cycle times and tighter process control. We’ve run this combination successfully on our two-shot machines, but it requires more validation shots than ABS/TPE pairs.
“Mold temperature affects two-shot bonding as much as melt temperature.”Wahr
A warm mold surface (80–100°C) keeps the first-shot interface above Tg long enough for the second material to interdiffuse. Running the mold too cold quenches the bond surface before chemical adhesion can develop, even if both materials are compatible.
“Higher melt temperature on the second shot always improves bonding.”Falsch
Excessive second-shot temperature can degrade the first shot’s surface, causing gas traps, discoloration, or dimensional distortion. The optimal temperature is the minimum needed to achieve interdiffusion — typically 20–30°C above the overlay material’s melting point, not higher.
How Do You Choose the Right Material Pair for Your Project?
Brauchen Sie Hilfe bei der Auswahl von Two-Shot-Material?
Step 1: Define what the bond needs to do. Is the overlay purely cosmetic (color contrast)? Does it need to be watertight (sealing)? Is it a soft-touch surface that gets gripped repeatedly? Or is it structural, transferring load between the two materials? The required bond strength varies by an order of magnitude between these use cases.
Step 2: Start from the substrate. The substrate material is usually determined by the part’s structural, thermal, or chemical requirements. If the part needs heat resistance, you’re starting with PC or PA. If it needs chemical resistance, maybe PP. Once the substrate is locked, your overlay choices narrow significantly.
Step 3: Match the overlay chemistry to the substrate. This is where most projects go wrong. Use this shortcut: styrenic TPEs for ABS/PC/PC-ABS substrates, polyamide-based TPEs for nylon substrates, and olefinic TPEs/TPVs for PP substrates. If you’re not sure, ask your material supplier for their two-shot compatibility chart — every major TPE manufacturer publishes one.
Step 4: Validate with test shots. Never skip this. Mold a flat plaque of the substrate, then overmold the overlay material on half the surface. Do a pull test and a tape test. If the overlay separates cleanly at the interface, you have an adhesion problem. If it tears cohesively (the overlay material itself breaks before the bond fails), your bonding is solid.
One practical tip: if your design calls for a material pair outside the “standard” combinations listed above, budget extra time and money for validation. Non-standard pairs aren’t impossible — we’ve bonded PEEK overlays onto PPS substrates for aerospace clients — but they require more process development, higher scrap rates during commissioning, and longer lead times.
For projects where chemical bonding isn’t achievable, Einsatzspritzguss[3] or mechanical interlock features in the mold design become your insurance policy. Design undercuts, through-holes, or textured surfaces into the substrate geometry so the overlay material has something physical to grab. It’s less elegant than a chemical bond, but it’s reliable when done right.
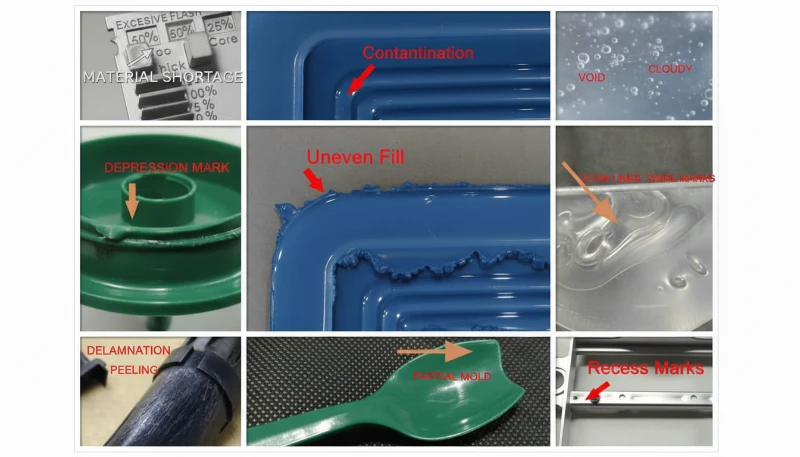
What Defects Signal Material Incompatibility?
If you’ve already tooled a mold and the first shots are coming off the machine, here’s what to look for. These defects don’t always mean your material pair is wrong — processing parameters matter too — but they’re strong indicators.
Delamination at the interface: The most obvious sign. If you can peel the overlay material off the substrate with moderate force — or if it separates during a standard pull test — chemical bonding has failed. Check the material compatibility chart first, then investigate mold temperature and injection speed.
Warpage after cooling: When the substrate and overlay have very different shrinkage rates (more than 1% differential), the part warps as it cools unevenly. This is common with amorphous-over-semi-crystalline pairs. Adjusting gate locations and cooling time can help, but if the shrinkage gap is too large, the fundamental material choice may need revisiting.
Surface blemishes at the bond line: Splay marks, silver streaking, or discoloration along the interface between the two materials usually indicates that the second shot’s melt temperature is too high, causing localized degradation of the substrate. Drop the second-shot temperature by 10–15°C and check if the blemishes improve.
Cold slugs or incomplete fill in the overlay: If the overlay material doesn’t fully fill the second cavity, the bond surface may have cooled below the threshold for chemical adhesion. This is a process issue (mold too cold, or too long between shots), not a material issue — but it creates the same functional problem: weak bonding.

In our experience, about 70% of two-shot bonding failures trace back to material selection, not processing. The remaining 30% are process-related — usually mold temperature or injection speed. If you’ve confirmed the material pair is compatible and you’re still seeing delamination, check these process variables before changing materials:
- Mold temperature in both cavities (aim for 80–100°C for engineering resins)
- Delay time between first and second shot (shorter = better for bonding)
- Second-shot injection speed (faster fills reduce cooling before the cavity is full)
- Holding pressure on the second shot (maintains contact pressure at the bond interface)
With 120+ production staff and a 6-step quality control process (IQC → in-process sampling → process inspection → packaging inspection → FQC → OQC), we catch bonding failures at the sampling stage before they reach full production. Our 30+ English-speaking project managers ensure that when a bonding issue is detected, the feedback loop to the engineering team is closed within 24 hours.
-
two-shot molding: Two-shot molding is a specialized injection molding process where two different materials are injected sequentially into the same mold to produce a multi-material part in a single cycle. ↩
-
chemical adhesion: Chemical adhesion in polymer bonding refers to the interdiffusion of polymer chains across the material interface, measured by peel strength in N/mm according to ASTM D903. ↩
-
glass transition temperature: Glass transition temperature (Tg) is the temperature range at which an amorphous polymer transitions from a rigid glassy state to a rubbery state, typically measured by DMA at 1 Hz. ↩
-
shrinkage rate: Shrinkage rate in injection molding is the dimensional reduction of a molded part during cooling, expressed as a percentage of the mold cavity dimensions, and varies from 0.4% (amorphous) to 2.5% (semi-crystalline). ↩
Häufig gestellte Fragen
Can You Use Two Different Colors of the Same Material in Two-Shot Molding?
Yes. Same-material two-shot molding (e.g., black ABS + white ABS) produces excellent bonds because the chemistry is identical. This is the simplest form of two-color injection molding, commonly used for consumer product housings, buttons, and branded components where color contrast is the only requirement.
What Is the Minimum Bond Strength Required for Two-Shot Parts?
There’s no single standard — it depends on the application. For cosmetic overlays, 1–2 N/mm peel strength is typically sufficient. For functional seals or soft-grip surfaces under repeated use, target 3–5 N/mm. For structural bonds transferring mechanical load, aim for 5+ N/mm. Test against ISO 4624 or ASTM D4541 for pull-off adhesion values.
Does Two-Shot Molding Cost More Than Overmolding?
Two-shot molding tooling costs 30–50% more than standard molds because of the rotary mechanism and dual injection units. However, per-part cost is often lower because the cycle is faster — you get a finished multi-material part in one cycle instead of two separate molding operations. For volumes above 10,000 parts, two-shot is usually more economical than overmolding.
Can TPU Be Used in Two-Shot Molding?
Yes. TPU bonds well to polar substrates like PC, ABS, and PA. It’s a popular choice for wearables and medical devices because of its biocompatibility and abrasion resistance. Processing temperatures range from 190–230°C, which overlaps well with most engineering thermoplastics. The main drawback is longer cycle times — TPU requires more cooling time than styrenic TPEs.
How Do You Test Material Compatibility Before Tooling?
The most reliable pre-tooling test is to mold flat plaques of both materials in sequence using a test mold, then perform peel testing (ASTM D903) and cross-hatch adhesion testing (ASTM D3359). Most TPE suppliers also offer adhesion data sheets showing measured peel strength against common substrates — request these before finalizing material selection.
Can Recycled Materials Be Used in Two-Shot Molding?
In the substrate shot, yes — with standard regrind ratios (typically 15–30%). In the overlay shot, it’s riskier because regrind can alter surface chemistry and melt viscosity, which directly affects bonding. If you need recycled content, validate bonding with the actual regrind blend before production.
What Happens If the First Shot Cools Too Much Before the Second Shot?
The bond weakens significantly. As the substrate surface temperature drops below its Tg, molecular mobility at the interface decreases, and the second material can’t interdiffuse. The result is weak adhesion that relies on mechanical interlocking instead of chemical bonding. This is why cycle time control between shots is critical.
Need Help with Two-Shot Material Selection?
Zweikomponenten-Spritzgieß-Materialverträglichkeitsleitfaden
Get a Free Technical Assessment → For more information, see our complete guide to injection mold[4]. For more information, see our complete guide to injection molding.


