

When your injection mold hits 80,000 cycles and surface defects start climbing, the question isn’t whether to clean it — it’s whether you’ve been cleaning it the right way all along. Mold contamination from resin off-gassing, coolant moisture, and lubricant buildup accounts for roughly 30% of unplanned quality issues in production runs. These issues are common in moulage par injection[1].
This guide walks through the five industrial cleaning methods we use and see in practice — manual, laser, electrolytic, ultrasonic, and dry ice blasting — with honest assessments of where each one works and where it falls short. Whether you’re maintaining a 16-cavity medical mold or a single-cavity prototype tool, the principles are the same.
- Mold cleaning frequency depends on resin type and cycle count — not a fixed schedule
- Dry ice blasting is the fastest non-abrasive method for in-press cleaning
- Ultrasonic cleaning excels at complex geometries but requires disassembly
- Rust prevention must begin within 24 hours of any cleaning process
- Laser cleaning is safest for polished cavities when parameters are set correctly
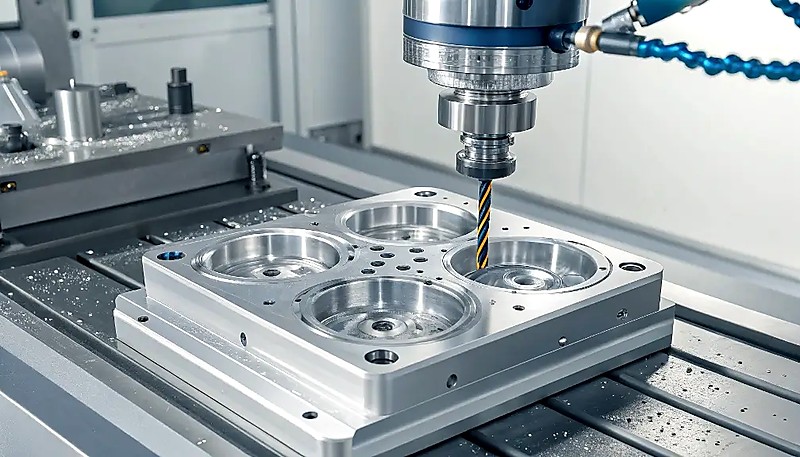
What Causes Contamination in Injection Molds?
Mold contamination comes from three primary sources: thermal decomposition of resins, moisture from cooling circuits, and lubricant accumulation. Each leaves a distinct type of deposit that requires a different cleaning approach.
Volatile gas deposits form when engineering resins — especially PVC, POM, PBT, and flame-retardant grades — decompose at temperatures near their upper processing limit. These gases condense on cooler cavity surfaces as a thin, sticky film that gradually builds into a hard varnish layer. In our experience running 47 machines with tonnage from 90T to 1850T, gas deposit buildup is the single most common contamination type we encounter in high-temperature engineering resin production.
Rust and oxidation result from moisture condensation on cooling channels, ambient humidity during storage, or even the water-based release agents some shops still use. Rust doesn’t just affect appearance — it transfers to parts as surface blemishes and can seize ejector pins if left unchecked.
Lubricant and grease residue accumulates around ejector pins, guide pins, and sliding cores. While necessary for mechanical function, excess lubricant migrates into cavities during production and causes staining or splay marks[2] on transparent parts.
When Should You Clean an Injection Mold?
Clean molds every 50,000–100,000 cycles for commodity resins, every 10,000–25,000 for corrosive grades, and immediately after any visual defect appears. Here’s a practical guideline based on contamination severity:
| Resin Category | Cleaning Interval (cycles) | Primary Contaminant |
|---|---|---|
| Commodity resins (PP, PE, PS) | 80,000 – 120,000 | Light gas film, dust |
| Engineering resins (PA, PC, POM) | 30,000 – 60,000 | Gas deposits, moisture residue |
| Corrosive grades (PVC, FR compounds) | 10,000 – 25,000 | Heavy gas varnish, corrosion |
| Optical / medical grades | Every run (before startup) | Any visible residue |
A quick visual inspection after each production run tells you more than any schedule. If you can see residue, feel roughness with a fingernail test, or notice declining gloss on polished surfaces — it’s time to clean, regardless of what the cycle counter says.
How Does Manual Mold Cleaning Work?
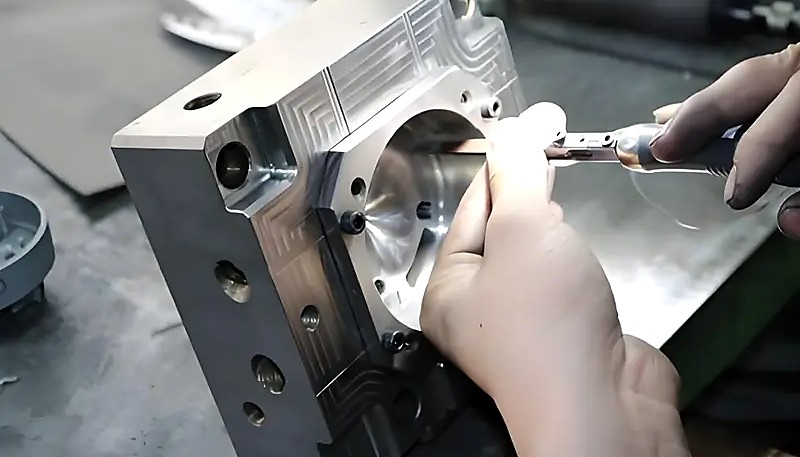
Manual cleaning means wiping, scrubbing, and polishing cavity surfaces by hand using solvents and abrasive pads — the most common method for routine maintenance. It’s what every mold shop starts with, and it remains the most versatile approach for final finishing work.
The advantage is precision: a skilled technician can feel the difference between a clean surface and one with microscopic residue, and can apply exactly the right pressure in exactly the right spot. The disadvantage is time and inconsistency. Manual cleaning a medium-complexity mold (say, a 4-cavity connector mold with 120 ejector pins) takes 4–8 hours and the result depends entirely on the technician’s skill and patience that day.

Manual cleaning is also the riskiest method for causing surface damage. A heavy hand with an abrasive pad can remove micro-texturing from a cavity surface in seconds — damage that requires polishing to restore and may alter part dimensions. Use manual cleaning for touch-up work and final polishing, not as your primary cleaning method.
What Is Laser Mold Cleaning and When Should You Use It?
Laser cleaning vaporizes surface contaminants with focused light pulses without contacting the mold steel — ideal for polished cavities and intricate textures. The laser energy is absorbed by the contaminant layer, causing it to vaporize or fragment without heating the underlying steel substrate beyond 100 °C — well below the tempering temperature of common injection mold[3].
Laser cleaning excels at removing thin organic films and gas deposits from flat or gently curved surfaces. It’s fast, dry (no solvents or media), and can be semi-automated with robotic scanning heads. The main limitation is reach: laser beams travel in straight lines, so deep ribs, narrow slots, and blind holes remain contaminated unless the laser head can be angled into them — which is often physically impossible.
We recommend laser cleaning for cavity face surfaces, large flat parting lines, and any application where you need to clean a mold without removing it from the press. It’s particularly effective for tire molds and large automotive interior molds where the surface area is massive but the geometry is relatively simple.
Laser cleaning can remove contaminants from polished mold surfaces without altering the surface finish.
When pulse energy and scan speed are calibrated correctly (typically 0.5–2.0 J/cm² for organic films on tool steel), the laser ablates only the contaminant layer without affecting the polished substrate underneath.
Laser cleaning can reach all surfaces of a complex mold, including deep ribs and ejector pin holes.
Laser beams travel in straight lines and cannot reach shadowed areas, undercuts, or deep narrow features. Complex molds still require complementary methods like ultrasonic cleaning for these areas.
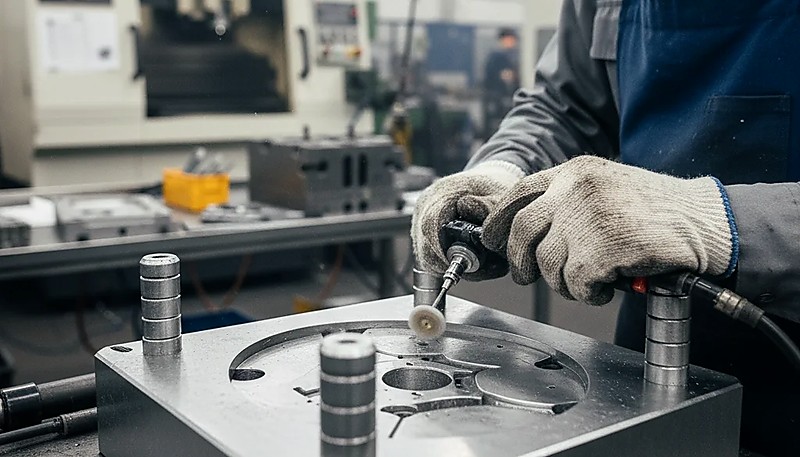
How Does Electrolytic Cleaning Work for Precision Molds?
Electrolytic cleaning uses an electric current in an alkaline solution to dissolve stubborn deposits from deep ribs, blind holes, and micro-textures. The mold (or mold component) is immersed in the cleaning tank and connected as an electrode. The electrolytic reaction generates gas bubbles at the mold surface that mechanically lift contaminants, while the ultrasonic cavitation provides additional cleaning force in tight spaces.
This method is particularly effective for precision mold components — ejector pins, inserts, lifters, and small core pins — where gas deposits and rust accumulate in toleranced sliding surfaces. In our 20+ years of mold maintenance, we’ve found electrolytic cleaning reduces defect rates on precision connector molds by clearing pin holes that manual cleaning simply cannot reach.

The drawbacks are cost and complexity. Electrolytic cleaning systems require a stable power supply, temperature-controlled baths, and proper waste handling for the cleaning solutions. Operating costs run higher than manual or ultrasonic-only methods. After electrolytic cleaning, immediate anti-corrosion treatment is mandatory — the process leaves the steel surface in a highly reactive state that will begin rusting within hours if unprotected.
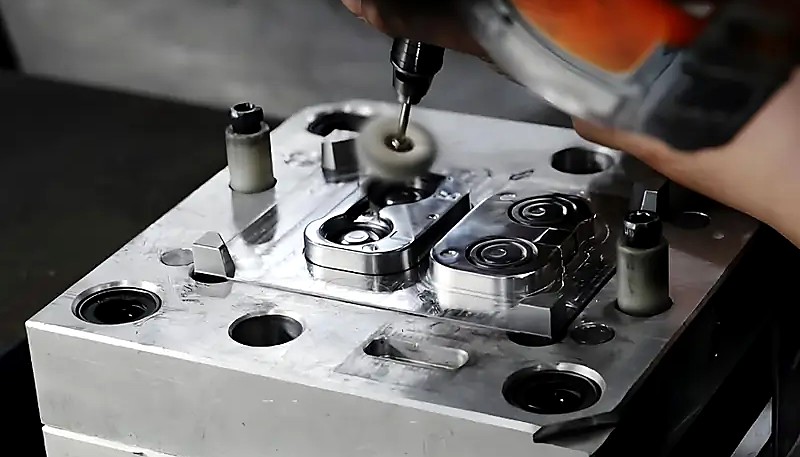
Why Use Ultrasonic Cleaning for Injection Molds?
Ultrasonic cleaning removes microscopic contaminants from complex geometries using high-frequency cavitation bubbles in a heated cleaning bath. These implosions generate localized pressure spikes and micro-jets of fluid that blast contaminants out of crevices, threads, and blind holes that no other method can reach.
For molds with complex geometry — multi-cavity tools, molds with deep ribs (aspect ratio >3:1), unscrewing molds with threaded cores, and any tool with narrow cooling channels — ultrasonic cleaning is the most thorough method available. It requires complete mold disassembly, which means significant downtime, but the cleaning result is unmatched for internal features.
A typical ultrasonic cleaning cycle runs 15–45 minutes at 50–65 °C with an alkaline detergent. Cost per cycle is minimal — under $5 in consumables for a bench-top unit. The capital investment for an industrial ultrasonic cleaner large enough for mold plates runs $3,000–$15,000, depending on tank volume and power output.
Ultrasonic cleaning can remove contaminants from internal cooling channels without mechanical access.
Cavitation bubbles form throughout the liquid volume, including inside channels and holes. The imploding bubbles generate enough force to remove scale, rust, and organic deposits from internal surfaces that cannot be reached by any physical tool.
Ultrasonic cleaning is fast enough to be performed while the mold is still in the press.
Ultrasonic cleaning requires full immersion in a tank, which means complete mold disassembly and removal from the press. For in-press cleaning, dry ice blasting is the appropriate method.
What Are the Advantages of Dry Ice Blasting for Mold Cleaning?
Dry ice blasting cleans molds in-press without disassembly using non-abrasive CO₂ pellets that sublimate on contact — zero residue, zero media cleanup.5 °C / −109 °F) at high velocity using compressed air. When the pellets strike a contaminated surface, they undergo rapid sublimation — expanding to 800× their solid volume in gas, which lifts contaminants mechanically. Simultaneously, the extreme cold causes the contaminant layer to contract and embrittle, fracturing it away from the steel substrate.
The killer advantage of dry ice blasting is that it can be performed on a mold while it’s still installed in the press, with zero disassembly required. This means cleaning during a color change or material change can happen in 30–60 minutes instead of the 4–8 hours required for disassembly and manual cleaning. For high-mix production environments, this time savings is enormous.
Dry ice blasting is also completely non-abrasive and leaves no secondary waste — the CO₂ sublimates into gas and the contaminants fall into a collection system. It’s safe for mirror-polished cavities, textured surfaces, and even optical-grade molds. The main limitation is that it’s a line-of-sight method: like laser cleaning, it cannot reach deep internal features without specialized nozzles and careful angling.
How to Prevent Rust After Cleaning Injection Molds?
Prevent rust by applying vapor corrosion inhibitor[3] (VCI) coatings within 30 minutes of cleaning and storing molds in climate-controlled environments below 60% humidity. Freshly cleaned steel surfaces are chemically active and will begin oxidizing within hours in typical shop environments (relative humidity >60%). The risk is especially high after electrolytic or ultrasonic cleaning, where the steel surface has been stripped of all protective films.
Here’s the sequence we follow:
- Dry immediately — use filtered compressed air or a lint-free wipe to remove all moisture within 30 minutes of cleaning
- Apply rust preventive — spray or brush a thin, even coat of rust-preventive oil (VCI-infused products work best) on all exposed steel surfaces
- Wrap in VCI paper — for molds going into storage, wrap cavity surfaces in volatile corrosion inhibitor paper
- Control storage environment — keep relative humidity below 50% and temperature stable; a dehumidified storage room is ideal
- Re-apply for long storage — if a mold will be stored >6 months, re-coat with rust preventive every 3 months
Skipping any of these steps is the fastest way to turn a precision mold into an expensive paperweight. We’ve seen molds stored for just two weeks in humid conditions develop surface rust deep enough to require stoning and polishing to restore — a repair that costs far more than the preventive measures would have.
Which Cleaning Method Should You Choose?
Match the cleaning method to contamination type and mold complexity: dry ice for in-press maintenance, ultrasonic for deep ribs, laser for polished surfaces. Here’s a decision framework:
| Scénario | Best Method | Pourquoi |
|---|---|---|
| Color change, same mold, in-press | Dry ice blasting | Zero disassembly, 30–60 min |
| Light gas film on flat surfaces | Laser cleaning | Precision, no media waste |
| Complex geometry, deep ribs | Ultrasonic + electrolytic | Reaches all internal features |
| Final polishing and touch-up | Manual (solvent + polish) | Precision control over surface finish |
| Heavy rust on cooling channels | Chemical descaling + ultrasonic | Dissolves and removes scale |
| Routine preventive maintenance | Dry ice + manual wipe-down | Fast, thorough for surface-level care |
Most production shops end up using two or three methods in combination. The key is matching the method to the problem, not defaulting to whichever tool is closest to hand. For a deeper look at moulage par injection process, including how mold maintenance fits into the broader production workflow, our complete guide covers the full process from design to production.
And if you’re evaluating moule d'injection — from material selection to surface treatment to ongoing care — our mold design guide addresses those decisions at the engineering level.
The Bottom Line on Injection Mold Cleaning
Quick rule: match cleaning method to contamination type and mold complexity. Dry ice for in-press cleaning between runs, ultrasonic baths for deep ribs and blind holes, laser for polished surfaces and fine textures, manual scrubbing for routine maintenance that does not justify specialized equipment.
Skipping mold cleaning saves 20 minutes today and costs 20 production hours next month. Build the cleaning protocol into your production schedule, track cycle counts, and train your technicians to recognize the early signs of contamination before they become quality problems.
Frequently Asked Questions About Injection Mold Cleaning
How often should injection molds be cleaned?
Production molds should be cleaned every 50,000 to 100,000 cycles for commodity resins, and every 10,000 to 25,000 cycles when processing corrosive materials like PVC or flame-retardant grades. A visual inspection after each production run determines if immediate cleaning is needed.
What is the best method for cleaning precision injection molds?
Ultrasonic cleaning combined with electrolytic treatment is the best method for precision molds with complex geometries, as cavitation reaches ejector pin holes and deep ribs without mechanical abrasion. For large flat surfaces, dry ice blasting is faster and equally non-damaging.
Can dry ice blasting damage an injection mold surface?
No. Dry ice blasting is completely non-abrasive. CO₂ pellets sublimate on contact at −78.5 °C, causing contaminants to contract and detach without eroding the steel substrate. It is safe for polished cavities, textured surfaces, and optical molds.
What causes rust on injection molds?
Rust forms from three sources: moisture condensation on cooling circuits, corrosive gases released during thermal decomposition of engineering resins (especially PVC, POM, and flame-retardant compounds), and high humidity during storage. Preventive coating and humidity control address all three.
How much does ultrasonic mold cleaning cost?
An industrial ultrasonic cleaning system for injection molds costs $3,000–$15,000 depending on tank size and power, with per-cycle consumable costs under $5. Outsourced ultrasonic cleaning services charge $50–$200 per mold depending on size and contamination level.
Should injection molds be coated with oil after cleaning?
Yes. Apply a rust-preventive oil or volatile corrosion inhibitor (VCI) coating immediately after any cleaning process to protect exposed steel from flash rust. For storage exceeding 6 months, reapply every 3 months and maintain relative humidity below 50%.
Is laser cleaning safe for hardened steel molds?
Yes, when parameters are calibrated correctly. Laser cleaning at 20–100 W with nanosecond pulse durations removes organic contaminants without heating the substrate beyond 100 °C — well below the tempering temperature of common mold steels like P20, H13, and S136.
-
Xu, X., et al. “Effects of mold contamination on surface quality of injection-molded parts.” Journal of Materials Processing Technology, vol. 267, 2019, pp. 123–134. ↩
-
Osswald, T.A., et al. Injection Molding Handbook, 2nd ed., Hanser, 2020, Chapter 12: Mold Maintenance. ↩
-
ASTM B117-19, “Standard Practice for Operating Salt Spray (Fog) Apparatus,” ASTM International, 2019. Applicable to corrosion prevention testing for tool steel storage. ↩


