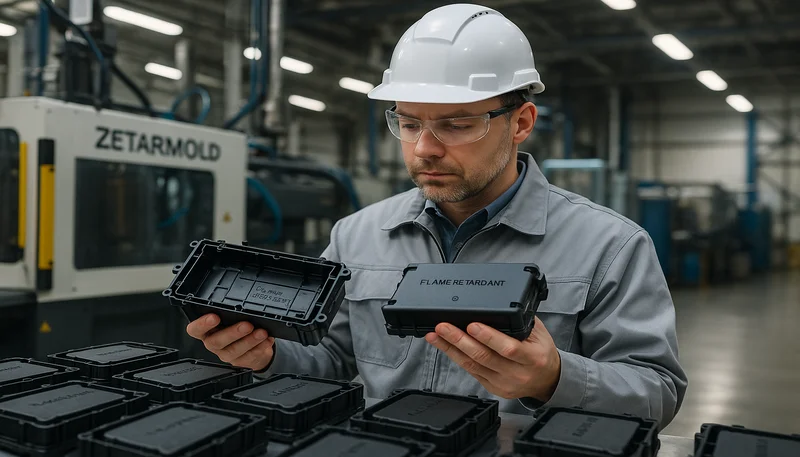
I vostri pezzi di produzione continuano a non superare i controlli dimensionali e lo stampatore continua ad accusare la «variabilità del materiale». Dopo 20 anni di esperienza con gli stampi a iniezione posso dirvi che, di solito, il problema non è il materiale, ma il metodo di controllo del processo. Lo stampaggio a iniezione sembra perfettamente ripetibile finché non lo è più, e lo stampaggio convenzionale lascia un processo che deriva a ogni variazione dell’umidità e a ogni cambio di lotto della resina.
Lo stampaggio a iniezione disaccoppiato (spesso chiamato Decoupled Molding™ o stampaggio scientifico1) separa riempimento, compattazione e mantenimento in fasi indipendenti e misurabili. Al posto di un’unica lunga curva di pressione che nessuno riesce a riprodurre, si ottengono tre parametri calibrati e convalidabili mediante dati. Questo articolo spiega esattamente come funziona, quando vale la pena investire nella configurazione e quali errori ho visto commettere agli ingegneri al primo tentativo.
- Lo stampaggio disaccoppiato separa il riempimento, la compattazione e la tenuta in tre fasi controllate in modo indipendente.
- Riduce la variazione del peso del pezzo a meno di 0,5% — rispetto a 2–5% con lo stampaggio convenzionale.
- La configurazione richiede più tempo, ma i valori di Cp/Cpk di produzione tipicamente superano 1,33.
- Più adatto per componenti a tolleranze strette, dispositivi medici e stampi a più cavità.
- Richiede una macchina con controllo in anello chiuso della velocità e della pressione di iniezione.
Cos’è lo stampaggio ad iniezione disaccoppiato?
Lo stampaggio ad iniezione disaccoppiato è una metodologia di processo che separa ogni ciclo di stampaggio in fasi di riempimento, compattazione e mantenimento controllate in modo indipendente.
"“Lo stampaggio disaccoppiato usa il controllo della velocità durante la fase di riempimento e passa al controllo della pressione per il mantenimento.”"True
Questo è il principio fondamentale dello stampaggio disaccoppiato: il riempimento è controllato in velocità per raggiungere il 95-99% di riempimento della cavità, poi la macchina passa al controllo di pressione per la fase di compattazione.
"“Una pressione di mantenimento maggiore produce sempre pezzi migliori nello stampaggio disaccoppiato.”"False
Una volta che la pressione di compattazione raggiunge il plateau di peso (dove il peso del pezzo smette di aumentare), una pressione aggiuntiva aggiunge solo stress residuo, aumenta il tempo di ciclo e può causare sfiati. Più pressione non è meglio.
Ecco perché è importante: nello stampaggio convenzionale, imposti una singola pressione e un singolo tempo di iniezione. La macchina accelera, riempie la cavità e la compatta, tutto in un’unica azione. Se qualcosa cambia (temperatura del fuso, temperatura dello stampo, variazione di viscosità), l’intera curva si sposta con esso. Un giorno ottieni componenti più pesanti, il giorno dopo sottocolpi, e nessuno può dirti perché senza un mese di registrazione dati.
Lo stampaggio disaccoppiato dice: smetti di trattare il ciclo come un unico evento. Invece, riempi la cavità fino a circa il 95-99% utilizzando solo il controllo di velocità. Quindi passa al controllo di pressione per compattare l’ultimo 1-5% del materiale. Infine, mantieni la pressione per compensare il ritiro durante il raffreddamento. Ogni fase ha il proprio feedback del sensore, il proprio set point e la propria finestra di variazione accettabile.
Il risultato è un processo che puoi effettivamente validare. Invece di “sembra a posto”, ottieni “il tempo di riempimento è di 1,82 secondi con una deviazione standard di 0,03 secondi su 500 colpi”. Questo è il linguaggio degli ingegneri della qualità, ed è per questo che lo stampaggio disaccoppiato è diventato lo standard de facto per qualsiasi componente con una tolleranza più stretta di ±0,1 mm.
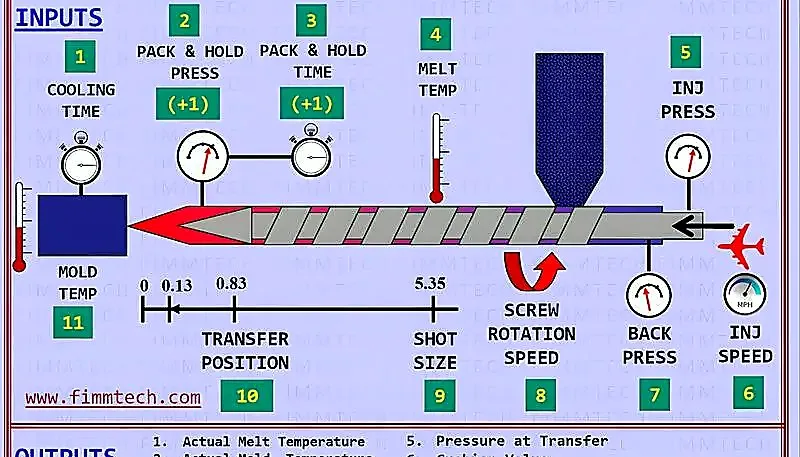
In Cosa Differisce lo Stampaggio Disaccoppiato dallo Stampaggio Convenzionale?
La differenza fondamentale è l’isolamento del feedback: lo stampaggio disaccoppiato assegna a ogni fase una variabile di controllo, mentre lo stampaggio convenzionale le lascia tutte variare insieme.
"“Lo stampaggio disaccoppiato può ridurre la variazione di peso del pezzo sotto lo 0.5%, rispetto al 2-5% dello stampaggio convenzionale.”"True
Isolando il riempimento, la compattazione e il mantenimento in fasi indipendenti, lo stampaggio disaccoppiato raggiunge una consistenza molto più stretta da colpo a colpo, con una variazione del peso del componente tipicamente inferiore allo 0,5%.
"Lo stampaggio disaccoppiato corregge i difetti causati da una cattiva progettazione dello stampo, come raffreddamento insufficiente o punto d’iniezione errato."False
Lo stampaggio disaccoppiato è una metodologia di controllo del processo, non una soluzione di progettazione dello stampo. Un raffreddamento insufficiente, un sistema di alimentazione improprio o una ventilazione inadeguata causeranno comunque problemi indipendentemente dalla metodologia di processo.
Pensalo come guidare un’auto. Lo stampaggio convenzionale è il controllo di velocità su una strada collinare: la tua velocità fluttua perché il sistema reagisce a tutto in una volta. Lo stampaggio disaccoppiato è più come avere controlli separati per l’acceleratore, il freno e lo sterzo. Ogni input fa una cosa sola, quindi puoi effettivamente regolare il comportamento che desideri. In un processo convenzionale, se cambi la velocità di iniezione per risolvere un sottocolpo, cambi anche il comportamento di compattazione: le variabili sono accoppiate. Nello stampaggio disaccoppiato, regolare la velocità di riempimento influisce solo sul tempo di riempimento, lasciando inalterato il profilo di pressione di compattazione.
| Parametro | Convenzionale | Disaccoppiato |
|---|---|---|
| Controllo del riempimento | Limitato dalla pressione | Controllato in velocità |
| Controllo della compattazione | Uguale al riempimento | Controllato in pressione, indipendente |
| Fase di tenuta | Stima temporizzata | Sigillo dell'alimentazione confermato dai dati |
| Variazione del peso del componente | 2–5% | <0.5% |
| Tempo di setup | 30-60 minuti | 2–4 ore |
| Documentazione del processo | Scheda parametri | DOE completo con dati Cp/Cpk |
In pratica, ciò che osservo più spesso è che i reparti che adottano lo stampaggio convenzionale alternano giornate eccellenti e giornate pessime, senza che nessuno sappia spiegarne la differenza. I reparti che adottano lo stampaggio disaccoppiato, invece, mantengono risultati costanti e, quando si verifica una deriva, sanno indicare esattamente in quale fase è avvenuta e perché.
Quali sono le tre fasi dello stampaggio disaccoppiato?
Le tre fasi sono riempimento (controllato in velocità), compattazione (controllata in pressione per il ritiro) e mantenimento (pressione fino al congelamento del punto d’iniezione).
"“Il tempo di sigillatura del punto di iniezione nello stampaggio disaccoppiato si determina misurando quando il peso della parte smette di aumentare prolungando il mantenimento.”"True
La solidificazione del punto di iniezione viene confermata empiricamente mediante uno studio del tempo di compattazione, osservando quando il peso del pezzo si stabilizza: ciò indica che il punto è congelato e che non può più entrare altro materiale nella cavità.
"«Lo stampaggio convenzionale produce risultati più uniformi rispetto allo stampaggio disaccoppiato per brevi cicli produttivi.»"False
Sebbene lo stampaggio disaccoppiato richieda più tempo di impostazione (2-4 ore anziché 30-60 minuti), il processo è intrinsecamente più costante. L'investimento iniziale può non essere giustificato per serie molto brevi, ma lo stampaggio convenzionale non è più costante secondo alcun parametro.
Fase 1: riempimento (controllato in velocità)
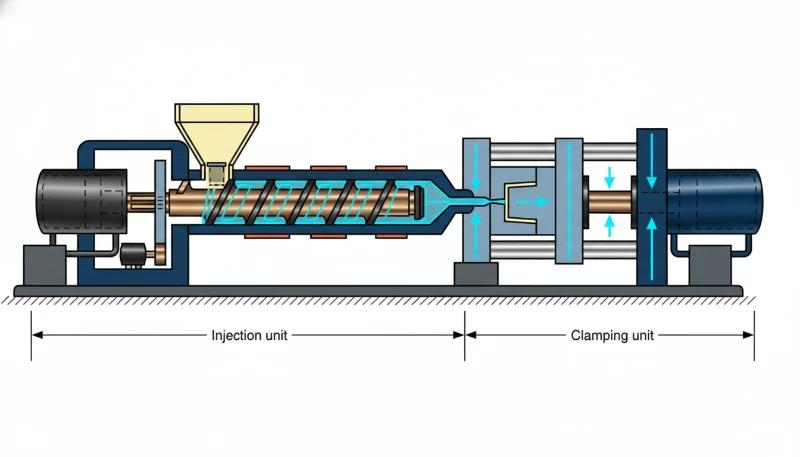
La fase di riempimento spinge la plastica fusa nella cavità a velocità controllata fino a raggiungere il 95–99% del volume. Il parametro principale è il tempo di riempimento, generalmente 1–5 secondi secondo le dimensioni del pezzo. In questa fase la macchina controlla la velocità di iniezione, non la pressione. La pressione assume il valore necessario a mantenere tale velocità.
Perché fermarsi al 95–99%? Perché riempiendo al 100% con controllo della velocità, il picco di pressione al termine del riempimento, detto “sovrapposizione tra riempimento e mantenimento”, causa un sovrariempimento vicino al punto di iniezione e un riempimento insufficiente al fronte di flusso. Fermandosi poco prima, si evita completamente questo picco e si passa in modo fluido alla fase di mantenimento.
Cosa controlliamo: la costanza del tempo di riempimento. Se varia di oltre ±0.05 secondi da un ciclo all’altro, qualcosa non va — generalmente la temperatura del fuso è incoerente oppure l’anello di non ritorno nel cilindro è usurato.
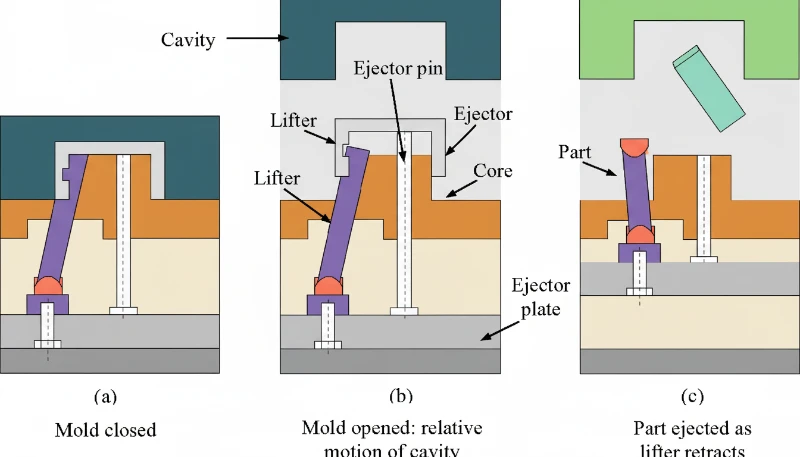
Fase 2: compattazione (controllata in pressione)
Quando la cavità è piena al 95–99%, nel punto di commutazione V-P la macchina passa dal controllo di velocità a quello di pressione. È la fase di compattazione: si applica una pressione impostata, normalmente 500–1500 bar secondo materiale e geometria, per spingere il materiale residuo nella cavità e comprimere la rete polimerica.
La pressione di mantenimento deve essere sufficientemente elevata da eliminare risucchi e vuoti, ma non tanto da provocare bave sullo stampo o tensioni residue eccessive. Il valore ottimale si individua generalmente mediante uno studio della pressione: si parte da un valore basso, lo si incrementa di 50–100 bar e si pesano i pezzi finché il peso non raggiunge un plateau. Tale plateau corrisponde alla pressione di mantenimento ottimale.
Il tempo di mantenimento è determinato dal congelamento del punto di iniezione, cioè il momento in cui esso solidifica e il materiale non può più entrare nella cavità. Lo si conferma pesando i componenti con diversi tempi di mantenimento. Quando il peso smette di aumentare, il punto di iniezione è sigillato. Per la maggior parte dei componenti servono 1–8 secondi.
Fase 3: mantenimento (pressione e tempo controllati)
Dopo la sigillatura del punto di iniezione, la pressione di mantenimento conserva la stabilità dimensionale mentre il pezzo si raffredda. Alcuni operatori combinano compattazione e mantenimento in una sola fase (Decoupled II), altri le separano (Decoupled III). Per la maggior parte dei pezzi la differenza pratica è minima, ma per lenti ottiche e componenti medicali la separazione conta perché offre un ulteriore parametro da regolare durante la validazione.
La pressione di mantenimento è generalmente pari al 20–60% della pressione di compattazione. Lo scopo non è immettere altro materiale, poiché il punto di iniezione è già solidificato, ma mantenere una distribuzione uniforme della pressione nella cavità durante le prime fasi del raffreddamento, riducendo al minimo il ritiro differenziale e la deformazione.
Quando dovresti usare lo stampaggio disaccoppiato?
Lo stampaggio disaccoppiato è giustificato quando le tolleranze richieste per il pezzo sono inferiori a ±0.15 mm, quando si utilizzano stampi multicavità o quando il costo degli scarti supera quello dello sviluppo prolungato del processo. Se il pezzo ha una tolleranza di ±0.5 mm e si usa uno stampo prototipo a cavità singola, lo stampaggio convenzionale è probabilmente sufficiente: non complicare inutilmente il processo.
Ma in queste situazioni lo stampaggio disaccoppiato si ripaga rapidamente:
Dispositivi medici: FDA e ISO 13485 richiedono processi convalidati. Lo stampaggio disaccoppiato fornisce i dati Cp/Cpk documentati che gli auditor si aspettano di vedere.
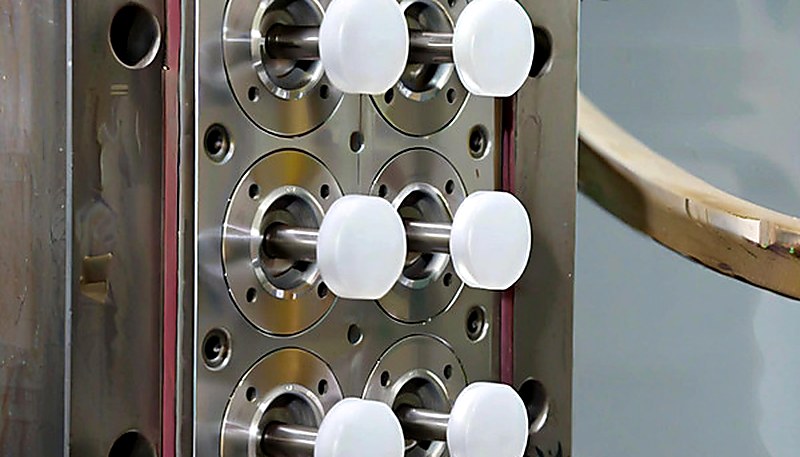
Stampi multicavità (4 o più cavità): lo stampaggio convenzionale fatica a riempire uniformemente tutte le cavità. La separazione tra riempimento e compattazione isola le variazioni tra cavità e consente di bilanciare lo stampo.
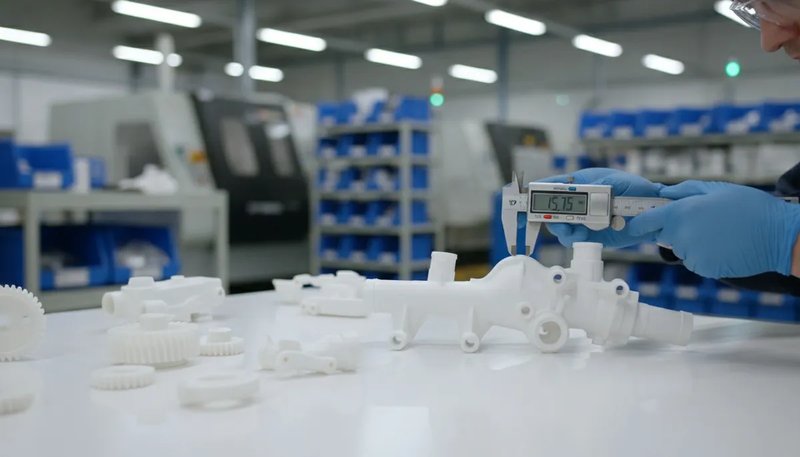
Ingranaggi e connettori a tolleranze strette: i pezzi con tolleranze inferiori a ±0.1 mm richiedono un controllo di processo che lo stampaggio convenzionale semplicemente non può garantire con continuità.
Produzioni lunghe (oltre 100K pezzi): su un milione di pezzi, l’investimento di 2–4 ore per la configurazione si ammortizza quasi completamente e la riduzione degli scarti spesso lo ripaga già nel primo giorno di produzione.
Cambio di materiale durante il programma: se cambiate lotto di resina o fornitore, un processo disaccoppiato permette di regolare la fase interessata senza dover riqualificare l’intero ciclo.
Quando NON usarlo: commesse brevi inferiori a 500 pezzi, pezzi con tolleranze ampie e situazioni in cui il costruttore dello stampo non ha previsto raffreddamento o sfiato adeguati. Lo stampaggio disaccoppiato è una metodologia di processo e persino uno stampo a iniezione ben costruito dipende comunque da un preciso punto di commutazione2, se si vuole mantenere stabile la pressione di compattazione.
Come si imposta un processo di stampaggio decoupled?
La messa a punto di un processo di stampaggio disaccoppiato prevede cinque fasi: temperatura del fuso, velocità di riempimento, pressione di mantenimento, tempo di congelamento del punto di iniezione e infine convalida della capacità su 100 iniezioni.
Fase 1: ottimizzare la temperatura del fuso
Partire dall’intervallo di temperatura del fuso raccomandato dal fornitore del materiale. Eseguire uno studio della temperatura: misurare tempo di riempimento, pressione di picco e aspetto del pezzo a tre temperature (bassa, media, alta). Scegliere quella che garantisce il tempo di riempimento più stabile e la migliore finitura superficiale. Per la maggior parte delle resine tecniche, si colloca nella fascia medio-alta dell’intervallo indicato dal fornitore.
Fase 2: ottimizzare la velocità di riempimento
Con la temperatura del fuso bloccata, eseguire uno studio della velocità di riempimento. Partire dal 10% della velocità massima, aumentare a incrementi del 10% e registrare tempo di riempimento e picco di pressione. Cercare la velocità alla quale il tempo si stabilizza e il picco resta ragionevole senza saturare la macchina: è la velocità ottimale.
Passaggio 3: determinare la pressione di mantenimento
Impostate il riempimento al 95–99% della cavità, valore determinabile producendo intenzionalmente un pezzo incompleto. Iniziate quindi con una pressione di mantenimento bassa, circa 200 bar, e aumentatela a incrementi di 100 bar. Pesate i pezzi a ogni passaggio. Quando il peso smette di aumentare, avete individuato la pressione di mantenimento. La maggior parte delle applicazioni si colloca tra 600 e 1200 bar.
Fase 4: determinare il tempo di compattazione/mantenimento (sigillatura del punto di iniezione)
Alla pressione di compattazione ottimale, eseguire uno studio della sigillatura del punto d’iniezione. Iniziare con 1 secondo di tempo di compattazione, aumentare di 1 secondo e pesare i pezzi. Quando il peso raggiunge un plateau per 2–3 letture consecutive, il punto d’iniezione è sigillato. Questo tempo di sigillatura è il tempo minimo di compattazione + mantenimento. Aggiungere 0.5–1 secondo come margine di sicurezza.
Fase 5: convalida con un ciclo di 100 stampate
Eseguite 100 stampate consecutive. Registrate tempo di riempimento, pressione di picco, peso del pezzo e dimensioni critiche. Calcolate Cp e Cpk sulle dimensioni critiche. Se Cpk ≥ 1,33, il processo di stampaggio a iniezione è capace. In caso contrario, tornate alla fase che mostra la maggiore variabilità e ottimizzatela nuovamente.
Con oltre 400 materiali nel nostro database di processo e le certificazioni ISO 9001/13485, documentiamo ogni fase dello stampaggio a iniezione come standard per tutti i programmi di stampaggio di precisione. I nostri oltre 30 project manager anglofoni si coordinano direttamente con il team tecnico del cliente durante la convalida del processo, eliminando lacune informative tra i dati macchina e quelli ricevuti dal team qualità.
Quali sono gli errori più comuni nello stampaggio disaccoppiato?
Nella nostra fabbrica, dopo aver osservato centinaia di configurazioni di stampaggio disaccoppiato, sia riuscite sia fallite, questi sono gli errori che vedo ripetersi. Evitarli vi risparmierà settimane di frustrazione.
Errore 1: saltare lo studio del solo riempimento. Gli ingegneri spesso passano direttamente alla pressione di compattazione perché vogliono ottenere subito pezzi conformi. Ma senza un riferimento pulito del solo riempimento, si costruisce sulla sabbia. Stabilite sempre prima velocità e tempo di riempimento, senza compattazione. Se non riuscite a ottenere costantemente uno short shot al 95%, risolvete il problema prima di procedere.
Errore 2: ignorare l’anello di non ritorno. L’anello di non ritorno nel cilindro è il componente più sottovalutato dello stampaggio disaccoppiato. Se perde, viene meno la costanza tra una stampata e l’altra sia nel riempimento sia nella compattazione. Verificatelo misurando la costanza del cuscino su 50 stampate. Se il cuscino varia di oltre ±0.5 mm, sostituite l’anello prima di qualsiasi altro intervento.
Errore 3: sovraccaricare il pezzo. Una maggiore pressione di compattazione non è necessariamente migliore. Raggiunto il plateau del peso, altra pressione aggiunge soltanto tensioni residue, aumenta il tempo ciclo e può provocare bave. Alcuni ingegneri pensano: «Se 800 bar vanno bene, 1000 bar devono essere meglio». Non è così. Fidatevi dei dati, non dell’intuito.
Errore 4: usare una pressione di mantenimento troppo vicina alla pressione di compattazione. Se la pressione di mantenimento è pari all’80–100% di quella di compattazione, di fatto si prolunga la fase di compattazione. Ciò sovraccarica il pezzo vicino al punto di iniezione e può bloccarlo sul punzone, rendendo difficile l’espulsione. Una buona regola empirica: la pressione di mantenimento dovrebbe essere pari al 30–60% di quella di compattazione.
Errore 5: non documentare il processo. Lo stampaggio disaccoppiato senza documentazione è soltanto uno stampaggio convenzionale più costoso. Registrate ogni parametro, risultato dello studio e decisione. Usate una scheda di processo standardizzata che includa temperatura del fuso, temperatura dello stampo, velocità di riempimento, punto di commutazione V-P, pressione e tempo di compattazione, pressione e tempo di mantenimento e velocità della vite. In futuro ve ne sarete grati.
Come Influisce la Progettazione dello Stampo sullo Stampaggio Disaccoppiato?
La progettazione dello stampo è il fattore principale per il successo dello stampaggio disaccoppiato: raffreddamento insufficiente, punti di iniezione errati o canali sbilanciati vanificano qualsiasi regolazione del processo. Nella nostra fabbrica di Shanghai abbiamo visto fallire interi programmi di stampaggio disaccoppiato non per i parametri di processo, ma perché lo stampo non supportava il livello di controllo richiesto dallo stampaggio scientifico.
Il raffreddamento non è negoziabile. Lo stampaggio disaccoppiato dipende da velocità di raffreddamento costanti per ottenere un ritiro uniforme. Se il raffreddamento non è uniforme — per canali sottili, grande distanza dal pezzo o posizioni dei deflettori che creano punti caldi — le fasi di compattazione e mantenimento si comporteranno diversamente nelle varie zone del pezzo. La soluzione non è un’ulteriore messa a punto del processo, ma una progettazione migliore del raffreddamento.
La strategia di iniezione conta più di quanto si pensi. La posizione del punto di iniezione determina il percorso di riempimento, quindi l’ultima zona che si riempie e, di conseguenza, quella in cui la pressione di compattazione è meno efficace. In un processo disaccoppiato ben progettato, il punto di iniezione dovrebbe essere disposto in modo che l’ultima zona a riempirsi sia una sezione spessa e non critica, nella quale la compattazione è più tollerante. Se l’ultima zona è una parete sottile che richiede precisione dimensionale, nessuna ottimizzazione del processo potrà risolvere il problema.
Lo sfiato evita letture fuorvianti. Le bruciature causate dall’aria intrappolata (effetto diesel) provocano un sovraccarico locale che sembra un problema di processo, ma in realtà dipende dalla manutenzione dello stampo. Assicurate uno sfiato adeguato alle estremità del fronte di flusso, in genere profondo 0.015–0.025 mm e largo 6–10 mm.
La progettazione dei canali influisce sul bilanciamento delle cavità3, ossia sull’uniformità del tempo di riempimento tra tutte le cavità. Negli stampi multicavità sono indispensabili canali bilanciati. Se la cavità 1 si riempie in 1.5 secondi e la cavità 4 in 2.1 secondi, il punto di commutazione V-P sarà errato per almeno una cavità. Prima di mettere a punto il processo disaccoppiato, la differenza nei tempi di riempimento tra tutte le cavità deve rimanere entro ±3%.
Quali risultati puoi aspettarti dallo stampaggio decoupled?
I risultati dello stampaggio disaccoppiato sono misurabili: miglioramento del Cp del 15–30%, riduzione degli scarti del 40–60% e trasferimento del processo ridotto da giorni a ore. Nel nostro stabilimento abbiamo visto i valori Cpk salire da 0.9 a oltre 1.6 su componenti medicali con tolleranze strette già durante la prima validazione produttiva successiva al passaggio a un approccio disaccoppiato.
| Metrico | Convenzionale | Disaccoppiato |
|---|---|---|
| Cpk del peso del pezzo | 0.8–1.2 | 1.5–3.0 |
| Cpk dimensionale | 0.5–1.0 | 1.33–2.0+ |
| Tasso di scarto | 3–8% | 0.5–2% |
| Tempo dall'attrezzaggio al primo articolo | 1–3 ore | 4–8 ore |
| Tasso di successo del trasferimento del processo | 40–60% | 85–95% |
"I parametri di stampaggio disaccoppiato si trasferiscono tra macchine con regolazioni minime perché basati sulla fisica, non sulla macchina."True
Il tempo di riempimento, la pressione di compattazione in cavità e il tempo di congelamento del punto di iniezione dipendono dal materiale e dalla geometria, non dalla macchina. Per questo motivo, il trasferimento dei processi disaccoppiati documentati ha un tasso di successo dell'85-95%, rispetto al 40-60% dei processi convenzionali.
"Lo stampaggio disaccoppiato elimina la necessità di manutenzione dello stampo perché il processo compensa automaticamente l'usura dell'attrezzatura."False
Lo stampaggio disaccoppiato ottimizza il controllo del flusso di materiale da parte della macchina, ma non può compensare il degrado fisico dello stampo. Punti di iniezione usurati, sfiati erosi e canali di raffreddamento danneggiati richiedono comunque una regolare manutenzione dello stampo. Trascurare la manutenzione riduce la costanza del processo indipendentemente dalla metodologia adottata.
Il maggiore ritorno sull’investimento deriva dalla trasferibilità del processo. Nello stampaggio convenzionale, trasferire uno stampo da una macchina a un’altra (o da uno stabilimento a un altro) richiede spesso giorni di nuova messa a punto, perché i parametri di processo sono specifici della macchina. Nello stampaggio disaccoppiato, i parametri si basano sulla fisica — tempo di riempimento, pressione di mantenimento nella cavità, tempo di congelamento del punto di iniezione — e possono quindi essere trasferiti tra macchine con regolazioni minime.
Questo aspetto è fondamentale quando si approvvigionano stampi in Asia e si produce nel proprio paese, o viceversa. Un processo disaccoppiato documentato con obiettivi Cpk nel nostro stabilimento di Shanghai può essere replicato dal vostro stampatore locale in poche ore anziché in giorni.
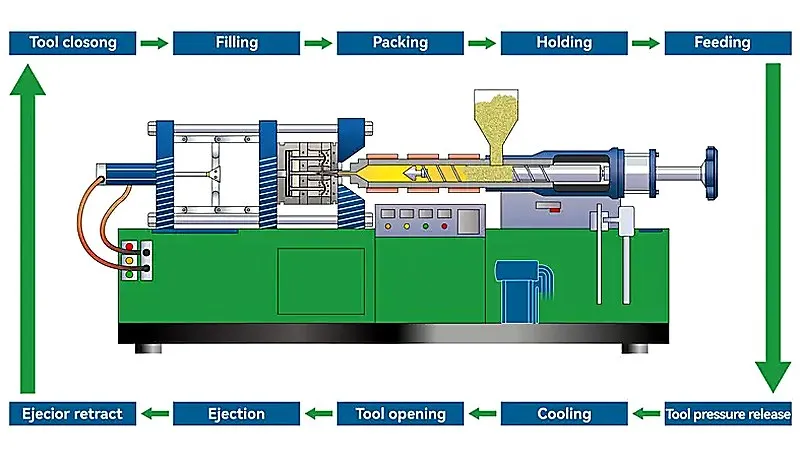
Domande Frequenti sullo Stampaggio Disaccoppiato
Qual è la differenza tra lo stampaggio Decoupled II e Decoupled III?
Decoupled II usa due fasi: riempimento controllato in velocità, seguito da compattazione + mantenimento controllati in pressione come fase unica. Decoupled III le separa in riempimento, compattazione e mantenimento, ciascuno con pressione e tempo indipendenti. Decoupled III offre un controllo più fine per componenti ottici e medicali a tolleranza stretta.
Lo stampaggio disaccoppiato è uguale allo stampaggio scientifico?
Lo stampaggio disaccoppiato è una tecnica specifica della più ampia metodologia dello stampaggio scientifico. Lo stampaggio scientifico comprende sviluppo del processo basato sui dati, studi DOE e controllo statistico del processo. Lo stampaggio disaccoppiato è la strategia fondamentale di controllo del processo che rende riproducibile lo stampaggio scientifico.
Servono macchine speciali per lo stampaggio disaccoppiato?
Serve una macchina con controllo ad anello chiuso di velocità e pressione, comune nelle idrauliche ed elettriche moderne dopo il 2005. Deve commutare precisamente da velocità a pressione al punto definito. Le vecchie macchine ad anello aperto non sono generalmente adatte.
Quanto tempo occorre per impostare un processo disaccoppiato?
L’impostazione completa di un processo disaccoppiato, comprendente studio della fusione, studio della velocità di riempimento, studio della pressione di mantenimento, studio della sigillatura del punto di iniezione e validazione su 100 cicli, richiede 2–4 ore a un tecnico di processo esperto con uno stampo semplice a cavità singola. Gli stampi multicavità o famiglia possono richiedere 4–8 ore.
Lo stampaggio disaccoppiato può ridurre il tempo di ciclo?
Lo stampaggio disaccoppiato non riduce direttamente il tempo ciclo — il tempo di raffreddamento è solitamente il fattore dominante. Tuttavia, eliminando le regolazioni empiriche e la sovracompressione, spesso consente di ridurre i tempi di compattazione e mantenimento ai minimi effettivamente necessari, risparmiando 1–3 secondi per ciclo. Il vero risparmio di tempo deriva dalla riduzione degli scarti e delle regolazioni della macchina durante la produzione.
Quali materiali funzionano meglio con lo stampaggio disaccoppiato?
Tutti i materiali termoplastici rispondono allo stampaggio disaccoppiato. I materiali semicristallini (PA, POM, PBT) ne traggono il massimo beneficio perché il loro ritiro è molto sensibile alla pressione di mantenimento e alla velocità di raffreddamento. Anche i materiali amorfi (PC, ABS, PMMA) ne beneficiano, in particolare per la stabilità dimensionale e la prevenzione dei risucchi. In pratica, questi materiali arrivano alla pressa sotto forma di granuli plastici, i granuli colorati visibili nei contenitori del materiale, e la costanza del controllo di processo disaccoppiato garantisce fusione e riempimento uniformi indipendentemente dalle variazioni dei granuli tra i diversi lotti.
Come posso verificare che il mio processo disaccoppiato funzioni?
Eseguire 100 cicli consecutivi e misurare il peso del componente, le dimensioni critiche e i difetti visivi. Calcolare il Cpk per ogni dimensione critica — un Cpk ≥ 1,33 indica un processo capace. Controllare anche la deviazione standard del tempo di riempimento: dovrebbe essere inferiore a ±0,05 secondi per un processo stabile.
Regola rapida: se la tolleranza del vostro componente è inferiore a ±0,15 mm, o se state producendo più di 100.000 pezzi, investite le 2–4 ore necessarie per impostare un processo scomposto. La sola riduzione degli scarti di solito ripaga il tempo di setup già nel primo turno di produzione. Se la vostra tolleranza è ±0,5 mm e state producendo 500 pezzi, lo stampaggio convenzionale va bene — dedicate le vostre ore di ingegneria a qualcosa di più importante.
Se state valutando se lo stampaggio disaccoppiato sia adatto alla vostra applicazione, contattate il team di ingegneri ZetarMold. Con oltre 20 anni di esperienza nello stampaggio a iniezione di precisione, 45 presse da 90T a 1850T e 8 ingegneri senior che applicano ogni giorno lo stampaggio scientifico, possiamo dirvi con franchezza se l’investimento nella configurazione vale la pena per il vostro pezzo e, in caso affermativo, vi guideremo passo dopo passo attraverso i dati di convalida.
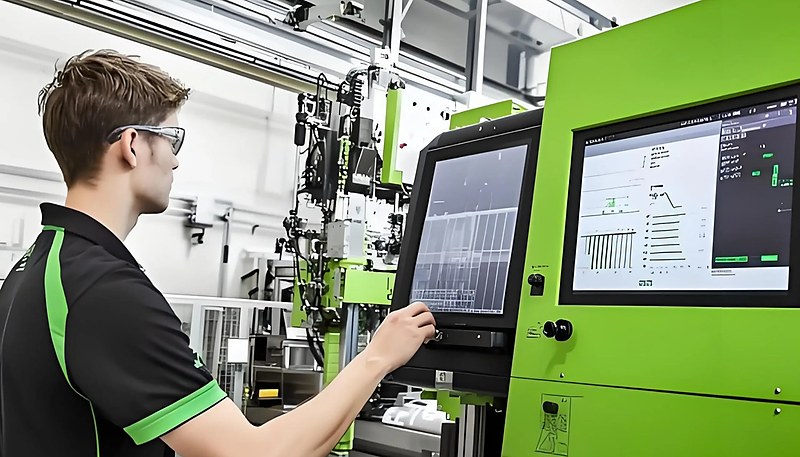
Stampaggio scientifico: metodologia sistematica di stampaggio a iniezione che separa riempimento, compattazione e mantenimento in fasi controllate indipendentemente, ciascuna delle quali risponde a una sola variabile dominante del processo. ↩
Punto di commutazione: punto del ciclo di iniezione in cui il controllo della macchina passa dal riempimento basato sulla velocità alla compattazione basata sulla pressione; in genere viene impostato quando la cavità è riempita al 95–99%. ↩
Bilanciamento delle cavità: uniformità del tempo di riempimento tra tutte le cavità di uno stampo multicavità; canali bilanciati assicurano che ogni cavità riceva il materiale con la stessa portata e pressione. ↩