

You just got a quote for five different injection molds, each running a different part family. The total tooling number made your CFO wince. Sound familiar? That scenario is exactly why Master Unit Die (MUD) systems exist — and why they’ve been gaining traction in low-to-mid volume production for the last two decades.
A MUD injection mold uses a standardized universal base plate that stays mounted in the machine, while removable insert sets define the actual cavity geometry. Swapping one part design for another takes minutes instead of hours. This guide breaks down the engineering details, cost trade-offs, and decision criteria so you can determine whether MUD makes sense for your project.
- MUD systems cut mold changeover from hours to under 20 minutes.
- One base plate serves multiple insert sets — 30–50% tooling savings at 3+ designs.
- Best suited for parts under 12×12 inches and runs of 100–10,000 units.
- Not ideal for high-volume production above 500K annual units.
- ROI typically breaks even at 3–4 insert changes per base plate.
What Is a MUD Injection Mold and How Does It Work?
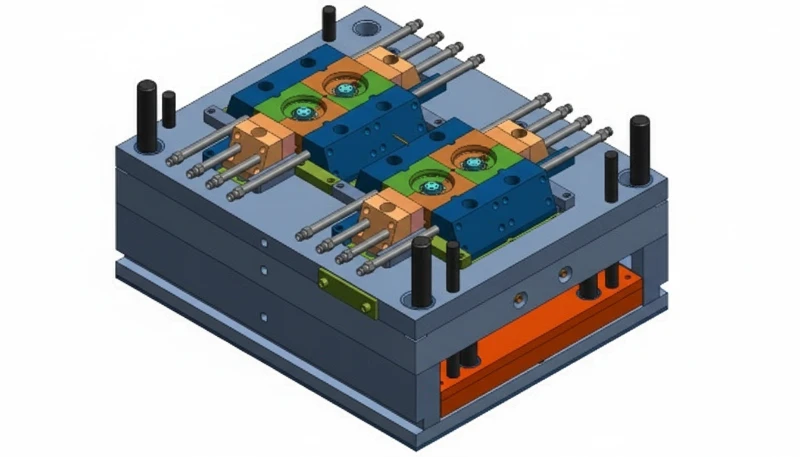
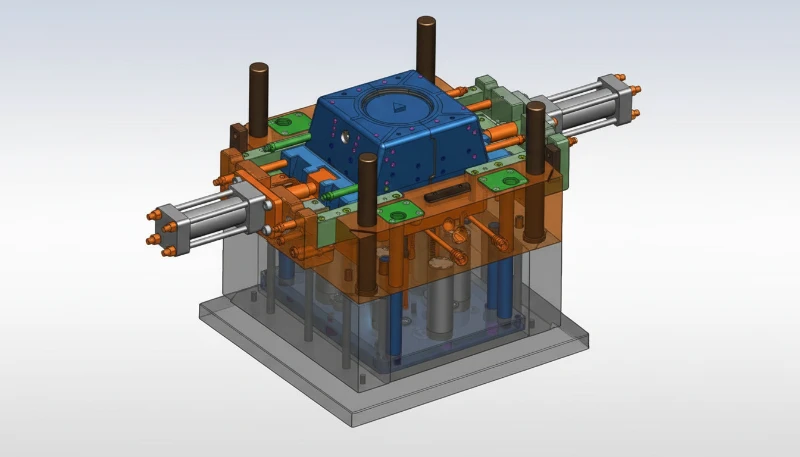
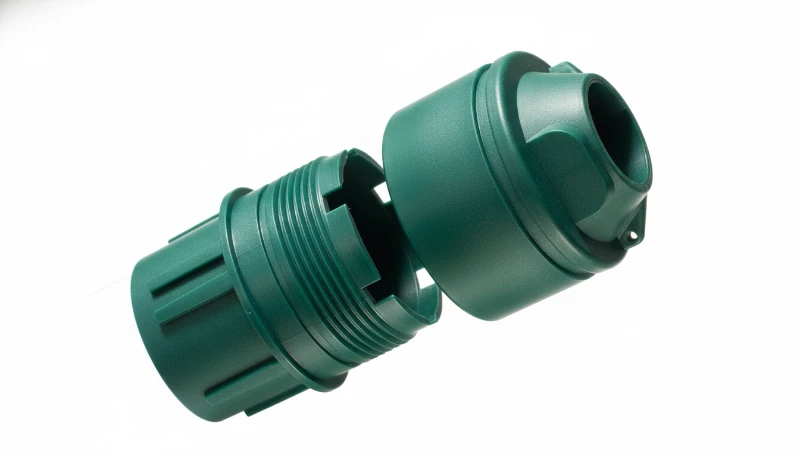
A MUD injection mold — short for Master Unit Die1 — is a modular tooling system with a permanent universal frame and swappable cavity inserts, cutting mold changeover time from 2–4 hours to 5–20 minutes. The standardized base plate stays bolted in the press while removable insert sets define each unique part geometry.
Think of it like a cordless drill: the body and battery stay the same, but you swap drill bits depending on the job. With MUD, you’re swapping cavity inserts instead of removing an entire mold from the machine. The locating pins and heel blocks on the base plate ensure each insert seats with positional accuracy typically within ±0.001 inch (0.025 mm).
In practice, a technician loosens the clamping mechanism, slides out the current insert set, drops in the next one, and locks it down. The whole process takes 5–20 minutes depending on the frame size and clamping style. Compare that to a traditional mold changeover — crane out the old mold, bolt in the new one, recalibrate the machine — which eats 2–4 hours of production time.
The system was originally developed for prototype shops and low-volume production houses that needed to cycle through dozens of part designs on a handful of machines. Today, contract manufacturers use MUD for bridge production, family mold strategies, and any scenario where multiple low-volume parts share similar envelope dimensions.
“MUD inserts can be swapped in under 20 minutes on most press sizes up to 500T.”Vrai
Standard MUD frames use quick-lock clamping mechanisms. On a 200T press with a 6×6 or 8×8 frame, experienced operators complete a swap in 5–15 minutes. Larger frames (10×10, 12×12) take closer to 15–20 minutes due to heavier insert weights.
“MUD systems require specialized injection molding machines to operate.”Faux
MUD base plates are designed to fit standard injection molding machines. The base plate mounts to the machine platens using conventional clamping slots and bolt patterns. No machine modification is needed.
What Are the Core Components of a MUD Quick-Change System?
A MUD quick-change system has three core element groups: a universal conception de moules d'injection2 base frame ($8,000–$15,000), interchangeable insert sets ($3,000–$10,000 each), and precision alignment hardware with clamping mechanisms. The base frame and inserts work together to enable rapid part-to-part changeovers without removing the mold from the press.
The base frame is the heaviest and most expensive single component. It includes the A-side and B-side plates, support pillars, leader pins, and the ejection system. This frame stays bolted into the press semi-permanently. Quality base frames are machined from pre-hardened tool steel (typically P20 or equivalent) and ground flat to within 0.0005 inch across the mounting surface.
The insert set is where your part geometry lives. Each insert is a self-contained block carrying the cavity, core, cooling channels, and ejector pin locations for one specific design. Inserts are typically machined from P20, H13, or S136 depending on the production volume and material being molded. The insert fits into a pocket in the base frame with slip-fit tolerances.
Alignment hardware includes precision-ground locating pins, heel blocks, and wedge locks. These ensure the insert seats in exactly the same position every time. The clamping system — usually hydraulic or manual toggle clamps — locks the insert against the frame with consistent force. Misalignment here is the number one source of quality issues in MUD systems, which is why the locating features are hardened and replaceable.
When Does a MUD System Save Money Over Traditional Molds?
MUD systems save 30–50% on tooling costs3 when you need three or more part designs that fit within the same frame envelope, with break-even at 3–4 insert sets per base plate. Each insert costs 40–60% less than a standalone mold for the same geometry, so the savings compound with every additional design.
Here’s the math in plain terms: a dedicated production mold for a medium-complexity part might run $15,000–$40,000. A MUD base plate in the 8×8 size runs $8,000–$15,000, and each insert set for that frame costs $3,000–$10,000. So for a single design, the MUD route is actually more expensive (base + insert vs. standalone mold). But for five designs on one base plate, you’re looking at roughly $40,000–$65,000 total versus $75,000–$200,000 for five dedicated molds.
| Scénario | Traditional Molds | MUD System | Savings |
|---|---|---|---|
| Single part design | $20,000 | $25,000 (base + insert) | -$5,000 (more expensive) |
| 3 part designs | $60,000 | $38,000 (base + 3 inserts) | $22,000 (37%) |
| 5 part designs | $100,000 | $53,000 (base + 5 inserts) | $47,000 (47%) |
| 8 part designs | $160,000 | $71,000 (base + 8 inserts) | $89,000 (56%) |
Beyond direct tooling cost, MUD also reduces downtime. If you’re running a job shop that changes molds daily, saving 2–3 hours per changeover translates to significant capacity recovery. Over a year with 200 changeovers, that’s 400–600 hours of recovered press time.
In our Shanghai facility, we run 45 injection molding machines ranging from 90T to 1850T. For customers with multi-part families in the 100–5,000 unit range per design, MUD frames let us consolidate production across fewer machines while keeping changeover time under 20 minutes. Our 8 senior mold engineers evaluate each project’s part envelope and volume to recommend MUD versus dedicated tooling before quoting.
What Are the Design Constraints of MUD Tooling?
MUD tooling has three hard constraints: maximum part envelope of 12×12 inches, cavity pressure limits around 20,000–25,000 psi, and cooling capacity restricted by the insert’s smaller footprint. Parts exceeding any of these limits are better served by dedicated production molds.
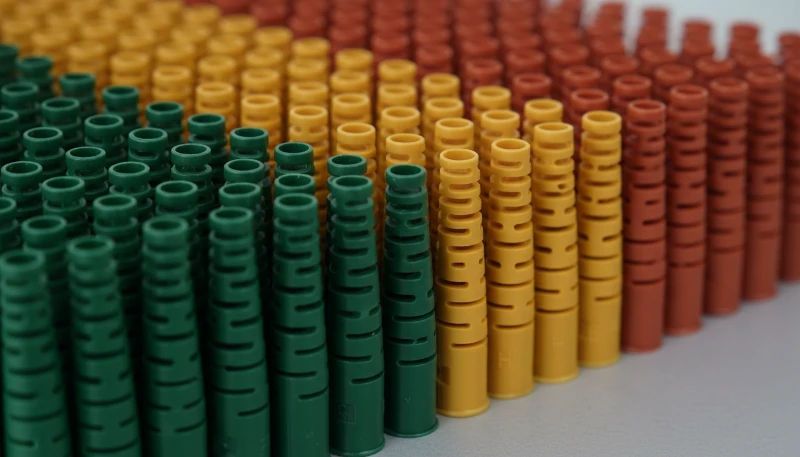
Size is the most obvious constraint. Standard MUD frames come in sizes from roughly 6×6 inches up to 12×12 inches (some custom frames go larger, but availability drops and cost rises). If your part — including runner system — exceeds the insert pocket, MUD is off the table. In practice, this means MUD works best for parts with projected areas under 100 square inches. Think medical devices, electronic enclosures, small automotive trim pieces, and consumer product housings — not bumper covers or large structural components.
Cavity pressure distribution can be uneven compared to a dedicated mold. Because the insert sits in a pocket rather than being supported by the full mold base, high-pressure applications (thin-wall molding, glass-filled materials) may show flash or dimensional variation at the insert-to-frame interface. Most MUD frames handle injection pressures up to 20,000–25,000 psi reliably, but pushing beyond that range requires careful evaluation.
Cooling channel routing inside the insert is limited by the insert’s smaller footprint. Dedicated molds have the luxury of routing cooling circuits through the full mold base, while MUD inserts must contain all cooling within the insert block itself. For parts with demanding cycle time requirements or thick sections, this constraint can add 10–30% to cooling time versus a conventional mold.

Which Materials and Part Geometries Suit MUD Best?
MUD systems work best with common thermoplastics — PP, PE, ABS, POM, unfilled nylon, and TPU — processed at 10,000–18,000 psi injection pressure and below 300°C melt temperature. These parameters stay well within the reliable operating range of standard MUD frame interfaces.
That said, we’ve successfully run polycarbonate and PBT through MUD inserts on projects where the wall thickness stayed above 1.5 mm and the flow length-to-thickness ratio was reasonable. We evaluate whether your material and geometry will push the insert-to-frame seal beyond its limits. Glass-filled nylons (PA6-GF30, PA66-GF35) deserve extra scrutiny — the abrasive nature of the glass fibers accelerates wear on the insert cavity, and the higher packing pressures stress the frame interface.
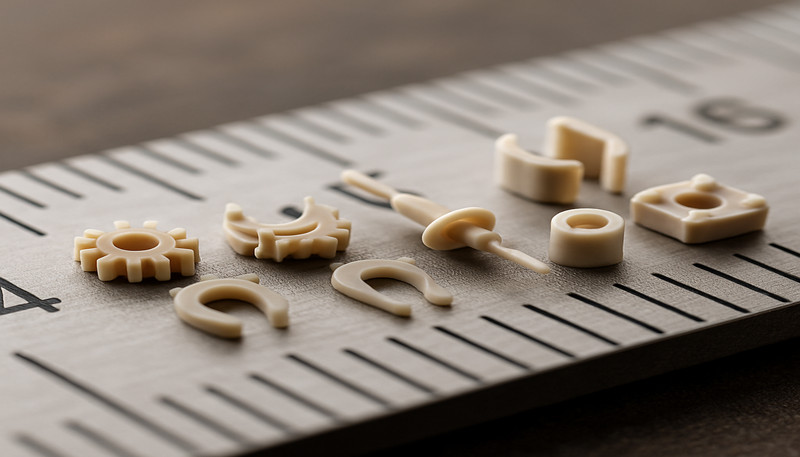
For part geometry, MUD-friendly designs share these characteristics:
- Uniform wall thickness (ratio under 3:1) — avoids differential shrinkage that the smaller cooling circuits struggle to control
- No deep draws or tall cores — long core pins deflect more in MUD inserts due to reduced support structure
- Undercuts that can be resolved with lifter or slider mechanisms fitting within the insert envelope
- Part weight under 200 grams — heavier parts require more robust ejection and cooling that pushes insert complexity
How Do You Maintain a MUD System for Maximum Lifespan?
MUD base plates last 5–10 years with proper maintenance, and insert sets last 50,000–200,000 cycles — but the insert-to-frame interface requires daily cleaning and weekly wear measurement to achieve those numbers. Unlike conventional one-piece molds, MUD has a removable interface that adds a wear point demanding specific attention.
Daily maintenance focuses on the alignment features. After every insert change, clean the locating pin bores and the pocket surfaces with compressed air and a lint-free wipe. Any debris or plastic residue between the insert and frame pocket creates micro-misalignment that compounds over time. A 0.001-inch shift in insert position translates directly into part dimension variation.
Weekly checks should measure the insert pocket for wear. Use a dial indicator to check the depth and parallelism of the pocket surfaces. If the pocket shows more than 0.002 inch of wear or taper, it’s time to re-machine or shim. The locating pin holes should be checked with go/no-go gauges — worn pin holes are the most common source of gradual quality drift in MUD systems.
Monthly calibration involves running a certified measurement part (usually a simple flat plaque mold that comes with the frame) and checking critical dimensions against the baseline. Any deviation beyond tolerance means the frame needs attention. Also inspect the clamping mechanisms — hydraulic clamps should hold consistent pressure, and manual toggles should lock without play.
The good news is that most MUD wear is progressive and predictable. Unlike a catastrophic mold failure, you’ll see dimensional drift long before the system becomes unusable. Track the measurement data over time and you can plan rework or replacement well in advance.
“Regular cleaning of locating pin bores after each insert change extends MUD frame life by 30–50%.”Vrai
Debris accumulation in the alignment features is the primary wear mechanism in MUD systems. Shops that implement a mandatory blow-and-wipe routine after every insert swap report significantly longer intervals between frame rework cycles.
“MUD inserts don’t require any maintenance since they’re designed to be disposable.”Faux
MUD inserts carry the actual cavity geometry and require the same level of maintenance as conventional mold cavities — polishing, vent cleaning, ejector pin lubrication, and cooling circuit flushing. Treat them as production tooling, not consumables.
What Common Mistakes Do Engineers Make With MUD Systems?
The top four mistakes with MUD systems are: specifying them for high-volume production (above 500K units/year), ignoring insert weight ergonomics, buying cheap frames with poor tolerances, and over-complicating insert designs with unnecessary mechanisms. Any one of these can turn a cost-saving strategy into a production headache.
Second mistake: ignoring insert weight. A fully machined 12×12 insert set can weigh 80–150 lbs. If your pressroom doesn’t have a hoist or lift table at every machine, changeovers become a safety issue and a bottleneck. We’ve seen shops buy MUD systems for the flexibility and then leave them idle because the changeover ergonomics didn’t match their floor layout.
Third mistake: assuming all MUD frames are equal. There are significant quality differences between manufacturers. A cheap frame with soft locating pins and sloppy pocket tolerances will drive you crazy with flash, dimensional drift, and inconsistent ejection. Spend the money on a quality frame from the start — it’s a 5–10 year asset, and the price difference between adequate and excellent is usually under $3,000.
Fourth mistake: not designing inserts for manufacturability. Some engineers treat MUD inserts as miniature standalone molds and pack in features that require complex side actions, lifters, or unscrewing mechanisms. The insert has limited real estate, and every mechanism you add increases the risk of the insert not seating properly in the frame. Keep insert designs as simple as your part geometry allows.
How to Decide Between MUD and Traditional Molds for Your Project?
Choose MUD for 3+ part designs under 12×12 inches at under 50,000 annual units each; choose traditional molds for single high-volume designs exceeding 100,000 units/year or requiring tolerances tighter than ±0.005 inch. The decision hinges on three variables: number of part designs, annual volume per design, and changeover frequency.
Use MUD when:
- You have 3+ part designs that fit within a common frame size
- Annual volume per design is under 50,000 units
- Your production schedule requires frequent mold changes (daily or weekly)
- Budget is limited and spreading tooling cost across multiple designs is necessary
- You’re in a prototyping or bridge production phase before committing to production tooling
Use traditional molds when:
- Annual volume per design exceeds 100,000 units
- Part dimensions require tolerances tighter than ±0.005 inch
- Your part envelope exceeds 12×12 inches
- You’re running glass-filled or high-temperature materials above 300°C
- The mold will run on one machine continuously without changeovers
The gray zone is 50,000–100,000 annual units with 2–3 part designs. In that range, the decision depends on your specific quality requirements and how much downtime you can absorb for mold changes. Run the cost model with real numbers from your supplier — don’t estimate.
With over 400 materials in our processing library and machines from 90T to 1850T, we evaluate MUD feasibility as part of every DFM review. When a customer approaches us with a multi-part project, our 8 senior engineers assess whether a MUD frame strategy or dedicated injection mold tooling delivers better total cost of ownership — and we show the calculation, not just the recommendation.
Frequently Asked Questions About MUD Injection Molds
What does MUD stand for in injection molding?
MUD stands for Master Unit Die — a standardized quick-change mold system developed by DME (Detroit Mold Engineering) that uses a universal frame with interchangeable cavity inserts for rapid mold changes.
How long does a MUD insert change take?
A trained operator can swap MUD inserts in 5–20 minutes depending on frame size. Smaller frames (6×6, 8×8 inches) take 5–10 minutes, while larger 12×12 frames take 15–20 minutes due to heavier insert weights.
What is the maximum part size for MUD molds?
Standard MUD frames accommodate inserts up to approximately 12×12 inches. Parts must fit within the insert pocket minus clearance for the runner system. Custom frames exist but cost significantly more and have longer lead times.
Are MUD molds suitable for production runs?
MUD molds work well for low-to-mid volume production (100–50,000 units per run). For annual volumes exceeding 100,000 units per design, dedicated production molds deliver better dimensional consistency and lower per-part cost.
How much does a MUD base plate cost?
A MUD base plate costs $5,000–$15,000 depending on size and quality. Insert sets range from $2,000–$10,000 each. The total system becomes cost-effective at 3+ insert sets compared to buying individual dedicated molds.
Can MUD molds run engineering-grade plastics?
MUD systems handle most engineering thermoplastics including ABS, nylon, polycarbonate, POM, and PBT. High-temperature or glass-filled materials above 20,000 psi injection pressure require careful evaluation of the frame’s sealing capability.
What tolerances can MUD injection molds achieve?
MUD inserts typically achieve tolerances of ±0.003 to ±0.008 inch, depending on part geometry and material. This is slightly wider than dedicated molds (±0.001 to ±0.005 inch) due to the insert-to-frame interface tolerance stack-up.
Quick decision rule: If you’re molding 3+ part designs under 12×12 inches at under 50K units each, run the MUD cost model. If the numbers work for tooling, confirm your supplier can maintain dimensional consistency across insert swaps. At ZetarMold, we’ve been helping engineers make this call since 2005 — with 100+ sets of moulage par injection tooling produced monthly and 30+ English-speaking project managers ready to walk through your specific requirements. Request a sourcing consultation and we’ll include a MUD vs. dedicated mold comparison in your DFM report.
-
Master Unit Die: A Master Unit Die (MUD) is a standardized quick-change mold base system that accepts interchangeable mold inserts, allowing rapid swapping of cavity geometries within a single universal frame.↩
-
injection mold design: Injection mold design refers to the engineering process of creating the mold structure, including cavity layout, cooling channels, ejection systems, and alignment features for reliable production.↩
-
tooling costs: Tooling cost represents the total investment in mold construction, including base frame, cavity inserts, cooling circuits, ejection systems, and all machining and finishing operations.↩


")

