

- Mold inspection is a systematic process of examining injection molds for dimensional accuracy, surface quality, and functional performance before and during production.
- Regular tooling inspections can reduce scrap rates by 15–30% and extend mold life by thousands of additional cycles.
- A proper inspection checklist covers parting line fit, cavity surface condition, cooling channel integrity, ejection system function, and dimensional tolerances.
- Both visual and instrument-based methods—including CMM, optical comparators, and profilometers—play essential roles in comprehensive tooling evaluation.
- Preventive inspection schedules aligned with shot counts are more cost-effective than reactive repairs after defects appear.
What Is Mold Inspection and Why Does It Matter?
If you’re already seeing flash, sticking parts, or unexplained dimensional drift, the mold problem usually started much earlier. Mold inspection is the systematic evaluation of an injection mold’s physical condition, dimensional accuracy, and functional readiness so it can keep producing conforming parts before those small warning signs turn into scrap, downtime, or missed deliveries.
In practical terms, mold inspection sits upstream of both moldeo por inyección process control and molde de inyección performance. It helps teams catch issues at the tool level before they become thousands of defective parts on the production floor.
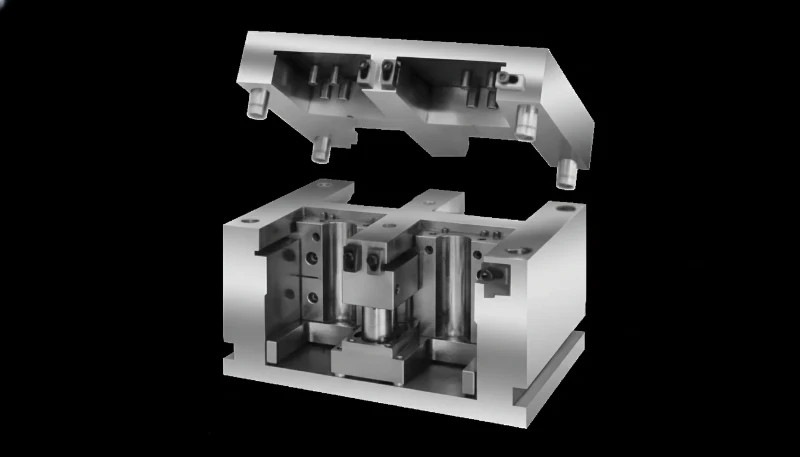
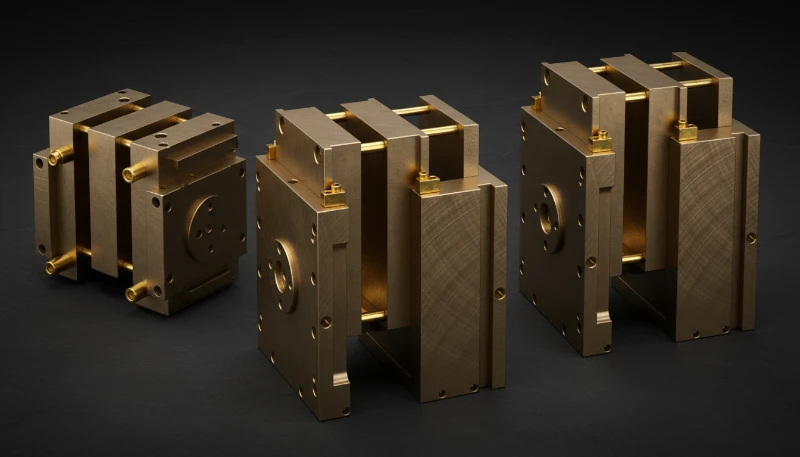
Every injection mold is a precision tool, often machined to tolerances of ±0.01 mm or tighter. Over time, the repeated thermal cycling, high clamping forces, and abrasive flow of molten plastic take their toll. Without regular inspection, small issues—a micro-crack on a cavity surface, a worn guide pin, a blocked cooling line—can escalate into costly production shutdowns or, worse, ship defective parts to your customer.
We’ve found that manufacturers who implement structured inspection programs see measurable improvements: lower scrap rates, fewer unplanned downtime events, and longer overall mold life. It’s not just about quality—it’s about protecting your investment in tooling that can cost anywhere from $5,000 to $500,000 or more.
What Are the Key Types of Mold Inspection?
There are four primary types of tooling inspection, each serving a different purpose in the mold lifecycle: incoming inspection, in-process inspection, preventive maintenance inspection, and post-repair inspection. In our experience, using all four strategically gives you the most complete quality coverage.
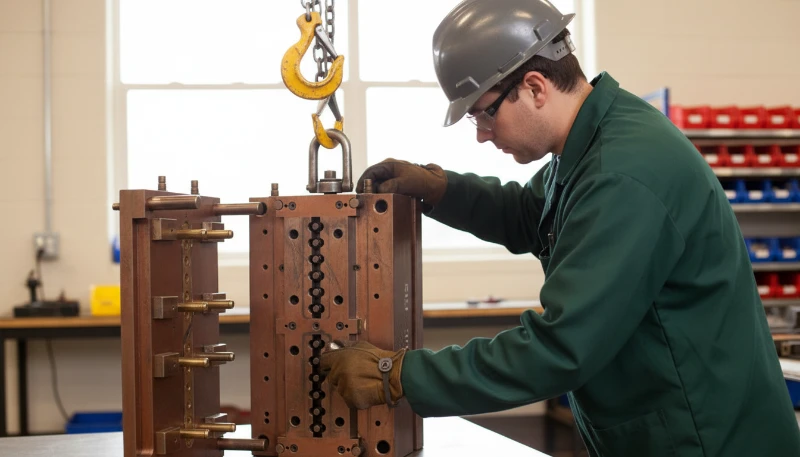
Incoming Inspection (New Mold Qualification) — When a new mold arrives from the toolmaker, we run a comprehensive dimensional check, trial shots, and first-article inspection1. This verifies the mold meets the design intent before it enters production.
In-Process Inspection — During production runs, operators perform visual checks on parts and periodic dimensional sampling. We typically inspect the first 5 shots after every mold setup, then sample at intervals based on the part’s criticality.
Preventive Maintenance Inspection — This is the scheduled tear-down and examination of mold components at predetermined shot-count intervals. We’ve standardized this at every 50,000–100,000 shots depending on the mold complexity.
Post-Repair Inspection — After any welding, re-machining, or component replacement, the mold goes through a qualification cycle similar to incoming inspection to confirm the repair was successful. In regulated programs, these records often sit alongside broader validación del proceso de moldeo por inyección documents so the customer can trace tool condition back to part approval.
“Mold inspection is only necessary when parts start showing visible defects.”Falso
Waiting for visible defects means the mold has already been producing marginal or scrap parts. By that point, parting line wear, cooling blockage, or surface damage may have progressed well beyond a quick fix.
“Proactive inspection on a scheduled basis catches issues before they affect part quality.”Verdadero
Scheduled inspections tied to shot counts identify wear patterns early, allowing planned repairs during downtime rather than emergency fixes during production.
What Does a Mold Inspection Checklist Include?
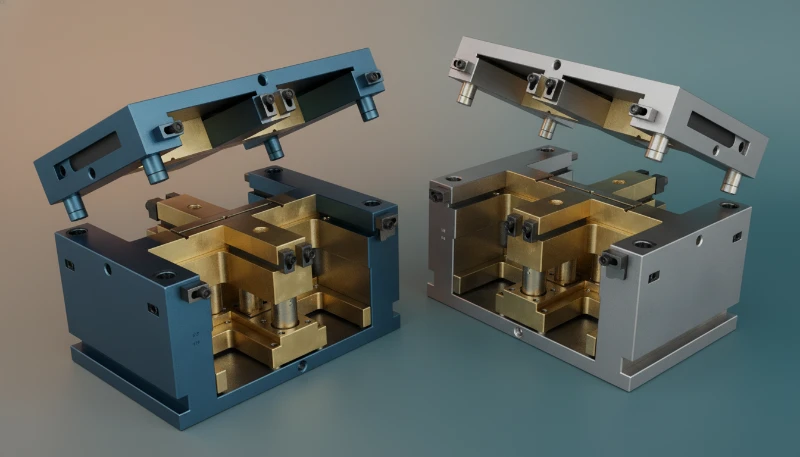
A thorough tooling inspection checklist covers five critical areas: mold exterior and mounting, parting surfaces and shutoffs, cavity and core surfaces, mechanical systems, and thermal systems. We use a standardized 50-point checklist in our facility that has evolved over 15 years of molding experience.
| Inspection Area | Key Checkpoints | Typical Frequency |
|---|---|---|
| Mold Exterior & Mounting | Clamp slots, locating ring, eyebolt holes, rust/damage | Every setup |
| Parting Surfaces & Shutoffs | Flash witness marks, crushing, fit uniformity | Every setup + 50K shots |
| Cavity & Core Surfaces | Scratches, erosion, deposits, texture condition | Every 25K–50K shots |
| Sistema de eyección | Pin wear, return spring condition, sleeve fit | Every 50K shots |
| Sistema de refrigeración | Flow rate test, leak check, channel blockage | Every 50K–100K shots |
| Hot Runner System | Heater resistance, thermocouple function, gate condition | Every 100K shots |
| Slides & Lifters | Wear surfaces, gibs, angle pin fit, stroke length | Every 50K shots |
En línea de partición2 area deserves special attention. Even 0.02 mm of crushing on the parting surface can cause flash on parts. We use blue dye (Dykem) on the parting surfaces during inspection—the contact pattern tells us immediately if the mold halves are meeting properly.
What Tools and Equipment Are Used for Mold Inspection?
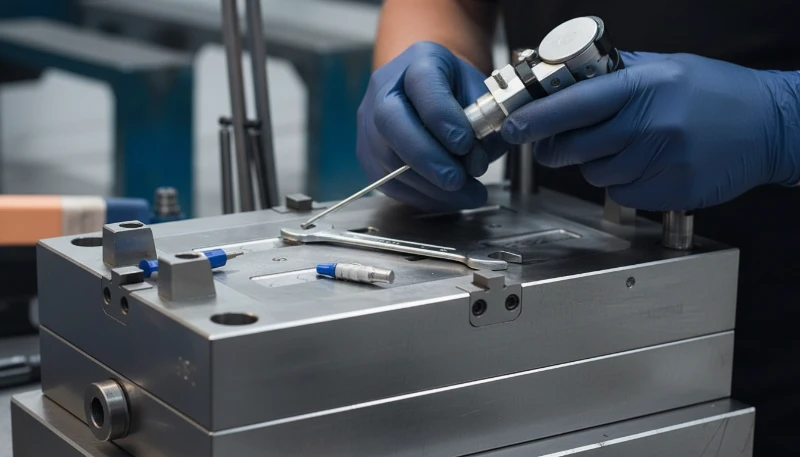
The inspection process relies on a combination of visual, dimensional, and surface measurement tools ranging from simple hand instruments to sophisticated coordinate measuring machines. The right tool depends on what you’re measuring and the tolerance required.
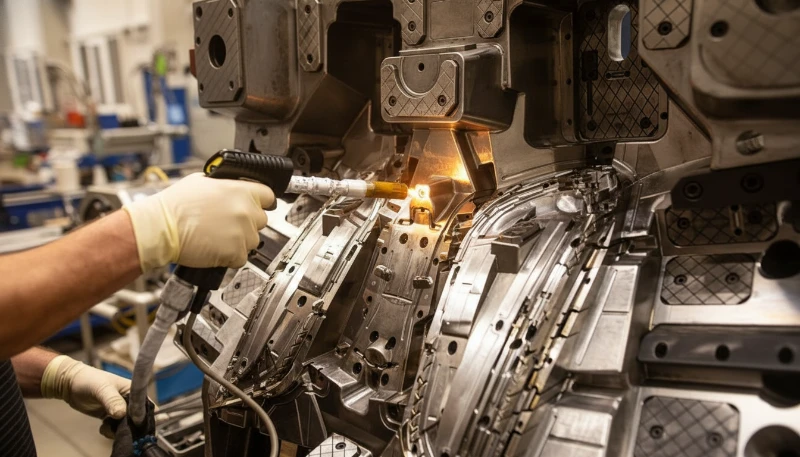
Visual and Optical Tools: Magnifying loupes (10×–30×), bore scopes for deep features, and UV lights for crack detection. We keep a 20× loupe at every press for operators to inspect gate areas and parting line conditions quickly.
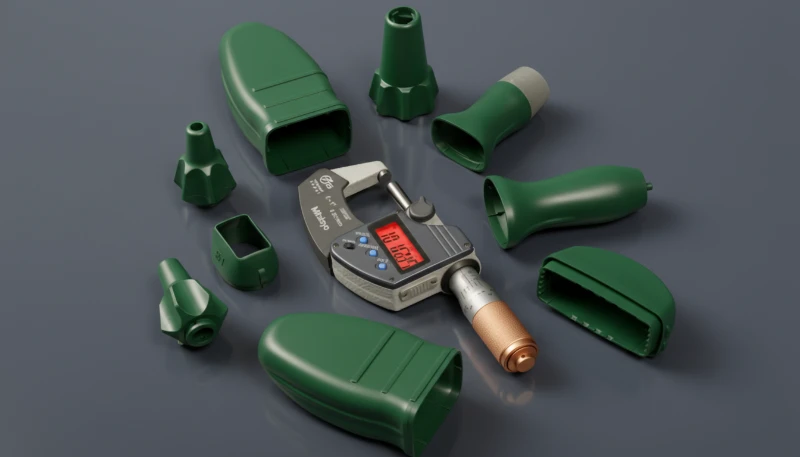
Dimensional Tools: Calipers, micrometers, height gauges, and pin gauges cover most routine measurements. For critical dimensions, we use a coordinate measuring machine (CMM)3 that gives us repeatability within ±0.002 mm. Material checks matter too: if a mold is running filled or high-temperature termoplásticos, inspection standards for gate wear, vent deposits, and surface attack usually need to be tighter.
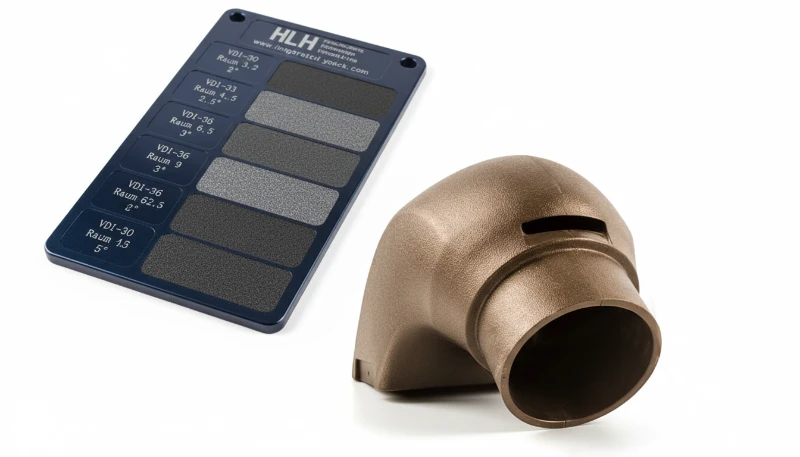
Surface and Flow Tools: Profilometers measure surface roughness (Ra values), which is especially important for textured molds or high-gloss optical parts. We’ve found that tracking Ra values over time gives an early warning of cavity surface degradation.
Flow Testing: We use flow meters on cooling circuits during every mold setup. A drop of more than 20% in flow rate compared to the baseline signals a blockage that needs attention before it causes hot spots and warpage.
How Often Should You Inspect Injection Molds?
The optimal inspection frequency depends on the mold’s complexity, material being processed, production volume, and part criticality—but as a baseline, every mold should receive a comprehensive inspection at minimum every 50,000 to 100,000 shots. In our factory, we tier our inspection schedules based on risk.
“High-quality mold steel eliminates the need for frequent inspections since the mold will last longer without degradation.”Falso
Premium steels like S136 or H13 resist corrosion and wear better, but moving components, cooling systems, and venting still degrade with use regardless of steel grade.
“Even molds built from premium steels require regular inspection of mechanical and thermal systems.”Verdadero
Steel grade affects cavity life but does not prevent ejector pin galling, cooling channel fouling, or slide wear—all of which need scheduled inspection.
Tier 1 – High-Risk Molds (every 25,000 shots): Medical or automotive safety parts, multi-cavity molds with hot runners, molds processing abrasive glass-filled materials.
Tier 2 – Standard Molds (every 50,000 shots): Consumer product molds with standard tolerances, cold-runner molds with straightforward geometries.
Tier 3 – Low-Risk Molds (every 100,000 shots): Simple geometries, non-critical parts, robust mold construction with hardened cavities.
We track shot counts electronically with mold-mounted counters and trigger automatic work orders when thresholds are reached. This removes human memory from the equation—we’ve seen too many molds run 200,000+ shots without inspection simply because nobody was tracking.
What Are the Most Common Issues Found During Mold Inspection?
The most common issues found during routine checks are parting line wear and flash, cooling channel deposits, ejector pin wear, cavity surface damage, and venting degradation. In over 20 years of mold maintenance, we see the same failure patterns repeat across different mold types and industries.

Parting Line Wear: This is the number one issue. The repeated clamping force of 50–500+ tons gradually crushes the parting surfaces. We check for flash on parts as the early indicator and verify with dye transfer tests on the mold.
Cooling Channel Fouling: Scale, rust, and biological growth restrict water flow over time. In our experience, about 40% of molds that come in for “part quality issues” actually have cooling problems. A simple flow test during inspection catches this. If uneven cooling is left unchecked, it often shows up later as injection molding warpage or other dimensional instability on finished parts.
Ejector System Wear: Ejector pins gall, bend, or wear undersized, leading to part sticking, witness marks, or broken pins. We measure pin diameters and check bore clearances during every preventive inspection.
Cavity Surface Damage: Scratches from part removal, corrosion from off-gassing4 (especially with PVC or flame-retardant materials), and erosion at gate areas. Surface inspection under magnification catches issues invisible to the naked eye.
Vent Blockage: Vents clog with deposits from the molding process, leading to burn marks, short shots, and incomplete filling. We clean and verify vent depths at every preventive maintenance cycle.
How Can You Build an Effective Mold Inspection Program?
Building an effective tooling inspection program requires three elements: standardized procedures, trained personnel, and a tracking system that ties inspection data to production outcomes. We’ve refined our program over many years, and these are the principles that make it work.
Step 1: Document baseline conditions. When a new mold is qualified, record all critical dimensions, cooling flow rates, surface roughness values, and photographs. This baseline becomes your reference for all future inspections. If the tool supports cosmetic or optical components, it also helps to align mold inspection records with your mold quality standards acceptance criteria so wear trends are easier to spot.
Step 2: Create mold-specific checklists. While a general checklist is a starting point, each mold has unique features that need specific attention. A mold with hydraulic core pulls needs different inspection points than a simple two-plate mold.
Step 3: Train your team. Tooling inspection is a skill. We pair new technicians with experienced moldmakers for at least 6 months before they inspect independently. Knowing what “normal wear” looks like versus “needs action” comes from experience.
Step 4: Track and trend data. Use a mold management system to record every inspection finding, repair action, and shot count. Over time, patterns emerge—you’ll learn which molds need attention sooner and which ones are workhorses that run reliably.
Step 5: Close the loop with production. Inspection findings should feed back to the engineering team. If a mold consistently develops flash at a specific location, perhaps the mold design needs reinforcement rather than repeated repair.
PREGUNTAS FRECUENTES
How long does a typical mold inspection take?
A basic setup inspection takes 15–30 minutes. A full preventive maintenance inspection with tear-down and measurement typically takes 4–8 hours for a standard mold, and up to 2–3 days for complex multi-cavity hot-runner molds.
Can mold inspection be automated?
Partially. Vision systems can automate part inspection and some cavity surface checks. CT scanning is emerging for internal channel inspection. However, the tactile assessment of mechanical components—feeling for galling, checking spring tension, verifying slide movement—still requires skilled human hands.
What is the cost of neglecting mold inspection?
The cost multiplies quickly: scrap rates can increase by 20–40%, unplanned downtime for emergency repairs typically costs 3–5× more than scheduled maintenance, and catastrophic mold failures can require $10,000–$50,000+ in repairs or even complete mold replacement.
Should mold inspection records be shared with the customer?
Yes, especially in automotive and medical industries where traceability is required. We provide inspection reports as part of our PPAP5 documentation and include mold condition updates in our regular quality reviews with customers.
What’s the difference between mold inspection and mold validation?
The inspection examines the physical condition of the mold itself—surfaces, dimensions, mechanical function. Mold validation (or qualification) tests whether the mold produces parts that meet specifications under defined process conditions. Inspection is about the tool; validation is about the output.
How do you inspect cooling channels that aren’t visible?
We use flow testing as the primary method—comparing current flow rates to the baseline. For deeper investigation, we use bore scopes where channel diameters allow, and in some cases, industrial CT scanning to visualize internal channel geometry and detect blockages or wall thinning.
Resumen
Tooling inspection is not a luxury—it’s a fundamental practice that separates professional molding operations from those constantly fighting quality fires. From our experience running thousands of molds, the investment in systematic inspection pays for itself many times over through reduced scrap, fewer surprises, and longer mold life. Whether you’re running a single prototype mold or managing a fleet of hundreds, establishing clear inspection standards, equipping your team with the right tools, and tracking the data will transform your operation’s reliability.
Rule of thumb: if a mold produces any repeat defect pattern for two consecutive runs, inspect the tool before changing process settings again. That simple discipline prevents teams from chasing symptoms at the press while the real root cause remains in the mold.
- First-Article Inspection (FAI): A complete, independent, and documented inspection of the first production parts to verify that the manufacturing process produces conforming parts. ↩
- Línea de separación: The line or surface on a molded part where the two halves of the mold meet. Quality of the parting line fit directly affects flash formation. ↩
- Coordinate Measuring Machine (CMM): A device that measures the geometry of physical objects by sensing discrete points on the surface with a probe, providing extremely precise dimensional data. ↩
- Off-gassing: The release of volatile compounds from heated plastic materials during the molding process, which can deposit on mold surfaces and cause corrosion or buildup. ↩
- PPAP (Proceso de aprobación de piezas de producción): A standardized process in the automotive and manufacturing industries used to demonstrate that a production process can consistently manufacture parts meeting all requirements. ↩


