 Skip to content

Introduction
Making injection molds is a long and complicated process. There are many steps involved in what seems like a simple operation. Do you know what is the injection mold making process?
Now I will tell you in detail. The plastic injection molding process of making injection molds mainly includes: accepting customers’ customized needs, engineering team mold design, melted plastic injection molds manufacturing, mold inspection and mold trial, mold modification and mold repair, and mold maintenance. Below I will take you to understand one by one.

Accepting Customers’ Customized Needs
When you want to make a plastic mold, you give the mold maker a drawing or a sample of the product you want to make. The mold maker needs to know how you are going to use the part, how you are going to process it, and how accurate you need it to be.

To meet the requirements of plastic molding production, we need to collect, analyze, and digest product data to meet the customized needs of customers.
Mold Design
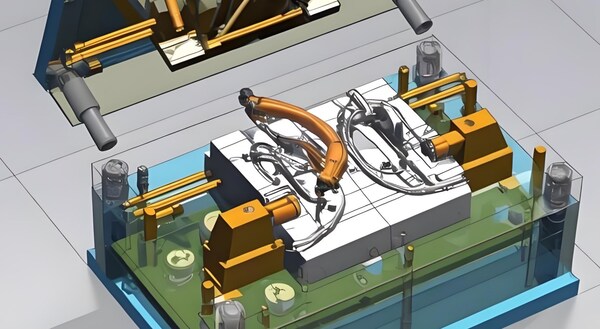
Designing the injection mold is the most important part of the entire mold manufacturing process. The structure and size of the mold must be determined according to the requirements and characteristics of the product. The following are the steps to design an injection mold.
Preparation Work Before Design
Design task book; familiar with plastic parts, including their geometric shape, use requirements of plastic parts, and raw materials of plastic parts; check the molding processability of plastic parts; clarify the model and specifications of the injection molding machine.
Injection Mold Structure Design Steps
Count the number of holes. Conditions: maximum injection volume, clamping force, product precision requirements, economy; choose where to split. The principle should be simple mold structure, easy to split, and no impact on the appearance and use of plastic parts; decide where to put the holes.

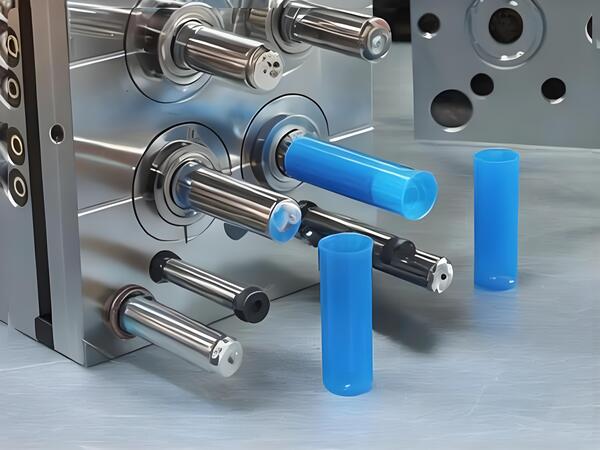
Try to make it even; decide where to pour.Decide how to take the part out of the mold, including the main runner, branch runner, gate, cold slug well, etc. Design different ways to take the part out of the mold depending on where the plastic part is left in the mold.

Decide how to control the temperature. The temperature control system is mainly decided by the type of plastic. When you decide to use an insert in the mold or core, divide the inserts into sections and make the inserts and fix them at the same time.

Figure out the exhaust method. In general, the exhaust can be achieved by the gap between the parting surface of the mold and the ejection mechanism and the mold. For large and high-speed injection molds, the corresponding exhaust method must be designed; determine the main dimensions of the injection mold.

Use the formula to calculate the working dimensions of the molded parts. Determine the side wall thickness of the mold cavity, the thickness of the cavity bottom plate, the core pad, the thickness of the movable plate, the thickness of the cavity plate of the block-type cavity, and the closing height of the injection mold.

Choose a standard mold frame.Based on the designed and calculated dimensions of the injection mold, choose a standard mold base for the injection mold, and try to choose standard mold components; sketch out the mold structure.
When designing a mold, it is very important to draw a complete structural sketch of the mold and draw a mold structure diagram. Check the relevant dimensions of the mold and the injection machine.

Check the parameters of the injection molding machine used: including the maximum injection volume, injection pressure, clamping force, and the size of the mold installation part, mold opening stroke and ejection mechanism.
Review of injection molded parts design. Conduct a preliminary review and obtain the user’s consent. At the same time, it is necessary to confirm and modify the user’s requirements; draw the assembly drawing of the mold.

Clearly indicate the assembly relationship, necessary dimensions, serial numbers, detailed lists, title bars and technical requirements of each part of the injection molding (the technical requirements include the following items.

performance requirements for mold structure, such as assembly requirements for ejection mechanism and core pulling mechanism; requirements for mold assembly process, such as the fitting gap of the parting surface and the parallelism of the upper and lower surfaces of the mold.

mold use requirements; anti-oxidation treatment, mold numbering, lettering, oil seals and storage requirements; requirements for trial molds and inspections.).
Make mold part drawings. The order of making part drawings is: inside first, then outside, complex first, then simple, and molding parts first, then structural parts. Check design drawings.

The final check of the injection mold design is the final check of the injection mold design, and more attention should be paid to the processing performance of the parts.
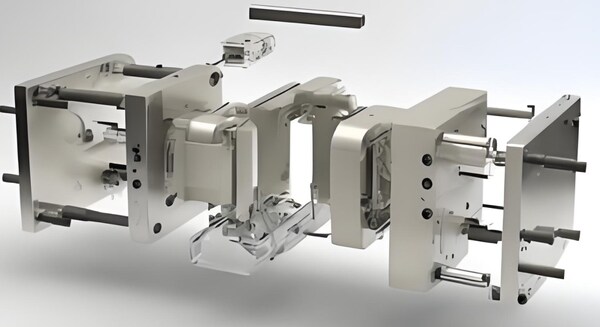
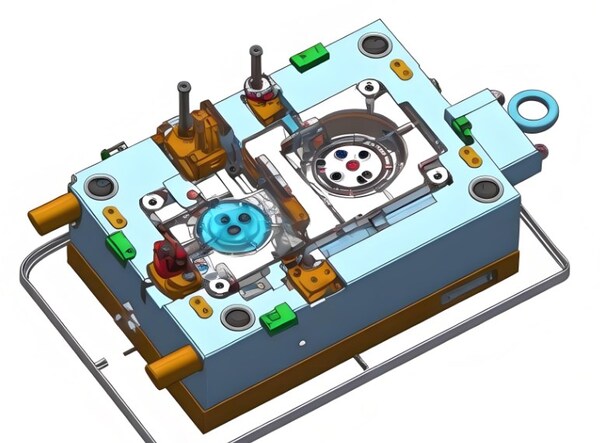
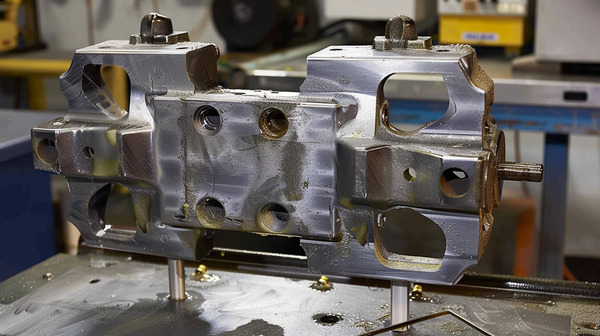
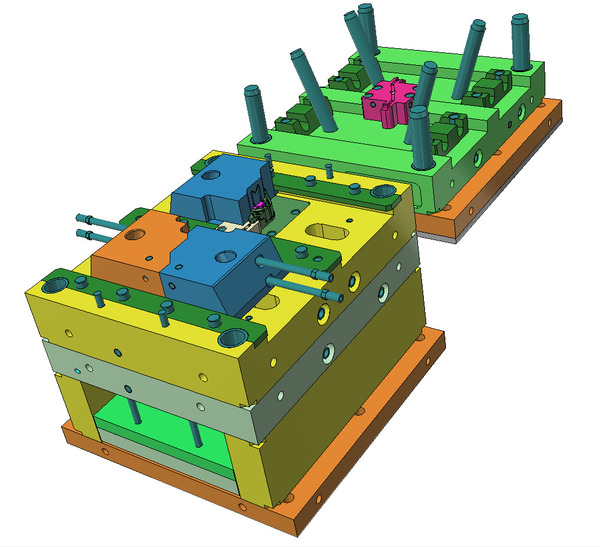
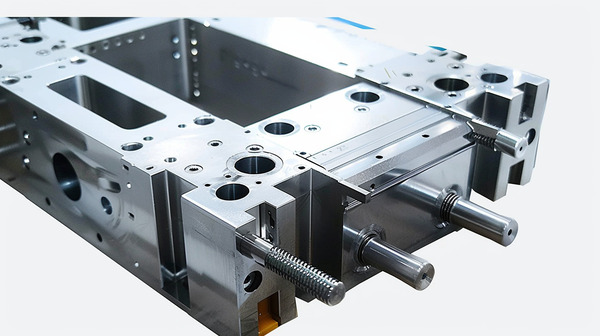
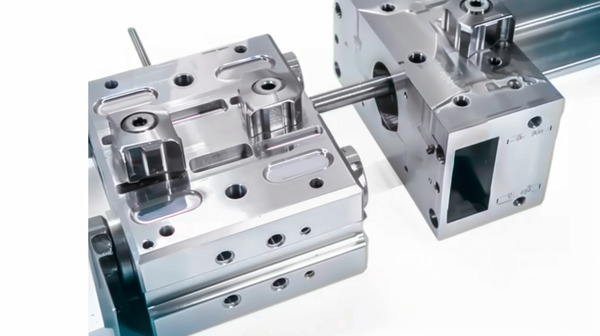
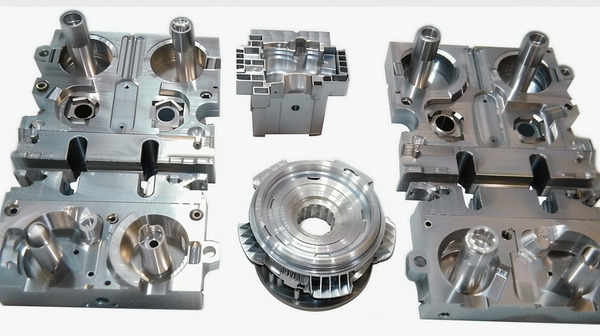
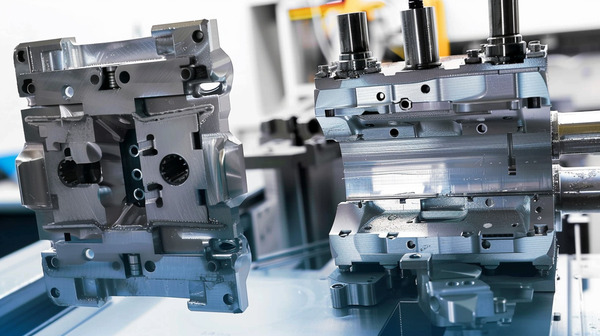
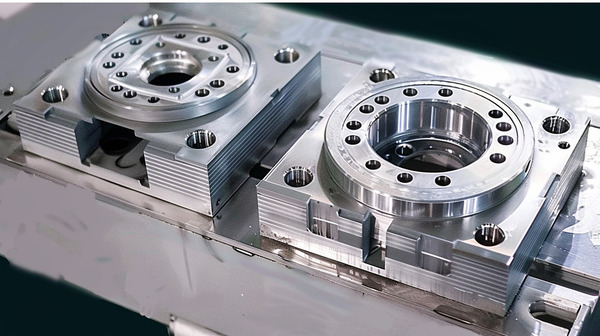
Mold Manufacturing
Programming, Electrode Removal
Once the mold design is done, you need to make the CNC program based on the processing conditions of each part and whether the electrode needs to be taken out for EDM.

Machining
The mold’s mechanical processing includes CNC processing, EDM processing, wire cutting processing, deep hole drilling processing, etc. After the mold base and materials are ordered, the mold is only in a rough processing state or only steel material.
At this time, a series of mechanical processing must be carried out according to the design intention of the mold to make various parts

CNC machining, or computer numerical control machining, is a machining center that uses numerical control. It requires various machining processes, tool selection, machining parameters, and other requirements.

EDM machining, or electrical discharge machining, is a machining process that uses electrical discharge to erode the material to the required size, so it can only process conductive materials. The electrodes used are generally made of copper and graphite.
Fixer Assembly
A fitter is a very important role in the mold making process, and the work needs to run through the entire mold manufacturing process. The work of a fitter is proficient in fitting mold assembly, turning, milling, grinding and drilling.
Mold Saving and Polishing
Mold saving and polishing is the process of using sandpaper, oilstone, diamond paste and other tools to process the mold parts after the mold is processed by CNC, EDM, and fitter before the mold is assembled.

Injection Mold Inspection
Mold Appearance
The mold nameplate has complete content, clear characters, and neat arrangement. The nameplate should be fixed on the mold foot near the template and the reference angle. The nameplate is fixed reliably and not easy to peel off.
The cooling water nozzle should be a plastic block plug-in nozzle, and the customer has other requirements. The cooling water nozzle should not extend out of the mold frame surface. The cooling water nozzle needs to be processed with countersunk holes.

The countersunk hole diameter is 25mm, 30mm, and 35mm. The hole chamfer should be consistent.The cooling water nozzle should have in and out marks.

The marked English characters and numbers should be greater than 5/6, and the position should be 10mm directly below the water nozzle. The handwriting should be clear, beautiful, neat, and evenly spaced.

Mold accessories should not affect the hoisting and storage of the mold. During installation, there are exposed oil cylinders, water nozzles, pre-reset mechanisms, etc. below, which should be protected by support legs.

The installation of the support legs should be fixed to the mold frame with screws through the support legs. The overlong support legs can be fastened to the mold frame by machining external threaded columns. The size of the mold ejection hole should meet the requirements of the specified injection molding machine.

You can’t use only one center ejection unless it’s a small mold. The positioning ring should be fixed reliably, with a ring diameter of 100mm and 250mm. The positioning ring is 10~20mm higher than the bottom plate unless the customer has other requirements.

The mold’s external dimensions should meet the requirements of the specified injection molding machine. Molds with directional installation requirements should be marked with arrows on the front or rear template to indicate the installation direction.

There should be “UP” next to the arrow. The arrow and text are both yellow and the height is 50 mm. There should be no pits, rust, extra lifting rings, water vapor in and out, oil holes, etc. on the surface of the mold frame, as well as defects that affect the appearance.

The mold should be easy to lift and transport. The mold parts must not be disassembled during lifting, and the lifting rings must not interfere with the faucet, oil cylinder, pre-reset rod, etc.

Mold Material and Hardness
The mold frame should use a standard mold frame that meets the standards. The materials of mold forming parts and pouring system (core, movable mold insert, movable insert, diverter cone, push rod, gate sleeve) are made of materials with performance higher than 40Cr.

When molding plastics that are easily corroded by the mold, the molded parts should be made of corrosion-resistant materials, or anti-corrosion measures should be taken on their molding surfaces. The hardness of mold forming parts should not be less than 50HRC, or the hardness of surface hardening treatment should be higher than 600HV.

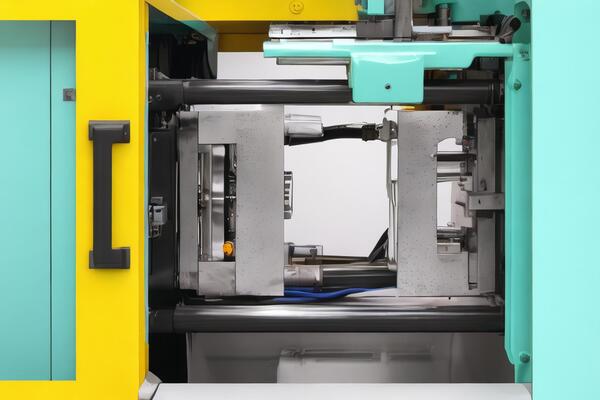
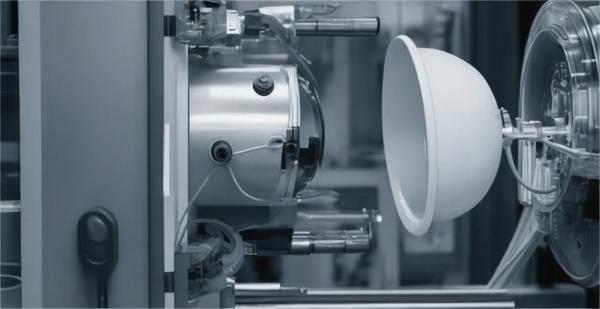
Injection Mold Trial
Precautions Before Trial
The mold frame should use a standard mold frame that meets the standards. The materials of mold forming parts and pouring system (core, movable mold insert, movable insert, diverter cone, push rod, gate sleeve) are made of materials with performance higher than 40Cr.

When molding plastics that are easily corroded by the mold, the molded parts should be made of corrosion-resistant materials, or anti-corrosion measures should be taken on their molding surfaces. The hardness of mold forming parts should not be less than 50HRC, or the hardness of surface hardening treatment should be higher than 600HV.

After confirming that the various parts of the mold are moving properly, it is necessary to select a suitable trial mold injection molding machine. When selecting, you should pay attention to: what is the maximum injection volume of the injection molding machine.

whether the inner distance of the tie rod can accommodate the mold; whether the maximum moving stroke of the movable template meets the requirements; whether other related trial mold tools and accessories are fully prepared.

Once everything is confirmed to be okay, the next step is to hang the mold. When hanging, it should be noted that before locking all the clamping plates and opening the mold, the hook should not be removed to prevent the clamping plate from loosening or breaking and causing the mold to fall.

Once the mold is in place, double-check that all the mechanical parts are working properly. Make sure the slide plate, ejector pin, tooth withdrawal structure, and limit switch are all functioning correctly. Also, make sure the injection nozzle and feed port are lined up.

Now, let’s talk about the next step, which is the mold closing action. At this time, the mold closing pressure should be reduced. During the manual and low-speed mold closing action, you should pay attention to whether there is any unsmooth movement and abnormal sound.

The process of hoisting the mold is actually very simple. The main thing that needs to be done carefully is that it is difficult to adjust the center of the mold gate and nozzle. Usually, the center can be adjusted by using a test paper.

Bump up the mold temperature: Depending on the material you’re using and the size of your mold, pick a mold temperature controller that’ll get your mold up to the temperature you need to make parts.

After the mold temperature is increased, check the movement of each part again, because the steel may cause mold jamming after thermal expansion, so pay attention to the sliding of each part to avoid strain and vibration.

If the factory doesn’t implement the experimental plan rule, it is recommended that when adjusting the trial mold conditions, only one condition can be adjusted at a time, so as to distinguish the impact of a single condition change on the product.

Depending on the raw materials, the raw materials used should be properly baked.Try to use the same raw materials for the trial mold and future mass production. Don’t try the mold entirely with inferior materials. If there is a color requirement, you can arrange a color test at the same time.
Secondary processing is often affected by problems such as internal stress. After the trial mold, the mold should be processed for secondary processing when the product is stable. After closing slowly, adjust the clamping pressure and move it several times to check whether there is uneven clamping pressure to avoid burrs and mold deformation of the product.

Once you’ve done all that, you can lower the mold closing speed and pressure, set the safety catch rod and ejection stroke, and then adjust the normal mold closing and mold closing speed. If the limit switch for maximum stroke is involved, you should adjust the mold opening stroke to be a little shorter, and cut off the high-speed mold opening action before the mold reaches its maximum stroke.

This is because during the mold loading period, the high-speed action stroke is longer than the low-speed one in the entire mold opening stroke. On the plastic machine, the mechanical ejector rod must also be adjusted to act after the full-speed mold opening action to avoid deformation of the ejector plate or stripping plate due to force.

Before you start molding, please check the following: Is the feeding stroke too long or too short? Is the pressure too high or too low? Is the filling speed too fast or too slow? Is the processing cycle too long or too short?

To avoid short shots, breakage, deformation, burrs, and even mold damage. If the cycle time is too short, the ejector will push through the part or the stripper ring will squeeze the part. It may take you two or three hours to remove the part. If the cycle time is too long, the thin and weak parts of the core may break due to the shrinkage of the rubber.

You can’t predict every problem that might happen during a mold trial, but thinking ahead and taking action will help you avoid big, expensive problems.

The Main Steps of Mold Trial
To avoid wasting time and effort during mass production, you must be patient and adjust and control various processing conditions, find the best temperature and pressure conditions, and establish standard mold trial procedures that you can use every day.

Check if the plastic resin in the barrel is correct and if it has been baked according to regulations (if different plastic materials are used for mold trial and production, different results may be obtained).

Make sure to clean the material tube well so that you don’t inject bad rubber or foreign material into the mold. Bad rubber and foreign material can jam the mold. Check to see if the temperature of the material tube and the temperature of the mold are right for the material you’re running.

Change the pressure and injection volume to make the product look good. But don’t let it flash, especially when some parts are not fully solidified. Think about it before you change all the control settings, because a small change in the fill rate can make a big difference in the fill.

Just be patient and wait until the machine and mold conditions stabilize. Even a medium-sized machine may have to wait for more than 30 minutes. This time can be used to check possible problems with the product.

The screw advance time should not be shorter than the time it takes for the gate plastic to solidify, otherwise the weight of the product will be reduced, which will damage the product’s performance. And when the mold is heated, the screw advance time should also be extended to compact the product.

Reasonable adjustment reduces the total processing cycle. Run the newly adjusted conditions for at least 30 minutes until they are stable, and then continuously produce at least a dozen full-mold samples, mark the date and quantity on the container, and place them separately according to the mold cavity to test their actual operation stability and derive reasonable control tolerances (especially valuable for multi-cavity molds).
Measure and record the important dimensions of the continuous samples (wait until the samples cool to room temperature before measuring).
Check the size of each mold sample and look for: whether the product size is stable; whether some dimensions are trending up or down, which means the machine processing conditions are still changing, like bad temperature control or oil pressure control; whether the size change is within the tolerance range.

If the product size doesn’t change and the processing conditions are normal, you need to see if the quality of the product in each cavity is acceptable and if its size is within the allowable tolerance. Write down the cavity numbers that are consistently bigger or smaller than the average to check if the mold size is right.

Record the Parameters Obtained During the Mold Trial
Record and analyze the data as needed to modify the mold and production conditions, and as a reference for future mass production.

Make the processing time longer to stabilize the melt temperature and hydraulic oil temperature.
Adjust the machine conditions according to the size of all products that are too big or too small. If the shrinkage rate is too big and the product appears to be under-shot, you can also refer to increase the gate size.

If the cavity size is too big or too small, fix it. If the cavity and gate size are still good, then try to change the machine conditions, like filling rate, mold temperature and pressure of each part, and check if some cavities are filling slowly.
Make corrections based on the matching conditions of each cavity product or the core displacement, and maybe try adjusting the filling rate and mold temperature again to make it more uniform.

Fix the problems of the injection molding machine, like the oil pump, oil valve, temperature controller, etc. If you don’t fix these problems, the processing conditions will change. Even if you have the best mold, it won’t work well on a machine that you don’t take care of.
After reviewing all the recorded values, keep a set of samples to check and compare whether the corrected samples have improved. Properly save all records of sample inspection during the mold trial, including various pressures in the processing injection molding cycle, melt and mold temperature.

material tube temperature, injection action time, screw feeding period, etc. In short, save all data that will help to successfully establish the same processing conditions in the future to obtain products that meet quality standards.
Currently, the mold temperature is often ignored during mold trials in factories. In short-term mold trials and future mass production, mold temperature is the most difficult to control. Incorrect mold temperature can affect the size, brightness, shrinkage, flow lines and lack of material of the sample. If the mold temperature controller is not used to control it, difficulties may occur in future mass production.

Injection Mold Modification
Preparation Before Mold Modification
Understand what the customer wants and the requirements for making the new product; Look at the whole thing to see what parts need to be changed, and test and write down what kind of steel the mold is made of, how hard it is, and so on.

Draw the original mold structure, find the parts that need to be changed, and mark the size, position, chamfer, etc.
Mold Modification Design
Based on the product requirements, do the mold modification design; modify the mold structure, and fully consider the processing difficulty and cost in the design; make new mold structure drawings, and determine parameters such as size, material, hardness, etc.

Mold Modification Processing and Manufacturing
Figure out the mold modification processing and manufacturing plan, including material procurement, manufacturing, debugging, and other processes.Perform processing and manufacturing based on the design drawings for mold modification, which includes milling, EDM, wire cutting, and other processes.

Also, perform fine processing using benchwork and grinders. After completing the mold modification process, perform a thorough dimensional inspection and testing to verify if the mold structure meets the production requirements for new products.
Mold Modification and Debugging
Once the mold processing is done, the mold is debugged. This includes adjusting the injection molding temperature, pressure, speed, and other parameters of the mold. The mold is dried and dusted to make sure there is no pollution during the injection molding process. The mold is tested and debugged on the injection molding machines to check the size, defects, leakage, and other conditions of the mold.

Maintenance After Mold Modification
After using the mold, it should be cleaned and maintained to prevent rust and damage. The mold should be regularly maintained and repaired, including replacing worn parts and cleaning the heater pipeline.

When the mold is no longer in use, it should be stored properly and inspected regularly.
Injection Mold Repair
Preliminary Preparation
Before starting the injection mold repair, we need to do a series of inspections to understand the specific conditions of the mold that needs to be repaired, so as to ensure the smooth progress of the mold repair work.

Check the mold structural components to understand the specific location and degree of repair required. Understand the process and production conditions when the mold is used to see if changes are needed. Prepare the required repair tools and materials.
Disassembly of Mold
When you do mold repair work, you need to disassemble the mold first. This process mainly includes removing the mold’s moving plate and fixed plate. Divide the mold into two parts, left and right, and separate them from the tie rod. Remove the accessories, core, cavity, nozzle, ejector and other parts on the mold.
Repair the Mold
Once the mold is removed, it can enter the repair stage. The repair mainly includes cleaning and heat treatment: sandblast the mold to remove rust, and then heat treat it. Through-hole renovation: Renovate and repair the through-holes of the mold, and close the old through-holes.

Mold: Repair the damaged parts of the mold, use a grinding wheel to smooth and polish it. Spraying: Spray the surface of the mold to form a protective film on the surface of the mold to increase the service life of the mold.
Assemble the mold
Once the repair is done, you can put it back together. The assembly steps are mainly to check if the various parts of the mold have been repaired. Perform a mold test on the mold to check its reliability. Check and adjust the mold installation and adjustment.
Test Adjustment
After the assembly is done, we need to do the test and adjustment work. This process mainly tests the machines and equipment used together with the mold to make sure that the two work together and get better production results.
Mold Maintenance
Plastic injection mold need regular maintenance and upkeep to ensure they function properly and have a long service life.

Correct mold Maintenance Methods
Keep the mold clean: When you use the mold, some molten plastic flows residue or impurities will stick to the surface of the mold. If you don’t clean it in time, it will affect the quality of the product. Therefore, regular cleaning of the mold is a very important maintenance work.

Fix damage in time: The mold can get damaged or worn out during use, like cracks, burrs, and other issues. Finding and fixing these problems quickly can make the mold last longer and stop worse things from happening because of the damage.
Keep the mold lubricated: The parts of the mold need to be lubricated during work to reduce friction and wear. Regular lubrication and maintenance of the mold can effectively extend the service life of the mold.

Key Mold Maintenance Skills
Use the mold right: When you use the mold, follow the design and operating instructions so you don’t overload it or use it wrong and mess it up.
Store the mold right: Molds you don’t use should be stored right to keep them from getting wet, from the sun, and from other bad things in the air. Also, be careful not to bump them into each other and break them.

Keep an eye on the mold: Keep an eye on the mold, fix problems as they come up, prevent future problems, and make sure the mold keeps working.
Conclusion
Plastic molds are tools used in the plastic processing industry to match plastic molding machines and give plastic products complete configurations and precise dimensions. Because there are many types and structures of plastics, processing methods, plastic molding machines, and plastic products, there are also many types and structures of plastic molds.

The main process of injection mold manufacturing mainly includes accepting customer customization needs, mold design, mold manufacturing, injection mold inspection, plastic mold trial, injection mold modification, injection mold repair, and mold maintenance.
Need a Quote for Your Injection Molding Project?
Get competitive pricing, DFM feedback, and production timeline from ZetarMold’s engineering team.
Request a Free Quote → See our Injection Molding Complete Guide for a comprehensive overview.


