 Skip to content

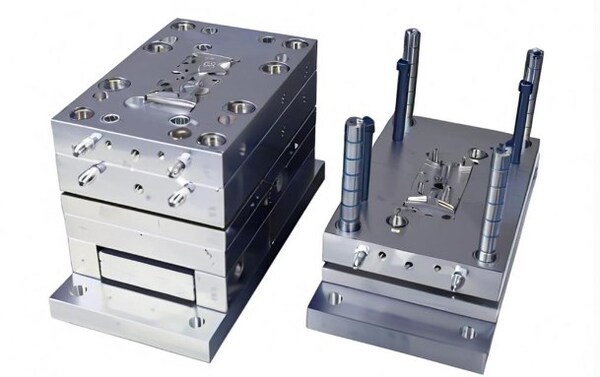
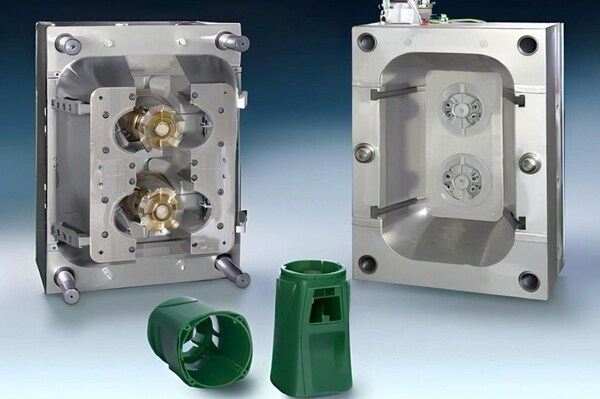
Proface : The production process of plastic injection mold is generally divided into: customer customization, mold design, mold manufacturing, mold inspection and trial mold, mold modification and repair, and mold maintenance. We will explain them one by one below.

Customer Customization
The process of making plastic molds starts with the customer’s engineering people giving the mold maker product drawings. The mold maker takes the product data, analyzes it, and digests it into the requirements for making plastic parts. This is called customer engineering.

Plastic Parts Production Requirements
Understand the use, processability, dimensional accuracy and other technical requirements of the parts. For example, what are the requirements for the appearance shape, color transparency, and performance of plastic parts .
Is the geometric structure, slope, and insert of the injection molded parts reasonable? The allowable degree of molding defects such as weld marks and shrinkage holes . Is there any post-processing such as painting, electroplating, silk screen printing, and drilling.

Check if the molding tolerance is smaller than the tolerance of the plastic parts, and if the plastic parts can be molded that meet the requirements. Also, you need to know the plasticization and molding process parameters of the plastic.
Process Data
Understand the requirements of the glue feeding method, beer machine model, plastic molten materialmaterial performance, mold structure type, etc.The molding material should be strong enough for plastic parts, flow well, be the same all over, be the same in all directions, and not change when it gets hot.
Depending on what the plastic parts are for and if they get worked on later, the molding material should be good for dyeing, putting metal on, looking good, being stretchy and bendy enough, see-through or shiny, stick together (like with sound), or get welded.
Choose Molding Equipment
Injection capacity, clamping pressure, injection pressure, mold installation size, ejection device and size, nozzle hole diameter and nozzle spherical radius, gate sleeve positioning ring size, mold maximum thickness and minimum thickness, template stroke, etc.

Specific Mold Structure Plan
Two-plate mold, three-plate mold. Whether the mold structure is reliable, whether it meets the process technology (such as geometric shape, surface finish and dimensional accuracy, etc.) and production economic requirements of plastic parts (low part cost, high production efficiency, continuous mold operation, long service life, labor saving, etc.).
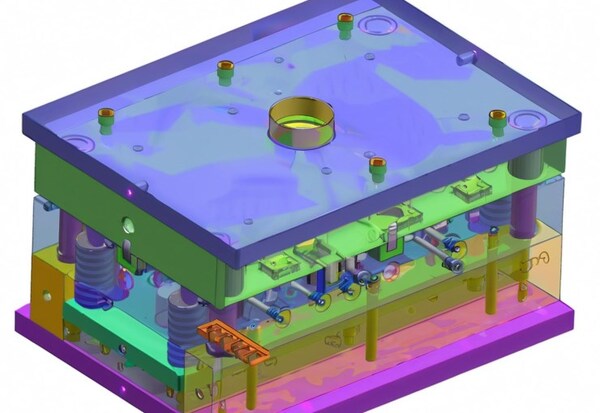
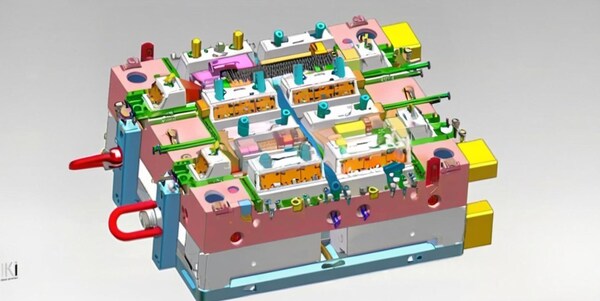
Mold Design
Plastic Parts Ranking
Plastic parts ranking is about putting one or more plastic parts that you need in order, based on how you want to make them and what kind of mold you want to use.
The ranking of plastic parts complements the mold structure and the plastic processability, and directly affects the subsequent injection molding process. The corresponding mold structure must be considered during the ranking, and the ranking must be adjusted under the condition of meeting the mold structure.
From the plastic injection molding process perspective, the ranking should consider: runner length, runner waste, gate position, glue inlet balance, cavity pressure balance.
When considering the mold structure, you need to think about the following: Does it meet the sealing requirements . Does it meet the mold structure space requirements, such as the shovel base, the row position, the inclined top, and other space requirements . Are the mold structure parts strong enough? Do multiple moving parts interfere with each other .

Does the position of the sleeve avoid the position of the ejector hole . You also need to think about screws, cooling water, and ejector devices: Pay attention to the influence of screws and ejectors on cooling water holes during ranking.
Does the length and width ratio of the mold make sense? The mold should be as compact as possible, with an appropriate length and width ratio, and you should also consider the installation requirements of the injection machine.

Drawing of Quotation Drawing And Ordering
The quote drawing is the first design plan of the mold, and also provides a reference for mold ordering. The quote drawing is a relatively detailed identification of the mold base, its structure and the size of the mold material based on the original mold arrangement.
When you order, you need to draw a simple diagram of the mold base and fill out the order form based on the quotation drawing.When ordering, you need to pay attention to the selection of various mold materials according to the various requirements of the mold.
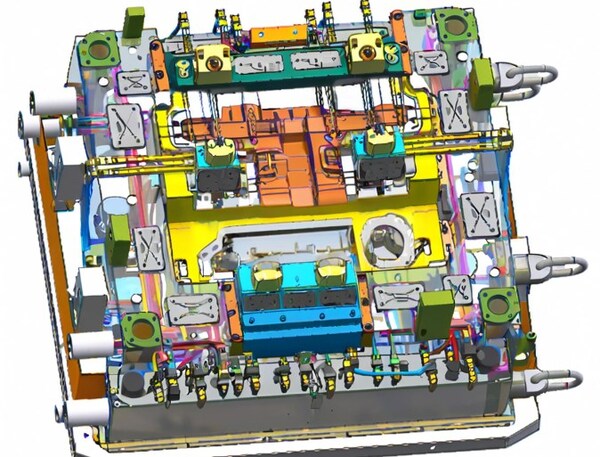
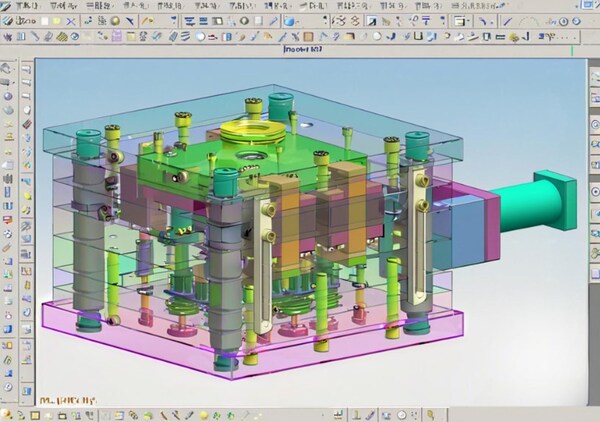
Mold Structure Design
The mold structure is determined by the type of injection molding machine and the characteristics of the plastic parts.
When designing, focus on the following aspects: technical specifications of the injection molding machine; process performance of plastics; pouring system, including runners, gates, etc.; molding parts; commonly used structural parts; sliding mechanism; ejection mechanism; mold temperature control; exhaust; mold materials.

When designing a mold, you need to think about a lot of things and pick a good shape that will make the mold work right.
Plastic Parts Ranking
In the 3D design stage, we rank based on the 2D ranking at the beginning of the design for a more in-depth design.

Parting
Choose the right parting line, consider the sealing distance, build the reference plane, balance the side pressure, flatten the nozzle contact surface, deal with the contact and penetration of small holes, avoid sharp steel, consider the appearance of the product, etc.
Verification And Improvement of Mold Strength
To make sure the mold can work normally, we need to check not only the overall strength of the mold, but also the strength of the local structure of the mold.Make some improvements to the specific mechanism to enhance the local strength.
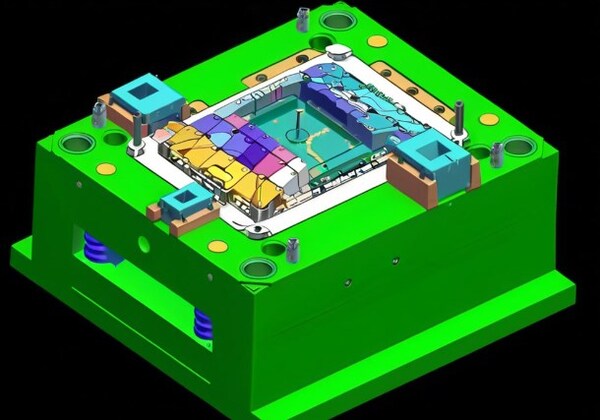
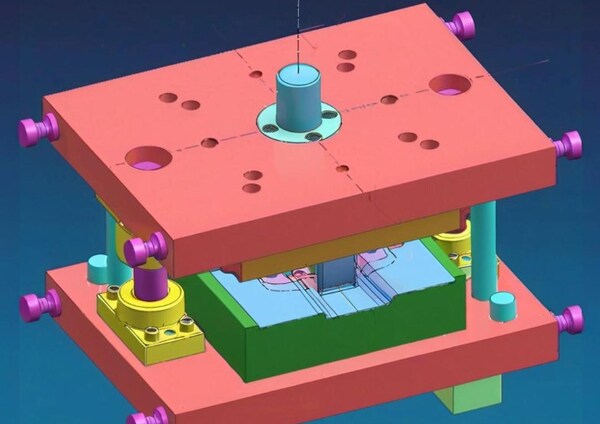
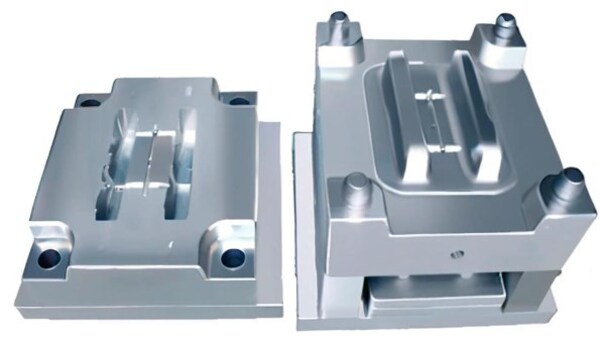
Design of Mold Parts
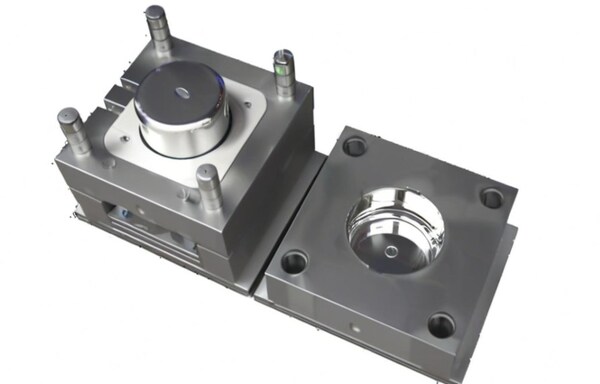
Mold parts can be divided into two types: forming parts and structural parts. Forming parts are the parts that directly participate in the formation of the cavity space, such as the concave mold (cavity), punch (core), insert, slide, etc.
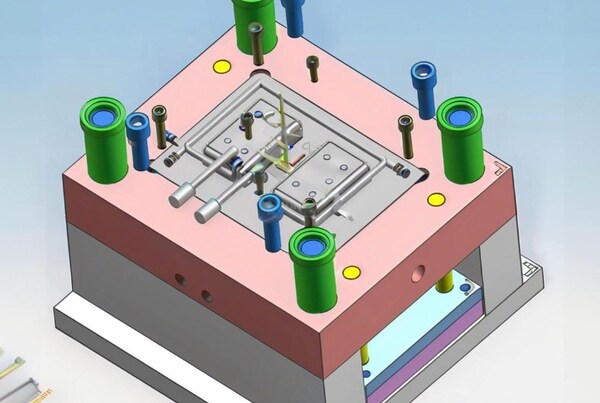
Structural parts are the parts used for installation, positioning, guiding, ejection, and various actions during the forming process, such as positioning rings, nozzles, screws, pull rods, ejectors, sealing rings, fixed distance pull plates, hooks, etc.
When splitting inserts, there are several things to consider: no sharp or thin steel, easy to process, easy to adjust size and repair, ensure the strength of the molded parts, easy to assemble, no impact on appearance, and comprehensive consideration of cooling (after the inserts are made, local cooling is difficult, so the cooling situation should be considered).

When designing structural parts, the general principle for the layout of ejector pins and cooling channels is to arrange the ejector pins first, then arrange the cooling channels, and then adjust the ejector pins. However, in actual production, mold modification is often taken into account.
After the mold is made, the cooling channels are not started immediately. They can only be opened after the mold modification is completed for a period of time according to the modified situation.

Arrangement of the Ejector Sleeve:
The ejector sleeve is usually used for the mold column position. In addition, for the deeper bone position, the ejector pin is easy to be ejected, and the ejector sleeve can also be used to add bones to assist ejection.

In general, the wall thickness of the ejector sleeve is >=1mm, and the ejector sleeve and ejector needle are ordered together when ordering.
In the structural design, the height of the column should not be too high, otherwise the sleeve needle will be easily bent and difficult to eject.

For the design and selection of other structural parts, such as positioning rings, nozzles, screws, pull rods, sealing rings, fixed distance pull plates, hooks, springs, etc., those who are interested can find some information to understand it by themselves.
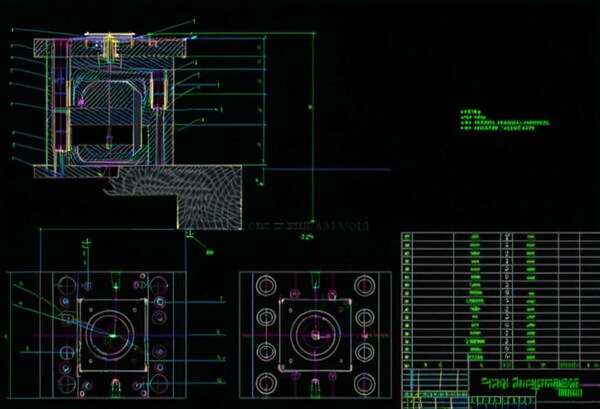
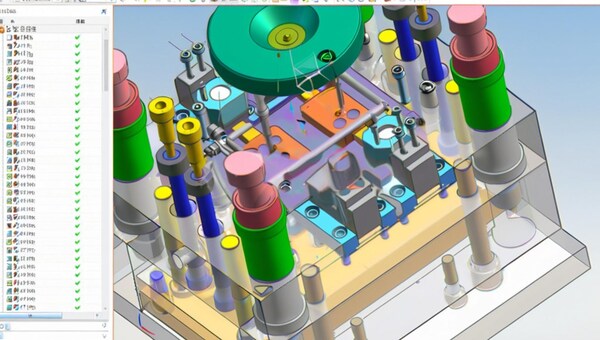
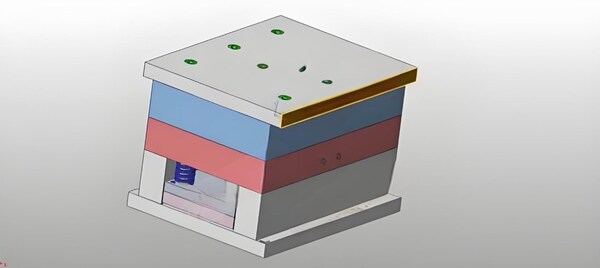
Mold Drawing Production
Mold drawings are important documents that convert design intentions into mold production. Generally, they need to be drawn according to national standards, and they also need to be combined with the customary drawing methods of each factory . Mold drawings include general assembly structure drawings and their technical requirements, as well as part drawings of all parts including various inserts.

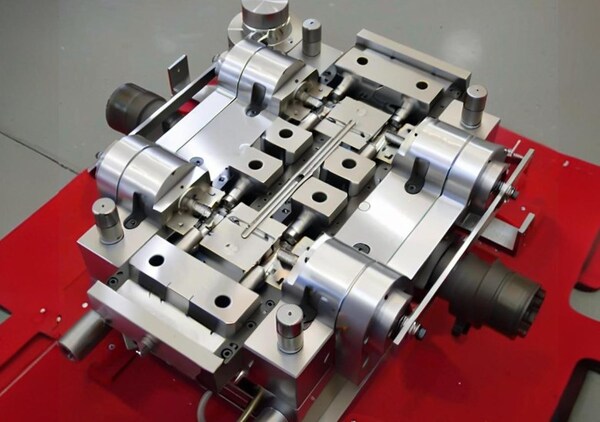
Mold Manufacturing
Programming And Electrode Removal
Once the mold design is done, you need to make CNC programs and take out the electrodes for EDM processing based on the processing conditions of each part.
Machining
The mold’s mechanical processing includes CNC processing, EDM processing, wire cutting processing, deep hole drilling processing, etc. After the mold base and materials are ordered, the mold is only in a rough processing state or only steel material.

At this time, a series of mechanical processing must be carried out according to the design intention of the mold to make various parts.
CNC machining involves different machining processes, tool choices, machining settings, and other things you need to know. If you want to learn more, you can find the information you need.
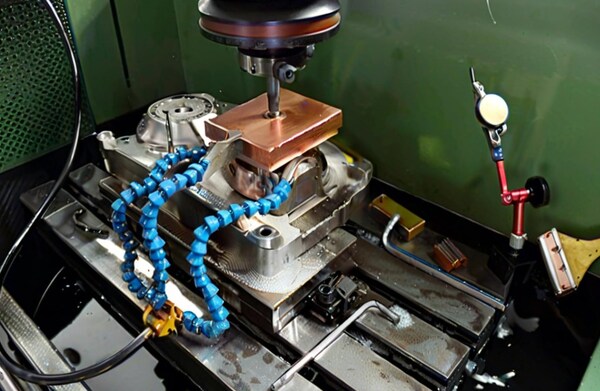
EDM machining is electric spark machining. It is a machining process that uses discharge to corrode materials to achieve the required size, so it can only process conductive materials. The electrodes used are generally copper and graphite.
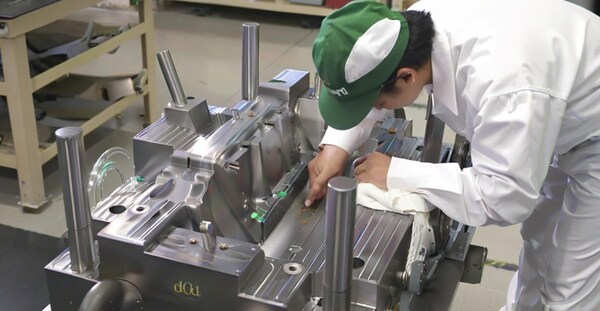
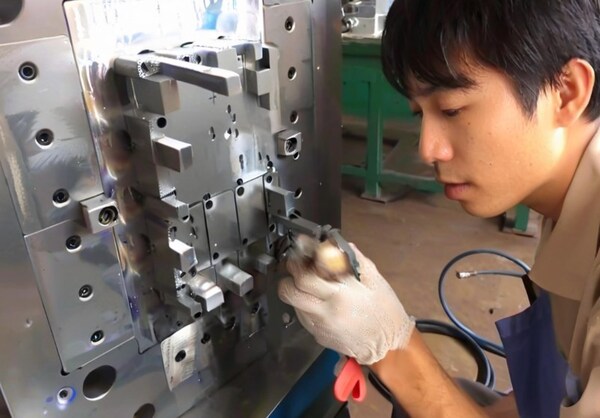
Bench Assembly
Bench work is a very important part of the mold making process, and it is a job that needs to be done throughout the entire mold manufacturing process. Bench work is suitable for mold assembly, and it is good at turning, milling, grinding, and drilling.
Mold Saving And Polishing
Mold saving and polishing is the process of using sandpaper, oilstone, diamond paste and other tools to process the mold parts after the mold is processed by CNC, EDM, and bench work, and before the mold is assembled.

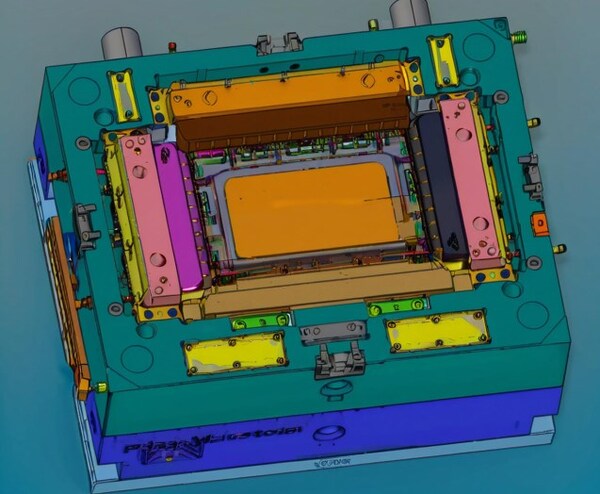
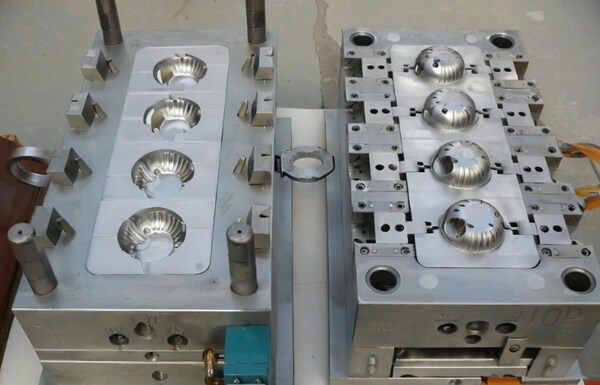
Mold Inspection And Mold Trial
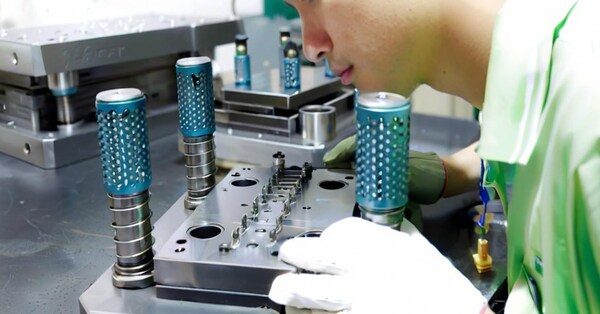
Mold Inspection
The mold and assembly process is actually the mold inspection process. In the mold assembly, you can check whether the red lead is in place, whether the ejector sleeve is smooth, and whether the mold has any wrong interference.
Mold Detection Method
Appearance Detection
One of the most basic ways to detect mold is by looking at it. When you do this, you should check to see if the mold is flat, if it has any scratches, dents, cracks, or anything like that. You should also check to see if the mold is all the same color and if it has any oil on it.
Dimension Inspection
Checking the size of the mold is very important, because if the size is not good, it will seriously affect the quality of the product. In the size inspection, we should use professional measuring tools, such as micrometers, vernier calipers, etc., to detect whether the various dimensions of the mold meet the requirements.

Hardness Inspection
The hardness of the mold is an important factor that affects the life of the mold and the quality of the product. You can use a hardness tester to check the hardness, and measure the hardness value of the mold to see if it meets the requirements.

Installation Inspection
Make sure the mold is installed correctly and securely. During the installation inspection, check to see if the various parts of the mold are reasonable and if the connection is secure to ensure that the mold will not break or deform during use.

Check Mold Performance
Different molds require different properties for use, such as wear resistance and corrosion resistance. When evaluating mold performance, conduct tests based on the design requirements for different types of molds.
Durability Testing
Durability testing is all about making the mold and then running it a bunch of times to see if it gets tired, bent, or broken, or whatever, so you can figure out how long it’s going to last and how good it is.
Material Organization Testing
Use tools like microscopes to check the organization of the mold material to see if there are impurities, defects, overburning, etc. to make sure the quality of the material meets the requirements.
Functional Testing
Functional testing is the actual use test of the product made by the mold to see if the product meets the design requirements and performance indicators during use. Common functional tests include product assembly testing, product operation testing, product reliability testing, etc.

Mold Testing Steps
Pre-Inspection
Before you test for mold, you need to do a pre-inspection. First, look at the mold to see if there is any obvious damage, like chips, cracks, or breaks. Then clean the mold to make sure there is no dirt or anything corrosive. Finally, put oil on all the moving parts of the mold.

Set up a Testing Plan
Create a testing plan that matches the design requirements and functional requirements of the mold. Decide what to test, how to test it, and what tools to use.

Appearance Inspection
Use magnifying glasses, microscopes, and other tools to inspect the overall appearance of the mold. Observe if there are obvious defects like bumps, bubbles, breakage, mechanical damage, etc.

Dimension Inspection
Based on the mold design drawings, use the appropriate measuring tools to measure the dimensions, compare the measurement results with the design requirements, and determine whether the dimensional accuracy of the mold meets the requirements.
Durability Inspection
To test the mold, you need to do a certain number of continuous molds or injections to see if the mold will fatigue, deform, break, and so on during use. Record the life and changes of the mold.

Material Organization Inspection
Take a sample of the mold material and make a test piece. Look at the structure of the material under a microscope and other tools. See if there are any impurities, defects, overburning, or other problems. Make sure the quality of the mold material is good enough.
Functional Inspection
Practical use test of the products made by the mold. Such as assembly, operation, reliability and other tests. Detect whether the product meets the design requirements and performance indicators during use.

Record theTest Results
Record all the test items, including the test methods, test results, test time, etc. And make a mold test report for subsequent analysis and reference.
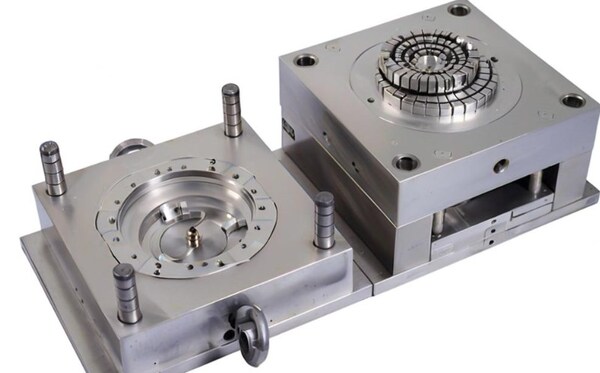
Mold Trial
Once the mold is made, we need to test it on the injection machine to see if the mold is good and if the plastic part structure is good. By testing the mold, we can see how the mold is doing during the beer making process and if the plastic part structure is good.
Precautions Before Mold Trial
Get to know the mold: It is best to get the mold design drawings, analyze them in detail, and arrange for the mold technician to participate in the mold trial.

First, check the mechanical coordination action on the workbench: pay attention to whether there are scratches, missing parts and looseness, whether the mold moves to the slide plate, whether the water channel and air pipe joints are leaking, and if there are any restrictions on the opening of the mold, they should also be marked on the mold.
If the above actions can be done before hanging the mold, it can avoid the waste of time caused by finding problems when hanging the mold and then disassembling the mold.

After confirming that the various parts of the mold are moving properly, it is necessary to select a suitable trial mold injection machine. When selecting, attention should be paid to: what is the maximum injection volume of the injection molding machine,
Whether the inner distance of the tie rod can fit the mold, whether the maximum moving stroke of the movable template meets the requirements, and whether other related trial mold tools and accessories are fully prepared.

Once everything is confirmed to be OK, the next step is to hang the mold. When hanging, it should be noted that all clamping templates should be locked and the hanging hook should not be removed before opening the mold to prevent the clamping template from loosening or breaking and causing the mold to fall.
After the mold is installed, the mechanical actions of various parts of the mold should be carefully checked, such as whether the actions of the slide plate, ejector pin, tooth-retracting structure and limit switch are correct.

And pay attention to whether the injection nozzle and the feed port are aligned. The next step is to pay attention to the mold closing action. At this time, the mold closing pressure should be lowered. In the manual and low-speed mold closing action, pay attention to see and listen to whether there are any unsmooth actions and abnormal sounds.
Hoisting the mold is actually pretty simple. The main thing you need to be careful about is that the centering of the mold gate and the nozzle is difficult. Usually, you can adjust the center by using test paper.

Increase mold temperature: According to the performance of the raw materials used in the finished product and the size of the mold, select an appropriate mold temperature controller to increase the temperature of the mold to the temperature required for production.
After the mold temperature is increased, check the movement of each part again, because the steel may cause mold jamming after thermal expansion, so pay attention to the sliding of each part to avoid strain and vibration.

If the factory doesn’t follow the experimental plan rule, we suggest adjusting only one condition at a time when adjusting the trial mold conditions, so you can see the effect of a single condition change on the finished product.
Depending on the raw materials, you should bake the original materials properly. The trial mold and future mass production should use the same raw materials as much as possible.

Don’t use crappy materials for trial molds. If you have a color requirement, you can do a color test at the same time. Secondary processing is often affected by internal stress and other problems.

After the trial mold is stable, do secondary processing. After the mold is closed slowly, adjust the mold closing pressure and move it a few times to see if there is uneven mold closing pressure to avoid burrs on the finished product and mold deformation.
Main Steps of Mold Trial
To avoid wasting time and effort during mass production, you need to patiently adjust and control various processing conditions, find the best temperature and pressure conditions, and develop standard mold trial procedures that you can use to establish your daily work methods.

Make sure the plastic material in the barrel is correct and that it has been dried according to the rules (if you use different raw materials for the mold trial and production, you might get different results).
To avoid bad plastic or foreign materials getting into the mold, the material pipe must be cleaned well. Bad plastic and foreign materials can jam the mold. Check if the temperature of the material pipe and the temperature of the mold are right for the raw materials you’re using.
Change the pressure and injection volume to make the finished product look good, but don’t flash, especially when some of the mold cavities are not completely solidified. Think about it before you change any of the control settings because a small change in the mold fill rate can cause a big change in the mold fill.
Just be patient and wait until the machine and mold conditions stabilize, that is, the medium-sized machine. The machine may also have to wait for more than 30 minutes. This time can be used to check for possible problems with the finished product.

The screw advance time should not be shorter than the gate plastic solidification time, otherwise the weight of the finished product will be reduced and the performance of the finished product will be damaged. And when the mold is heated, the screw advance time should also be extended to compact the finished product.

Reasonable adjustment reduces the total processing cycle.
Run the newly adjusted conditions for at least 30 minutes until they are stable, and then continuously produce at least a dozen full-mold samples, mark the date and quantity on their containers, and place them separately according to the mold cavity to test their actual operation stability and derive reasonable control tolerances.
Measure and record the important dimensions of the continuous samples (wait until the sample cools to room temperature before measuring).
Check the dimensions of each mold sample and look for: consistency in product dimensions. Any dimensions that are trending up or down, which would indicate that the machine processing conditions are still changing, such as poor temperature control or oil pressure control. Whether the change in dimensions is within the tolerance range.

If the size of the finished product doesn’t change much and the processing conditions are normal, you need to see if the quality of the finished product from each cavity is acceptable and if its size is within the allowable tolerance. Write down the cavity numbers that are consistently bigger or smaller than the average to check if the mold size is right.
Record the Parameters Obtained During the Mold Trial
Record and analyze the data for the need to modify the mold and production conditions, and as a reference for future mass production.

Make the process run longer to stabilize the melt temperature and hydraulic oil temperature.
Adjust the machine conditions according to the size of all finished products that are too big or too small. If the shrinkage rate is too big and the finished product looks like it’s short shot, you can also use it as a reference to increase the gate size.

Fix the size of any cavities that are too big or too small. If the cavity and door size are still right, then try to change the machine conditions, like the fill rate, mold temperature and pressure of each part, and see if some cavities are filling slowly.

Make individual corrections based on the matching of the finished products of each cavity or the displacement of the mold core, and maybe try adjusting the filling rate and mold temperature again to make it more uniform.
Inspect and fix any issues with the injection molding machines, such as problems with the oil pump, oil valve, temperature controller, etc., that can cause changes in processing conditions. Even the best mold won’t work well on a poorly maintained machine.

After you’ve reviewed all the recorded values, keep a set of samples to check and compare whether the corrected samples have improved. Properly save all records of sample inspection during the mold trial, including various pressures in the processing cycle, melt and mold temperature, material pipe temperature, injection action time, screw feeding period, etc.
In short, save all data that will help you successfully establish the same processing conditions in the future to get products that meet quality standards.

Mould Modification And Mold Repair
After the mold trial, the mold should be modified according to the mold trial situation. Also, after the engineer confirms the plastic part, the structure of the plastic part should be changed accordingly.
Reasons for Mold Modification
Changes Due to Processing Errors
Machining errors are mainly concentrated in the early stage of new mold trial, such as water drilling errors, small mold core material size, CNC errors, EDM errors, etc. In the process of processing, it can be said that every processing step has the possibility of error.

Some errors can be saved by modifying the mold, and some errors must be redone by changing the material. If the material is changed and redone, it is not considered a mold modification. The need for mold modification is often due to some small errors, such as the EDM rib is a little off, or a little deep, the wire cutting is a little overcut, the threading hole is broken, etc.
Unreasonable Mold Design Changes
In the early stage of mold design, you will spend more time on the plan and results. Some obvious problems are easier to find, and some obscure problems are difficult to find directly until the mold trial or production. Most of the problems are found during the mold trial or production, and feedback is given to the design side, and then the modification plan is made.

For example, if the gate or runner is too small, the product won’t be easy to inject; the gate position or type is unreasonable, resulting in product quality problems; the inclined guide column or other parts affect the robot’s ability to take the product; the mold returns abnormally, etc.
Customer Product Design Changes
The most important reason for mold modification is customer product design changes. As a mold company, it is difficult to evaluate this aspect. Moreover, this is not within the control of the mold company.

The mold changes in this area can be big or small, such as adding or removing glue locally, needing to add sliders or inclined tops, or changing the parting surface, and even scrapping and redoing the sliders or mold cores.
Mold Modification Methods
Redesign the Mold
The best way to solve the problem is to redesign the mold. Based on the problems with the original mold, we optimize and design the mold structure, parting surface, gate location, etc. At the same time, we need to consider the selection of mold materials and the optimization of heat treatment process to improve the life and durability of the mold.

For example, in order to solve the problem of insufficient melt filling caused by uneven parting surface of the mold, we can redesign the parting surface to make the melt filling more uniform.
Modify Mold Parameters
Changing the parameters of the mold is a simple and quick way to modify the mold. By adjusting the parameters such as the size of the mold, the precision of the mold, and the surface roughness of the mold, the quality and production efficiency of the product can be improved.
For example, by adjusting the size and position of the gate, the filling process of the melt can be optimized and the quality of the product can be improved; by reducing the surface roughness of the mold, the residue of the product can be reduced and the production efficiency can be improved.
Replace Mold Accessories
Swapping out mold accessories is a popular and pretty cheap way to modify molds. For parts in the mold that are prone to wear and failure, like the cavity, core, gate sleeve, etc., you can replace them with molten material or surface treatments that are more resistant to wear and corrosion

You can also choose more advanced mold components based on your actual production needs to improve production efficiency and product quality. For example, if you replace the cavity, which wears out easily, with a highly wear-resistant material, you can effectively extend the life of the mold.
Reasons for Mold Repair
High Frequency of Mold Use Leads to Wear
As the number of times the mold is used increases, different parts of the mold will have different degrees of wear, resulting in problems such as inaccurate mold processing dimensions, increased surface roughness, and decreased mold precision. At this time, the mold needs to be repaired to ensure the processing accuracy and production efficiency of the mold.

Problems Caused by Improper Mold Surface Treatment
The surface treatment of the mold is an important factor affecting the life and use effect of the mold. If the coating falls off, the hardness is not enough, and the surface is uneven, it will affect the use effect of the mold.
In response to these problems, the mold needs to be repaired, the mold surface needs to be reprocessed, and the precision and service life of the mold need to be improved.
Defects in the Mold Material Itself
It is rare for the mold material itself to have defects, but if this problem occurs, even after multiple adjustments and wear, it still cannot meet the processing requirements. For example, when cracks, pores, and other problems appear in the mold, the mold needs to be repaired to achieve normal use.
Poor Mold Use Environment
The environment where the mold is used has a great influence on the life of the mold. For example, if the mold is used in a humid and corrosive environment for a long time, it will cause corrosion and rust on the surface of the mold, increase the risk of mold wear and damage, and the mold needs to be repaired at this time to ensure the precision and life of the mold.
Methods of Mold Repair
Surface Repair
Grind the mold surface with a grinder to get rid of rust or old coating. Use a sandblaster to spray a new coating to make sure the coating thickness is even. Do the final grinding and polishing to make the mold surface smooth.
Hole Repair
Locate the holes and damaged areas that need fixing. Use a drill or mill to fix the holes so that the hole size and shape match the design requirements. Grind and polish the fixed holes so that they are smooth and flat.

Mold Core Repair
First, take apart the mold core, check the damaged part, and calculate the repair area. Use an EDM machine to weld and repair the mold core, paying attention to controlling the repair area and position. Do final grinding and polishing to make the mold core surface smooth.
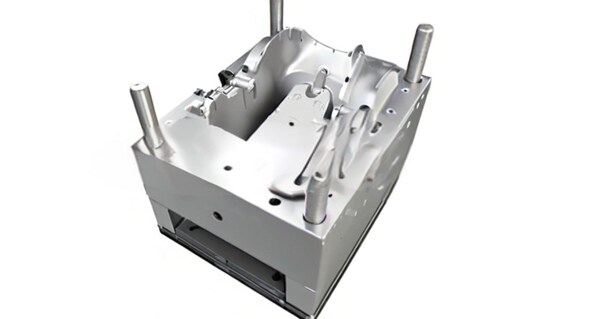
Plastic Injection Molds Maintenance
Because the mold works under high temperature and high pressure and is in contact with air for a long time, it is easy to rust. Therefore, the mold needs to be well maintained. When not in use, it needs to be applied with anti-rust oil and butter.
Also, because the mold steel has a long service life and the mold structure is not designed well, some thin steel structures or ejector pins may crack and break, and they need to be maintained and repaired constantly in the later maintenance. The following are the main methods of mold maintenance.
Make sure to use the mold in a dry place and stay away from moisture.If the environment is humid, the surface of the mold is prone to rust, which will reduce the surface quality and affect the service life of the mold. Therefore, when storing the mold, choose a dry and ventilated place, and use moisture-proof materials for protection.
Clean the Mold Surface Regularly
When using the mold, it will be covered with paint, oil and other things, which will affect the effect of use. Therefore, the mold surface should be cleaned regularly with detergent to ensure that its surface is smooth and avoid defects that affect quality.

Use the Mold Correctly
The mold is designed and manufactured under certain conditions of use, so special attention should be paid when using it. Avoid using excessive force during operation and abide by the operating procedures to ensure that the mold will not be damaged during long-term use. Quality problems such as.

Frequent Lubrication And Maintenance
The mold needs to work well with the moving parts when you use it. So, you should oil the moving parts of the mold often to keep it from getting stuck or jammed up from wear and tear when you use it.

Pay Attention to the Storage Method
When you store your mold for a long time, you don’t want it to get all messed up and ruined. So, when you store it, you want to put it on a flat surface and use something to hold it up so it doesn’t get all messed up.
Conclusion
The molten plastic is transformed into melted plastic during the injection molding cycle, completing the final molding in the form of plastic resin . Making injection molds is a very complicated process.

It has many steps. From mold design to CNC machining, precision grinding, electrical discharge machining, assembly and debugging, all aspects need to ensure manufacturing accuracy and efficiency. Only through strict inspection and testing can the quality and performance of injection molds be guaranteed.


