 Skip to content

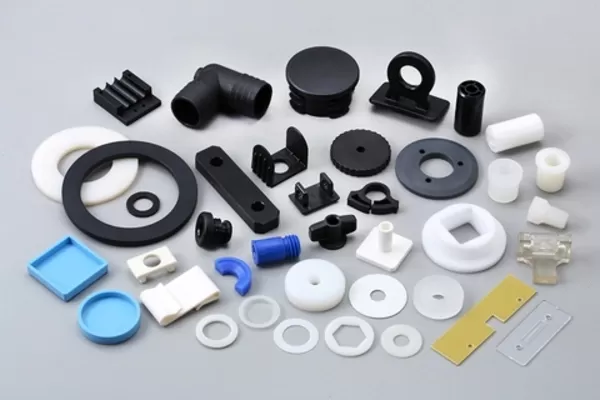
Injection molding is a widely used plastic processing method for making all sorts of plastic products. But sometimes, things go wrong during the injection molding process. You might end up with weld lines, bubbles, shrinkage cavities, short shots, or warpage. These defects don’t just make your product look bad and work bad, they also make it not last as long. So it’s important to find and fix these problems as soon as you can.
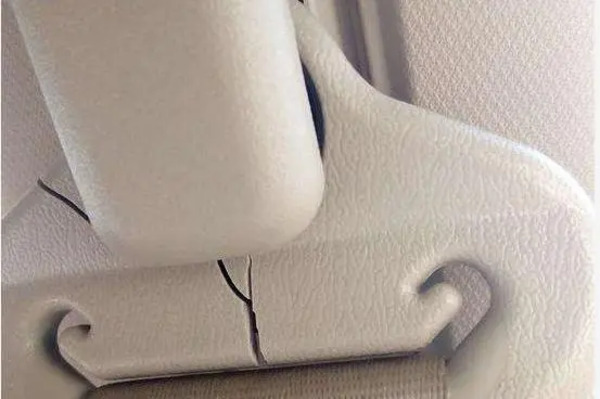
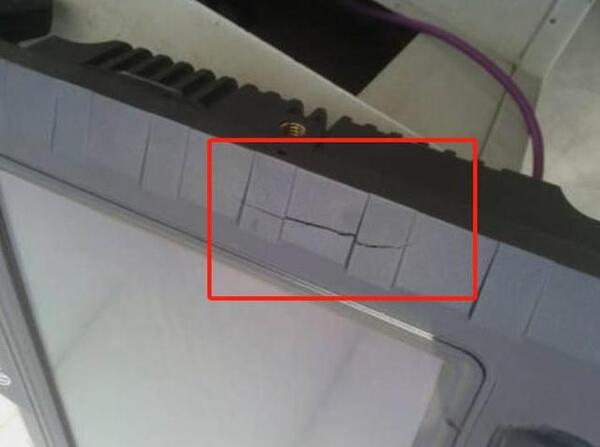
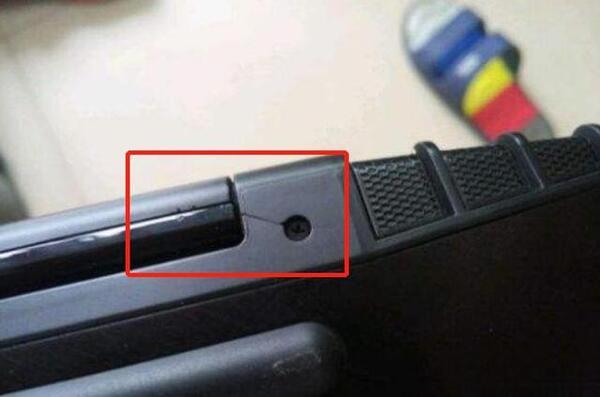
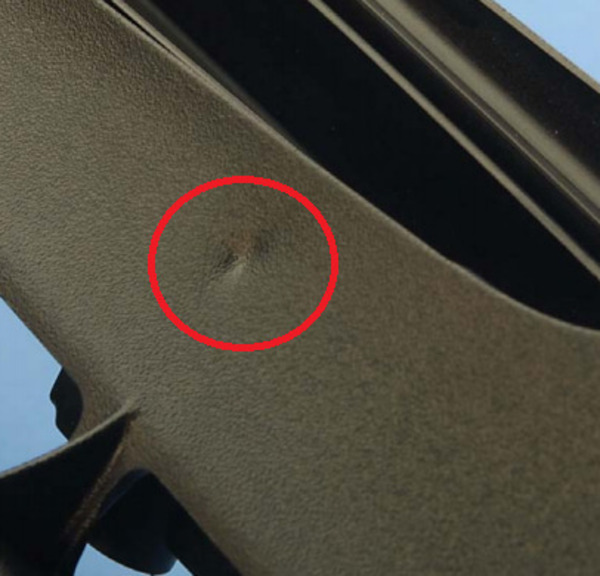
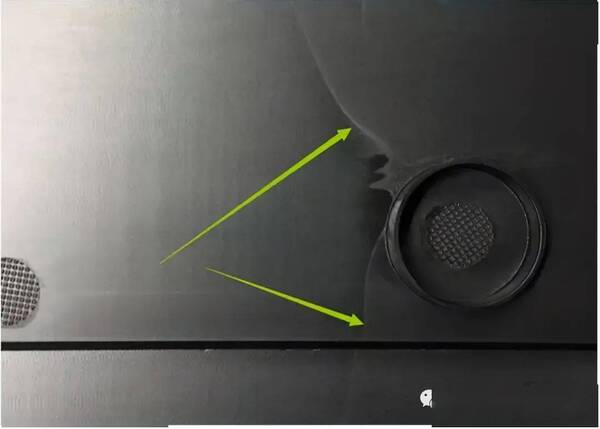
1. Injection Molded Products Crack
Cracking can be divided into filamentous cracking, micro-cracking, top whitening, cracking on the surface of the part, and trauma risks caused by the mold sticking of the part and the flow channel. According to the cracking time, it is divided into demoulding cracking and application cracking. Mainly due to the following reasons:
1.1 Processing
① If the pressure is too high, the speed is too fast, the filling is too much, the injection is too long, and the pressure holding time is too long, it will cause excessive internal stress and cracking.
② Adjust the mold opening speed and pressure to prevent the parts from being forcibly pulled out too quickly, causing demolding and cracking.
③ Appropriately increase the mold temperature to make the parts easy to demold, and appropriately reduce the material temperature to prevent decomposition.
④ Prevent cracking due to lower mechanical strength due to welding marks and plastic degradation.
⑤ Appropriately use release agents and pay attention to frequently removing aerosols and other substances attached to the mold surface.
⑥ The residual stress of the part can be eliminated by annealing heat treatment immediately after molding to reduce the generation of cracks.
1.2 Mold Aspects
① Ejection must be balanced. For example, the number of ejector pins and cross-sectional area must be sufficient, the draft angle must be sufficient, and the cavity surface must be smooth enough to prevent cracking due to the concentration of residual stress in ejection caused by external forces.
② The structure of the parts should not be too thin, and arc transitions should be used as much as possible in the transition parts to avoid stress concentration caused by sharp corners and chamfers.
③ Use as few metal inserts as possible to prevent internal stress from increasing due to different shrinkage rates between the insert and the finished product.
④ Appropriate demoulding air inlets should be provided for deep-bottomed parts to prevent the formation of vacuum negative pressure.
⑤ The sprue is large enough to allow the sprue material to be released from the mold before it has time to solidify, making it easy to release the mold.
⑥ The connection between the main flow bushing and the nozzle should prevent the cold hard material from being dragged and causing the part to stick to the fixed mold.
1.3 Materials
① The content of recycled materials is too high, which makes the parts weak.
② If the humidity is too high, some plastics will react with the water vapor, which will make them weak and cause them to crack and break.
③ If the material itself is not suitable for the environment in which it is being processed or is of poor quality, contamination will cause it to crack and break.

1.4 Machine Aspects
The plasticizing capacity of the injection molding machine must be appropriate. If it is too small, the plasticization will be insufficient and it will not be fully mixed and it will become brittle. If it is too large, it will degrade.
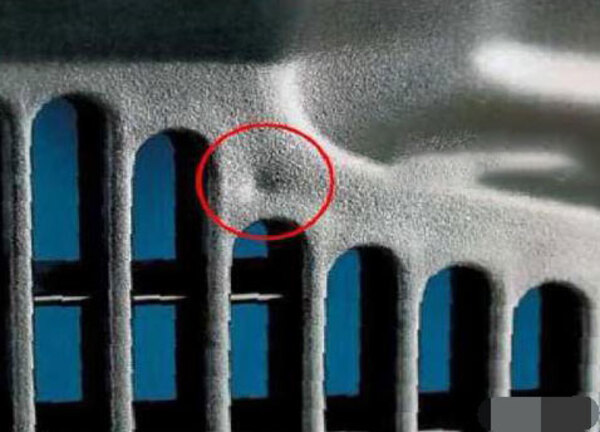
2. Injection Molded Products Have Bubbles
Bubbles (vacuum bubbles) are vacuum bubbles in which the gas is very thin. Generally speaking, if bubbles are found at the moment of mold opening, it is a gas interference problem. Vacuum bubbles are formed due to insufficient filling of the plastic or low pressure. Under the rapid cooling of the mold, the fuel in contact with the cavity is pulled, resulting in volume loss.

Solution
① Boost the injection energy: pressure, speed, time and material volume, and crank up the back pressure to fill the mold.
② Crank up the material temperature and make it flow smoothly. Lower the material temperature to cut shrinkage, and jack up the mold temperature, especially the local mold temperature where the vacuum bubble forms.
③ Put the gate in the thick part of the part to improve the flow conditions of the nozzle, runner and gate and cut the pressure consumption.
④ Improve mold exhaust conditions.
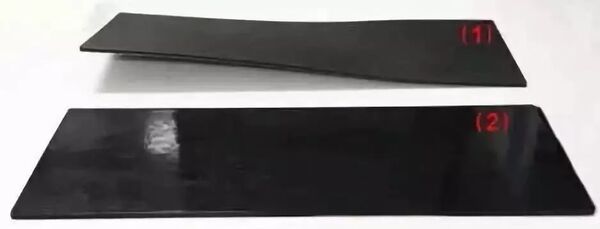
3. Warp Deformation of Injection Molded Products
The deformation, bending, and twisting of injection molded products are mainly caused by the fact that the shrinkage rate in the flow direction is greater than that in the vertical direction during plastic molding, resulting in different shrinkage rates in each direction and causing the parts to warp. In addition, due to the inevitable process of mold filling during injection molding, there is a large internal stress remaining inside the part, which causes warping. These are all manifestations of deformation caused by high stress orientation. Therefore, fundamentally speaking, mold design determines the warping tendency of parts. It is very difficult to suppress this tendency by changing molding conditions. The final solution to the problem must start with mold design and improvement. This phenomenon is mainly caused by the following aspects:

3.1 Mold Aspects
① Ensure that the thickness and quality of all parts are consistent.
② Design the cooling system to ensure that the temperature of all parts of the mold cavity is consistent. Design the gating system to ensure that the material flows symmetrically to prevent warping caused by different flow directions and shrinkage rates. Increase the thickness of the runner and main channel for difficult-to-fill parts as much as possible. Eliminate differences in density, pressure, and temperature in the cavity.
③ Ensure that the transition areas and corners of the part thickness are smooth and have good demolding properties, such as increasing the demolding margin, improving the polishing of the mold surface, and balancing the ejection system.
④ Ensure good exhaust.
⑤ Increase the wall thickness of the part or increase the anti-warping direction, and use reinforcing ribs to enhance the anti-warping ability of the part.
⑥ The mold material is not strong enough.
3.2 Plastics
Crystalline plastics are more likely to warp than amorphous plastics. Additionally, crystalline plastics can correct warping by going through the crystallization process, which decreases as the cooling rate increases and the shrinkage rate decreases.
3.3 Processing
① The injection pressure is too high, the holding time is too long, the melt temperature is too low, and the speed is too fast, which will cause the internal stress to increase and cause warpage deformation.
② The mold temperature is too high, and the cooling time is too short, which causes the parts to be overheated during demolding and causes ejection deformation.
③ Reduce the screw speed and back pressure to reduce the density while maintaining the minimum charging amount to limit the generation of internal stress.
④ If necessary, the parts that are prone to warping and deformation can be molded softly or de-molded after de-molding.
4. Defects of Color Bars, Lines, and Flowers in Injection Molded Products
This defect mainly occurs in plastic parts colored with masterbatch. Although masterbatch coloring is better than dry powder coloring and dye paste in terms of color stability, color purity, color migration, etc., the distribution, that is, the color particles are relatively poor in diluting the plastic and mixing evenly, and the finished products naturally have regional color differences.
Solution
① Increase the temperature of the feeding section, especially the temperature at the rear end of the feeding section, so that the temperature is close to or slightly higher than the temperature of the melting section, so that the color masterbatch can melt as quickly as possible when entering the melting section, promote uniform mixing with dilution, and increase the chance of liquid mixing.
② When the screw speed is constant, increasing the back pressure increases the melt temperature and shearing effect in the barrel.
③ Modify the mold, especially the pouring system. If the gate is too wide, the turbulence effect is poor when the melt passes through, and the temperature rise is not high, so it is uneven and the ribbon mold cavity should be narrowed.
5. Injection Molded Products Shrinkage and Dents
When you inject the plastic into the mold, it will cool down and solidify. During this process, the plastic will shrink. This is normal. But sometimes, the shrinkage is not even. This is when you get dents.
5.1 Machine Aspects
① If the nozzle hole is too big, the melt will flow back and cause shrinkage; if it is too small, the resistance will be big and the amount of material will be small, causing shrinkage.
② If the clamping force is not enough, the flash will shrink, so you should check whether there is any problem with the clamping system.
③ If the amount of plasticizing is not enough, you should use a machine with a big amount of plasticizing to check whether the screw and barrel are worn.
5.2 Mold Aspects
① Make sure the wall thickness is the same all over and that the shrinkage is the same.
② Make sure the mold’s cooling and heating system keeps the temperature the same for all parts.
③ Make sure the gate is smooth and doesn’t have too much resistance. For example, the size of the main channel, runner, and gate should be right, the surface should be smooth, and the transition area should be curved.
④ For thin parts, raise the temperature to make sure the material flows smoothly. For thick parts, lower the mold temperature.
⑤ Make sure the gate is symmetrical and try to put it in the thick part of the part. Make sure the cold slug well is big enough.
5.3 Plastics
Crystalline plastics shrink more than amorphous plastics. When you process them, you need to add more material or add something to the plastic to make it crystallize faster and not shrink as much.
5.4 Processing
① The temperature of the barrel is too high and the volume changes greatly, especially the temperature of the front furnace. For plastics with poor fluidity, the temperature should be increased appropriately to ensure smoothness.
② The injection pressure, speed, and back pressure are too low, and the injection time is too short, resulting in insufficient material volume or density and shrinkage. The pressure, speed, and back pressure are too high, and the time is too long, causing flash and shrinkage.
③ If the amount of material added is too large, the injection pressure will be consumed; if it is too small, the amount of material will be insufficient.
④ For parts that do not require precision, after the injection and pressure-holding is completed, the outer layer is basically condensed and hardened but the sandwich part is still soft and can be ejected. It can be removed from the mold as soon as possible and allowed to cool slowly in air or hot water. The shrinkage dent is gentle and not so conspicuous and does not affect use.
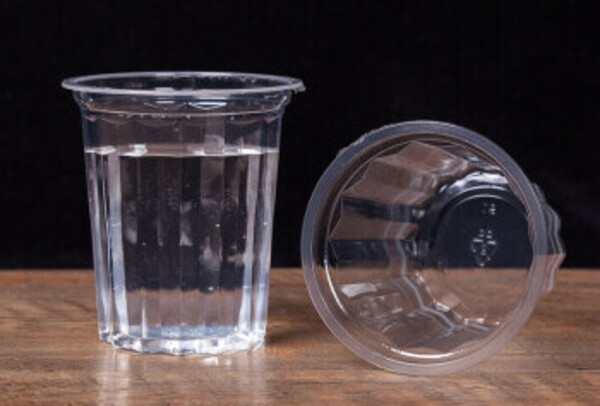
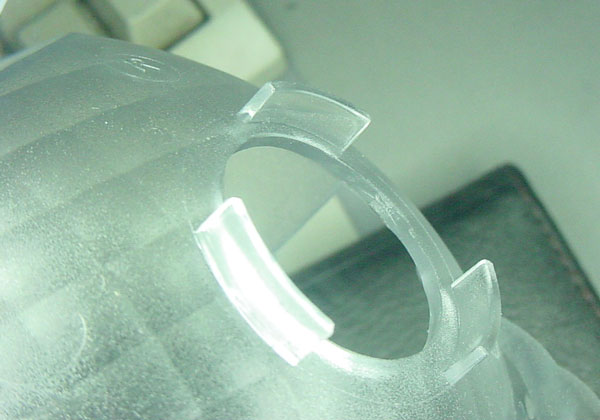
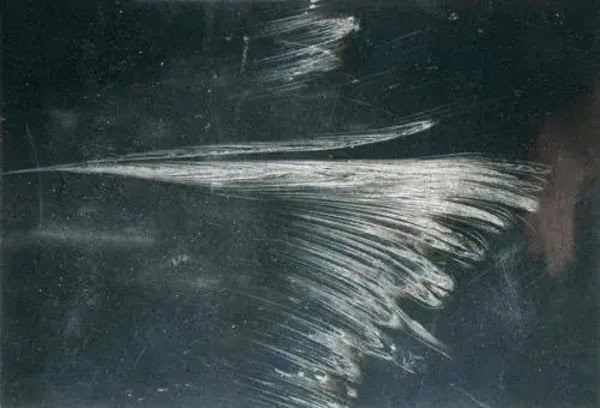
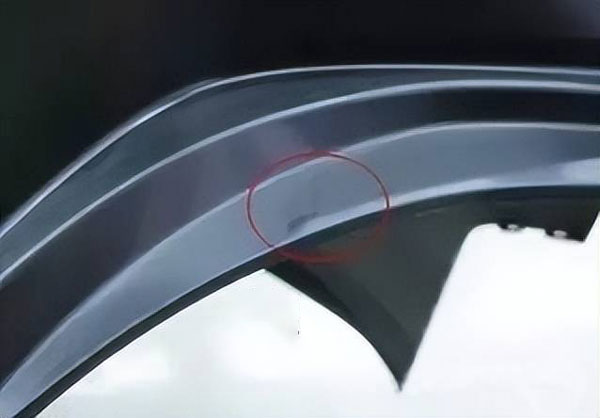
6. Transparent Defects in Injection Molded Products
Melting spots, silver streaks, cracked polystyrene, transparent parts of plexiglass, sometimes through the light you can see some sparkling filament-like silver streaks. These silver streaks are also called flash spots or cracks. This is due to the stress generated in the vertical direction of the tensile stress, which causes the heavy flow orientation of the polymer molecules and the difference in folding rate between the non-oriented part and the heavy flow orientation.
Solution
① Remove any gas or impurities and make sure the plastic is completely dry.
② Lower the temperature of the material, gradually adjust the temperature of the barrel, and increase the temperature of the mold as needed.
③ Increase the injection pressure and decrease the injection speed.
④ Increase or decrease the back pressure before injection and decrease the screw speed.
⑤ Improve the exhaust conditions of the runner and mold cavity.
⑥ Clean any possible blockages in the nozzle, runner, and gate.
⑦ To shorten the molding cycle, you can use annealing methods to get rid of silver streaks after demolding: for polystyrene, hold at 78°C for 15 minutes, or at 50°C for 1 hour. For polycarbonate, heat to above 160°C for several minutes.
7. Injection Molded Products Have Uneven Colors
Here are the main reasons and solutions for uneven color of injection molded products:
① Poor colorant diffusion often results in patterns near the gate.
② Plastics or colorants have poor thermal stability. To stabilize the color tone of parts, production conditions must be strictly fixed, especially material temperature, material quantity and production cycle.
③ For crystalline plastics, try to keep the cooling rate of all parts of the part consistent. For parts with large wall thickness differences, colorants can be used to mask the color difference. For parts with more uniform wall thicknesses, the material temperature and mold temperature must be fixed.
④ The shape, gate form and position of the part have an impact on the plastic filling, causing color differences in some parts of the part, which must be modified if necessary.
8. Color and Gloss Defects of Injection Molded Products
In most cases, the shine of the surface of injection molded parts is determined by the type of plastic, colorant, and the smoothness of the mold surface. But sometimes, the surface color and shine defects, surface darkness, etc. are caused by other reasons. The reasons and solutions are analyzed as follows:
① The mold finish is bad, the cavity surface has rust stains, etc., and the mold exhaust is bad.
② The mold pouring system is not good. The cold well should be enlarged, the runner should be enlarged, the main channel should be polished, and the runner and gate should be polished.
③ The material temperature and mold temperature are low, and local heating of the gate can be used if necessary.

④ The processing pressure is too low, the speed is too slow, the injection time is not enough, and the back pressure is not enough, resulting in poor compactness and dark surface.
⑤ The plastic must be fully plasticized, but the degradation of the material must be prevented, the heating must be stable, and the cooling must be sufficient, especially for thick walls.
⑥ To prevent cold material from entering the workpiece, use a self-locking spring or lower the nozzle temperature if necessary.
⑦ Too much recycled material is used, the plastic or colorant is of poor quality, mixed with water vapor or other impurities, and the lubricant used is of poor quality.
⑧ The clamping force must be sufficient.
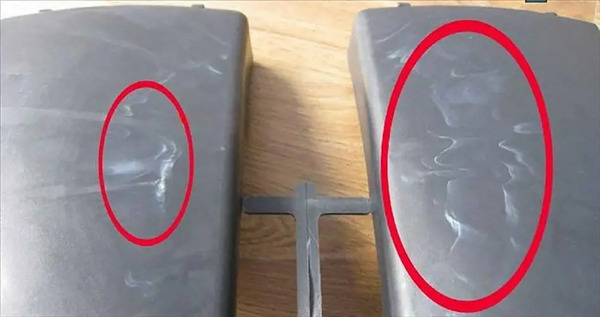
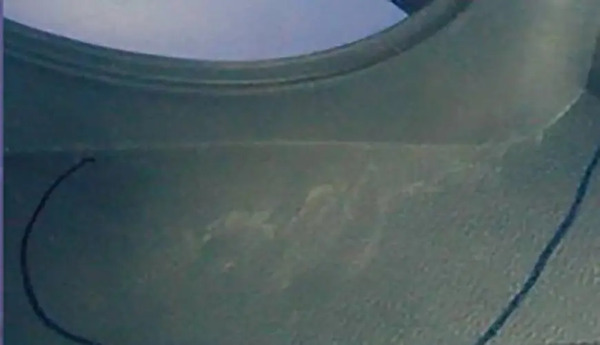
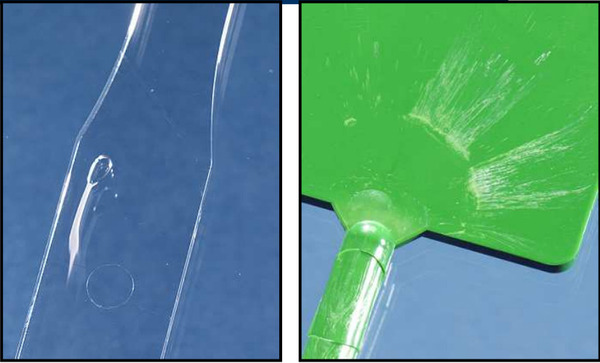
9. Injection Molding Products Silver Pattern
Silver streaks on injection molded products are caused by surface bubbles and internal pores. The main reason for these defects is the interference of gases, such as water vapor, decomposition gas, solvent gas, and air. Let’s analyze the specific reasons:
9.1 Machine Aspects
① The barrel and screw are worn or there is a dead corner in the material flow in the rubber head and rubber ring, which will decompose due to long-term heating.
② The heating system is out of control, causing the temperature to be too high and decomposing. You should check whether there are problems with heating elements such as thermocouples and heating coils. Improper screw design may cause loosening or easily introduce air.
9.2 Mold Aspects
① Insufficient ventilation.
② The friction resistance of the runners, gates, and cavities in the mold is large, causing local overheating and decomposition.
③ Unbalanced distribution of gates and cavities, and unreasonable cooling systems will cause unbalanced heating, resulting in local overheating or blocking of air channels.
④ Water leaks from the cooling passage and enters the mold cavity.
9.3 Plastics
① If the plastic has high humidity, too much recycled material is added, or it contains harmful debris (the debris is easily decomposed), the plastic should be fully dried and the debris should be eliminated.
② To absorb moisture from the atmosphere or from the colorant, the colorant should also be dried. It is best to install a dryer on the machine.
③ If the amount of lubricants, stabilizers, etc. added to the plastic is too much or unevenly mixed, or the plastic itself contains volatile solvents, decomposition can also occur when mixed plastics are heated to a difficult balance.
④ The plastic is contaminated and mixed with other plastics.
9.4 Processing
① If the temperature, pressure, speed, back pressure, and melt motor speed are set too high, decomposition may occur. If the pressure and speed are too low, the injection time and holding pressure are insufficient. If the back pressure is too low, the density may be insufficient due to failure to obtain high pressure and melting may not occur. If the gas causes silver streaks to appear, set the appropriate temperature, pressure, speed and time. Use multi-stage injection speed.
② Low back pressure and fast rotation speed can easily cause air to enter the barrel and enter the mold with the molten material. If the cycle is too long, the melt will be heated in the barrel for too long and decompose.
③ Insufficient material quantity, too large feeding cushion, too low material temperature or too low mold temperature will affect the material flow and molding pressure and promote the generation of bubbles.
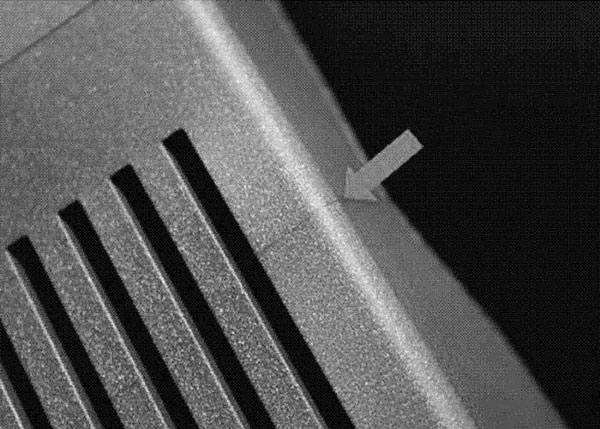
10. Plastic Products Have Welded Seams
When the melted plastic comes together in multiple streams in the cavity because it hits insert holes, areas with different flow rates, and areas where the mold filling material flow is interrupted, it creates linear weld lines because it can’t completely melt together. Also, weld lines will be created when the gate fills the mold, and the strength and other properties of the weld lines are very weak. The main reasons are analyzed as follows:
10.1 Processing
① The injection pressure and speed are too low, and the barrel temperature and mold temperature are too low, causing the melt entering the mold to cool prematurely and cause weld lines.
② When the injection pressure and speed are too high, spraying will occur and weld lines will appear.
③ The rotation speed should be increased and the back pressure should be increased to reduce the viscosity of the plastic and increase the density.
④ Plastics must be dried well and recycled materials should be used sparingly. Weld lines may also occur if too much release agent is used or if the quality is poor.
⑤ Reduce the clamping force and facilitate exhaust.
10.2 Mold Aspects
① If there are too many gates in the same cavity, reduce the number of gates or set them symmetrically, or set them as close to the weld joint as possible.
② If the exhaust at the welded joint is poor, install an exhaust system.
③ The sprue is too large and the gating system is improperly sized. Open the gate to prevent the melt from flowing around the insert holes, or use as few inserts as possible.
④ If the wall thickness changes too much or the wall thickness is too thin, make the wall thickness of the part uniform.
⑤ If necessary, open a fusion well at the weld seam to separate the weld seam from the product.
10.3 Plastics
① If the plastic has poor fluidity or is heat sensitive, add lubricants and stabilizers as needed.
② Plastic often contains impurities, so if necessary, replace it with higher quality plastic.
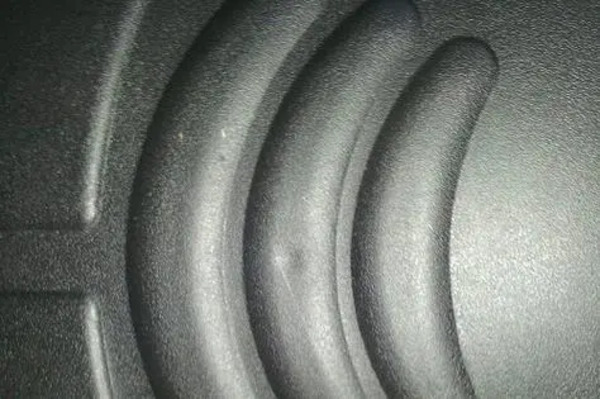
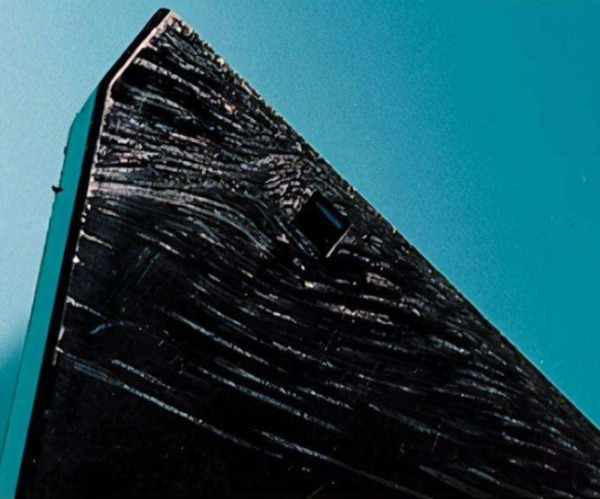
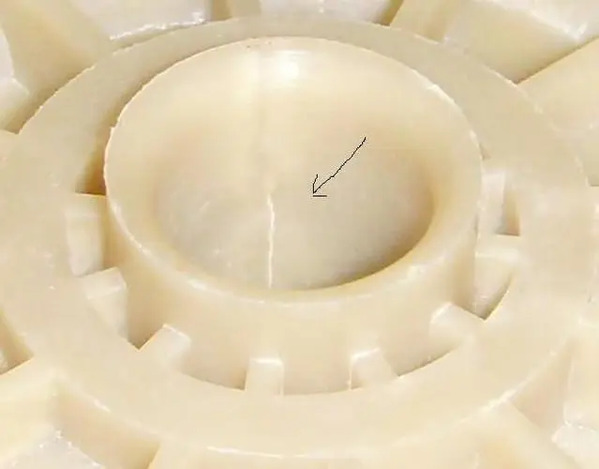
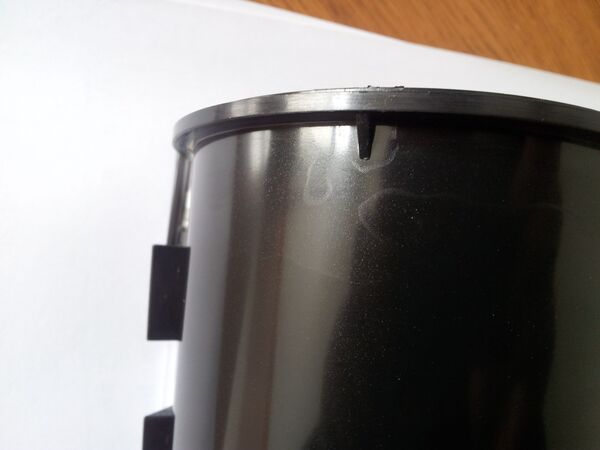
11.Vibration Marks on Injection Molded Products
Hard plastic parts, like PS, have these dense ripples on their surfaces near the gate, which are sometimes called vibration lines. This happens because when the melt viscosity is too high and the mold fills in a stagnant manner, the front material quickly condenses and shrinks as soon as it touches the cavity surface, and the subsequent melt pushes the shrunken cold material and continues the process. This continuous back and forth causes the material flow to create surface vibration patterns as it moves forward.
Solution
① To increase the barrel temperature, especially the nozzle temperature, you should also increase the mold temperature.
② Increase the injection pressure and speed to fill the mold cavity quickly.
③ Increase the size of the flow channel and gate to prevent too much resistance.
④ Make sure the mold is well vented and has a big enough cold slug well.
⑤ Don’t make parts too thin.
12.Swelling and Bubbling of Injection Molded Products
Some plastic parts will soon develop swelling or bubbling on the back of the metal insert or in particularly thick areas after being molded and demolded. This is caused by the expansion of gas released by the plastic that is not completely cooled and hardened under the action of internal pressure.
Solution
① Cool it down. Lower the mold temperature, keep the mold open longer, and lower the drying and processing temperature of the material.
② Slow down the injection speed, shorten the molding cycle, and reduce the flow resistance.
③ Increase the holding pressure and time.
④ Fix the problem where the part’s wall is too thick or the thickness changes a lot.
Conclusion
Injection molding defects can really mess up your product quality, production efficiency, and overall costs. But if you can figure out what’s causing these defects and fix them, you can make your process more reliable, reduce your scrap rate, and make consistently good parts. You have to keep working at it, though. You can’t just fix your process and forget about it. You have to keep improving, keep maintaining, and keep monitoring to get the best results from your injection molding operation.
Need a Quote for Your Injection Molding Project?
Get competitive pricing, DFM feedback, and production timeline from ZetarMold’s engineering team.
Request a Free Quote → See our Injection Molding Complete Guide for a comprehensive overview.


