 Skip to content

- Transparent plastic injection molding demands stricter material preparation, mold surface finishing, and process control compared to opaque parts.
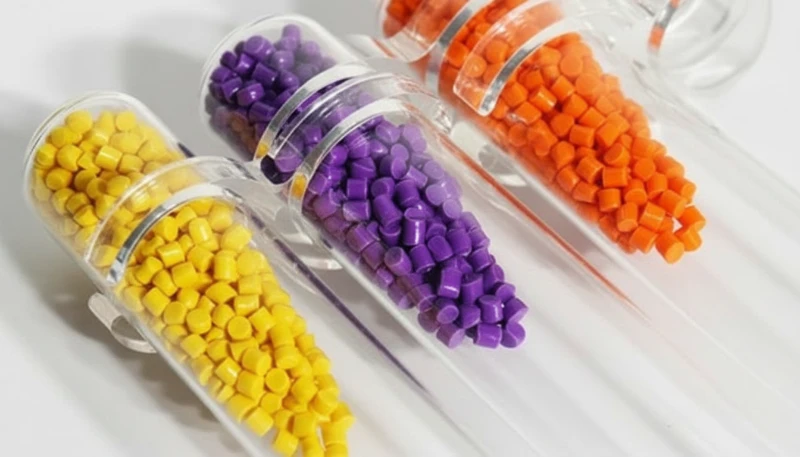
- Polycarbonate (PC), PMMA (acrylic), and transparent PS are the three most common materials for clear injection molded products, each offering distinct advantages.
- Material drying is absolutely critical — even 0.02% excess moisture can cause visible bubbles and haze in transparent parts.
- Mold cavity surfaces must achieve mirror-polish finish (SPI A1 or A2) to ensure optical clarity in the final product.
- Gate design, injection speed, and melt temperature all require precise optimization to prevent flow marks, silver streaks, and stress whitening.
- Post-molding handling and packaging procedures must prevent scratches and contamination that would ruin optical transparency.
Why Does Transparent Plastic Injection Molding Require Special Attention?
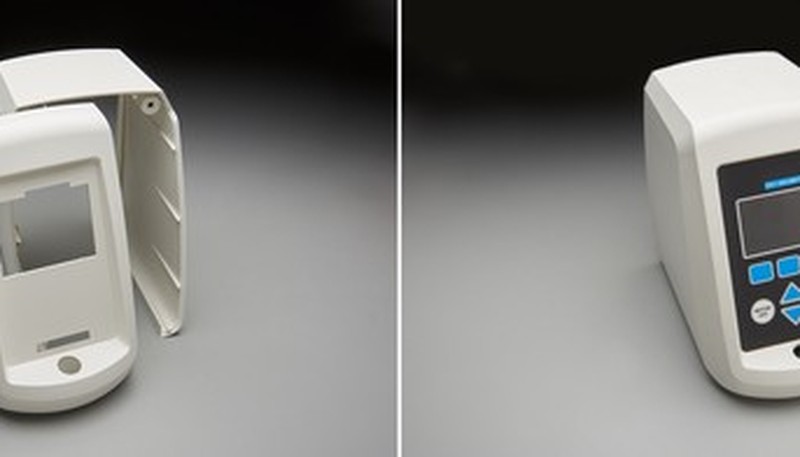
Transparent plastic injection molding requires significantly more process discipline than molding opaque parts because every internal defect — bubbles, flow lines, contamination, and stress marks — becomes visible to the naked eye. In over 20 years of manufacturing at Zetar, we have learned that producing consistently clear, optically acceptable parts is one of the most demanding challenges in the injection molding1 industry.
The global market for transparent plastic products spans automotive lighting lenses, medical device housings, consumer electronics displays, food packaging containers, and optical components. These applications demand not just transparency but also dimensional accuracy, surface quality, and structural integrity — all of which require mastery of several interconnected process variables.
What makes transparent molding uniquely challenging is that defects invisible in colored or opaque parts become immediately apparent. A tiny air bubble, a faint flow mark, or subtle moisture-induced haze can render a transparent part unusable. This is why every stage of the process — from material selection and drying to mold design, process parameters, and post-processing — must be carefully controlled to a higher standard than conventional molding.
Which Materials Are Best Suited for Transparent Injection Molded Products?
The three most widely used transparent plastics for injection molding are polycarbonate (PC)2, polymethyl methacrylate (PMMA, commonly known as acrylic)3, and transparent polystyrene (PS). Each material offers a different balance of optical clarity, impact resistance, heat resistance, and processability.
At Zetar, we work with all three materials regularly and guide our clients toward the best choice based on their specific application requirements. Here is a detailed comparison:
| Property | Polycarbonate (PC) | PMMA (Acrylic) | Transparent PS |
|---|---|---|---|
| Light Transmittance | 88–90% | 91–93% | 88–90% |
| Impact Resistance | Excellent (250× glass) | Moderate (10× glass) | Low (brittle) |
| Heat Deflection Temp | 130–140°C | 85–105°C | 70–85°C |
| UV Resistance | Moderate (yellows without UV stabilizer) | Excellent (naturally UV stable) | Poor (yellows quickly) |
| Chemical Resistance | Moderate (sensitive to solvents) | Low (cracks with solvents) | Low |
| Typical Applications | Safety lenses, automotive lighting, medical devices | Display panels, lighting covers, optical lenses | Disposable containers, packaging, lab consumables |
| Processing Difficulty | High (requires precise drying and high melt temps) | Medium-High (moisture sensitive, narrow window) | Low (easier to process) |
| Relative Cost | High | Medium | Low |
Beyond these three primary materials, transparent grades of PET, PETG, SAN (styrene acrylonitrile), and even certain transparent nylons are used in specialized applications. The key is matching the material properties to your product’s functional requirements — not just selecting the clearest option available.
How Critical Is Material Drying for Transparent Plastic Parts?
Material drying is arguably the single most important preparatory step in transparent plastic injection molding. If I could give one piece of advice to anyone new to transparent molding, it would be this: never underestimate the impact of moisture on optical clarity.
Polycarbonate and PMMA are both hygroscopic materials that absorb moisture from the surrounding air. When moisture-laden resin is heated in the injection barrel, the water turns to steam and creates bubbles, silver streaks, and haze inside the molded part. Even a moisture content as low as 0.02% can produce visible defects in a transparent PC part.
Here are the recommended drying parameters for the three main transparent materials:
| Material | Drying Temperature | Drying Time | Target Moisture Content | Dryer Type |
|---|---|---|---|---|
| Polycarbonate (PC) | 120°C (248°F) | 4–6 hours | < 0.02% | Desiccant dryer (required) |
| PMMA (Acrylic) | 80°C (176°F) | 4–6 hours | < 0.04% | Desiccant dryer (recommended) |
| Transparent PS | 70–80°C (158–176°F) | 2–3 hours | < 0.1% | Hot air dryer (acceptable) |
At Zetar, we use dedicated desiccant dryers for all transparent material processing and verify moisture content with Karl Fischer titration testing before every production run. We also ensure the hopper-to-barrel feed system is sealed and insulated to prevent moisture re-absorption during processing.
A common mistake we see at less experienced factories is using hot-air dryers instead of desiccant dryers for PC and PMMA. Hot-air dryers cannot achieve the low dew points needed to properly dry these hygroscopic resins, especially in humid climates like southern China.
“Any standard hot-air dryer is sufficient for drying transparent polycarbonate resin before injection molding.”False
Polycarbonate is highly hygroscopic and requires desiccant dryers that achieve dew points of -40°C or lower. Standard hot-air dryers cannot remove enough moisture from PC resin, especially in humid environments, leading to visible bubbles and haze in transparent molded parts.
“Desiccant dryers with verified moisture testing are essential for achieving optical clarity in polycarbonate and PMMA injection molded parts.”True
Desiccant dryers provide the low dew points required to reduce moisture content below the critical thresholds (0.02% for PC, 0.04% for PMMA). Combined with Karl Fischer moisture verification, this ensures the resin is properly dried before processing.

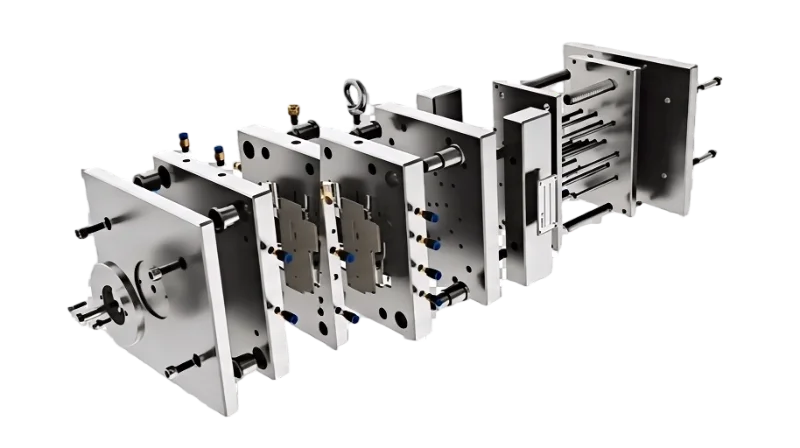
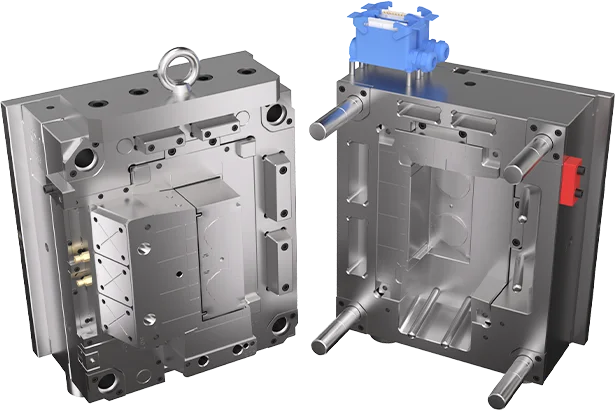
What Mold Design Features Are Essential for Transparent Parts?
The mold design for transparent plastic parts differs from conventional molds in several critical ways, with surface finish quality, gate design, and cooling system layout being the most important factors. At Zetar, our mold design4 team applies specific design rules for every transparent part project.
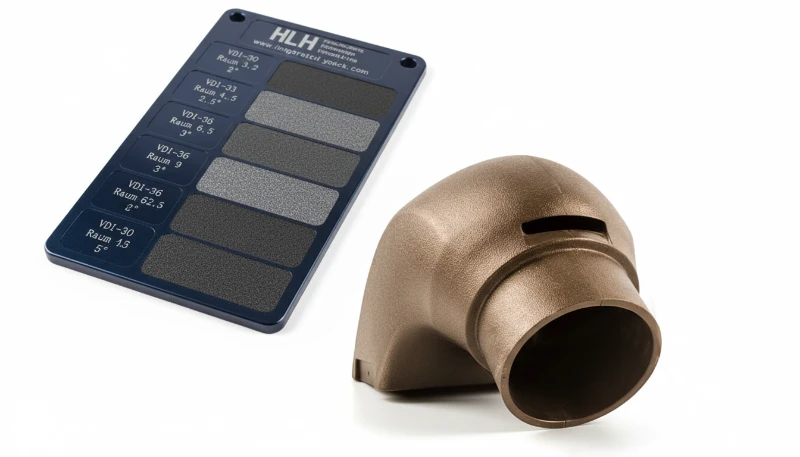
Surface Finish: The mold cavity surface directly transfers to the part surface. For transparent parts, this means the cavity must be polished to a mirror finish — typically SPI A1 (diamond buff, Ra ≤ 0.012 μm) or SPI A2 (high polish, Ra ≤ 0.025 μm). Any scratch, tool mark, or machining line in the cavity will be visible in the transparent part. We use S136 stainless steel (or equivalent) for transparent part cavities because it polishes to a superior finish and resists corrosion from condensation during cooling.
Gate Design: Gate type and location significantly affect the optical quality of transparent parts. The key considerations include:
- Avoid direct gates on optical surfaces — gate vestiges and flow disturbance create visible marks
- Fan gates or film gates provide more uniform flow for flat transparent panels
- Pin-point gates work well for small transparent parts but may create visible witness marks
- Hot runner systems with valve gates provide the cleanest gate vestige for transparent parts
Venting: Inadequate venting causes trapped air that forms visible bubbles or burn marks in transparent parts. We design vents at every flow front meeting point, typically 0.02–0.03 mm deep for PC and 0.03–0.04 mm deep for PMMA.
Cooling: Uniform cooling prevents internal stress that causes birefringence (stress-induced optical distortion visible under polarized light). Conformal cooling channels, achievable through 3D-printed metal inserts, provide the most uniform cooling for complex transparent parts.

How Do You Optimize Process Parameters for Optical Clarity?
Achieving optical clarity in transparent injection molded parts requires precise control of several interconnected process parameters. The injection speed, melt temperature, mold temperature, packing pressure, and cooling time all interact to determine the final optical quality of the part.
Based on our extensive experience at Zetar, here are the critical process considerations:
Melt Temperature: Transparent materials generally require higher melt temperatures than their opaque counterparts to ensure complete melting and uniform flow. For PC, we typically run at 280–310°C; for PMMA, 220–260°C; and for transparent PS, 190–230°C. Running too cold creates flow marks and poor surface replication, while running too hot causes degradation and yellowing.
Injection Speed: Moderate to fast injection speeds produce the best optical results for most transparent parts. Slow filling allows the melt front to cool prematurely, creating visible flow lines and weld marks. However, excessive speed generates shear heat and can cause jetting or burn marks. We use multi-stage injection profiles that start faster to fill the cavity and then slow down near the end to prevent over-packing.
Mold Temperature: Higher mold temperatures (80–120°C for PC, 60–80°C for PMMA) improve surface replication and reduce internal stress but increase cycle time. We balance mold temperature against cycle time requirements for each specific project.
Packing and Holding Pressure: Adequate packing pressure is essential to prevent sink marks and internal voids that become clearly visible in transparent parts. We typically use 60–80% of the injection pressure as holding pressure, with a properly calculated gate seal time.
“Using the slowest possible injection speed always produces the clearest transparent parts.”False
Slow injection speeds allow the melt front to cool during filling, creating visible flow lines, hesitation marks, and weld lines that are especially noticeable in transparent parts. Moderate to fast injection speeds, often with multi-stage profiles, produce better optical results by maintaining a uniform melt front temperature.
“Optimized multi-stage injection speed profiles combined with proper melt and mold temperatures produce the best optical clarity in transparent molded parts.”True
Multi-stage injection profiles allow faster initial filling to prevent premature cooling while slowing near the end to prevent over-packing and jetting. When combined with proper melt temperature and elevated mold temperature, this approach minimizes flow marks, stress whitening, and internal defects visible in transparent parts.
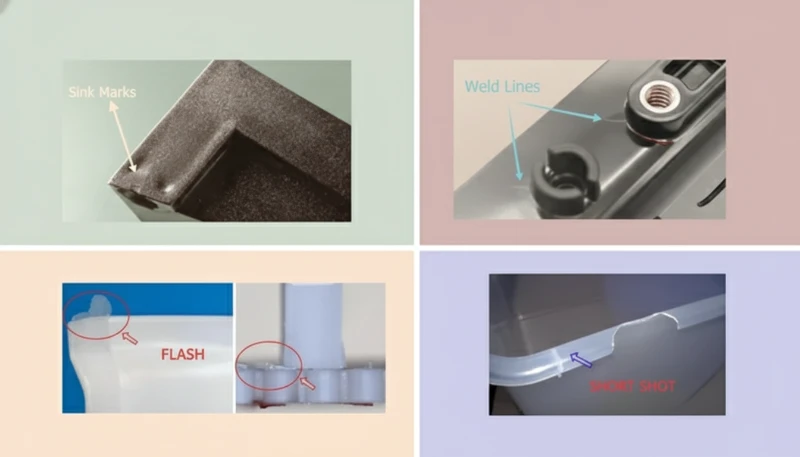
What Common Defects Occur in Transparent Parts and How Do You Prevent Them?
Transparent parts are susceptible to a range of defects that would be invisible in opaque parts. Understanding these defects and their root causes is essential for achieving consistently high-quality production. Here are the most common issues we encounter and resolve at Zetar:
| Defect | Appearance | Root Cause | Prevention Method |
|---|---|---|---|
| Silver Streaks | Shiny lines along flow direction | Moisture in resin, material degradation | Proper drying, reduce melt temperature |
| Bubbles/Voids | Trapped air or gas pockets | Inadequate venting, moisture, too-fast screw speed | Improve venting, verify drying, reduce screw RPM |
| Flow Marks | Wavy lines on surface | Low melt/mold temperature, slow injection | Increase temperatures, optimize injection speed |
| Weld Lines | Visible lines where flow fronts meet | Multiple flow paths, cold flow fronts | Optimize gate location, increase melt temp |
| Haze/Cloudiness | Loss of transparency | Moisture, contamination, crystallization | Thorough drying, clean material handling |
| Stress Whitening | White marks under stress or bending | High internal stress from rapid cooling | Increase mold temperature, anneal parts |
| Birefringence | Rainbow patterns under polarized light | Non-uniform cooling, high packing stress | Uniform cooling design, optimize packing profile |
| Surface Scratches | Visible scratch marks | Rough mold surface, poor demolding | Mirror polish cavity, adequate draft angles |
At Zetar, we use a systematic defect prevention approach that starts with mold flow analysis5 during the design phase to predict potential problem areas, followed by scientific molding methodology during process development to establish robust processing windows.
How Should You Handle Post-Molding and Packaging for Transparent Products?
The care you put into manufacturing transparent parts can be undone in seconds by improper handling after the parts leave the mold. Post-molding operations and packaging procedures are just as important as the molding process itself for maintaining optical quality.
At Zetar, our transparent part handling protocol includes several critical steps:
- Automated part removal: We use robotic arms to remove transparent parts from the mold to prevent fingerprints, scratches, and handling damage.
- Anti-static treatment: Transparent plastics, especially PC and PMMA, attract dust through static charge. We apply anti-static sprays or use ionizing air bars at the molding station.
- Protective film application: For high-value transparent parts, we apply protective PE film immediately after molding to prevent surface scratches during subsequent handling and assembly.
- Annealing (when required): For PC parts with tight optical specifications, post-mold annealing at 120–130°C for 1–4 hours relieves internal stress and improves optical clarity. This is especially important for thick-walled lenses and optical components.
- Clean room packaging: Parts requiring the highest optical quality are packaged in clean room conditions with dust-free bags and cushioned trays to prevent scratching during transport.
Packaging design for transparent products must account for several risks during shipping: surface-to-surface contact that causes scratching, static-charged dust contamination, UV exposure that yellows certain materials, and physical impact that causes stress whitening. We design custom packaging solutions for each transparent product to address these specific risks.
Frequently Asked Questions (FAQ)
Can you achieve optically clear parts with standard injection molding equipment?
Yes, but the equipment must be clean, well-maintained, and properly configured. You do not need specialized transparent-only machines, but you do need desiccant dryers, clean material handling systems, and precise temperature control. At Zetar, we dedicate specific barrels and screws to transparent material processing to prevent cross-contamination from colored materials.
What surface finish grade is needed for transparent injection mold cavities?
For optically clear parts, the mold cavity should be polished to SPI A1 (Ra ≤ 0.012 μm) or SPI A2 (Ra ≤ 0.025 μm). These mirror-finish grades ensure that the mold surface does not introduce any visible texture or marks onto the transparent part. S136 stainless steel or equivalent is recommended for its superior polishability and corrosion resistance.
How does wall thickness affect transparency in injection molded parts?
Thicker walls generally reduce transparency because light must travel through more material, increasing the chance of internal defects becoming visible. Uniform wall thickness is critical — variations create differential cooling that causes stress birefringence and visible distortion. We recommend keeping wall thickness as uniform as possible and avoiding abrupt thickness transitions.
Is it possible to mold transparent parts with recycled material (regrind)?
Using regrind in transparent parts is generally not recommended because recycled material often contains contaminants, has degraded molecular weight, and produces lower optical clarity. If regrind must be used, it should be limited to 10–15% maximum, blended with virgin material, and thoroughly dried. For high-quality optical parts, we always use 100% virgin resin.
What is the cost difference between transparent and opaque injection molding?
Transparent injection molding typically costs 15–30% more than equivalent opaque parts due to higher material costs (transparent grades are premium-priced), more expensive mold steel and surface finishing (mirror polish), stricter drying and processing requirements, and additional quality inspection steps. However, the premium is worthwhile for applications where optical clarity is a functional or aesthetic requirement.
Summary

Injection molding of transparent plastic products shares several common process requirements regardless of the specific material used: meticulous material drying, mirror-polished mold surfaces, optimized injection parameters, and careful post-molding handling. These common points form the foundation of successful transparent part production.
At Zetar, our decades of experience with transparent PC, PMMA, and PS products across automotive, medical, consumer electronics, and packaging applications has taught us that consistent quality comes from rigorous process discipline at every step. From material receipt and drying verification through mold design and process optimization to final inspection and packaging, each stage must meet elevated standards compared to opaque part production.
Whether you need transparent automotive lenses, medical device housings, consumer electronics covers, or optical components, our engineering team is ready to apply our transparent molding expertise to your next project. Contact Zetar for a free DFM review and transparent molding consultation.
-
Injection Molding: A manufacturing process where molten plastic is injected under high pressure into a precisely machined mold cavity, then cooled and ejected as a finished part. It is the most efficient method for mass-producing complex plastic components. ↩
-
Polycarbonate (PC): A high-performance engineering thermoplastic known for exceptional impact resistance, optical clarity, and heat resistance. Widely used in safety glazing, automotive lighting, and medical devices. ↩
-
PMMA (Polymethyl Methacrylate): Also known as acrylic, PMMA offers the highest light transmittance (91–93%) among common transparent plastics. It has excellent UV resistance and weatherability but lower impact strength than polycarbonate. ↩
-
Mold Design: The engineering process of designing the mold tool including cavity geometry, runner system, cooling channels, ejection mechanism, and venting. Proper mold design is critical for part quality, cycle time, and mold longevity. ↩
-
Mold Flow Analysis: Computer simulation that predicts plastic flow behavior, cooling patterns, and potential defects within a mold cavity before manufacturing. Essential for optimizing gate locations and preventing issues in transparent parts. ↩


