 Skip to content

– 3D printing is cheaper than injection molding for prototype quantities (1–100 parts) because it requires zero tooling investment; injection molding becomes cheaper above a crossover point typically between 500–5,000 parts depending on part size and complexity.
– The injection mold tooling cost ($3,000–$100,000+) is the dominant cost at low volumes; the low per-part cost ($0.05–$5.00) of injection molding makes it increasingly advantageous as volume grows.
– In our factory, we use 3D printing specifically for design validation, functional prototypes, and jigs/fixtures—not for production parts above 200 units where unit economics consistently favor injection molding.
– 3D printed parts have mechanical properties 20–60% lower than equivalent injection molded parts in most resins due to layer-based anisotropy and porosity—a critical consideration for structural or functional applications.
– The correct question is not “which is cheaper” but “at what volume does injection molding become cheaper”—and the answer must be calculated for each specific part.
Is 3D Printing Actually Cheaper Than Injection Molding?
3D printing is cheaper than injection molding at low quantities—typically below 500–2,000 parts—because it requires no tooling investment. Injection molding is cheaper than 3D printing at higher volumes because its tooling cost is amortized across many parts, driving the per-piece cost far below what 3D printing can achieve. The crossover point where injection molding becomes cheaper is the most important number in any make-or-buy decision between these two technologies, and it must be calculated specifically for each part based on size, material, and complexity.
In our factory, we receive this question regularly from customers launching new products. We run the cost calculation for every inquiry because the crossover point varies so significantly: a large, complex housing might cross over at 300 parts, while a small, simple bracket might not cross over until 5,000 parts. The only way to answer the question correctly is to calculate it—not estimate it.
How Do 3D Printing and Injection Molding Costs Break Down?
Understanding the cost structure of each technology is essential for making accurate comparisons. The two processes have fundamentally different cost curves: 3D printing has near-zero fixed cost and relatively high variable (per-part) cost; injection molding has high fixed cost (tooling) and very low variable cost at scale.

| Cost Element | 3D Printing (FDM/SLA) | Injection Molding |
|---|---|---|
| Tooling / Setup Cost | $0–$500 (file prep, supports) | $3,000–$100,000+ (mould) |
| Material Cost per kg | $20–$300 (filament/resin) | $1–$20 (pellets) |
| Machine Time per Part | High (1–24 hrs per part) | Very low (2–60 s per cycle) |
| Labor per Part | Post-processing: 15–60 min | Minimal: automated ejection |
| Typical Cost at 10 parts | $5–$200 per part | $500–$5,000 per part (tooling amortized) |
| Typical Cost at 10,000 parts | $5–$200 per part (same) | $0.10–$5.00 per part |
“3D printing is always cheaper than injection molding for small production runs under 1,000 parts.”False
The crossover point depends heavily on part size, complexity, and material. A small, simple ABS bracket can cross over as low as 200 parts if the mould is a simple single-cavity aluminum tool costing $2,500. A large, complex housing with side actions might not cross over until 5,000+ parts. The specific part must be calculated—no universal threshold applies.
“Injection molding material cost per kilogram is significantly lower than 3D printing material cost for equivalent polymer types.”True
Injection molding uses standard plastic pellets at $1–$20/kg for common resins (ABS, PP, PE, nylon). The equivalent 3D printing filament or resin costs $20–$300/kg for comparable materials. This 5–20× material cost premium is a key driver of why 3D printing cannot compete on per-part cost at production volumes.
How Do You Calculate the 3D Printing vs Injection Molding Crossover Point?
The crossover calculation is straightforward and should be done before committing to any production strategy. The crossover volume (Q) is the quantity at which total injection molding cost equals total 3D printing cost. In our factory, we help customers run this calculation at the quoting stage to avoid costly technology mismatches.
The formula: Crossover Q = Tooling Cost ÷ (3D Printing Cost per Part − Injection Molding Variable Cost per Part). Example calculation for a medium housing part: tooling cost = $15,000; 3D printing cost per part (SLA, material + machine time + post-processing) = $45; injection molding variable cost per part (material + machine time + labor) = $0.80. Crossover Q = $15,000 ÷ ($45 − $0.80) = $15,000 ÷ $44.20 = 339 parts. At 340+ parts, injection molding is cheaper for this specific part. At 338 parts or fewer, 3D printing is cheaper.
We’ve found that most B2B product programs with annual volumes above 1,000 parts cross over well before 500 units when using aluminum rapid tooling1—which costs $3,000–$8,000 for simple parts versus $15,000–$50,000 for production steel moulds. Rapid tooling shifts the crossover point significantly, making injection molding economical at quantities as low as 100–300 parts for simple geometries.
How Do Part Quality and Mechanical Properties Compare Between the Two Technologies?
Cost is only one dimension of the comparison—part quality and mechanical performance are equally important for most engineering applications. 3D printed and injection molded parts made from nominally “the same” polymer have significantly different mechanical properties due to the fundamental differences in how each process creates the part.
Injection molded parts2 have isotropic mechanical properties in the plane of the part because the molten polymer fills the cavity under high pressure, packing polymer chains uniformly. FDM (Fused Deposition Modeling)3 3D printed parts are inherently anisotropic: they are typically 20–50% weaker in the Z-axis (perpendicular to layer lines) than in the XY plane. SLA and SLS prints have better isotropy but still show 15–30% lower tensile strength than equivalent injection molded parts due to cure-induced porosity and layer interfaces. For load-bearing applications, snap fits, or parts requiring consistent dimensional stability over temperature cycles, injection molding is the clear technical choice regardless of cost.
When Is 3D Printing the Right Choice Over Injection Molding?
3D printing has genuine advantages over injection molding in specific scenarios—not just at low volumes, but also for specific part characteristics that injection molding cannot achieve economically. In our factory, we use 3D printing routinely for several workflows where it outperforms injection molding on criteria beyond cost.

Scenarios where 3D printing wins on more than cost: design validation before tooling commitment (catching geometry errors that cost $0 to fix in CAD versus $5,000–$15,000 in steel); parts with undercuts or internal geometries that require impractical draft angles or complex side-actions in injection molding; true mass customization where each unit is different (medical orthotic devices, patient-specific implants, personalized consumer products); prototype tooling4 and jigs/fixtures for production use where volumes are under 50 and replacement is acceptable; and bridge production between prototype approval and production mould completion. We produce all our factory jigs and assembly fixtures via FDM printing, replacing them when worn rather than investing in injection mould tooling for internal-use items.
“3D printed parts have equivalent mechanical properties to injection molded parts made from the same material.”False
FDM 3D printed ABS is typically 20–50% weaker in tensile strength in the Z-axis compared to injection molded ABS, due to incomplete layer-to-layer fusion and anisotropic fiber orientation. Surface finish is also significantly inferior (Ra 5–50 µm for FDM vs. Ra 0.4–3.2 µm for injection molding), and dimensional tolerance is wider (±0.2–0.5 mm for FDM vs. ±0.05–0.1 mm for injection molding).
“3D printing enables geometric complexity that is impossible or prohibitively expensive to achieve with injection molding.”True
Internal channels, lattice structures, re-entrant geometries, and organic shapes with no draft requirements are all achievable in 3D printing but impossible or extremely costly in injection molding. For low-volume applications where these geometries are functionally required, 3D printing is not just cheaper—it is the only viable manufacturing option.
How Does Material Selection Differ Between 3D Printing and Injection Molding?
The material ecosystems of 3D printing and injection molding overlap significantly but are not identical. Injection molding offers access to the full range of engineering thermoplastics—including glass-filled, carbon-fiber-filled, and specialty grades—at industrial quantities and low material cost. 3D printing material options have expanded dramatically in the last decade but still lag in mechanical properties, available grades, and cost efficiency.
Key material considerations: High-performance engineering resins like PEEK, PPS, and LCP are now available for industrial 3D printing but at material costs 5–15× higher than the same resins in pellet form for injection molding. Flexible and elastomeric materials (TPU, TPE) print well via FDM and SLA but at inferior surface quality to injection molded equivalents. Transparent parts (PC, PMMA) are achievable in both processes but injection molding produces optically clear parts directly from the mould; SLA-printed transparent parts require extensive polishing to reach equivalent clarity. In our factory, we’ve found that for any application requiring UL 94 V-0 flame rating or FDA food contact certification, injection molded parts from certified resins are the only practical choice—the material certification documentation for 3D printed equivalents is complex and rarely available at the required regulatory standard.
Frequently Asked Questions
What is the typical crossover volume where injection molding becomes cheaper than 3D printing?
For small, simple parts (under 30 g, no side actions), the crossover occurs at 200–800 parts when using aluminum rapid tooling at $3,000–$6,000. For medium, complex parts (50–200 g, 1–2 side actions), the crossover occurs at 500–3,000 parts with tooling at $12,000–$30,000. For large, complex parts (200+ g, multiple side actions), the crossover can reach 5,000–15,000 parts with tooling at $40,000–$100,000. These ranges are illustrative—the actual calculation for your specific part is the only reliable answer.
Can 3D printed moulds be used for injection molding to reduce tooling cost?
Yes—3D printed polymer moulds (typically SLA or DMLS metal prints) are used as bridge tooling for quantities of 50–500 shots before the mould degrades. Polymer 3D printed moulds cost $200–$2,000 and are viable for design validation and early production. Metal DMLS inserts cost $3,000–$15,000 and handle 1,000–10,000 shots. Both approaches reduce the initial tooling investment and lower the crossover point relative to full production steel moulds, making injection molding economical at much lower quantities.
How does surface finish compare between 3D printing and injection molding?
Standard FDM 3D printing produces Ra 5–50 µm surface roughness (visible layer lines). SLA/MSLA produces Ra 0.5–2 µm with proper settings. Injection molding directly from a polished mould achieves Ra 0.1–1.6 µm (SPI B1–C1 equivalent), with optical-quality A-grade finishes reaching Ra ≤ 0.05 µm. For cosmetic consumer products requiring smooth, paint-ready surfaces, injection molding requires no post-processing; FDM requires sanding, priming, and painting at significant labor cost.
Is 3D printing cheaper for producing replacement parts for obsolete products?
Yes—this is one of the strongest use cases for 3D printing over injection molding. If a product is obsolete and only 5–50 replacement parts per year are needed, maintaining or recreating injection moulds is economically indefensible. 3D printing from a digital file (which can be created from a physical scan) makes replacement parts on-demand at low fixed cost. We use this approach internally for factory equipment spares where the OEM no longer stocks the part.
Does lead time differ significantly between 3D printing and injection molding?
Significantly. A 3D printed part can be produced in 4–48 hours after file submission. An injection mould requires 4–8 weeks for standard complexity and 8–16 weeks for high-complexity production tooling. For product launches with compressed timelines, 3D printing for initial validation or bridge production while tooling is manufactured is a standard industry practice. We often overlap tooling lead time with 3D printed bridge production, eliminating the waiting period without compromising production start dates.
Can 3D printing and injection molding be used together in the same production process?
Yes—hybrid approaches are common and often optimal. We routinely use 3D printed parts for design validation (3–5 rounds), then 3D printed or aluminum rapid-tool injection moulded parts for engineering validation (50–500 parts), then transition to production steel moulds for volume production. Using 3D printing to validate design before steel commitment is standard practice in our factory—the cost of 5–10 SLA prototype sets ($500–$2,000) is always less than the cost of modifying a steel mould after first shot ($3,000–$15,000).
Summary

The question “Is 3D printing cheaper than injection molding?” has one honest answer: it depends on quantity, and you need to calculate the specific crossover point for your part. At prototype and validation quantities (1–200 parts), 3D printing almost always wins on total cost. At moderate to high production volumes (500–10,000+ parts), injection molding almost always wins on per-part cost once tooling is amortized. Between those extremes, rapid tooling options—aluminum moulds, 3D printed inserts—offer hybrid approaches that shift the crossover point significantly.
In our factory, we’ve helped hundreds of customers make this decision correctly by running the cost calculation upfront rather than assuming one technology is universally cheaper. The most expensive decision is the wrong technology chosen for the wrong reason—either committing to injection tooling for a program that doesn’t justify it, or printing at high volumes when injection molding at a fraction of the per-part cost was available. Run the numbers first. See our Injection Molding Complete Guide for a comprehensive overview.
-
Rapid tooling refers to mould manufacturing processes that use accelerated methods (aluminum CNC machining, 3D printed inserts, or simplified steel moulds) to produce injection mould tools in 1–3 weeks at significantly lower cost than production steel tooling. Rapid tooling is used for bridge production and design validation, typically rated for 500–50,000 shots depending on material and process. ↩
-
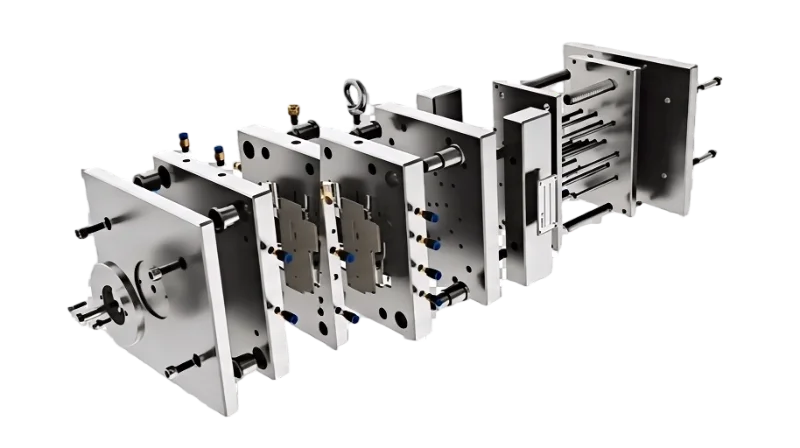
Injection molded parts are produced by injecting molten thermoplastic under high pressure into a closed steel mould cavity, where it cools and solidifies into the exact shape of the cavity. The process produces parts with consistent mechanical properties, tight dimensional tolerances, and high surface quality—distinguishing them from 3D printed parts made by additive layer deposition. ↩
-
FDM (Fused Deposition Modeling), also called FFF (Fused Filament Fabrication), is the most common 3D printing process for thermoplastics. It works by extruding melted filament layer by layer to build up a part. FDM parts are anisotropic due to the layer-based construction—significantly weaker in the Z-direction than in the XY plane—and have visible layer lines requiring post-processing for smooth surfaces. ↩
-
Injection moulding is a manufacturing process for producing parts by injecting molten material into a mould. It is widely compared with additive manufacturing (3D printing) for prototype and production cost analysis. ↩
Need a Quote for Your Injection Molding Project?
Get competitive pricing, DFM feedback, and production timeline from ZetarMold’s engineering team.
Request a Free Quote → See our Injection Molding Complete Guide for a comprehensive overview.


