 Skip to content

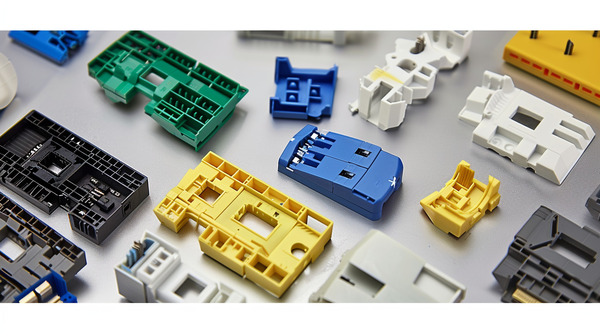
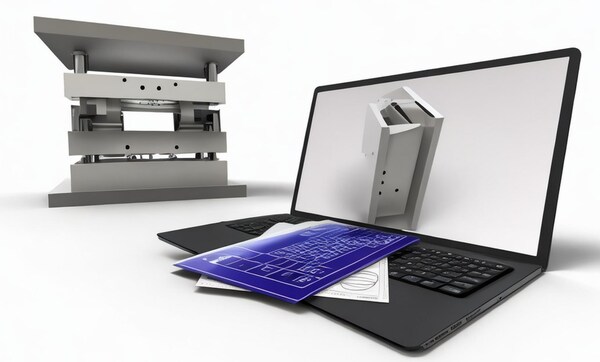
Introduction:When you’re designing injection molded parts, you gotta think about a lot of stuff. All these things can mess up your part and make it look like garbage. You can get shrink marks, sink, warp, and all kinds of other problems. So, you gotta know the rules for designing injection molded parts if you want to make good parts.
This article has the ultimate injection molding design rules that can help you get the best plastic parts. You will also learn detailed information on process control, important guidelines for mold design, and tips on how to avoid common design issues.
The Importance of Injection Molding Design
Injection molding is a way to make plastic stuff. You put melted plastic into a mold and let it cool and harden. The design of the mold and the stuff you’re making can make a big difference in how well it works. Here are some reasons why design is important for injection molding.
Determining the Complexity of Manufacturing
By analyzing the design, product designers and engineers can predict various complex situations that may arise during the manufacturing process. This design provides detailed instructions to reduce uncertainty before the production phase.
In addition, a prior understanding of complexity can clarify the shape and structure of the mold. This will help in designing and manufacturing suitable molds for the required products.
Ensure Manufacturing Feasibility
When you’re designing and producing a plastic part, you don’t know for sure if the part you’ve designed is going to be manufacturable. Injection molding design can determine manufacturability from the beginning.
So, you can find out if you’re going to have manufacturing issues where parts are going to get stuck in the mold. More importantly, it saves you time and money, so you can have reasonable part prices and produce parts in a shorter cycle time.
Prevent Component Failures
If you don’t design your injection molded part correctly, you’ll end up with a crappy part. It won’t work right, it won’t look right, and it’ll be a big pain in the butt. You’ll have to deal with injection molding defects and other mechanical failures that will keep your part from doing what it’s supposed to do.
The injection molding design guidelines will help you pick the right molding parameters and avoid the big mistakes that will keep your part from working.
Design Considerations for Injection Molded Parts
Injection molding is a complex process that needs careful design consideration to make sure it’s done right. If you mess up the design, you’ll have to pay for it later. So, you need to follow the right injection molding design guidelines to avoid screwing up. Here are some things to think about when you’re designing injection molded parts.

Wall Thickness
This is one of the important factors to consider during the design phase of injection molded parts. Wall thickness can affect several key characteristics of the component, including its performance, aesthetics, and cost.
Therefore, the nominal wall thickness should be determined based on functional performance requirements. You should consider the allowable stress and expected lifespan of molded parts to determine the minimum wall thickness.
The general rule is to keep the wall thickness consistent throughout the entire injection molded part. Ideally, you want to keep the uniform wall thickness between 1.2mm and 3mm. Thin walls require high plastic pressure and can cause air pockets. Thick walls will cost you more money because they take longer to cool and use more material.

Whenever you have a part that changes wall thickness, you need to make sure you have a smooth transition between each part. You can do this by adding chamfers on sloping edges or corners. Similarly, using rounded corners for rounded corners or edges will make sure that the melted plastic fills the mold completely and cools evenly.
Classification Line
The parting line is where the two halves of the mold meet to make the final product. If there is any mismatch or misalignment in the design of the parting line, it may cause flash defects in the molded parts.

So, it is important to design a simple and straight parting line to minimize these defects as much as possible. Simple parting lines are easier to make, require less maintenance, and can give a better overall smoothness to the final product.
When you’re designing parting lines, it’s generally best to put them on sharp edges rather than rounded surfaces. This helps to reduce the need for molds with tight tolerances, which increases the cost of production. You also need to think about how the parting line will look on the final product.

The design of the line should make it as invisible as possible and not go across any critical surfaces or features (like text or logos). This helps make sure that the final product looks the way it’s supposed to and improves the overall quality of the injection molding process.
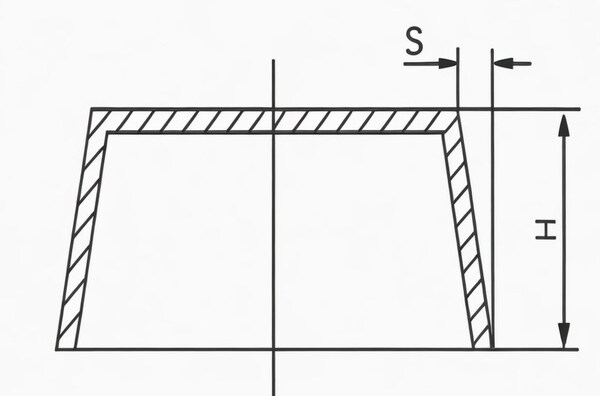
Draft Angle
The demolding angle on the surface of injection molded parts allows for easy removal from the mold without causing damage. The required draft angle depends on factors such as wall thickness, material shrinkage rate, and post processing and finishing requirements.

The average draft angle should increase by 1 degree per inch of depth, but for most parts, at least 1.5 to 2 degrees is usually safe. Heavy texturing may require a maximum of 5 degrees per inch. Not enough draft can cause cosmetic defects like drag marks.
You can add draft angles when designing injection molded parts using CAD systems, but it’s best to do this at the end of the design process to keep things as simple as possible.
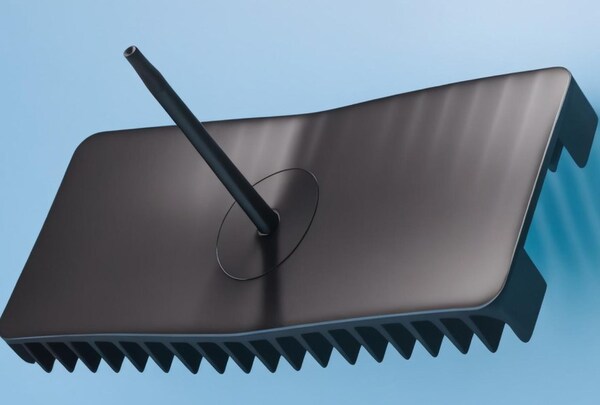
Ribs and Protrusions
Ribs are used to strengthen walls where two walls meet at a 90 degree angle. They help make the part stronger and able to hold more weight. The bumps also help you line up and attach parts. They also make the part stronger in places like screw holes and slots.

The maximum thickness of the bottom of the supporting rib should be 2/3 of the thickness of the adjacent wall. The height of reinforcing bars should not exceed 2.5 times the nominal wall thickness (2.5T). It is important to consider contraction. To avoid shrinkage marks, the thickness of the protrusion should not exceed 60% of the overall wall thickness.
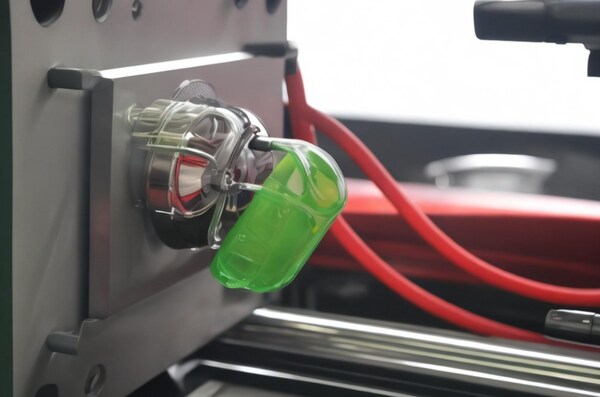
Gate Location and Type
The sprue is a very important part of the injection molding process. It is the part that is directly connected to the plastic part and controls the flow of the molten plastic resin into the mold cavity. The size, shape, and position of the gate have a big impact on the finished product. It will affect how strong the part is and how it looks.

There are four common types of gate designs used for different types of injection molds: edge, submarine, hot tip, and sprue. As the name suggests, the edge gate is located at the edge of a flat part and leaves scars on the parting line.
Submarine gates are very common and have different variants, such as Banana Gate, Smile Gate, and Tunnel Gate. They require automatic trimming with a top pin and help move the gate position away from the parting line for better filling.

Hot tip gates are only used for hot runner injection molds. They are usually located at the top of round or conical shaped molds. On the other hand, the sprue is a good choice for large cylindrical single cavity molds. They usually leave large marks where they touch, but are easy to make and take care of.
The gate design and type will depend on the part design, material selection, size requirements, and aesthetic needs of the final product. One important design consideration is to place the gate away from high-stress or high-impact areas to minimize the risk of defects.

It is also important to eliminate secondary gate removal operations and place gates in the thickest areas for optimal filling. In some cases, multiple gates may be required depending on the size, geometry, and type of plastic polymer of the part.
Top Needle
This is a key part of the injection molding setup, which helps to push the part out of the mold after it has cooled sufficiently. They often leave marks on the parts. Therefore, you need to design them on a plane that is perpendicular to the direction of pin movement.

The shape of the part, draft angle, wall depth, and wall texture will determine the number and position of the pins. These factors will affect how the parts stick to the mold wall. The material you choose will also affect the size and position of these pins.
For example, resins with higher viscosity will require more force to get them out. Similarly, softer plastic polymers will require wider or more pins to help spread the force out and avoid molding defects.

Bottom Cutting and Threading
Undercuts and threads are concave or hanging features that make it difficult for plastic parts to be ejected from the mold by a single pull. The design should ensure that the parts can be ejected by a single unidirectional pull. This will help maintain lower injection molding costs. Therefore, it is very important to avoid threading and undercutting when designing injection molded parts.
To avoid undercuts, you can orient the features parallel to the parting line and incorporate the lifters and slides into the design. Lifters help release internal undercuts without draft. After the parts cool, the lifter can be pushed up at an angle to remove the undercut from the mold. In contrast, the slide uses angled pins connected to the core mold to release external undercuts.
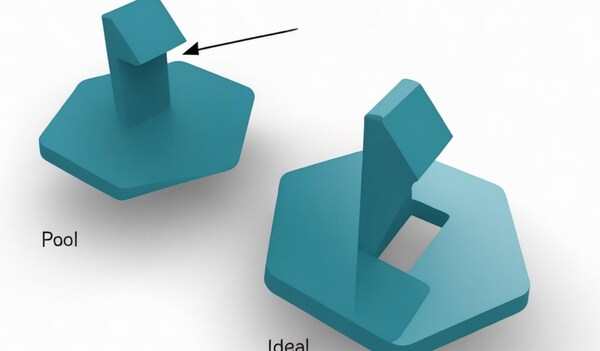
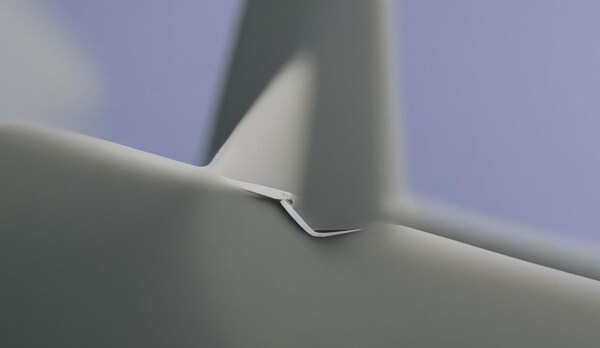
Fillet
To make injection molding better, you want to have rounded features instead of sharp corners and edges. Sharp edges need more pressure to fill, which can damage the part and cause defects when you eject it. Rounded inside and outside corners help the plastic flow better, which reduces stress and cracking.

The inner corner radius should be at least 50% of the adjacent wall thickness. On the other hand, the outer corner should be 150% of the adjacent wall thickness. For vertical features such as protrusions and snap fit, the base should be circular. The radius of the protrusion should be 25% of the adjacent wall, with a minimum radius of 0.381 mm (0.015 in).
Surface Treatment
Plastic parts can have different surface treatments that affect how they look, feel, and touch. Picking the right finish is important because it determines what tools and materials you need. Rough finishes need more draft and affect what material you can use.

You might still need to do something to the mold surface to get it smooth. Any little flaws on the mold surface will show up on the parts. The more you have to do after the parts come out of the mold, the more it costs and the longer it takes to make the mold.
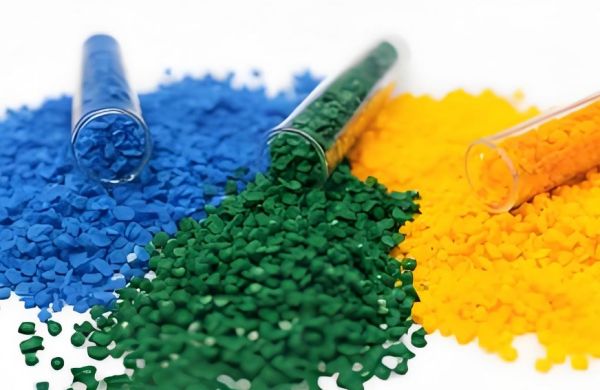
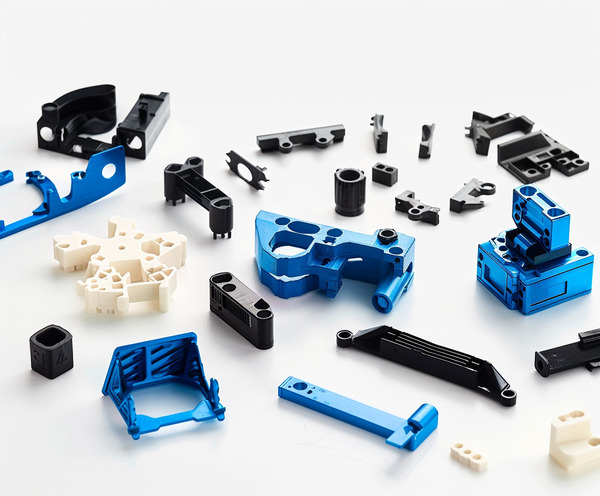
Material Selection
When it comes to injection molding, you’ve got a bunch of different plastic resins to choose from. Each one has its own unique physical and mechanical properties. The material you pick is going to affect how well your parts work in the real world.

When you’re choosing a material for injection molding, you need to think about how much the material is going to shrink, how you’re going to put the parts together, and how much the material is going to cost.
The shrinkage rate of materials varies depending on the type of plastic and processing conditions, which can affect the performance and geometric shape of the parts. You should also consider the ability to handle material handling and assembly processes, such as mechanical fastening and welding.
Although the ideal properties of plastic materials are crucial, you must also consider the costs of purchasing, processing, and finishing plastics to minimize production costs.
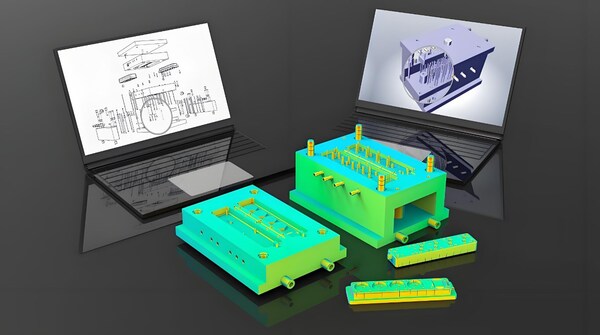
Guidelines for Plastic Injection Molds Design
Designing and making injection plastic mold design is a big deal in the plastic parts manufacturing world. Mold tools help define the shape of plastic parts. So, all mold components must be in the right condition for smooth injection molding .

For example, As you can see, when you are planning to die casting molds , you understand that the important point is that die casting mold design is very important, and it has the ability to improve the design of the instrument, but it also has the ability to avoid problems and present the highest quality quality.
Here are some things to think about when designing injection mold making process.
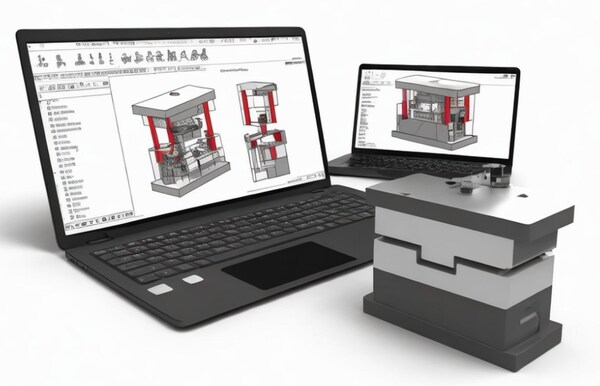
Mold Frame and Cavity Layout
Mold tools are made up of mold bases, cavities, core inserts, and other parts. The mold base is the foundation of the mold, while the cavity and core inserts shape the part. The design of mold components affects the accuracy and consistency of the molding process.
The mold has to be strong, tough, easy to take care of, and easy to take apart and put back together to fix and take care of. The mold tools have to be made very carefully so that the cavity and core line up right. The cavity layout of the mold frame also has to let you get to the hollow and core inserts to fix and take care of them. This makes it less likely that you’ll have problems and makes the parts better.
Cooling System Design
The cooling system is a big deal in injection mold design. It controls the temperature of the mold cavity and plastic material. Cooling is important because it helps solidify the plastic and control shrinkage.
The cooling system is a big deal in injection mold design. It controls the temperature of the mold cavity and plastic material. Cooling is important because it helps solidify the plastic and control shrinkage.
The cooling system should cool the entire mold cavity uniformly. The cooling channels should be close to areas with longer cooling times so they don’t interfere with the gating and runner systems. Mechanical engineers should also optimize the design to achieve the shortest possible cycle time.
Flow Channel and Door Design
The runner and sprue system is a big deal in injection mold design. It controls the flow of molten plastic into the mold cavity. The sprue is the entrance for plastic into the mold cavity, and the runner system guides the plastic to the sprue. The design of gate and runner systems affects the efficiency of the molding process and the quality of the finished product.

The gate is important. It should be the right size, in the right place, and have the right shape. It should help the plastic flow into the mold and not cause any problems. The runner system is important too. It should help the plastic flow into the mold and not cause any problems.
Launch System Design
The ejector system is what gets the parts out of the mold. When designing the ejector system, you need to think about the shape of the parts, how many bottom cuts you have, and how stiff the parts are. You can use ejector pins, sleeves, or hydraulic ejection systems to make sure you don’t damage the parts when you eject them.

You also need to make sure the ejector system is strong enough to push the parts out of the mold. You also need to think about where the injection system is in relation to the sprue and runner system so you don’t have any interference.
Mold Materials and Surface Treatment
The materials you use in your mold will affect how long it lasts and how good your parts look. You want materials that can take the heat, conduct heat well, and don’t wear out. Picking the right materials can help you make parts faster, make your molds last longer, and make better parts.

Every mold is different and needs to be thought about carefully during processing. The materials used need to be machined precisely to avoid surface defects that could transfer to the molded parts.
It’s really important to get rid of the visible marks left by the end mills on the mold surface through additional precision machining, like sandblasting or polishing. The degree of precision machining required will affect the cost and time of the mold processing process.

Quality Control of Injection Molding Process
Injection molding is a high-precision and efficient method for manufacturing plastic parts. To ensure high-quality plastic products, strict process control must be implemented throughout the entire manufacturing process. Before we get into the critical steps of implementing injection molding process control, let’s briefly outline the injection molding process.
Overview of Injection Molding Process
Injection molding is the process of melting plastic polymers and then solidifying them under pressure in a mold to give the component shape. This continuous cycle includes many steps. After heating the plastic resin, the gate will open when appropriate pressure is applied to the mold. Then inject the melted plastic into the mold.
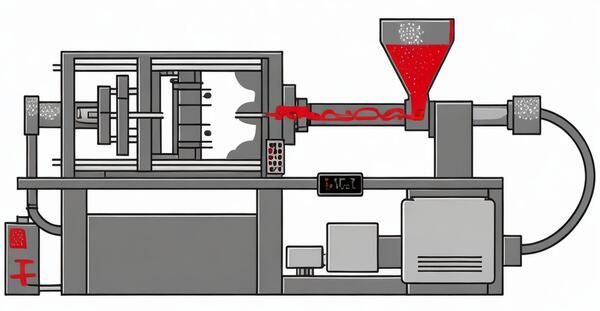
Once the molten resin reaches the end of the barrel, the door will close. Then the two parts of the mold are closed simultaneously and held together by the clamping pressure. After the pressure holding stage, the screw retracts and the parts cool in the mold. After the parts cool down, the mold opens and the ejector pin or top plate pushes the parts out. The completed parts are then ready for precision machining.
Considering this, let’s examine various aspects of injection molding process control:
Machine Selection and Settings
Picking the right injection molding machine and setting it up right will help you control the process and make good parts every time.

Consider the Following Factors
Locking force: When you’re doing injection molding, you need to make sure the machine has enough locking force to hold the mold together.
Injection unit size: The injection unit needs to be big enough to give you enough plastic to fill the mold without overfilling or underfilling it.
Screw type and size: The screw needs to give you good melt quality and flow rate. The screw diameter also needs to give you the right amount of plastic and melt density.

Temperature deviation: The machine should have a good temperature control system to keep the temperature the same all over the mold.
Material handling: The machine should also have a good material handling system that can move materials from the storage area without making them dirty.Overall, there should be room to keep track of important process things like temperature, pressure, and how long it takes. Mechanical engineers should be able to see if anything changes and fix it right away so the finished thing doesn’t have any problems.

Process Parameters and Optimization
When it comes to controlling the injection molding process, you need to keep an eye on a bunch of different things to make sure you get the best results. Here are some of the most important things to watch out for:
Injection pressure and speed: These two things control how fast the melted plastic gets into the mold. You want the pressure to be high enough to fill the mold completely, but not so high that it causes flashing or warping. You also want to make sure the plastic gets into the mold as fast as possible without getting messed up.

Injection temperature: The temperature of the injection affects the flow and viscosity of the plastic. The plastic should be heated to its melting point and kept at a steady temperature throughout the injection process. Mechanics can use thermocouples to monitor and control temperature at different points in the mold cavity.
Pressure holding and time: The pressure holding should be able to prevent the material from flowing back into the injection device. The insulation time should allow the plastic material to completely cool and solidify. The time will depend on the wall thickness and complexity of the parts.
Cooling time: The selection of cooling time should be based on the thermal properties of the material and the wall thickness of the component. Thermocouples can also help monitor cooling time. Mechanical engineers can adjust the time by changing the layout of the cooling channel or increasing its size.
Launch: The ejection system should make sure that parts and molds don’t get damaged by ejecting smoothly and consistently. The force of the push should also depend on how big and complicated the parts are.

Quality Control and Inspection
Quality control and inspection are important to make sure that molded parts are good. There are different things we do, like checking if the process is good, looking at the parts to see if they look good, and testing the parts to see if they work good. We do these things to find out what is making the parts not good and to help make the process better.

Good quality control is important to make sure that molded parts are free from defects and surface problems, and meet the right tolerances and functional requirements. You need to do regular quality control and inspection to make sure that parts meet the right quality, safety, and performance standards.
Common Plastic Injection Molding Design Issues and Solutions
Injection molding defects can happen when making parts, and they can directly affect the functionality of the product. These defects can be caused by a bunch of different things, including the molding parameters and the material you’re using.

But you can avoid design defects by adjusting the molding process. Sometimes, you might have to redesign the mold or get new production equipment to fix the problem.
Let’s look at some common injection molding design problems and how to fix them.
Shrinkage and warping
Shrinkage marks are a type of injection molding defect that appear as small depressions on the surface of the molded part. They are typically caused by the shrinkage of internal features of the molded part, which causes material to sink from the outside inward.
Warping is an undesired bending and twisting of injection molded parts due to uneven internal shrinkage during the cooling process. This creates uneven pressure across different areas of the molded part. This stress causes the part to bend and twist as it cools. You can see this in parts that are supposed to be flat but have gaps when placed on a flat surface.
Reason
Super high melt or mold temperature; Super low holding or injection pressure; Defects in mold structure design; Not enough insulation or cooling time and pressure.

Solution
Make sure you cool it down slowly and for a long time so it doesn’t get all stressed out inside; Make sure the walls are all the same thickness so the plastic can flow through the mold in one direction; Hold it down and cool it off so the outside of the part gets cold; Make the mold or the plastic colder.
Flying Edge and Component Adhesion
When you see thin lines of extra material at the edges of your part, that’s called flashing. It happens when some of the material goes where it’s not supposed to. Flashing is a small problem, but if it keeps your part from working right, it’s a big problem.

When your part sticks to the mold and you can’t get it out, that’s called part adhesion.
Reason
Bad exhaust system design and control; Not enough clamping force; Bad mold design and mold conditions going bad; Too much injection pressure or mold too hot; Not enough release agent; Not enough time to cool.

Solution
Make sure the exhaust passage is right; Clamp the board down hard so there are no gaps; Redo the mold so the molten stuff flows smooth and there’s enough air; Put the mold on right with the right stuff so it comes off; Get the injection pressure, mold temperature, and cooling time right for the stuff you’re using.
Short Shot and Burn Marks
When the molten stuff can’t fill the whole mold, you get a short shot. That means the part isn’t complete when it cools and you take it out of the mold. Short shots are bad because they can mess up how the part looks and how it works.
Burn marks are black rust stains on the surface or edges of the part. They usually don’t hurt the part, but they can be a big problem if they burn through the part and make it not work as well.
Reason
Not enough pressure; Air gets stuck and stops the plastic from flowing; Use materials that are really thick; The gate and runner systems are designed wrong; The temperature is too high .

Solution
Open up more vents or add more vents to make sure you have better venting; Use enough mold temperature to avoid cooling the material too fast and unevenly; Slow down the injection speed to reduce the chance of trapping air; Increase the injection speed and pressure or use thinner parts to make the material flow better.
Airholes and Gaps
Air pockets are one of the most serious problems in injection molding. They look like trapped air or bubbles in molded parts. These trapped bubbles can cause structural and cosmetic problems. If the initial air in the mold gets hot and compressed enough, it will explode and damage the molded parts and mold.

Vacuum voids are bubbles in injection molded parts. Manufacturers sometimes call these problems air pockets. Although quality control people say voids are minor problems, more voids can weaken molded parts.
Reason
Mold has bad ventilation; Mold cavity is not filled evenly; Air gets trapped and compressed, then ignites; Molding pressure is not enough; Material has big density changes, so it’s easy to have voids .

Solution
Bump up the mold temperature; Rework or tweak the runner system and gate positioning; Use materials with lower viscosity to avoid bubble formation; Keep the cycle time down to avoid squishing and igniting trapped air; Crank up the injection pressure and get rid of trapped air in the mold cavity.
Mismatch and Deviation of Parting Lines
Mismatched parting lines are a problem when the two halves of the mold don’t line up right. It can make seams or gaps show up on the parting line of the molded part. When molded parts bend or warp out of shape while they’re cooling, it’s called deflection. Both of these problems can make parts not meet the specs they’re supposed to, which means more parts get thrown away and less stuff gets made.

Reason
Clamping force not even; Mold parts change size; Injection pressure and temperature too high; Mold expands when hot; Not enough time for mold to cool
Solution
Make sure the mold is clamped and aligned correctly; Keep the mold at a consistent temperature throughout the whole molding process; Optimize the injection molding settings for the materials you’re using; Heat-treating after molding can help reduce stress.

Conclusion
Injection molding technique is a versatile and efficient technology that can produce high-quality custom plastic parts for a variety of industries. However, without following a set of injection molding design guidelines, the process is incomplete. This article will give you a comprehensive understanding of what you need and how to complete the process.
The injection molding design rules discussed in this article will help you optimize the process, ensure cost-effective production, and reduce cycle time. The cost of design mistakes is high. Contact Zetar Mold now to learn about your injection molding design. We are always ready to help you achieve better results.


