

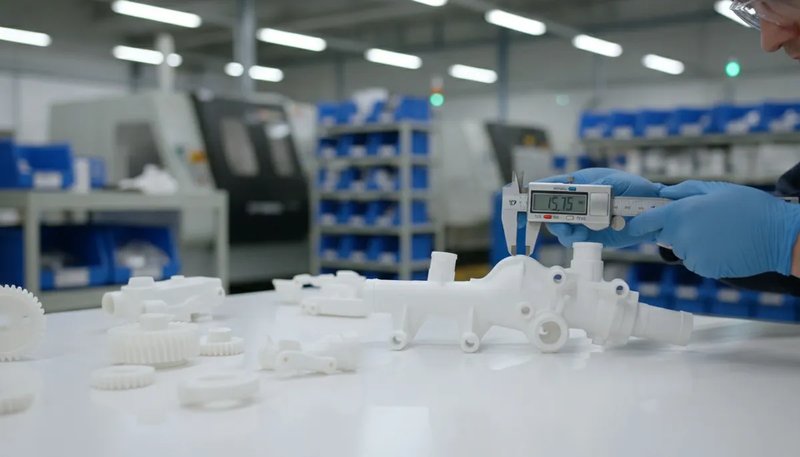
You need 500 parts for a product launch. Not 500,000 — just 500. Injection molding looks like overkill, but 3D printing each piece takes too long and the surface finish is nowhere near production quality. This is the gap most engineers fall into, and the wrong choice here costs real money and time.
This article breaks down five production options for low-volume plastic parts, from aluminum molds to 3D-printed tooling. By the end, you should know exactly which method fits your quantity, budget, and quality requirements — and which ones to avoid.
- Aluminum molds offer the best balance of cost, speed, and part quality for 500–10,000 piece runs.
- 3D-printed molds are limited to under 100 parts in soft materials only.
- Reaction injection molding works for large polyurethane parts in low quantities.
- Production steel molds rarely make economic sense below 10,000 units.
- Material selection often determines which low-volume method is viable.
What Is Low Volume Injection Molding?
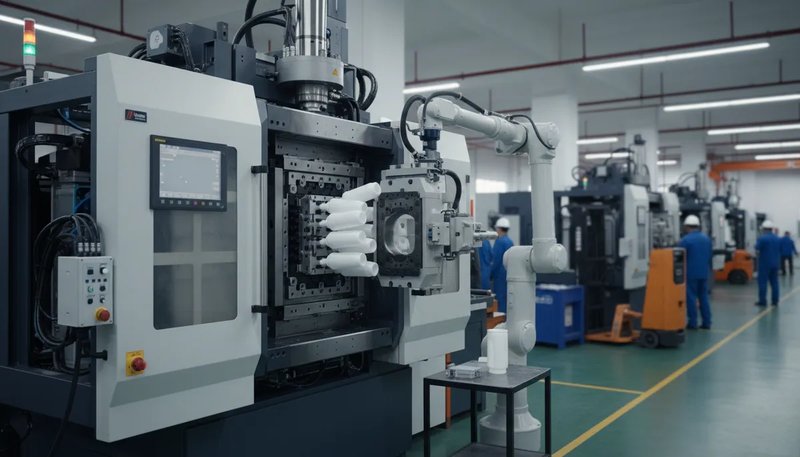
1 is standard injection molding applied to small production runs — typically 100 to 10,000 parts. The process itself does not change: plastic pellets melt, inject into a mold cavity, cool, and eject. What changes is the tooling strategy.
The core tension is simple. A production steel mold costs $10,000–$50,000+ and lasts 500,000+ cycles. If you only need 2,000 parts, you are paying for 248,000 cycles you will never use. Low-volume options solve this by using cheaper tooling materials, simplified mold designs, or alternative processes entirely.
In our experience, about 30% of projects that come through our shop start as low-volume runs. Some stay low-volume permanently (medical devices, aerospace components). Others use low-volume tooling as a bridge to validate the design before committing to production steel. Both paths are valid, but the economics work differently.
The key distinction is between process and tooling. The 射出成形プロセス stays the same regardless of volume. What changes is how you build the mold and how long you expect it to last. Understanding this separation helps you make better cost decisions.
What Are the Five Main Options for Low Volume Production?
Here are the five methods we see used most often, ranked roughly from most to least common in real projects:
| Method | Quantity Range | 金型費用 | リードタイム | Part Quality |
|---|---|---|---|---|
| 2 | 500–10,000+ | $1,500–$8,000 | 2–4 weeks | Production-grade |
| Steel Mold (Simplified) | 1,000–50,000+ | $5,000–$20,000 | 4–8 weeks | Production-grade |
| 3D-Printed Mold | 10–100 | $100–$500 | 1–3 days | Limited (soft materials) |
| 2 | 50–1,000 | $2,000–$6,000 | セットアップ時間:4時間 | Good (PU parts only) |
| Silicone Molding (Cast Urethane) | 10–500 | $500–$2,000 | 1–2 weeks | Good for prototypes |
Each method has a sweet spot. Choosing wrong usually means one of two things: you overspend on tooling, or your parts do not meet spec. Let me walk through each one with the trade-offs that actually matter.
One important note before we dive in: these methods are not interchangeable. Each one has hard constraints around material compatibility, part geometry, and production speed. The right answer depends entirely on what you are making and how many you need. A method that works perfectly for 200 polypropylene brackets will fail completely for 200 glass-filled nylon housings.
With 45 machines on our floor, we have run all five of these methods at some point. The experiences below come from actual production data, not theory. Let me be honest about where each one excels and where each one falls apart.
When Should You Use Aluminum Molds?
Aluminum molds are the default answer for low-volume injection molding. They cost 30–50% less than steel molds, machine 2–3 times faster, and produce parts that are identical to what a steel mold would make. The material flows the same way, cools the same way, and ejects the same way.
The trade-off is tool life. Aluminum molds typically handle 1,000 to 10,000 cycles before showing wear. For glass-filled or abrasive materials (nylon with 30% GF, PPS), expect the lower end of that range. For unfilled PP, PE, or ABS, you can push toward 10,000 or even higher.
There is a common misconception that aluminum molds produce inferior parts. This is false. The part quality is determined by the mold design, not the mold material. A well-designed aluminum mold with proper draft, radii, and cooling will produce parts with tolerances of ±0.005 inches — same as steel. We run aluminum molds regularly in our shop for pilot runs, and the parts pass the same inspection criteria as production parts.
Where aluminum falls short is with aggressive side actions, complex lifters, or multi-cavity layouts where differential wear between cavities becomes an issue. If your part has 4 side cores and needs 16 cavities, aluminum is the wrong choice regardless of volume.
Another advantage: aluminum dissipates heat faster than steel. This means cycle times are often 15–25% shorter with aluminum tooling, which directly reduces per-part cost on longer runs. For a part with a 30-second cycle in steel, you might see 23–25 seconds in aluminum. Over a 5,000-part run, that adds up to significant savings in machine time and energy.
The bottom line: if your part is relatively simple (no more than 2 side actions), your material is unfilled or lightly filled, and your volume is under 10,000, aluminum is almost always the best starting point. You can always upgrade to steel later if demand takes off.
ZetarMold Factory Data: With 45 injection molding machines (90T–1850T tonnage range), we regularly run aluminum tooling for pilot runs of 500–5,000 parts. Our in-house mold shop can deliver an aluminum mold in 10–15 business days. 8 senior engineers (10+ years experience each) review every mold design before cutting begins.
When Does a Steel Mold Make Sense for Low Volume?
Sometimes steel is the right answer even for low volume. This happens when the part geometry is complex enough that an aluminum mold would fail quickly, or when you plan to transition to high-volume production and want to avoid retooling.
A steel mold makes economic sense for low volume when:
1. The part requires multiple side actions, lifters, or unscrewing cores that would wear aluminum rapidly.
2. The material is highly abrasive (glass-filled nylon, PPS, PEEK) and would destroy an aluminum cavity in a few hundred shots.
3. You are running a bridge-to-production strategy: validate the part now with a few thousand units, then scale without retooling.
4. Tolerance requirements are extremely tight (±0.001 inches) and you need the dimensional stability that steel provides over many thermal cycles.
The risk of using steel for low volume is sunk cost. If the design changes after the first run — and it often does — you have a very expensive paperweight. Our recommendation: if there is any chance of design iteration, start with aluminum. If the design is frozen and signed off by the customer, steel is a defensible choice.
A simplified steel mold — single cavity, cold runner, no hot runner system — can cost as little as $5,000 to $8,000 for simple geometries. That is not far off from a complex aluminum mold. The key is to avoid over-specifying. Do not add features you do not need for the first run.
“Aluminum molds can produce parts with the same dimensional tolerances as steel molds.”真
Tolerance is determined by mold design precision, not mold material. A well-machined aluminum mold delivers ±0.005 inch tolerances. Steel only becomes necessary for extreme precision (±0.001) or very high cycle counts.
“You should always start with a steel mold if you eventually plan to produce 100,000+ parts.”偽
Starting with steel before design validation is a common trap. If the part design changes (and 60–70% of designs do change after first articles), you lose the entire steel mold investment. A smarter path: validate with aluminum, then cut steel on a confirmed design.
How Does 3D-Printed Tooling Compare?
3D-printed molds (also called printed tooling or soft tooling) use SLA or DLP-printed resin as the mold cavity. They are fast — you can go from CAD to molded parts in 24–48 hours — but the limitations are severe.
The resin cavity deforms under injection pressure and heat. Most printed molds survive 10 to 50 shots before dimensional accuracy drops. They work with low-melt-temperature materials (PP, PE, flexible TPE) at low injection pressures. Try running polycarbonate or glass-filled nylon through a printed mold and you will get one good part, maybe.
We see 3D-printed tooling used correctly in two scenarios:
1. Early-stage prototyping where you need the actual injection molding process (not FDM layer lines) but only need 5–20 parts for fit checks.
2. Emergency bridge production where you need 30 parts next week and no other option can deliver that fast.
For anything beyond 100 parts or any engineering-grade material, skip printed tooling entirely. It will cost you more in failed attempts than an aluminum mold would have cost upfront. The per-part economics look attractive on paper ($2–$5 in material for a $200 mold), but the reality of failed shots, warped cavities, and inconsistent dimensions makes it a false economy for anything beyond prototyping.
If you are deciding between 3D printing and injection molding for your project, the key question is whether you need production-representative parts. If yes, go straight to aluminum tooling and skip the printed mold entirely.
What Is Reaction Injection Molding for Low Volume?
Reaction injection molding (RIM) is a different process from thermoplastic injection molding. Two liquid polyurethane components mix at the injection head and chemically cure inside a relatively low-cost mold. The tooling is cheaper because the injection pressures are much lower (no need for hardened steel cavities).
RIM works well for large parts — automotive panels, enclosures, medical device housings — in quantities of 50 to 1,000. The molds are often epoxy or composite, which keeps tooling cost between $2,000 and $6,000.
The catch: you can only make polyurethane parts. If your design calls for ABS, PC, nylon, or any thermoplastic, RIM will not work. You also get lower mechanical properties and poorer surface finish compared to thermoplastic molding.
RIM parts tend to have lower heat resistance (typically maxing out around 80–100°C continuous use) and lower stiffness compared to glass-filled thermoplastics. For structural applications, polyurethane simply cannot compete with materials like glass-filled nylon or POM.
Our take: RIM is a niche solution. If your part is polyurethane and large, it is worth exploring. For most engineers reading this who need functional plastic parts in engineering thermoplastics, standard injection molding with aluminum tooling remains the better path.
How Do You Choose Between These Options?
The decision comes down to three variables: quantity, material, and timeline. Here is a practical framework:
| If you need… | 素材 | タイムライン | Best option |
|---|---|---|---|
| 10–50 parts | PP, PE, TPE | 1–3 days | 3D-printed mold |
| 50–500 parts | Any thermoplastic | 1–2 weeks | Cast urethane / RIM |
| 500–5,000 parts | ABS, PP, PE, PA | 2–4 weeks | Aluminum mold |
| 1,000–10,000 parts | GF nylon, PC, POM | 4–8 weeks | Simplified steel mold |
| 5,000+ parts (bridge) | Any thermoplastic | 6–10 weeks | Production steel mold |
One thing engineers often overlook: material selection constrains your tooling options more than quantity does. If your part needs glass-filled nylon 6/6, you cannot use a 3D-printed mold or cast urethane. You need metal tooling. The question then becomes aluminum or steel, and the quantity decides that.
Another factor is part complexity. A simple bracket with no undercuts can run in an aluminum mold for 10,000+ shots. A housing with snap fits, living hinges, and three side actions might need steel at any volume because the geometry destroys aluminum too quickly.
について 少量射出成形 projects, we usually recommend starting with an aluminum mold unless there is a specific reason not to. It gives you production-representative parts, fast iteration, and a clear upgrade path to steel when volumes justify it.
ZetarMold Factory Data: Our factory in Shanghai runs 45 injection molding machines (90T–1850T) with 400+ material options. We produce 100+ sets of molds per month and regularly handle low-volume bridge production. 30+ English-speaking project managers ensure smooth communication for international orders.
“Material selection often determines which low-volume production method is viable, sometimes more than part quantity.”真
Glass-filled nylon requires metal tooling regardless of quantity. Polycarbonate needs high injection pressure that printed molds cannot handle. Soft materials like PP can run in almost any tool type. Always confirm material compatibility before choosing a method.
“Cast urethane parts are identical in performance to injection molded parts.”偽
Cast urethane parts have lower mechanical strength, poorer dimensional consistency, and different surface finish compared to injection molded parts. They are excellent for appearance prototypes and fit checks but not for functional testing under load.
What Are the Common Mistakes in Low Volume Tooling?
After running thousands of low-volume projects, these are the mistakes we see most often:
1. Over-specifying the mold. Adding every feature to a low-volume mold — hot runners, multiple cavities, complex ejection — drives tooling cost into production-mold territory. For 2,000 parts, a single-cavity cold runner aluminum mold is almost always the right call. You do not need a hot runner system for a single cavity mold running 500 parts. The cost premium does not pay back.
2. Skipping DFM review. Low volume does not mean low risk. A part designed without draft, with uniform wall thickness violations, or with unnecessary undercuts will fail in any mold. A 30-minute DFM review before tooling saves thousands in modifications later. We have seen projects where a 2-degree draft angle oversight cost $3,000 in mold rework — on a mold that only cost $4,000 to begin with.
3. Choosing based on per-part price alone. A 3D-printed mold at $200 sounds cheap until you factor in failed shots, inconsistent parts, and the fact that you still need a real mold for production. Total cost of ownership matters more than unit cost. The cheapest per-part price means nothing if 30% of your parts fail QC.
Always calculate total landed cost: tooling amortized across the full run, plus per-part material and processing cost, plus inspection, plus shipping. When you look at the full picture, the cheapest option is rarely the one with the lowest upfront tooling price.
4. Not planning for design changes. Most first-run parts need tweaks. If your mold has no margin for modification (steel inserts are already hardened, no spare cores), a small design change means a new mold. Always build in modification margin for low-volume tools. Ask your mold maker to use standard insert sizes and leave room for steel-safe changes.
5. Ignoring surface finish requirements. If the part is visible to the end user, surface finish matters. Aluminum molds can achieve SPI A-2 to B-2 finish with proper polishing. But if you need SPI A-1 (mirror finish) on a cosmetic surface, you need steel. Match the mold material to the finish requirement before committing to tooling.
Also consider the texture. If you are specifying a Mold-Tech texture (MT11010, MT11020, etc.), the texture depth determines the minimum mold material hardness needed. Deep textures on soft aluminum can wear flat after a few thousand cycles, losing the texture definition. Steel holds texture much longer.
How Does Quality Control Work for Low Volume Runs?
Low volume does not mean low quality. The same inspection criteria apply whether you are making 500 parts or 500,000. The difference is in how you set up the quality process.
For low-volume runs, we recommend a first-article inspection (FAI) on the first 3–5 parts, checking critical dimensions against the drawing. If those pass, switch to statistical sampling — inspect every 50th part or 5% of the run, whichever is greater. This keeps inspection cost proportional to production cost.
For medical or aerospace parts, the standard is 100% inspection regardless of volume. There is no shortcut here. But for consumer and industrial parts, the statistical approach works well and keeps per-part costs reasonable.
One advantage of low-volume runs: you get tighter process control because the machine is set up for a single job rather than cycling between different parts. Tool wear is minimal, material consistency is high, and the operator can monitor every shot. This often results in better average quality than high-volume runs where setup drifts over time.
Document everything. Even for a 500-part run, keep the FAI report, material certificates, and process parameters on file. If the customer comes back 6 months later wanting another batch, you want to reproduce the exact same quality. Good records turn a one-off job into a repeatable process.
This is especially important for low-volume medical and automotive parts, where traceability is a regulatory requirement. Your QC records need to show not just that the parts passed, but exactly what machine settings produced them, what material lot was used, and who inspected each batch.
For international orders, QC documentation also smooths customs clearance significantly. A detailed inspection report with photos and dimensional data reduces the chance of delays at the border, particularly for parts going into regulated industries like medical devices, automotive, and aerospace.
ZetarMold Factory Data: Our 6-step quality control process (IQC → In-Process Sampling → Process Inspection → Packaging Inspection → FQC → OQC) applies to every run, including low volume. 10+ QC specialists and 8 senior engineers ensure parts meet spec from first shot to last. ISO 9001, 13485, 14001, and 45001 certified.
When Should You Move from Low Volume to Production Tooling?
The transition point depends on three things: demand certainty, design stability, and per-part cost targets.
Move to production steel tooling when:
1. Annual demand exceeds 10,000 parts and is growing.
2. The design has been validated through at least one low-volume run with no major changes needed.
3. The per-part cost with aluminum tooling amortization is higher than what a multi-cavity steel mold would deliver.
4. You need multi-cavity production (2, 4, 8+ cavities) to hit delivery timelines.
The math is straightforward. An aluminum mold at $5,000 for 5,000 parts adds $1.00 per part in tooling amortization. A 4-cavity steel mold at $25,000 for 200,000 parts adds $0.125 per part. The crossover point is usually around 15,000–20,000 total parts for simple geometries.
Do not rush this decision. We have seen companies jump to production tooling too early, only to discover a design issue at 50,000 units that required a $15,000 mold modification. Validate first, scale second. For 射出成形金型設計 guidance, our engineering team is available for consultation.
A practical rule of thumb: if you have placed two or more reorders of the same part without design changes, it is time to evaluate production tooling. The design is validated, demand is proven, and the economics favor steel at that point. Until then, stay lean with aluminum.
“Running a low-volume validation batch before committing to production tooling reduces the risk of costly mold modifications.”真
Data from our shop shows that 60–70% of part designs change after the first production run. Catching these changes during low-volume validation with an aluminum mold costs $1,000–3,000 in tooling. Discovering the same issues after a production steel mold is cut costs $10,000–25,000 in modifications.
よくあるご質問
What is the minimum order quantity for injection molding?
There is no technical minimum — you can mold a single part. The practical minimum is driven by tooling cost. For an aluminum mold at $3,000, ordering 100 parts means $30 per part in tooling alone. At 1,000 parts, it drops to $3. Most shops recommend a minimum of 300–500 parts for injection molding to be cost-effective, but it depends on the part value, complexity, and material. High-value aerospace or medical parts justify smaller runs because the part price is high enough to absorb tooling amortization.
How long does a low-volume aluminum mold last?
Aluminum molds typically last 1,000 to 10,000 cycles depending on the material being molded and the part geometry. Unfilled resins like PP and PE push toward the upper end. Glass-filled or abrasive materials like GF nylon or PPS can cause visible wear after 500–1,000 shots. Proper mold maintenance, adequate cooling between cycles, and avoiding excessive injection pressures extend tool life significantly. We have seen well-maintained aluminum molds exceed 15,000 shots on simple geometries with unfilled polypropylene. The key factor is how abrasive the material is and how aggressively the part ejects from the cavity.
Can low-volume injection molded parts be used for final production?
Yes. Parts from aluminum molds are functionally identical to parts from steel molds when the mold is properly designed. The material properties, tolerances, and surface finish are the same because the plastic does not know what material the cavity is made from. The only difference is tool longevity. If your total lifetime volume stays under 10,000 parts, an aluminum mold can serve as your production tool without any compromise in part quality or consistency. Many medical device and aerospace programs run entirely on aluminum tooling for small-volume production parts.
How much does low-volume injection molding cost?
Tooling for low-volume injection molding typically costs $1,500 to $8,000 for aluminum molds and $5,000 to $20,000 for simplified steel molds. Per-part pricing depends on material, cycle time, and part size, usually ranging from $0.50 to $15 per part. For an accurate estimate, you need to specify the material, part geometry, required tolerances, and total quantity. Request quotes from multiple suppliers and compare total cost including tooling, parts, and shipping. The biggest cost driver is usually mold complexity, not material price.
What materials work best for low-volume injection molding?
Unfilled commodity resins (PP, PE, ABS) and unfilled engineering resins (PA6, PC, POM) work best for low-volume injection molding because they cause minimal mold wear. Glass-filled materials are possible but reduce aluminum mold life significantly. Avoid high-temperature specialty resins (PEEK, PPSU) in aluminum molds unless the run is very short, as thermal cycling degrades the mold faster. For abrasive materials, consider a simplified steel mold instead of aluminum. The material choice also affects cycle time, which directly impacts per-part cost for low-volume runs.
What is the lead time for low-volume injection molding?
Aluminum mold fabrication takes 2–4 weeks. First article inspection adds 2–5 days. Production of 500–5,000 parts typically takes 1–2 weeks after FAI approval. Total lead time from order to parts at your door is usually 4–7 weeks for aluminum tooling. 3D-printed molds can cut this to under a week but with significant quality limitations. For rush orders, some shops (including ours) can deliver aluminum molds in 10–12 business days. Plan for shipping time if sourcing internationally — sea freight adds 2–3 weeks, air freight adds 3–5 days.
Need Help with Your Low Volume Project?
Choosing the right low-volume production method is not always straightforward. The best option depends on your material, geometry, quantity, and timeline — and getting it wrong is expensive. If you are evaluating options for a low-volume injection molding project, we can help you figure out whether aluminum tooling, steel tooling, or something else makes the most sense for your specific part.
Our engineering team in Shanghai reviews every project before quoting. We will tell you honestly whether your part is a good fit for low-volume production, what tooling approach we recommend, and what the realistic timeline looks like. Send us your 3D model and requirements — we typically respond within 24 hours with a preliminary assessment.
参考文献
- Injection Molding Complete Guide — ZetarMold
- Injection Mold Complete Guide — ZetarMold
- Low Volume Injection Molding — ZetarMold
- 射出成形と3Dプリンティング — ZetarMold
- DFM for Injection Molded Parts — ZetarMold
-
low-volume injection molding: Low-volume injection molding refers to production runs of 100 to 10,000 parts using standard injection molding tooling, typically for bridge production, market testing, or niche applications. ↩
-
bridge tooling: Bridge tooling is an intermediate mold solution, usually aluminum, used to produce parts while the final production steel mold is being fabricated. ↩
-
aluminum mold: An aluminum mold is a tooling option made from aluminum alloy (typically 7075 or QC-10), offering faster machining and lower cost than steel but with a shorter tool life of 1,000 to 10,000 cycles. ↩
-
rapid tooling: Rapid tooling refers to accelerated mold fabrication methods, including CNC aluminum molds and soft tooling, designed to deliver production-representative parts in 1 to 3 weeks. ↩
-
reaction injection molding: Reaction injection molding (RIM) is a process where two liquid components are mixed and injected into a mold, where they chemically react and cure into a solid polyurethane part. ↩
-
insert molding: Insert molding is a process where a pre-formed component (metal, plastic, or electronic) is placed into the mold cavity before injection, creating a single integrated part. ↩


