 Skip to content

You just got a quote back from a molder — $45,000 for a single-cavity mold and $1.85 per part. Your boss wants to know if that is reasonable by tomorrow morning. You need a way to estimate injection molding costs on your own, fast, without waiting for three suppliers to reply. This article walks you through the actual formulas, the variables that move the needle, and real number ranges from production runs so you can sanity-check any quote that lands on your desk.
- Mold cost drives 60-80% of total project spend for runs under 10,000 parts.
- Material cost per part = part weight times resin price per kilogram divided by 1000.
- Cycle time is the single largest lever on per-part cost for high-volume runs.
- A multi-cavity mold costs more up front but slashes per-part cost by 30-50%.
- Always add 5-10% scrap and regrind allowance to your material estimate.
What Are the Core Variables in an Injection Molding Cost Calculator?
Every injection molding cost calculator boils down to four buckets: 1, material cost, processing cost, and secondary operations. If a quote feels off, one of these four is usually the culprit. Understanding how each variable works — and which ones you can actually control — is the first step to making informed sourcing decisions rather than guessing.
Tooling cost is the biggest upfront hit. A simple single-cavity aluminum mold for prototyping runs $1,500–$5,000. A production-grade steel mold with multiple cavities, slides, and polish finishes can hit $50,000–$150,000. The spread is enormous because mold complexity scales fast — every side action, lifter, or hot-runner system adds thousands to the final price.
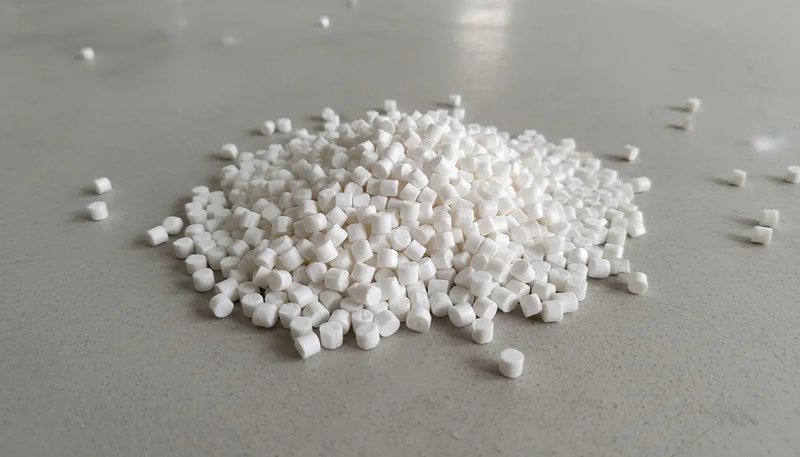
Material cost depends on resin price and 3. Commodity resins like PP or HDPE run $1.00–$2.00 per kg. Engineering resins like PEEK or PPS climb to $30–$100 per kg. If your part weighs 50 grams and you use PA66 at $3.50 per kg, raw material runs roughly $0.18 per part before accounting for scrap and runner waste.
Processing cost is machine time. You take the hourly machine rate, which ranges from $30 to $120 depending on tonnage and region, divide by the number of parts produced per hour, and add labor. A 200-ton press running at $60 per hour and producing 360 parts per hour adds $0.17 per part in machine cost alone.
Secondary operations — trimming gates, painting surfaces, assembling sub-components, performing dimensional inspection — are easy to overlook during initial quoting. In our experience, these add 10–25% to the total per-part cost, depending on how much post-molding work the part requires. A simple gate trim might cost $0.02, while full cosmetic painting and pad printing can add $0.50 or more per piece.
How Do You Calculate Injection Molding Cost per Part?
The basic formula for total per-part cost is straightforward: total cost per part equals tooling cost divided by total quantity, plus material cost per part, plus processing cost per part, plus secondary cost per part. Each component has its own sub-formula, but the structure is always the same.
| Cost Component | Formula | Typical Range |
|---|---|---|
| Tooling per part | Mold cost ÷ Total quantity | $0.05–$50.00 |
| Material per part | (Part weight × Resin $/kg) ÷ 1000 × (1 + scrap %) | $0.01–$5.00 |
| Processing per part | Machine $/hr ÷ Parts per hour | $0.05–$0.50 |
| Secondary per part | Sum of post-mold operations | $0.00–$1.00 |
Let us walk through a real example. Say you need 50,000 clips made from PA66. Your mold costs $18,000 for a two-cavity design in P20 steel. Part weight is 12 grams. Resin is $3.50 per kg. 2 is 18 seconds on a 150-ton press charging $55 per hour. Here is how the math breaks down step by step.
Tooling per part equals $18,000 divided by 50,000, which gives $0.36. Material per part equals 12 grams times $3.50 per kg, divided by 1000, times 1.08 for scrap allowance, yielding $0.045. Processing per part equals $55 per hour divided by 400 parts per hour, giving $0.14. Add $0.05 for gate trimming. Total per part: $0.60. If a supplier quotes $1.20 for the same specification, you know something does not add up.
What Drives Mold Tooling Cost the Most?
Mold cost is not random — it follows predictable drivers. Understanding these lets you push back on inflated quotes or decide where to invest more for better long-term returns. The three biggest cost drivers are 4, steel grade, and geometric complexity.
Cavity count is the first big lever. A single-cavity mold might cost $8,000. Doubling to two cavities does not double the price — it adds roughly 50–70%, so you land around $12,000–$14,000. But you produce twice as many parts per cycle, which cuts processing cost in half. For runs over 100,000 parts, multi-cavity almost always wins on total cost of ownership.
Steel selection matters too. P20 is the workhorse for most production molds — good hardness, reasonable cost at $15–$25 per kg. H13 or S136 for high-polish or high-wear applications runs $30–$50 per kg. The material cost difference on a 500 kg mold base can swing the total mold price by $5,000–$15,000, so choosing the right grade for your actual volume and surface requirements is critical.
Mold complexity — undercuts, internal threads, side actions, lifters — adds machining hours and design time. Each side action can add $2,000–$5,000 to the mold cost. A mold with four side actions is easily $8,000–$20,000 more than a straight-pull equivalent. Hot runner systems add another $3,000–$10,000 but eliminate runner waste and reduce cycle time for high-volume production runs.
Surface finish requirements push cost up fast. A mold with SPI A-1 mirror finish requires extensive polishing — sometimes 40–80 hours of hand work at $40–$60 per hour. That alone can add $2,000–$5,000 to the mold cost. If your part does not need a cosmetic surface, specify SPI B or even SPI C to save serious money without affecting part function.
Tolerance requirements also drive mold cost in ways that are not always obvious. A general commercial tolerance of plus or minus 0.1 mm is achievable with standard mold construction. Tightening to plus or minus 0.05 mm requires more precise machining, additional mold sampling iterations, and often a more rigid mold base to prevent deflection under clamping pressure. Each tolerance band tightening can add 10–20% to the mold cost.
Hot runner versus cold runner is another cost fork. Hot runner systems add $3,000–$10,000 to the mold price but eliminate runner waste, reduce cycle time by removing the sprue and runner cooling portion, and produce gate-free parts. For high-volume runs of commodity materials, hot runner almost always pays for itself. For short runs of expensive engineering resins, the runner savings alone can justify the investment.
“Increasing from a single-cavity to a four-cavity mold typically reduces per-part cost by 40-60% for runs over 50,000 units.”True
The mold costs roughly 2.5x more, but you produce 4x the parts per cycle. Machine time per part drops by 75%, and tooling amortization over a large volume makes the per-part mold cost negligible. The break-even point usually falls between 10,000 and 30,000 parts depending on cycle time.
“Aluminum molds are always cheaper than steel molds for any production volume.”False
Aluminum molds cost less upfront, typically $1,500 to $5,000 versus $8,000 to $25,000 for steel, but they wear out after 1,000 to 10,000 shots depending on resin abrasiveness and injection pressure. For runs exceeding 50,000 parts, you may need multiple aluminum molds, which makes hardened steel more economical over the project lifecycle.
How Does Material Choice Affect Total Cost?
Material cost can be the dominant per-part expense for small, lightweight parts molded in engineering resins. For a 5-gram part, the difference between PP at $1.20 per kg and PEEK at $90 per kg is $0.006 versus $0.45 — a 75x difference in material cost alone that dramatically reshapes the total project budget.
| Resin | Price per kg | Typical Application |
|---|---|---|
| PP | $1.00–$1.50 | Packaging, consumer goods |
| HDPE | $1.10–$1.60 | Containers, pipe fittings |
| ABS | $1.80–$2.80 | Housings, automotive interior |
| PA66 (Nylon) | $3.00–$4.50 | Gears, clips, structural parts |
| PC | $3.50–$5.00 | Optical, electrical housings |
| POM | $2.80–$4.00 | Gears, bearings, fasteners |
| PPS | $8.00–$15.00 | Under-hood automotive, electrical |
| PEEK | $60–$100 | Aerospace, medical implants |
But material cost goes beyond the resin price tag. Glass-filled nylons wear molds faster, shortening tool life and increasing maintenance spend. High-temperature resins like PPS or PEEK require specialized barrel components, screws, and heater bands, adding to machine maintenance costs. Additives — UV stabilizers, flame retardants, color masterbatch — add $0.50–$3.00 per kg depending on loading percentage and type.
Regrind is another factor most calculators miss. Not all runners and sprues go to waste — most molders regrind and reuse 15–30% of the total 5. However, regrind degrades material properties after 3–5 thermal cycles. Medical and automotive parts often prohibit regrind entirely, which increases effective material cost by 20–40% compared to virgin-only processing.
Color matching is an often-overlooked cost variable. Achieving a specific Pantone or RAL color in resin requires custom color compounding or masterbatch blending. A standard black or natural resin carries no premium, but a custom-matched corporate color can add $1.00 to $3.00 per kg. If color consistency across batches is critical — for consumer electronics housings, for example — you also need to budget for spectrophotometer verification and color hold samples.
Moisture content management adds processing cost for hygroscopic resins like nylon, polycarbonate, and PET. These materials require drying for 2 to 6 hours before molding at temperatures ranging from 80 to 120 degrees Celsius. The energy cost of running industrial dehumidifying dryers adds approximately $0.50 to $1.50 per hour to the machine operating cost, which translates to a small but measurable per-part increase depending on cycle time and throughput.
What Is the Impact of Production Volume on Unit Cost?
Volume is the biggest lever in injection molding economics. The injection molding process has a massive fixed cost — the mold — and a relatively low variable cost covering material and machine time. As volume increases, the fixed cost gets spread across more parts, and per-part cost drops sharply until it asymptotically approaches the variable cost floor.
At 1,000 parts, tooling might represent 80% of your total per-part cost. At 100,000 parts, it drops to 15–25%. At 1,000,000 parts, tooling per part becomes almost negligible — material and processing dominate the equation. This asymptotic behavior is why high-volume automotive and consumer electronics programs focus obsessively on reducing grams and seconds rather than negotiating mold prices.
This is why molders often recommend scaling up. If you are on the fence between 30,000 and 80,000 parts, running the larger batch can cut your per-part cost by 30–40% because the tooling investment amortizes so aggressively. We have seen clients hesitate on volume and end up paying more in the long run because they had to order a second short run at the original tooling rate.
The crossover point — where investing in a higher-cavity mold becomes cheaper than running more cycles on a simpler tool — typically falls between 10,000 and 50,000 parts depending on geometry complexity and cycle time. Below that threshold, a single-cavity or prototyping mold is usually the right call. Above it, start comparing multi-cavity options seriously.
How Do Machine Size and Cycle Time Influence Cost?
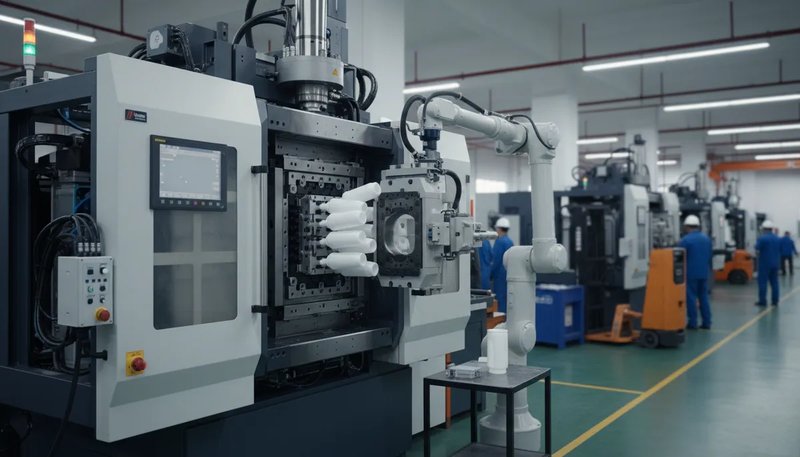
Machine tonnage determines the hourly rate, and cycle time determines how many parts you get per hour. Together, they set your processing cost per part. Getting either variable wrong means paying more than necessary for every single part that comes out of the press.
A 100-ton machine might run $30–$50 per hour. A 500-ton machine runs $80–$120 per hour. A 1000-ton machine climbs to $150–$250 per hour. You need the right machine for the part — too small and you get flash and short shots from insufficient clamping force, too large and you are paying for capacity you do not need.
Cycle time is where experienced molders earn their money. Reducing cycle time by even 2 seconds on a 100,000-part run saves significant machine hours over the project lifetime. A part running 20 seconds versus 22 seconds on a $60 per hour machine saves approximately $3,300 in machine cost alone. That is real money recovered purely from process optimization and cooling efficiency.
Cooling time typically consumes 50–70% of total cycle time. Optimizing mold design for cooling — conformal channels, beryllium copper inserts, proper water flow layout — can cut cycle time by 15–30%. That translates directly into lower per-part cost without changing the part design at all. We consider cooling optimization one of the highest-return engineering investments you can make on any mold project.
“Reducing cycle time from 24 seconds to 20 seconds saves over $5,000 in machine cost on a 200,000-part production run.”True
At $60 per hour, producing 200,000 parts at a 24-second cycle requires 1,333 machine hours totaling $80,000. At 20 seconds, it requires 1,111 hours totaling $66,667. The difference is $13,333 — more than most molders charge for a complete mold revision or cooling optimization pass.
“A larger machine always produces parts faster because it has more clamping force.”False
Clamping force prevents the mold from opening under injection pressure. It does not speed up the actual molding cycle. In fact, larger machines have slower clamp movements and bigger platens that require more time to open and close, which can actually increase total cycle time if you are not utilizing the full platen area efficiently.
Most cost calculators stop at material, mold, and machine time. Real projects have additional costs that can swing the total by 20–40%. Ignoring these line items leads to under-budgeting and unhappy surprises when invoices arrive.
Mold maintenance is the big one. A production mold needs periodic cleaning, polishing, and component replacement. Budget $500–$2,000 per year for light-duty molds and $2,000–$8,000 for high-cavitation or high-wear applications running abrasive glass-filled resins. Over a 500,000-part run spanning two years, maintenance adds $0.004–$0.016 per part — small per piece but significant in aggregate.
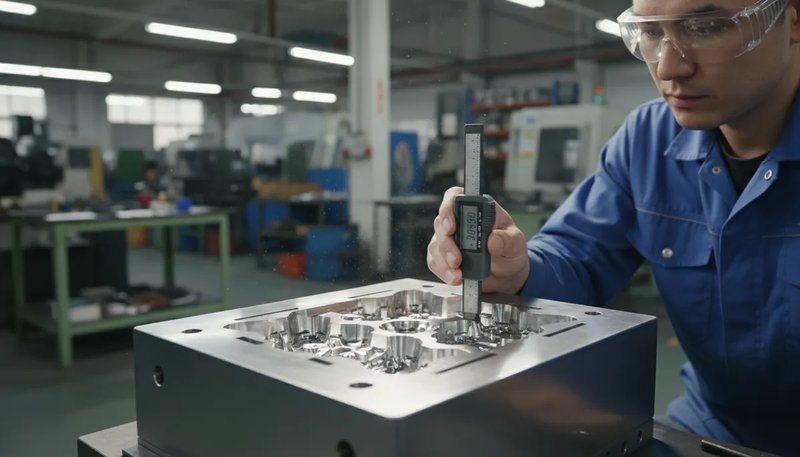
Quality inspection costs depend on your tolerance requirements. General-purpose parts might need a quick visual check that costs almost nothing. Tight-tolerance medical or aerospace components require CMM measurement, first-article inspection reports, and ongoing statistical process control. Inspection can add $0.05–$0.50 per part, and for regulated medical parts it can exceed the molding cost itself.
Packaging and shipping are frequently underestimated during initial quoting. Custom dunnage, anti-static bags, moisture-barrier bags for hygroscopic resins, and climate-controlled shipping all add up quickly. For international shipping from Asia, freight and customs duties can represent 5–15% of the total landed cost. Calculate molding cost in isolation and you will be surprised by logistics.
Design revisions and mold modifications are almost inevitable in real projects. Budget one or two rounds of steel-safe changes at $500–$3,000 each. If the part design is not fully finalized when mold cutting starts, the cost of changes multiplies because you are modifying hardened steel rather than adjusting a CAD model.
How Can You Reduce Injection Molding Costs Without Sacrificing Quality?
Cost reduction in injection molding is not about cutting corners — it is about making smart decisions early in the design phase when changes are cheapest. The best time to save money is before the mold steel is cut, not after.
Uniform wall thickness is the single most impactful design for manufacturing rule. Parts with uneven walls develop sink marks, warpage, and internal stresses that require longer cycle times and tighter process windows. Fixing these after the mold is built means expensive re-cuts. Get wall thickness within plus or minus 10% across the entire part and you avoid 80% of quality-related cost overruns.
Reduce undercuts whenever possible. Every undercut requires a side action or lifter, which adds tooling cost, increases mold maintenance risk, and can slow cycle time due to additional mechanical movements. Sometimes a minor design tweak — changing a snap-fit geometry, adding a through-hole, or adjusting a draft angle — eliminates the need for a side action entirely and saves $3,000–$8,000 on the mold build.
Consolidate parts where feasible. If you are assembling three plastic components into a sub-assembly, ask whether one molded part could replace all three. Tooling cost increases for the larger, more complex mold, but you eliminate two separate molds, all assembly labor, alignment fixtures, and inventory management for the individual components. We have seen 30–50% total cost reductions from smart part consolidation on automotive interior programs.
Choose the right mold steel for your actual volume and timeline. Do not spec H13 hardened steel for a 5,000-part prototype run — P20 or even aluminum is perfectly adequate. Conversely, do not build a million-part production mold in soft P20 and expect it to hold dimensional tolerance past 200,000 shots. Matching steel grade to project requirements saves money in both directions.
Gate type selection also affects both tooling cost and per-part quality. A tab gate is simple and cheap to machine but leaves a visible mark. A submarine gate automatically separates during ejection but adds complexity to the mold build. Hot-tip gating leaves minimal vestige but requires a hot runner system. Choosing the simplest gate type that meets your cosmetic requirements keeps tooling costs down without creating downstream rework problems.
Draft angle is a small design decision with outsized cost impact. Parts with insufficient draft — less than 0.5 to 1 degree per side — require higher ejection forces, which can cause scoring, warping, or even cracked parts. Adding adequate draft costs nothing in design time but can reduce scrap rates by 5–10% and prevent the need for mold polishing between production runs.
Real-World Cost Examples: From Prototyping to Mass Production
Numbers mean more when you see them in context. Here are three real-world scenarios at different volume levels, using actual cost structures from production projects we have managed. These examples illustrate how the cost formula behaves differently at each scale.
| Parameter | Low Volume (2,000 pcs) | Mid Volume (50,000 pcs) | High Volume (500,000 pcs) |
|---|---|---|---|
| Part | Sensor housing | Automotive clip | Consumer enclosure |
| Material | PC/ABS ($4.00/kg) | PA66 ($3.50/kg) | PP ($1.20/kg) |
| Part weight | 35g | 12g | 85g |
| Cavities | 1 | 2 | 8 |
| Mold cost | $4,500 (aluminum) | $18,000 (P20) | $65,000 (H13) |
| Cycle time | 28s | 18s | 14s |
| Material/part | $0.154 | $0.045 | $0.104 |
| Tooling/part | $2.25 | $0.36 | $0.13 |
| Processing/part | $0.39 | $0.14 | $0.08 |
| Total/part | $2.79 | $0.60 | $0.33 |
Notice how the cost composition shifts dramatically across volume tiers. At low volume, tooling dominates at 80% of per-part cost. At high volume, material and processing become the primary cost drivers. This shift explains why high-volume programs in automotive and consumer electronics focus obsessively on shaving grams off part weight and seconds off cycle time, while low-volume programs concentrate on minimizing mold investment.
One pattern we see repeatedly is clients underestimating how quickly the economics flip. A project manager will request a 10,000-part quote and balk at the $1.80 per part price, not realizing that doubling the order to 20,000 units drops the per-part cost to $1.10. The mold amortization curve is steep in the first 50,000 parts and then flattens out. Understanding where your project sits on that curve helps you negotiate from a position of knowledge rather than sticker shock.
At our facility in Shanghai, we run 45 injection machines ranging from 90T to 1850T. This machine range means we can match the right press to each specific part rather than forcing small parts onto oversized machines and passing the cost difference to the customer. For cost-sensitive programs, proper machine selection alone typically saves 10–20% on processing cost compared to shops with limited tonnage options.
Frequently Asked Questions About Injection Molding Costs
How much does an injection mold cost?
An injection mold costs between $1,500 and $150,000 depending on complexity, cavity count, and steel grade. A simple single-cavity aluminum prototyping mold runs $1,500 to $5,000 and is suitable for short runs under 5,000 parts. A standard two-cavity production mold in P20 steel costs $10,000 to $30,000 and handles volumes up to 500,000 shots. Complex multi-cavity molds with side actions, hot runners, and SPI A-1 polished finishes commonly exceed $100,000. The key cost drivers are the number of cavities, steel grade selection, surface finish requirements, and how many side actions or lifters the part geometry demands.
What is the formula for calculating injection molding cost per part?
The formula is total cost per part equals mold cost divided by total production quantity, plus material cost per part, plus processing cost per part, plus secondary operations cost per part. Material cost per part is calculated as part weight in grams times resin price per kilogram divided by 1000, multiplied by one plus the scrap percentage. Processing cost per part is the machine hourly rate divided by the number of parts produced per hour. Always verify your calculation against actual supplier quotes. If your estimate and the quote differ by more than 30 percent, investigate which specific variable is driving the gap.
Is injection molding cost-effective for low-volume production?
Injection molding becomes cost-effective at roughly 500 to 2,000 parts depending on part complexity and material requirements. Below that threshold, 3D printing or urethane casting is usually cheaper because there is no tooling investment. However, if you need production-intent material properties, dimensional stability, or plan to scale up quickly, investing in a low-cost aluminum mold for bridge tooling can make sense even at 500 units. The break-even point between 3D printing and injection molding typically falls around 100 to 300 parts for simple geometries using commodity resins. For complex parts requiring tight tolerances, injection molding may be justified at even lower quantities.
How does cavity count affect injection molding cost?
Doubling the cavity count increases mold cost by roughly 50 to 70 percent but doubles the output per cycle, which significantly reduces the processing cost per part. For example, a single-cavity mold at $10,000 versus a two-cavity mold at $15,000 produces twice as many parts per machine hour. On a 100,000-part production run, tooling cost per part drops from $0.10 to $0.075, and processing cost is halved. The crossover point where a multi-cavity mold becomes the cheaper total-cost option typically falls between 10,000 and 50,000 parts, depending on part complexity, cycle time, and the hourly machine rate.
What is the typical scrap rate in injection molding?
Typical scrap rates in injection molding range from 2 to 8 percent for mature, well-optimized production processes. Startup and qualification runs commonly see 10 to 20 percent scrap until the process parameters are fully dialed in and the mold reaches thermal equilibrium. Always budget 5 to 10 percent scrap in your cost calculator for a conservative but realistic estimate. Medical devices and tight-tolerance aerospace components may see higher scrap rates of 8 to 15 percent due to stricter dimensional acceptance criteria and mandatory visual inspection standards. Regrind allowance and cosmetic defect rejection rates should be tracked separately for accurate cost modeling.
How do I estimate material cost for injection molding?
To estimate material cost, multiply the part weight in grams by the resin price per kilogram, divide by 1000, then multiply by 1.05 to 1.10 to account for scrap, runner waste, and sprue material. For example, a 30-gram part molded in PA66 at $3.50 per kg calculates as 30 times 3.50 divided by 1000, multiplied by 1.08, yielding $0.113 per part. Do not forget to include color masterbatch and any specialty additive costs in your calculation. Color masterbatch typically adds $0.50 to $2.00 per kg, while flame retardant additives can add $1.00 to $3.00 per kg depending on loading percentage and regulatory requirements.
Can I reduce injection molding cost by changing the part design?
Yes, part design is the single most powerful cost-reduction lever available, and it is most effective before mold cutting begins. Uniform wall thickness reduces both cycle time and scrap rate by eliminating sink marks and warpage. Eliminating undercuts removes side actions from the mold, saving $3,000 to $8,000 per action in tooling cost and reducing ongoing maintenance risk. Reducing part weight by 10 percent through rib optimization saves 10 percent on material cost across the entire production run. Consolidating multiple assembled components into a single molded part eliminates assembly labor, additional molds, and inventory complexity. Good design decisions made before tooling starts typically save 20 to 40 percent on total project cost.
Getting injection molding costs right is not about finding the cheapest supplier — it is about understanding the math behind the quote so you can make informed decisions on mold design, material selection, and production volume. Whether you are quoting a 2,000-piece bridge run or a million-piece production program, the formula stays the same: tooling plus material plus processing plus secondary, divided and optimized for your specific situation. If you need help running the numbers on a specific project, our engineering team at ZetarMold can provide a detailed cost breakdown within 24 hours — material selection, mold design options, and realistic volume pricing included. Get in touch and let us put real numbers on your project.
-
tooling cost: Tooling cost refers to the total expense of designing and manufacturing a mold, including material procurement, CNC machining, EDM operations, surface polishing, and initial trial runs required before production approval. ↩
-
cycle time: Cycle time is the total duration of one complete injection molding cycle, measured in seconds, starting from mold clamp close through injection, packing, cooling, and ending with part ejection. ↩
-
part weight: Part weight is the mass of a single molded component, measured in grams, determined by the material density and the internal volume of the mold cavity. ↩
-
cavity count: Cavity count refers to the number of identical mold cavities cut into a single mold base, which determines how many parts are produced simultaneously per machine cycle. ↩
-
shot weight: Shot weight is the total mass of material injected into the mold during one cycle, including the finished part, runner system, and sprue, measured in grams. ↩


