 Skip to content

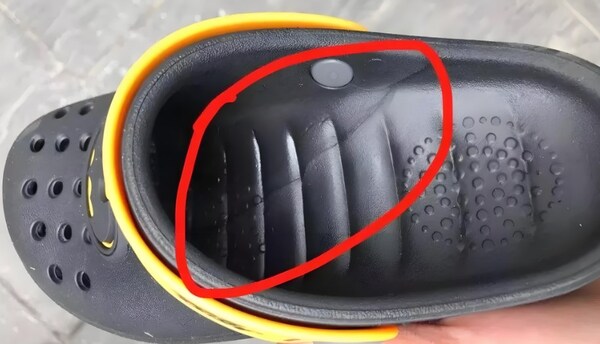
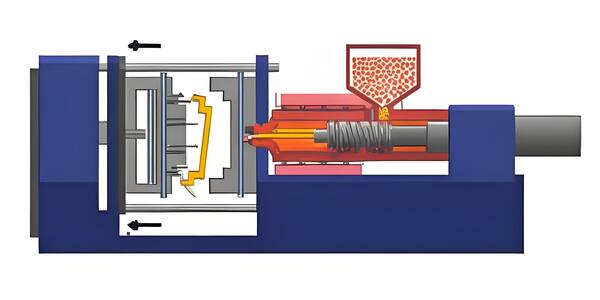
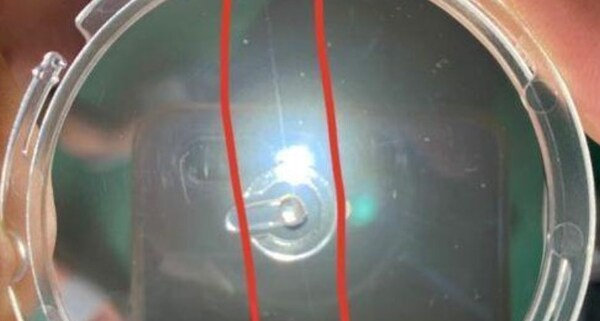
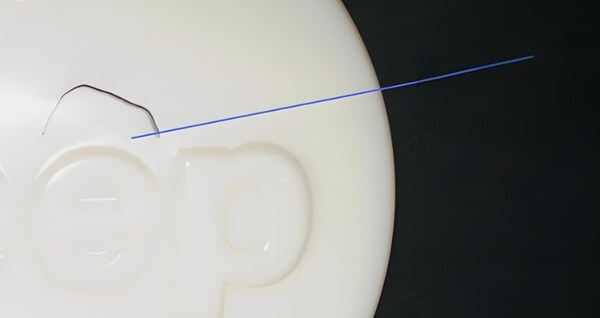
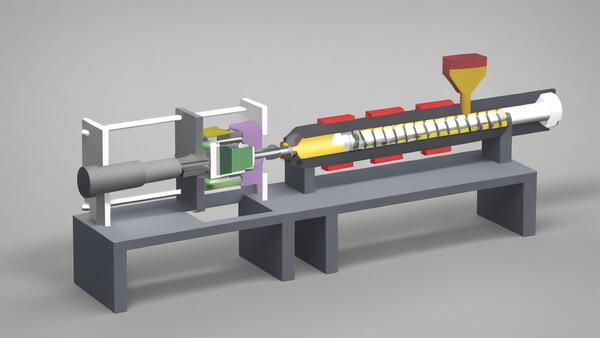
Preface: Injection molding is a great way to make pretty prototypes and plastic parts. But if you don’t have a good system for controlling your process, you might get molded parts with defects like flow marks.Flow marks are a common appearance defect of injection molded products. They mainly exist near the glue inlet of the product and spread in a wave-like manner to the depth of the mold.
Flow marks are a defect that is hard to get rid of in production. So, if you know why they happen and what process conditions make them worse, you can get rid of them faster and easier when you’re trying to get your mold to run right. That’s going to help you make more parts faster . causing flow lines by the different speeds and directions of the fluid at different locations.
Analysis of the Causes of Flow Marks
Mold Temperature is Too Low
The mold temperature is too low, which will cause the material temperature to drop too quickly, and the injection pressure and holding pressure will not be enough to press the condensed skin tightly against the mold surface, leaving flow marks of the melt in the flow direction.

Production Process Problems
The production process of injection molded PC products has a big impact on the appearance and performance of the product. If the injection temperature is too high or too low, the injection speed is too fast or too slow, and the holding pressure is not right, flow marks will appear on the product.
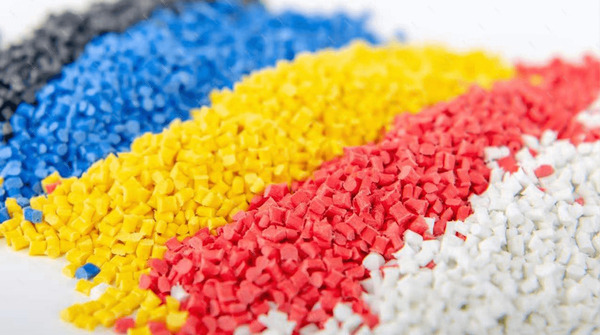
Material Selection Problems
The material selection of injection molded PC products also has a big impact on its performance and appearance. If the materials don’t match,poor material flow , the moisture control isn’t right, and there are too many additives, flow marks will appear on the product.
Processing Process Problems
When you’re processing, the mold temperature, injection time, holding time, etc. will affect the appearance and performance of the product. If the mold temperature is too low or too high, the injection time is too long or too short, and the holding time is improper, flow marks will appear on the product.
Poor Melt Flow
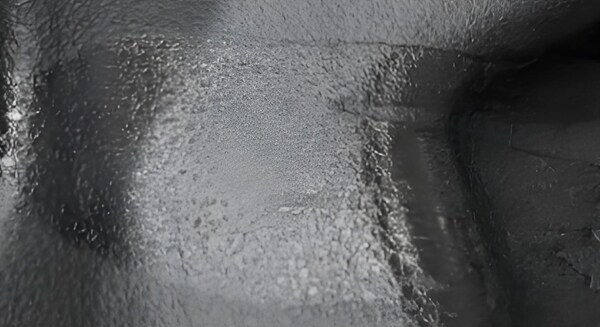
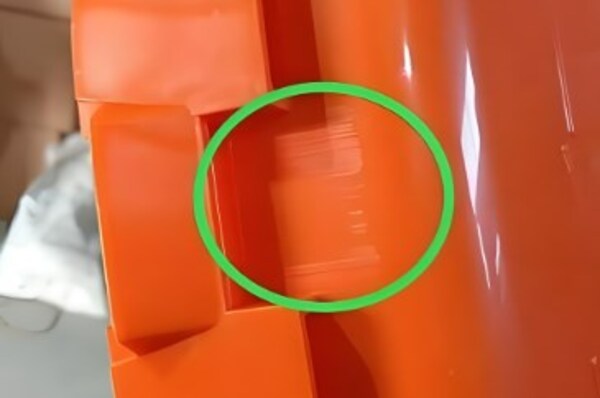
When the melt flow is poor, you get these ring-shaped flow marks on the surface of the plastic part, right around the gate. When the melt is cold and thick and doesn’t flow well, it gets injected into the cavity in a wavy, semi-solid state in the gate and runner.
It flows along the surface of the mold cavity and gets squeezed by the next shot of melt that comes in, and it backs up and gets stuck, and that’s what makes these ring-shaped flow marks on the surface of the plastic part, right around the gate.
To solve this problem, you can increase the mold and nozzle temperature, increase the injection rate and filling speed, increase the injection pressure and holding pressure, and increase the holding time. You can also set a heater at the gate to increase the local temperature of the gate. You can also appropriately increase the gate and runner cross-sectional area.
The gate and runner cross-section should be round if possible, because that’s the best way to fill the mold. But if the gate has to be in a weak part of the plastic part, then you should use a square cross-section.
Also, you should put a bigger cold slug well at the bottom of the gate and at the end of the runner. The temperature of the material has a big effect on how well the melt flows. You should pay attention to the size of the cold slug well. You have to put the cold slug well at the end of the melt, in the direction the melt is flowing from the gate.
If the main reason for the annual ring-shaped wave flow marks is the poor performance of the resin, you can select a low-viscosity resin if conditions permit.

The Melt Does Not Flow Smoothly in the Runner
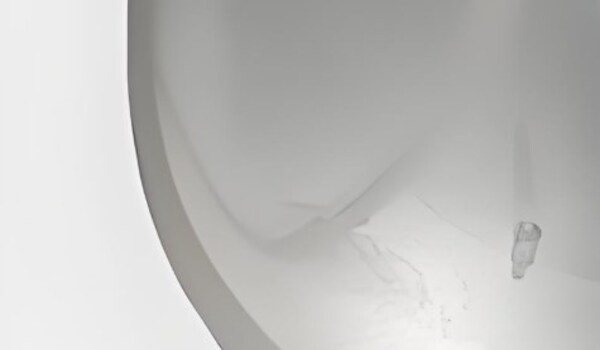
The melt doesn’t flow smoothly in the runner, resulting in spiral wave flow marks on the surface of the plastic part. When the melt flows from a narrow cross-section of the runner into a cavity with a larger cross-section or the mold runner is narrow and the finish is very poor, the flow is easy to form turbulence, resulting in spiral wave flow marks on the surface of the plastic part.
In this case, you can slow down the injection speed or control the injection speed to be slow, fast, and slow. The gate of the mold should be placed in a thick wall part or directly on the wall side. The gate shape should be a handle type, fan type, or diaphragm type. The cross-sectional area of the runner and gate can also be increased appropriately to reduce the flow resistance of the flow material.
Also, you should control the flow of cooling water in the mold to keep the mold at a higher temperature. If you increase the barrel and nozzle temperatures within the process operating temperature range, it will help improve the flow performance of the melt.
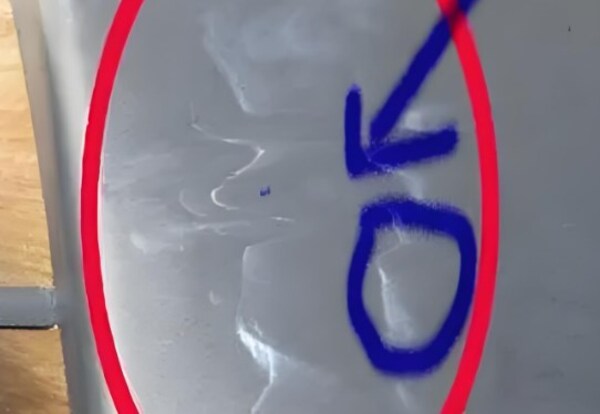
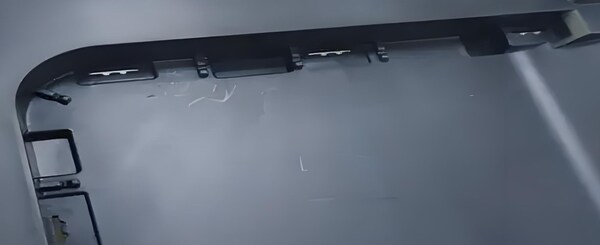
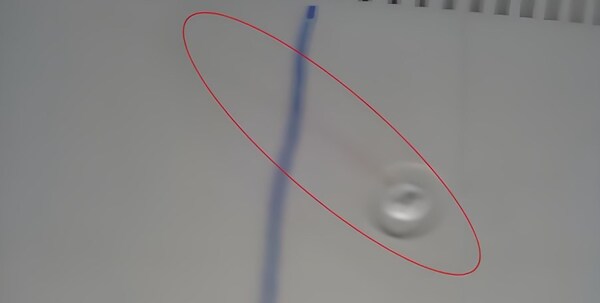
Volatile Gases Cause Cloud-Like Wave Flow Marks
When you use ABS or other copolymer resin raw materials, if the processing temperature is high, the resin and lubricant will generate volatile gases, which will cause cloud-like wave flow marks on the surface of the plastic parts.
For this, you should reduce the mold and barrel temperature properly, improve the exhaust conditions of the mold, reduce the material temperature and filling rate, expand the gate section properly, and change the type or quantity of the lubricant.
Solution to Flow Marks
Plastic
Reduce the Amount of Material
Too much material can also cause a mark problem. If the mark is caused by too much material, you can reduce the injection molding machine feed, but be careful not to reduce it too much and affect the quality of the product.
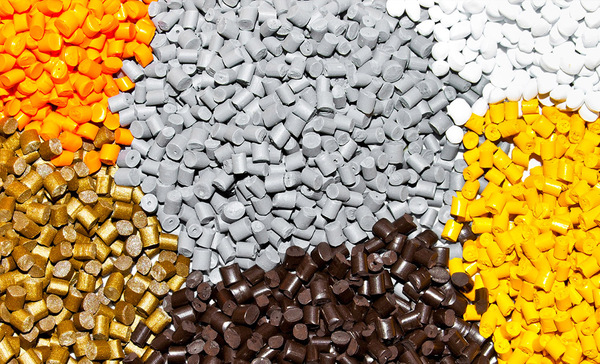
Improve the Fluidity of Plastic
You need to fill the cavity with a plastic that flows easily. If the molten plastic doesn’t flow well, the melt will slow down and the slower it goes, the colder it gets. The injection pressure and holding pressure aren’t enough to push the condensed skin against the mold surface.
So you get shrink marks in the direction of flow. The material suppliers can give you advice based on your design: use the most fluid plastic that doesn’t flash.
If you want to make a plastic part that’s long and skinny, you need a plastic that flows well. If you don’t have a plastic that flows well, you can add a little bit of something to make it flow better. Usually, you add less than 1% of this stuff. If you have a really long and skinny part, you might need to add more.
Improper Use of Molding Lubricants
Typically, the lubricant content is less than 1%. When the flow length is relatively long compared to the wall thickness, the lubricant content must be increased to ensure that the condensation layer sticks to the mold surface until the product is formed and flow marks are not generated. Increasing the lubricant content must be approved by the material supplier.
Mold
Increasing Mold Temperature
If the mold temperature is too low, the material temperature will drop too quickly, and the injection pressure and holding pressure will not be enough to press the condensed surface tightly against the mold surface, leaving shrinkage marks of the melt in the flow direction.
Raise the mold temperature, keep the material temperature high, and the injection pressure and holding pressure will press the condensation layer tightly against the mold surface until the product is formed and flow marks are not produced.
Set the mold temperature according to the recommended value of the material manufacturer. Each adjustment can be increased or decreased by 6℃. After 10 shots, if the molding is stable, decide whether to make further adjustments based on the results.
Improve the Runner
The runner, runners, or gate is too small. The runner, runners, or gate is too small, and the flow resistance goes up. If the injection pressure is not enough, the melt front will move slower and slower, and the plastic will get colder and colder. The injection pressure and holding pressure are not enough to press the condensed skin tightly against the mold surface, so shrink marks are left in the melt flow direction.
Improve the Exhaust
If the exhaust is not enough or the exhaust is not good, it will affect the filling of the melt. The melt wave front cannot press the condensed skin tightly against the mold surface, leaving shrinkage marks in the flow direction of the melt. Consider exhaust at the end of each runner to prevent gas from entering the cavity. The exhaust of the cavity should not be ignored, and it is best to use full-circle exhaust.
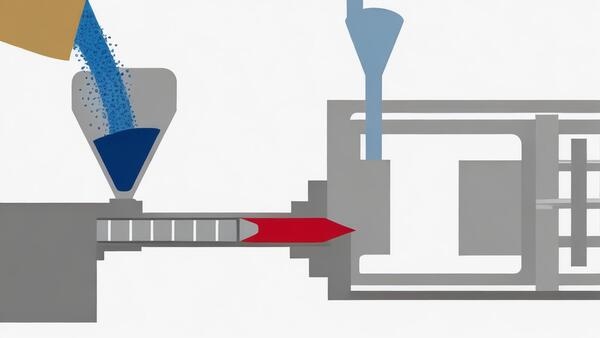
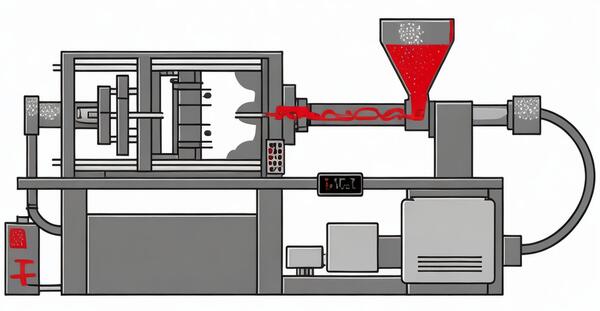
Injection Molding Machine
Adjust the Injection Speed
If the injection speed is too fast, the melt will not be able to remove the air during the flow of the mold surface, resulting in flow marks. The injection speed should be adjusted increase injection speed appropriately according to the specific situation to alleviate the flow mark problem.
Adjust the Injection Pressure
Another reason for flow marks is not enough machine injection pressure. So, you need to increase the injection pressure to make the plastic flow into the mold better and reduce flow marks.
Increase the Injection Pressure and Holding Pressure
If the injection pressure and holding pressure are not enough, the condensed skin will not be pressed tightly against the mold surface, and shrinkage marks will appear in the flow direction of the melt. Increase the injection pressure and holding pressure so that the condensed layer can be pressed tightly against the mold surface until the product is finalized, and flow marks will not appear.

Improve the Residence Time
The plastic stays in the barrel for too short a time, and the melt temperature is low. Even if the cavity is barely filled, the plastic cannot be compacted during the holding pressure, leaving shrinkage marks in the flow direction of the melt. The ratio of shot material to barrel material should be between 1/1.5 and 1/4.
Extend the Cycle Time
When the cycle time is too short, the plastic doesn’t get heated up in the material tube in time, and the melt temperature is low. Even if the cavity is barely filled, the plastic can’t be compacted during the holding pressure, leaving shrinkage marks in the flow direction of the melt.
The cycle time must be extended until the plastic is fully melted and the melt temperature is high enough to prevent shrinkage marks in the flow direction.
Increase the Barrel Temperature Setting
When the barrel temperature is too low, the melt temperature is low, and the injection pressure and holding pressure are not enough to press the condensed surface tightly on the mold surface, leaving shrinkage marks in the flow direction of the melt.
Crank up the heat, injection pressure, and holding pressure to squeeze that skin against the mold surface until the part sets up and you don’t see any flow marks. You can get the material temperature setting from the material supplier.
The barrel is divided into four zones: rear, center, front, and nozzle. The material temperature setting from rear to front should be gradually increased, and each zone should be increased by 6°C. If necessary, sometimes the material temperature setting value of the nozzle zone and/or front zone is the same as that of the center zone.
Increase the Nozzle Temperature Setting
The plastic absorbs the heat released by the heating belt and the friction heat generated by the relative movement of the plastic molecules caused by the screw rotation in the barrel, and the temperature gradually rises.
The last heating zone in the barrel is the nozzle. The melt should reach the ideal material temperature here, but it must be heated moderately to stay in the best state.
If the nozzle temperature isn’t set high enough, the nozzle and the mold will touch and take away too much heat, the material temperature will drop, and the injection pressure and holding pressure won’t be enough to press the condensed skin tightly against the mold surface, leaving shrinkage marks in the flow direction of the melt. Increase the nozzle temperature.
Typically, the nozzle zone temperature is set 6 degrees Celsius higher than the front zone temperature.
Conclusion
One of the most common appearance defects of injection molded products during production is flow marks, especially near the gate of the product. The main reasons for the formation of flow marks are low mold temperature, improper injection molding process parameters, improper material selection, and poor melt fluidity.

To effectively avoid and adjust the flow mark problem, manufacturers can take a series of measures. First, adjust the mold temperature and nozzle temperature to ensure that the molten material can flow evenly and fill the mold during the filling process.
Second, optimize the injection speed and pressure control to ensure that the plastic is filled and compacted.
Additionally, the reasonable selection and control of various parameters in the processing process, such as holding time and flow channel design, can also significantly improve the surface quality of the product. By making these adjustments, the flow mark problem can be effectively reduced or even eliminated, and the production efficiency and quality of injection molded products can be improved.


