 Skip to content

Injection molding is one of the best ways to make stuff. It’s fast, it can make a lot of things at once, and it’s really good at making really high-quality things. The reason it’s so good is because it has a lot of steps, and each step is really important to make sure the thing you want to make comes out the way you want it to. In this blog post, we’re going to go through all the steps of injection molding so you can see how it goes from an idea to a real thing.

Injection Molding Process
Basic Principles and Applications of Injection Molding
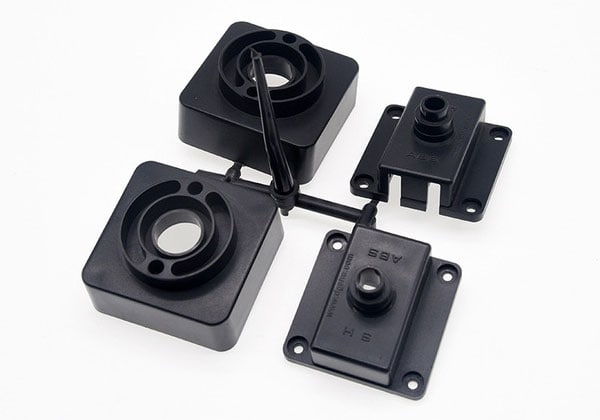
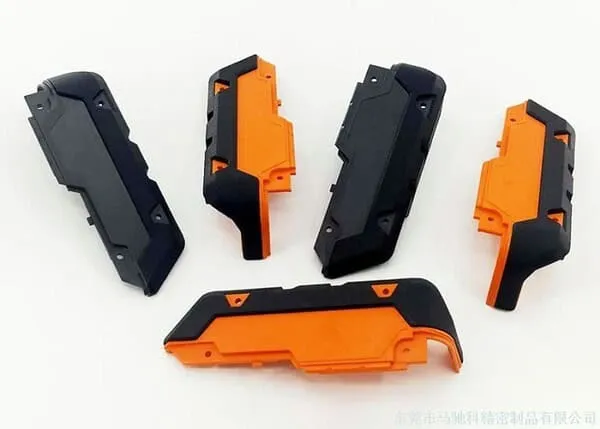
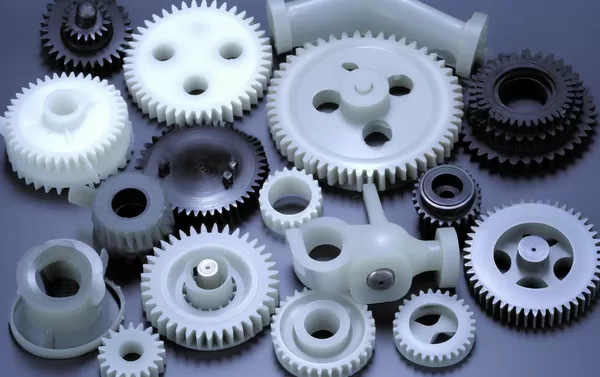
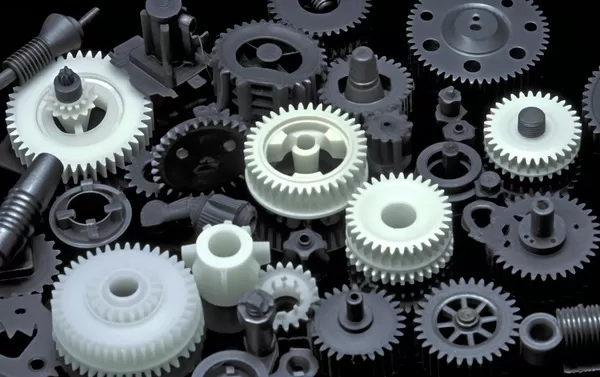
Injection molding is a process that turns plastic pellets into a liquid state by using heat and then pushes them through a nozzle into a mold. Once the plastic cools, it becomes a solid and is removed from the mold. Injection molding is a cheap and effective way to make a lot of plastic parts at one time using one mold. This process can make all sorts of plastic parts that are used in car engines, home appliances, and food containers.
Significance of Injection Molding in Modern Industry
As the demand for its derivatives continues to grow, injection molding technology is becoming increasingly important in industrial production. Injection molding technology is a form of automated production, which speeds up the production process. Additionally, because plastic injection molding uses highly precise tooling and has exact dimensional tolerances, it is possible to produce more profitably and with a higher quality end product.
Moreover, injection molding manufacturing offers many advantages such as wide applications, high automation, and stable production and quality efficiency. Especially during the pandemic, the connector industry had to quickly change direction and produce a lot of medical devices to meet normal and unexpected needs. This approach has been well received by society.
Injection Molding Production Process
Design and Prototype Production
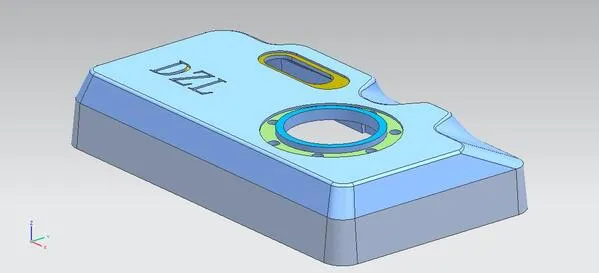
Every good injection molding project starts with good design and quality prototype manufacturing. This is the first step in the product development process where engineers and designers use their creative minds to develop products and translate ideas into technical details. CAD (Computer-Aided Design) software is one of the main tools used in additive manufacturing. It helps by creating blueprints that contain details about dimensions, requirements, and tolerance levels so that materials can be added according to the detailed instructions and aligned to achieve accuracy.
Design thinking also involves aesthetics. Engineers have a wide range of factors to consider, such as material selection, part geometry, and manufacturability. Advanced, complex simulators are being developed to simulate test runs of conceptual designs for complex parts. These simulators allow for predicting potential issues, identifying areas for optimization, and producing prototypes.
Prototyping is the process of making models that combine the testing of conceptual designs with the actual making of physical things. The rapid evolution of technologies like 3D printing allows for quick iterations and adjustments until the product design meets performance criteria and is approved by the aesthetic committees. Designers can do the same thing, but instead of things like fit, form, and function, they make changes as they see fit to get the results they want.
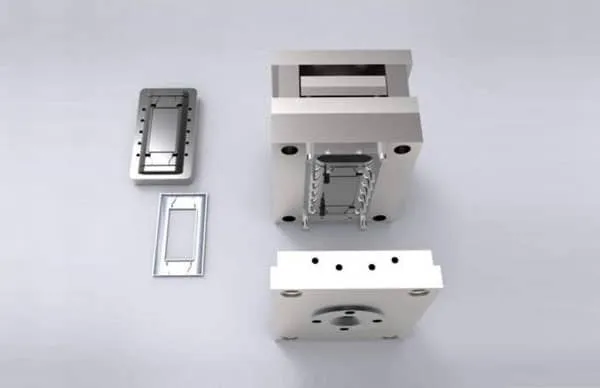
Mold Manufacturing
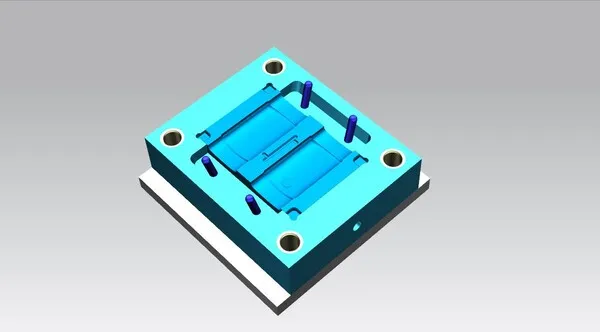
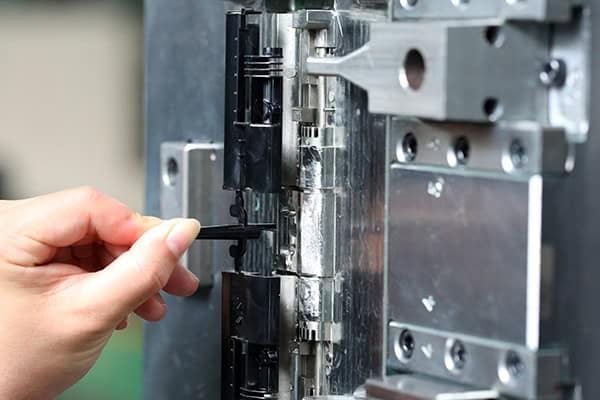
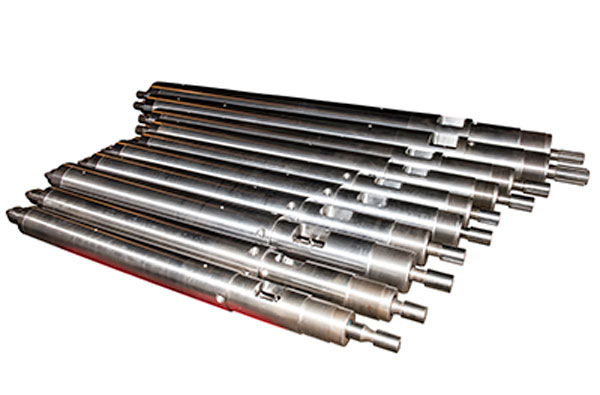
Injection molding revolves around the mold – a precise tool that dictates the final product’s shape and features. Making a mold is a painstakingly precise process that requires the machine to create the workpiece by removing material. Typically, workpieces are made from steel or aluminum and are created by milling or machining to create the desired shapes and surface finishes.
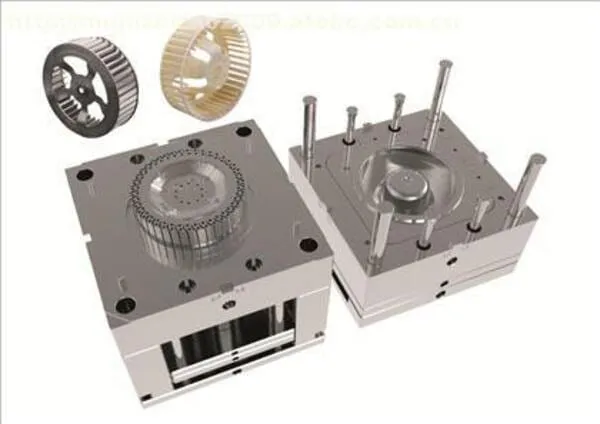
The complexity of the mold depends on how complex the parts are. You can have a mold that makes simple parts that are one cavity, and you can upgrade that to make two or three times as many parts with a multi-cavity or family mold. In addition to dealing with runner systems, venting, and cooling systems, mold design also has to consider things like gate locations, cooling channels, and parting lines to make sure the part is good quality.
After that, we test the mold and make sure it’s good to go. We want to make sure it’s going to work for a long time without any problems. We do test mold trials to figure out things like how much plastic to put in the mold, how long it takes to make a part, and how close we can get to the size we want. We might have to change some things on the mold to make it work better for us.
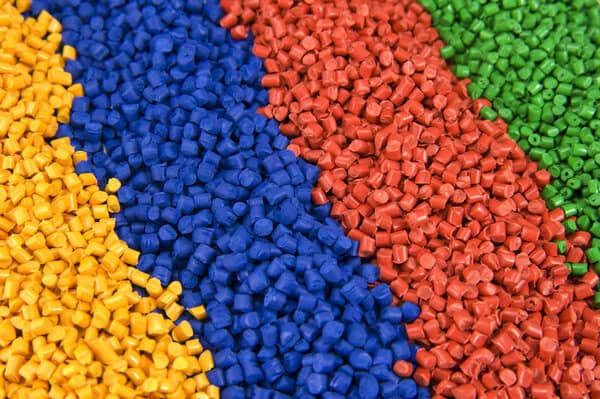
Material Preparation
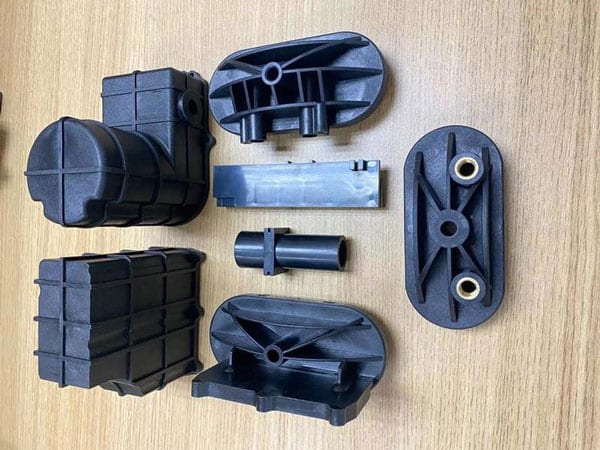
Once the mold is ready, we move on to material preparation. Injection molding can use a wide range of thermoplastics and thermosets, which are selected based on the specific needs of the application. Raw polymer resins, in the form of pellets or granules, go through several steps to get them ready for molding.
When it comes to picking materials for injection molding, the quality of the final product is key because it affects both the properties of the part and the cost. In this case, engineers need to consider things like mechanical strength, chemical stability, and environmental resistance to choose the right material. You also need to make sure the material works with the molding process, which means it has to have the right melt flow characteristics and shrinkage behavior. That way, you can make sure you get consistent, repeatable results.
The manufacturing process is where you mix stuff like colorants, stabilizers, or reinforcements with the base resin to make it work better or do what you want it to do. You can use material blending or pre-mixed materials to make it easier to work with and to make sure the additives are spread out in the resin.
Good material preparation is the foundation for consistent melt quality, good flow, and a good part finish later on. Material handling systems use conveyors, dryers, and pellet staging conveyors to reduce the moisture in storage and manufacturing to prevent the resin pellets from degrading and getting contaminated.

Injection
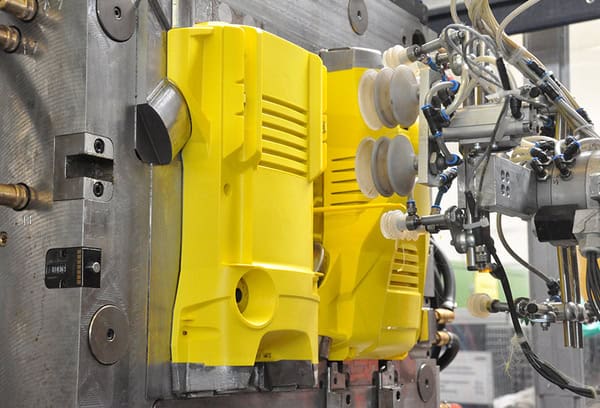
The injection molding process starts by filling the marked area of the mold with melted polymer material. The process begins when the mold is closed and the polymer resin is injected through a specific inlet called a sprue, creating a closed system.
Injection molding machines can have different sizes and setups, but they all have the same basic parts and work the same way. The screw is the part that turns and moves the plastic, melts it, and mixes it up so it’s all the same.
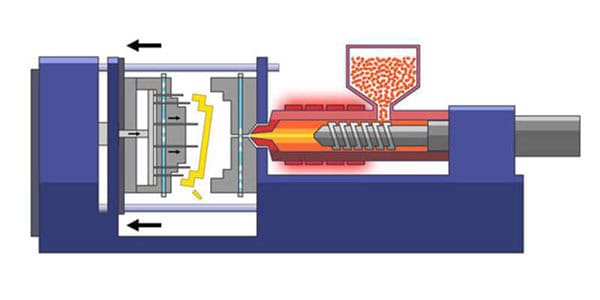
The screw, which is regulated by either hydraulic or electric motors, allows for better control of injection volume, screw speed, and pressure.
The liquid material is then shot into the mold, filling up the hole, and taking on the exact shape and detail that is determined by the mold. The perfect fill is achieved by controlling the pressure and temperature of the process throughout and this minimizes the chance of defects and ensures the consistency and quality of each hole is high. Injection parameters are set based on material, the part shape, and the production schedule. These parameters include injection speed, vacuum, packing and holding pressure, and cooling time.
Cooling and Solidification
Next, the molten material is poured into the mold, where it cools and solidifies. To achieve the desired properties and prevent any cracks, the cooling process needs to be as fast and uniform as possible. The mold has slots or channels that help with heat transfer, so the material cools and solidifies rapidly.
Cooling time is customized based on variables like part geometry, material type, and mold design. Cooling is important because if it’s not done right, the part can warp, shrink, or have internal stresses, which can affect the quality and performance of the part. For mold temperature control, thermal circulation systems, either water or oil, are used to stabilize cooling rates and achieve uniform processing.
New cooling technologies, like conformal cooling, use additive manufacturing to create cooling channels that fit the shape of the part, improving heat transfer and performance while cutting processing time. With software, designers can model cooling system optimization, heat transfer, and temperature maps, and identify hot spots or areas that need more cooling.
Ejection and Trimming
Once the piece has been strengthened to the required degree, the mold opens and the newly formed part is removed from the cavity. The machine, equipped with ejector pins or plates, for example, would allow the part to be disengaged from the location without deforming the geometry or damaging the surface condition.
This may require doing some extra stuff like cutting off extra stuff and flash from the part. The cutting, also called trimming or machining, is the last thing you do to make the part. You cut or shape the part to make it the right size and shape. Machines that cut the part use cutting, grinding or blasting to do the work. This makes the time it takes to do the work a lot shorter and you don’t need people to do the work.
Quality Control and Finishing
Lastly, the molding process does a bunch of quality testing through the final stages and finishing operations. We do inspections just to make sure the dimensions, structural integrity, and overall appearance of the parts are right. Coordinate measuring machines (CMMs) and optical scanners are examples of the high tech metrology instruments we use to check the quality and make sure we’re meeting the specs and standards.
Dimension inspection is when you measure the important stuff on a part. You also measure the roughness of the surface. Statistical Process Control (SPC) is when you keep track of how things are going and make sure you’re making good parts. You can also use X-rays or ultrasound to look inside a part and see if there’s anything wrong with it.

Any parts that don’t meet the appearance requirements can be sandblasted or have some other surface treatment applied. We can also paint, assemble, or do other final work to make these parts work better. If we have to do any special operations, we’ll have to do some sub-assembly work, which might include machining, welding, or bonding, to add more parts or features. We have quality control procedures in place to make sure we meet the condition requirements and make sure our customers are happy with what we make.

Factors Influencing the Injection Molding Process
Temperature Control
1. Barrel Temperature
Temperature control is crucial in this process, and there are three parameters that must be controlled: barrel temperature, nozzle temperature, and mold temperature. The first two temperatures primarily affect the plastic’s flow and crystallization, while the latter is the most important because it can control the cooling and flow. Each type of plastic has a different flow temperature, and even within the same type of plastic, different grades and sources have different flow and decomposition temperatures. As a result, the chemical properties of the resin can change, which is related to the average molecular weight and molecular weight distribution. The temperature of the barrel of the hand tool varies depending on the type of injection machine, so the selection of the barrel is also different.
2. Nozzle Temperature
Usually, the nozzle temperature is often not much lower than the highest temperature of the barrel. This keeps the molten material from dripping out of the nozzle, which is also called “drooling.” The melting nozzle temperature should not be too low so that the melted material doesn’t freeze too soon and clog the nozzle or the parts.
3. Mold Temperature
The temperature of the mold is the most important factor that affects the properties and appearance of the part. The high and low temperatures of the mold are affected by various factors such as the presence of crystallinity, the size and design of the mold, the properties of the part, and other process conditions (such as melt temperature, injection speed and pressure, cycle time, etc.).
Pressure Control
Injection molding pressure includes plasticizing pressure and injection pressure, both of which directly affect plasticizing and product quality.
1. Plasticization Pressure
(Reverse Pressure) On a screw machine with an injection nozzle, the screw’s plasticizing pressure increases the screw diameter at the graduation. The force in the system is controlled by the relief valve in the hydraulic system. This means that if the plasticizing pressure stays at the same level with the drive power, increasing the plasticizing pressure will increase the temperature of the melt but it will decrease the speed of plasticizing. On the other hand, higher plasticizing pressure usually results in the production of plastic products that are not only of uniform temperature and color, but also free from gases that may have been trapped in the melt. Most of the time, the pressure is set to the lowest possible value that can make and maintain a good product quality. In practice, the plasticizing pressure will be determined by the type of plastic that is chosen but it will rarely reach the value of 20 kg/cm².
2. Injection Pressure
Currently, almost all injection molding machines use the same pressure for plastic pressure and injection pressure (converted by the circuit from oil pressure). The injection pressure is to overcome the resistance caused by the flow of melt from the barrel to the cavity, the mold to be filled at a certain speed, and the melt to be compacted.

Molding Cycle
The time it takes to complete one process in injection molding is called the molding cycle or molding cycle. The process of casting through molds is directly related to labor productivity and equipment utilization. Therefore, in the production process, the length of the molding stage should be shortened while maintaining the highest quality level. Injection time and cooling time are the key stages in the injection molding process, which have the most direct impact on the quality of the product. The filling time is directly proportional to the filling rate (the inverse of time). In production, the filling time for the material is usually 3-5 seconds.

The time when the plastic in the cavity is under pressure is called the packing time. It is very important and accounts for a large proportion of the total injection time. It is usually between 20 and 120 seconds (in extreme cases, 5 to 10 minutes for thick parts). The packing time determines the final size of the product after the melt solidifies in the nozzle of the machine. The packing time of the mold is calculated based on the conditions of the mold and material temperatures, as well as the width of the feed section and the runner, which is called the gate. The pressure with the least shrinkage rate of the product should be selected as the standard according to the size of the main runner and gate and the process conditions. The cooling time depends on the thickness of the product, the thermal and crystalline properties of the plastic, and the mold temperature. The most important thing is to prevent the product from changing during the mold opening process. It is usually about 30 to 120 seconds. If the cooling time is too long, it is a waste of time. Not only does it reduce production efficiency, but it is also difficult to take out complex and thin parts, and it may be difficult to take them out without causing demolding stress. At other times the shape of the molding time depends on how the material processing is uninterrupted and machine-oriented, and how integrated the molding and filling processes are.
Trends in Injection Molding Technology
In the future, injection molding will be more flexible and stay the same. The more extreme the environmental problems worldwide, the more likely green manufacturing will be a new trend in the manufacturing industry. CNC machining and injection molding technology don’t buy raw materials or produce waste during the production process, but they will play a bigger role in future green manufacturing. Also, the development of automation technology will be promoted by the growth of injection molding technology, which will be better and less likely to fail.

Conclusion
Injection molding is a highly developed process that involves multiple stages. Each stage is important in producing high-quality finished parts and products. Understanding the sequence of each stage—from design and prototype production to inspection before releasing the final product—is crucial for manufacturers to improve their production methods, control quality, and produce the best products. The future of injection molding is being shaped by other technologies and the use of new materials and techniques that are more efficient, accurate, and versatile.
Need a Quote for Your Injection Molding Project?
Get competitive pricing, DFM feedback, and production timeline from ZetarMold’s engineering team.
Request a Free Quote → See our Injection Molding Complete Guide for a comprehensive overview.


